An article in the author’s Astronomy Digest – http://www.ianmorison.com
My two amateur astronomy books discuss the use of a DSLR and lens to take and stack many images, to increase the effective exposure. Here I would like to point out that single exposure images such as that of the Moon can be very pleasing − especially when a crescent at dawn or dusk whilst there is still light in the sky. This essay describes the making of two images, the first with a narrow field and the second with a wider field.
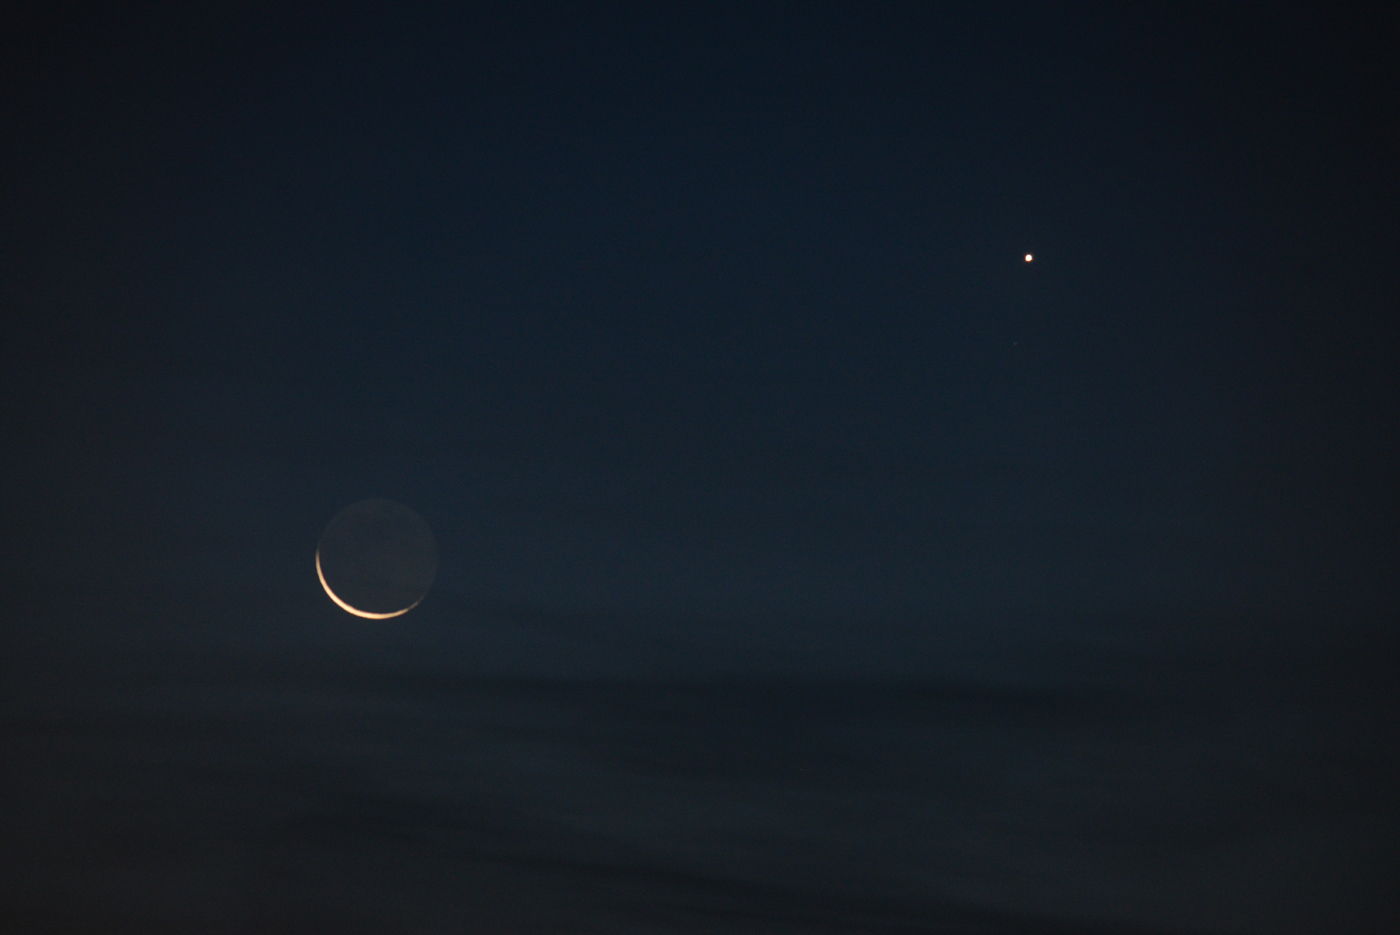
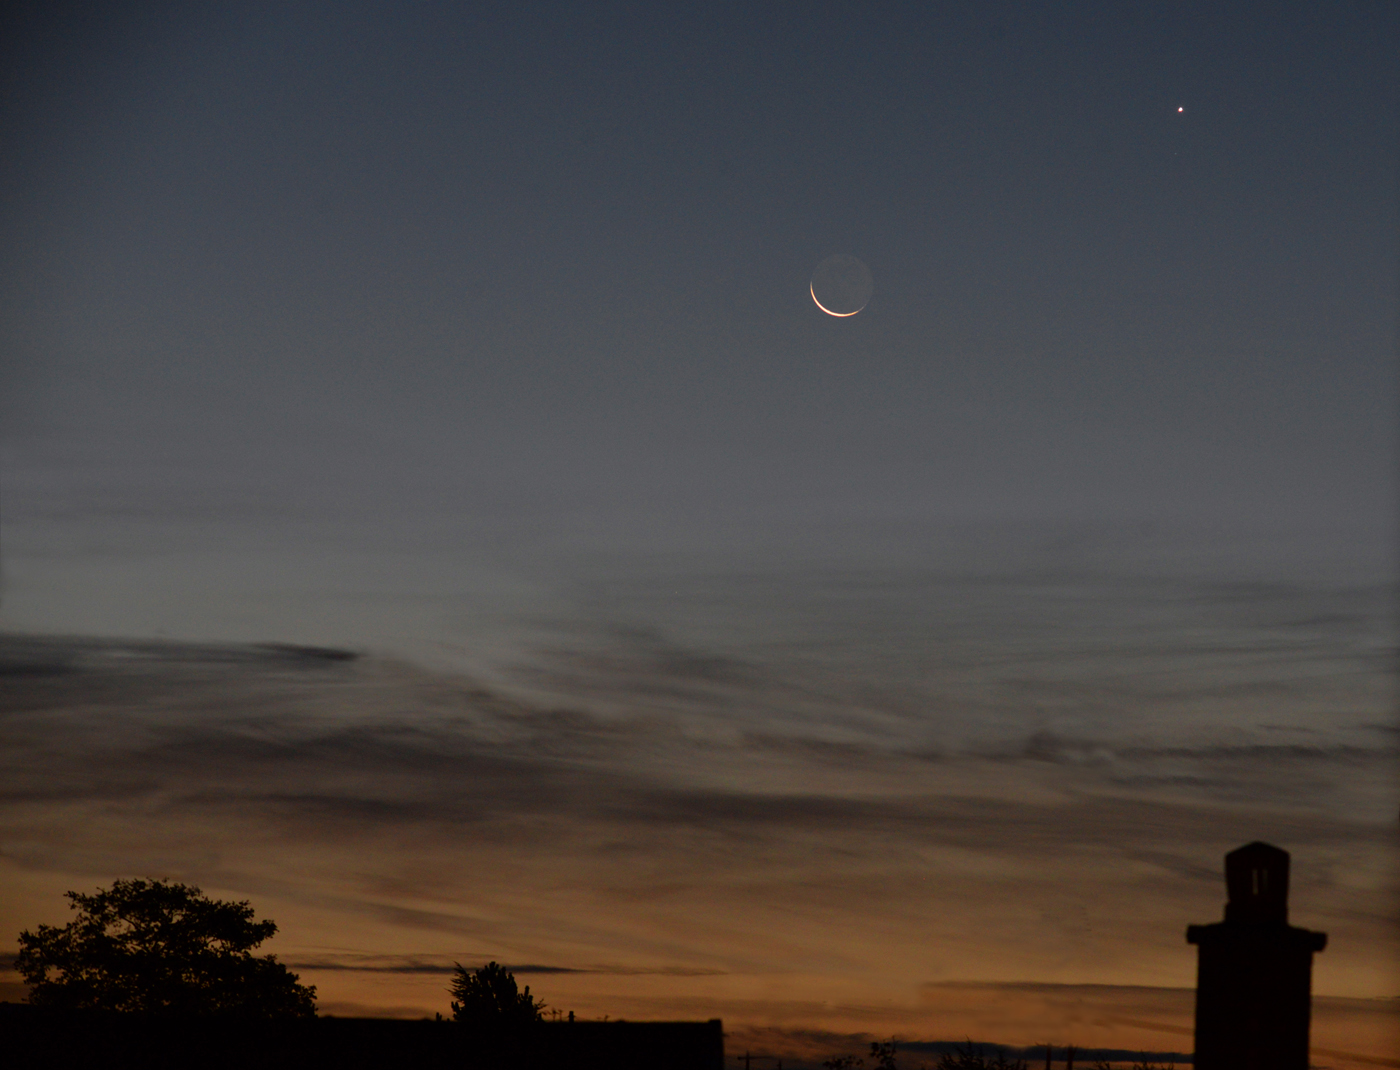
On the morning of the 18th October around 07:15 BST, I noticed that a thin crescent Moon was climbing out of some wispy clouds with Venus shining brightly above. Quickly, I set up my Nikon full frame D610 camera and Sigma 150-500 mm, f/5 to f/6.3 aperture, lens on a tripod looking out of an open, eastwards facing, window. The same camera and lens had been used to image the Moon and Jupiter as described in another article in the digest. The lens had been bought second hand for a very good price and I was actually rather surprised at its optical quality which, as the reviewer Ken Rockwell confirmed, is excellent. No longer made, used examples can be obtained for ~£400.
Narrow field image
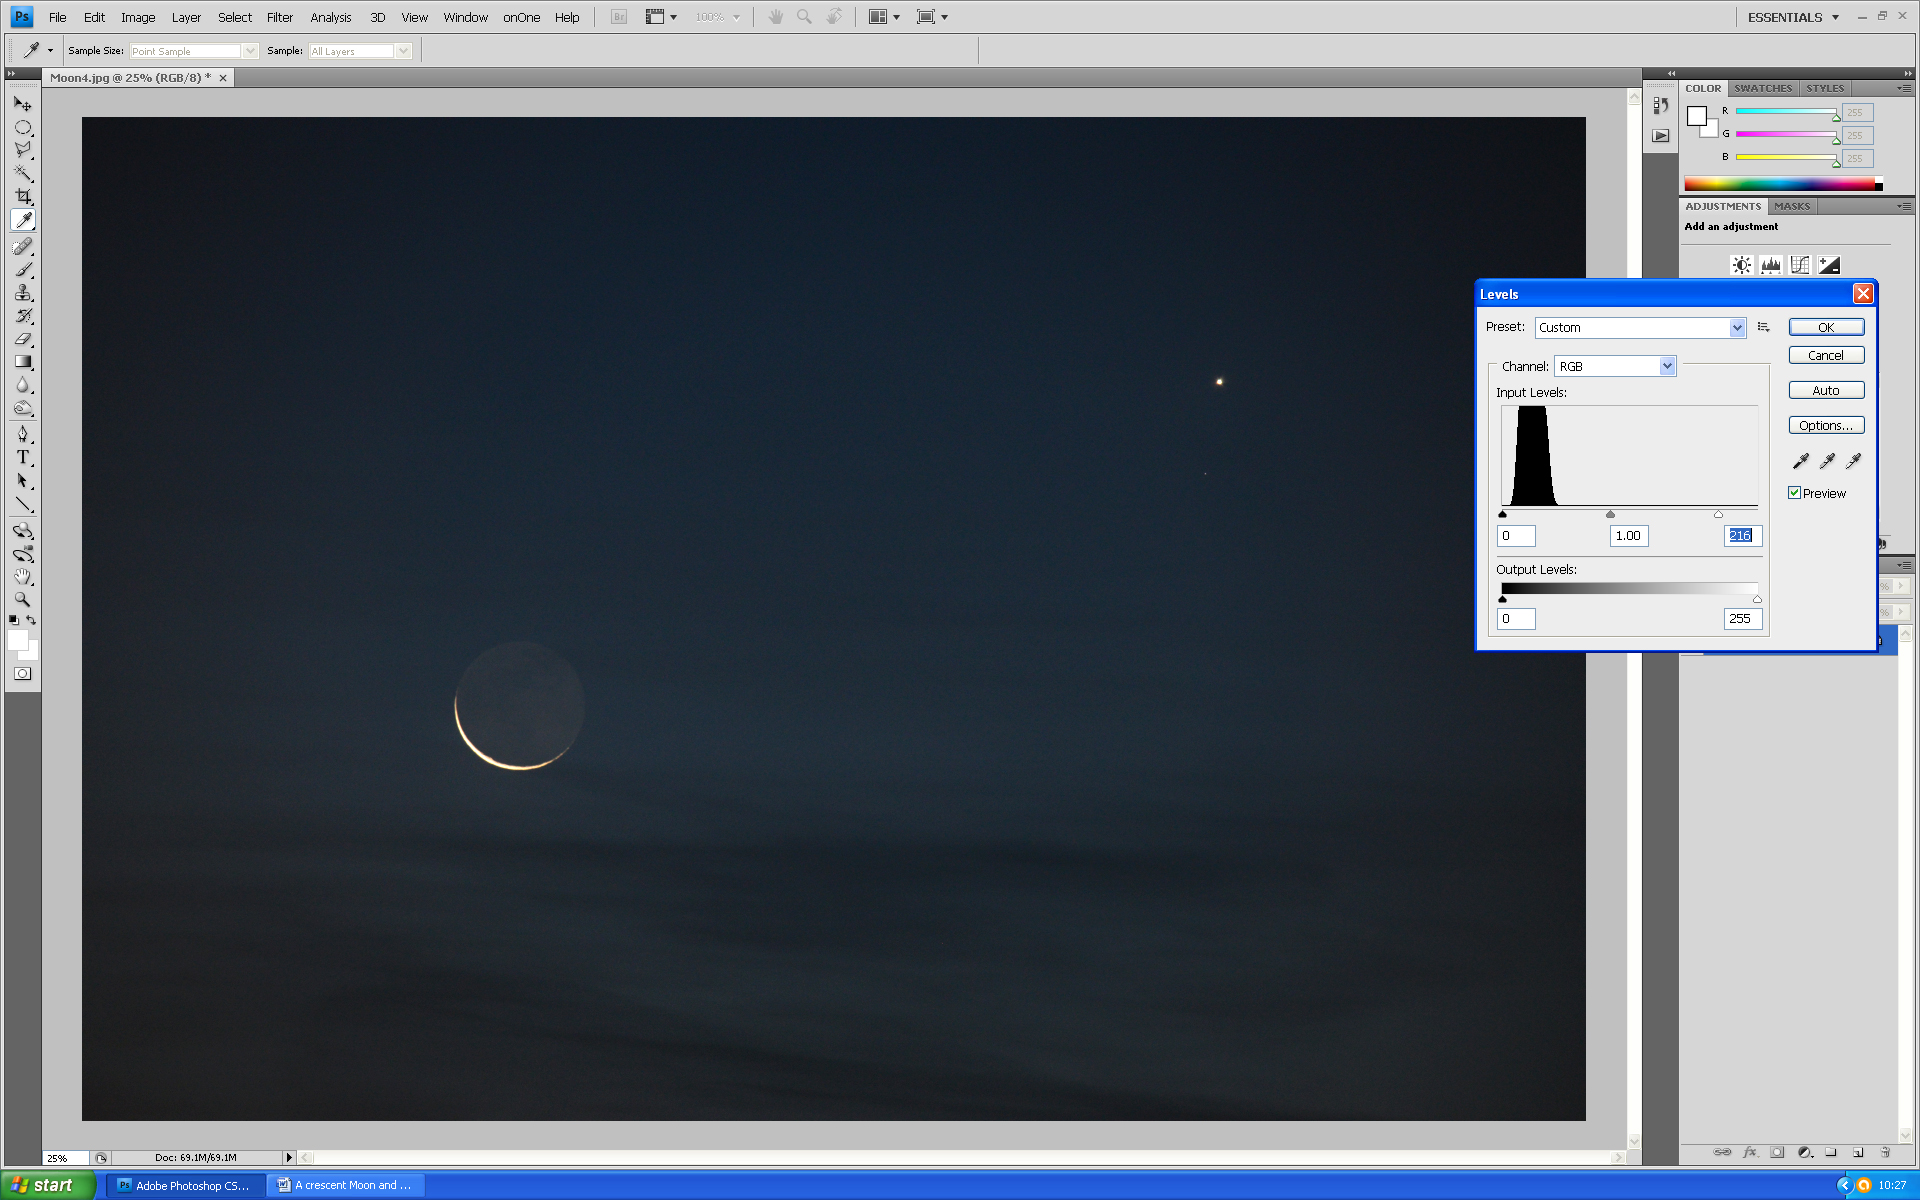
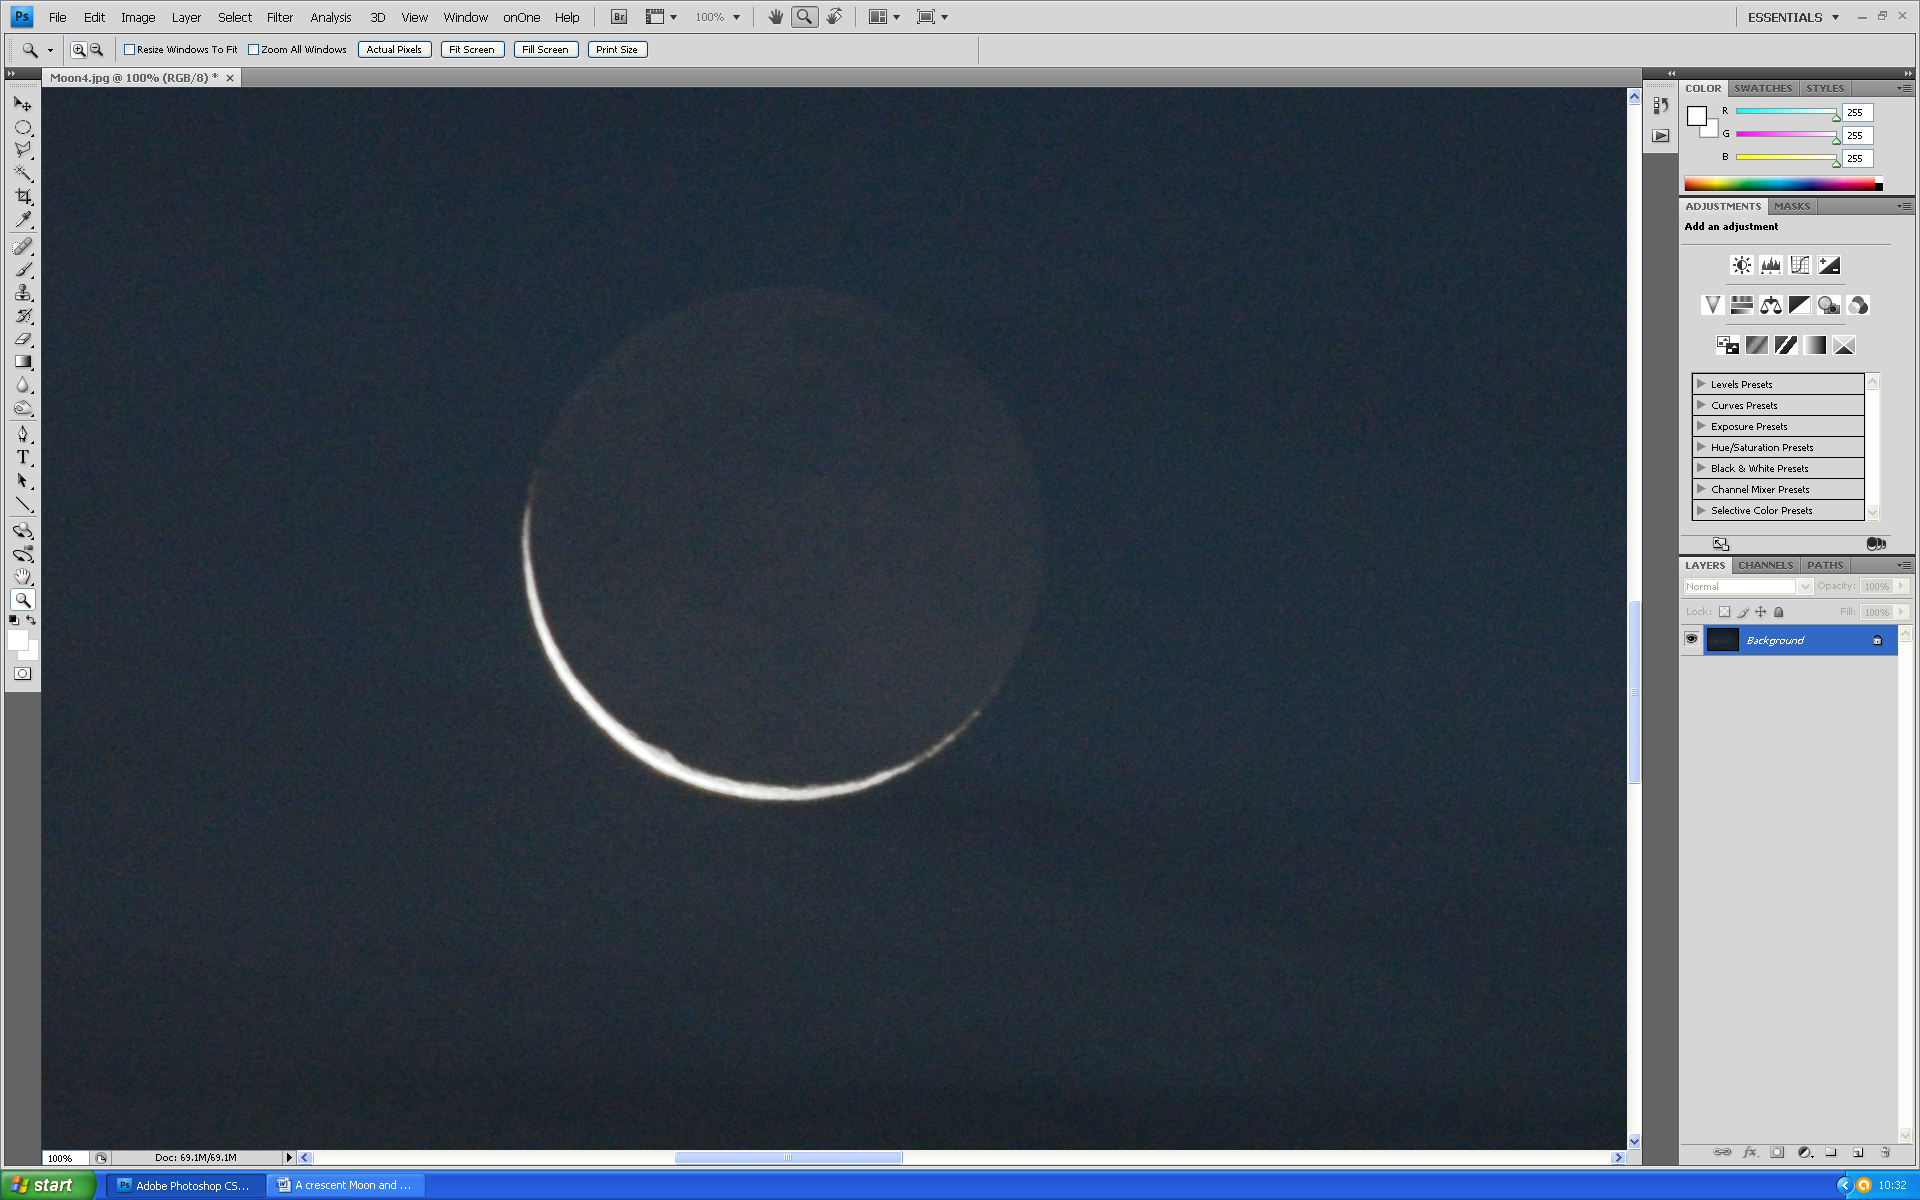
Adjusting the focal length, I found that both the Moon and Venus would be nicely encompassed with a focal length of 350 mm. The star 13 Virginis lay below Venus. Slightly annoyingly, I failed to check the ISO set on the camera which was at 1,600. It would have been better to have set the ISO to say 200 and used a longer exposure than the 10th of a second that appeared correct with the aperture set to f/6.3. (I was using manual aperture and shutter speed selection.) A delay of 2 seconds was inserted between pressing the shutter and taking the exposure to eliminate any camera shake. As you can see in the image below, this image was quite dark. I was aiming not to over expose the crescent limb of the Moon which would then have bled over the remainder of the Moon’s surface lit by light reflected from clouds over the Earth (called Earthshine). Not obvious on this scale is that the image was rather noisy due to the 1,600 ISO inadvertently employed. Chromatic aberration is seen within the bright limb of the Moon and is also present in the image of Venus.
I belong to the school of astroimagers (I suspect the majority) that feels that it is not wrong to enhance an image to show it at its best. So four processes were applied to the image: to lighten the image, to correct for chromatic aberration, to enhance the cloud structure and reduce the noise in the image. All processes were carried out in Adobe Photoshop. I think that the only one of these that some might object to is that of enhancing the cloud structure − but I really think that really adds to the aesthetic appeal of the image (if any).
Lightening the image
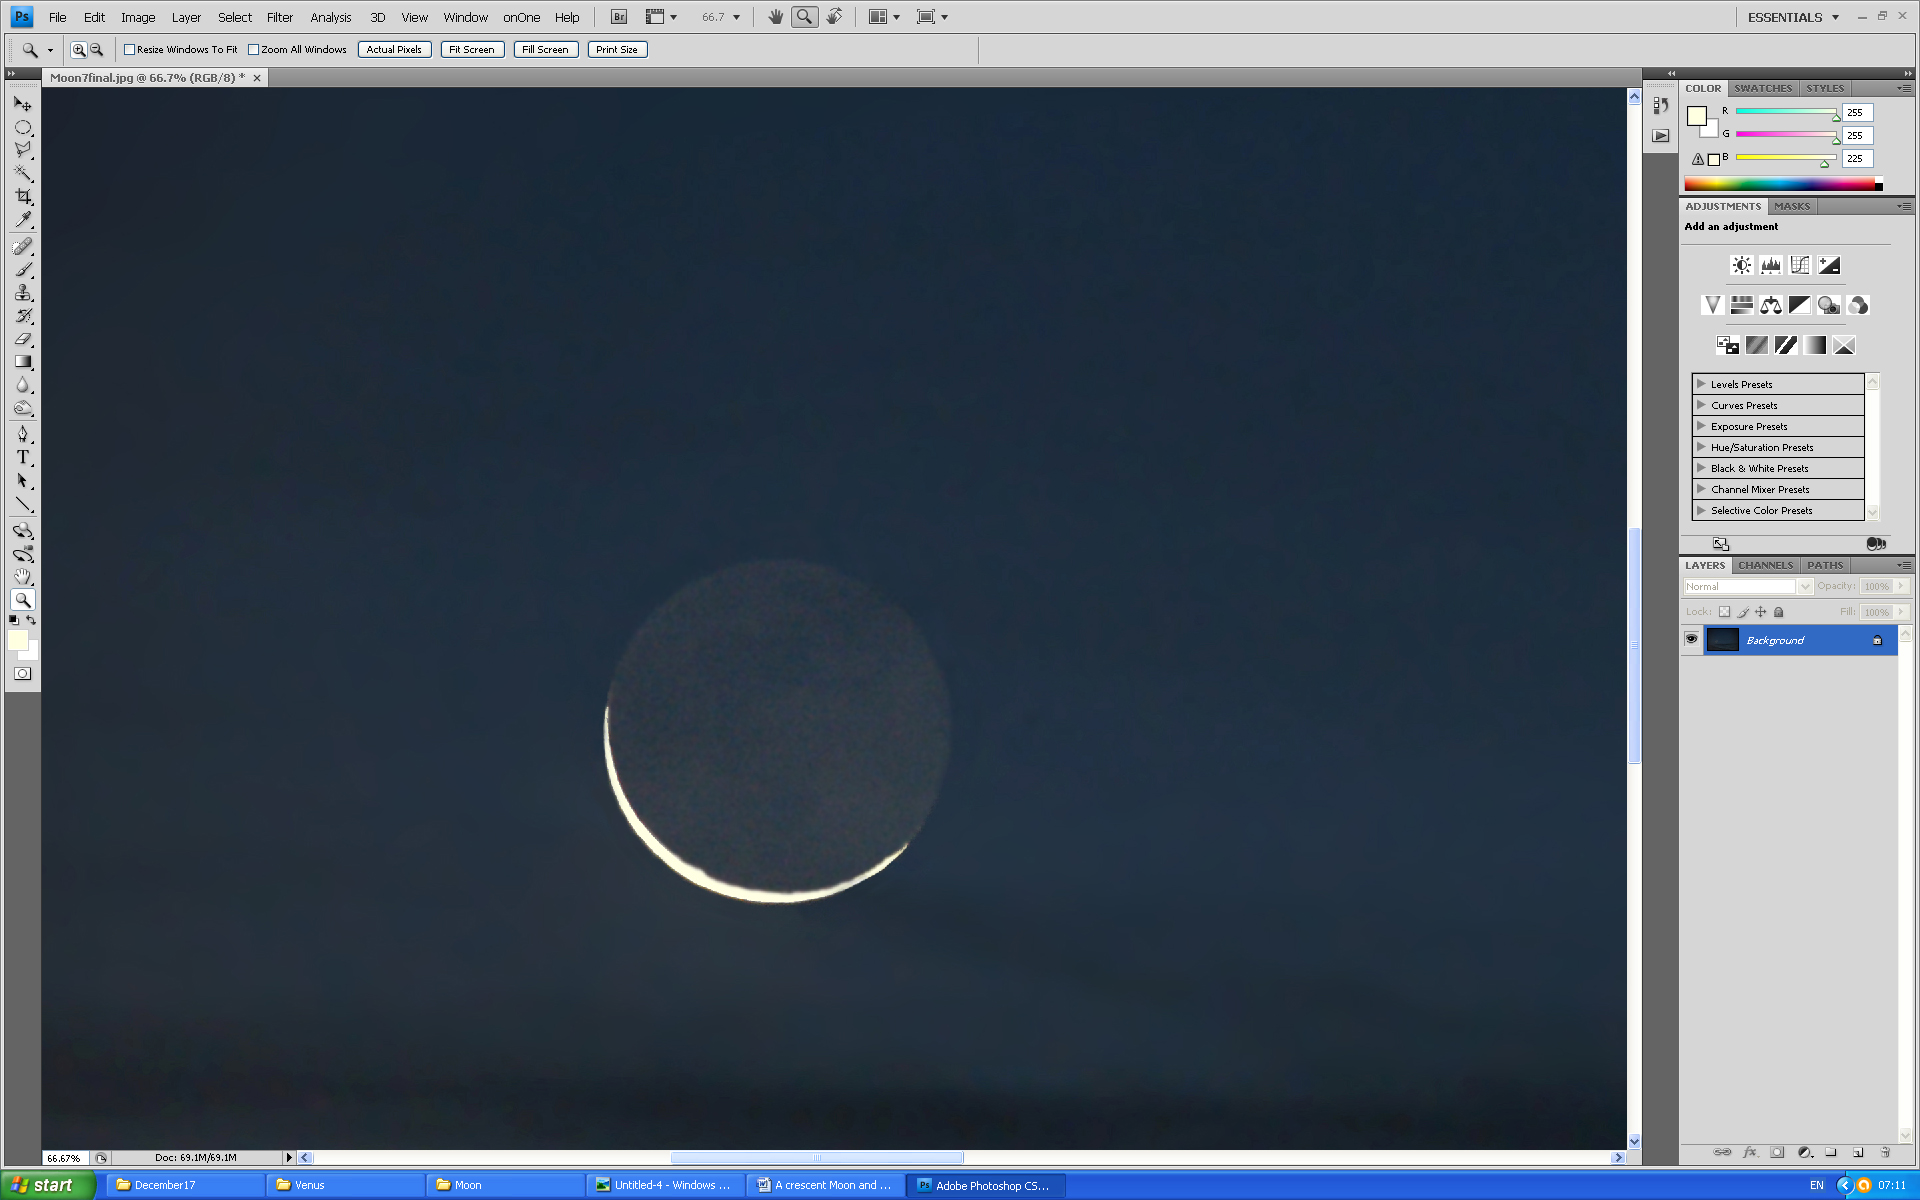
The image was loaded into Photoshop and the levels tool used with the right hand slider moved down to 200. At the end of the other work, a further small adjustment was also made.
Removing the chromatic aberration
This gave a red rim around the bright lunar crescent.
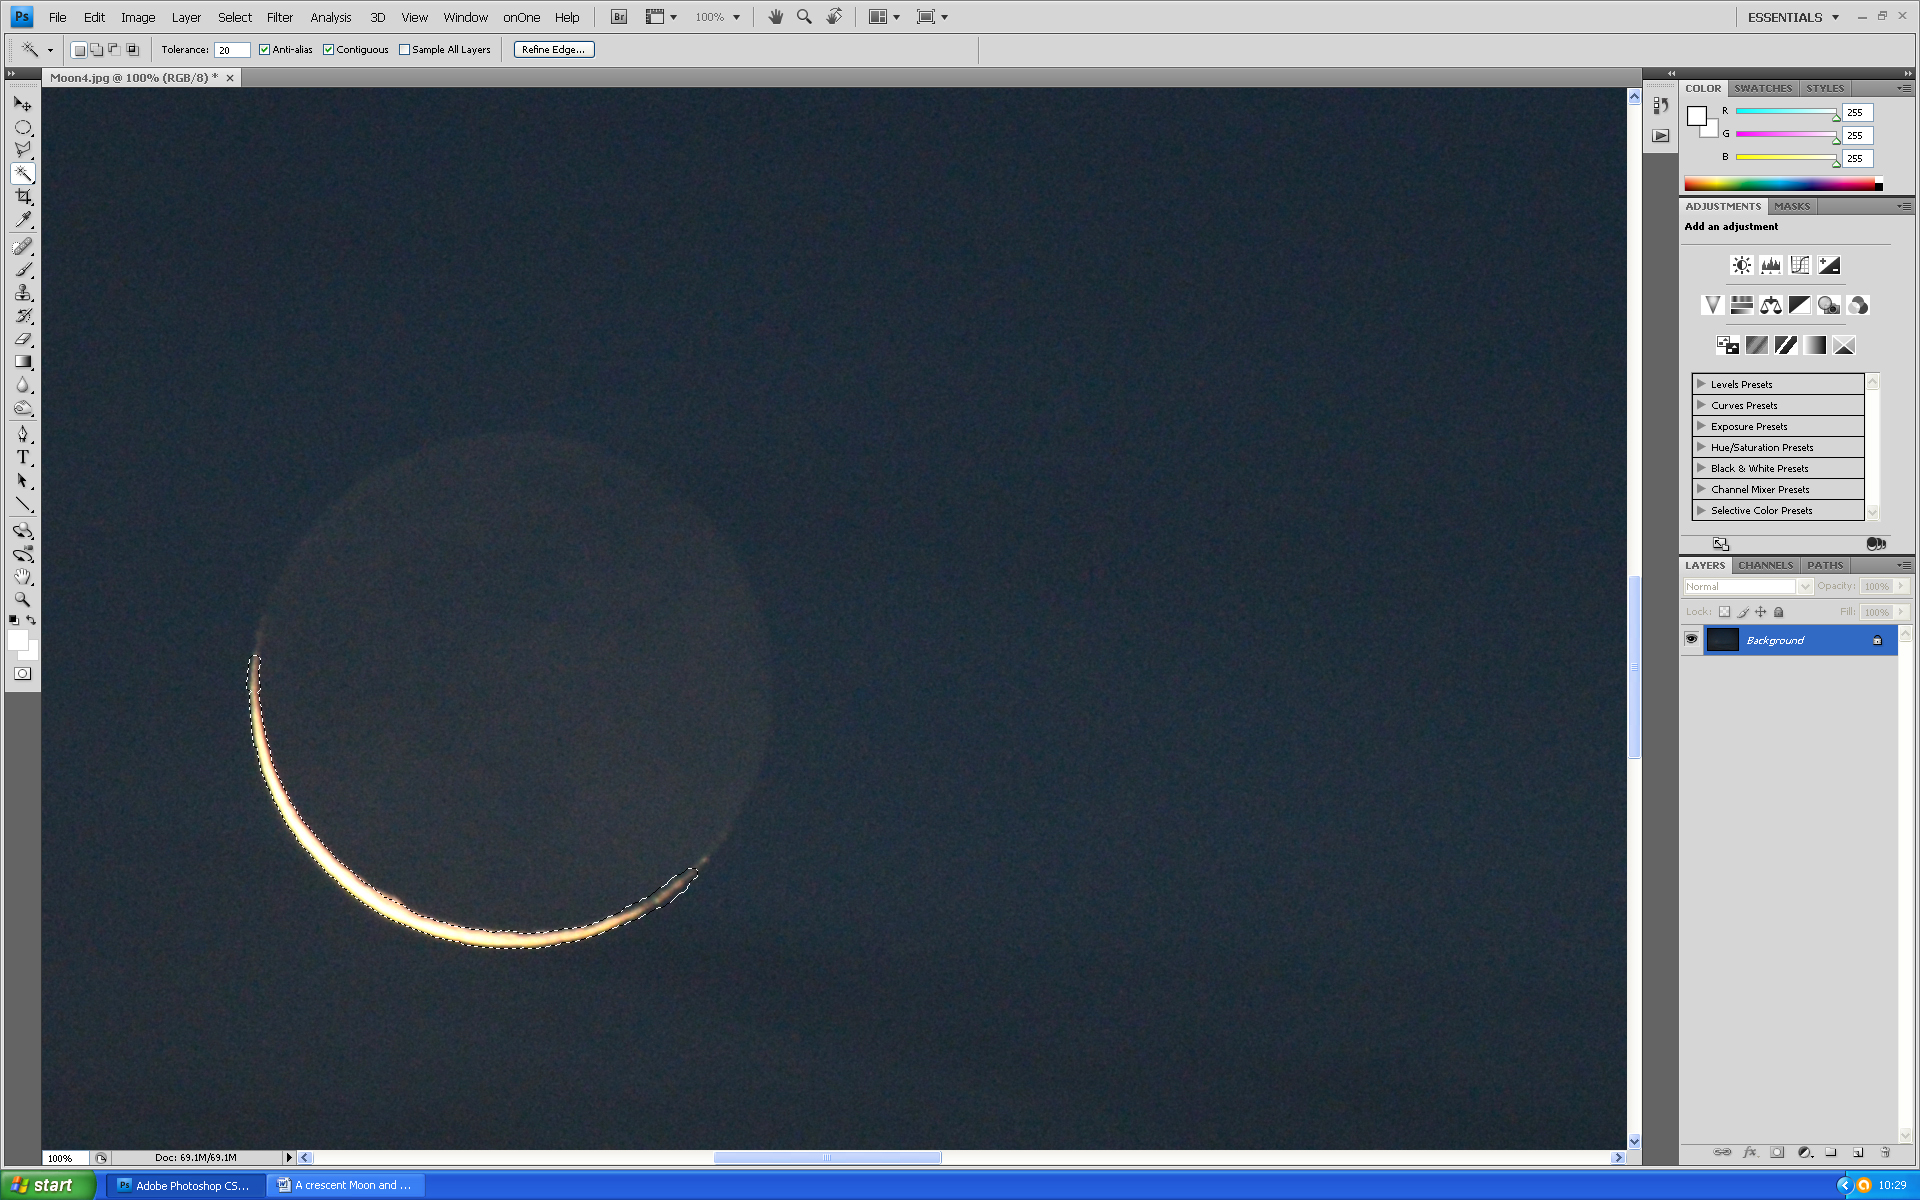
The ‘magic wand’ tool was used to select the white part of the crescent. This did not include the red rims and so the selection was expanded in all directions by 4 pixels so that these areas were also encompassed. The ‘Hue/Saturation’ tool was then used to reduce the saturation to zero so removing the red rims.
But, of course, at this elevation the limb’s colour should not be pure white but an off-white colour (towards the red end of the spectrum.) This was corrected by sampling the colour of the limb (away from the red rims) in the original image using the ‘paint brush’ tool. The magic wand tool was used to select the limb region in the worked on image and then painted the (pale yellow) colour retrieved from the original. Note that the Earth-lit part of the lunar surface is, not surprisingly, very noisy.
Enhancing the cloud structure
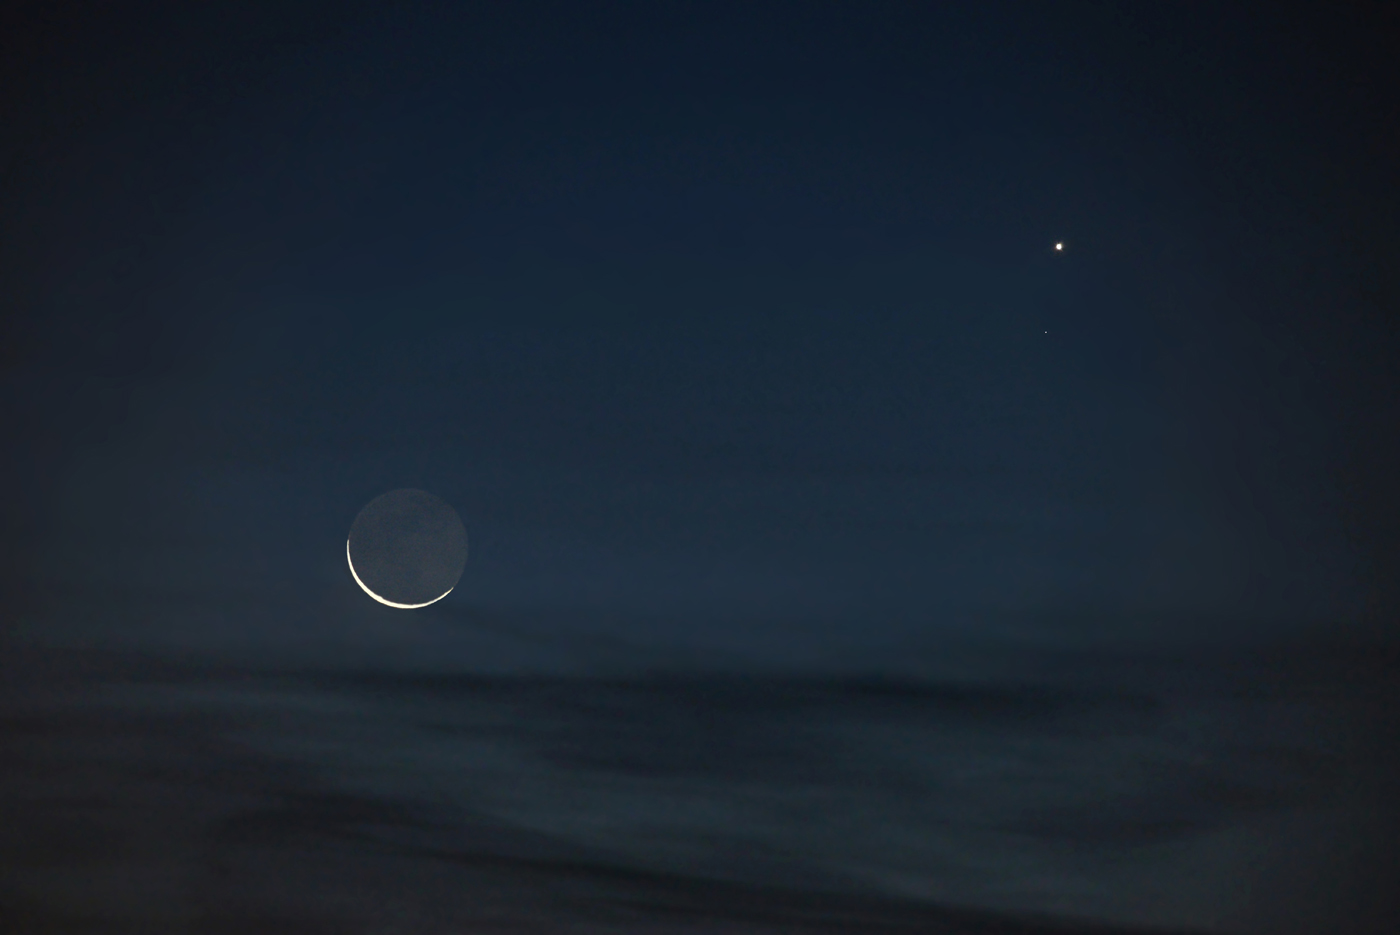
The area across the frame below the Moon was selected using the polygonal lasso tool with a feather of 50 pixels and the ‘Unsharp Mask’ filter applied with a radius of 250 pixels and an amount of 60%. This provides a ‘local contrast’ enhancement, making the darker parts of the selected region darker and the lighter parts brighter so making the clouds stand out better.
Reducing the noise in the image
The elliptical selection tool was used (with three areas) to select the Moon, Venus and 13 Virginis. The selection was inverted and a Gaussian Blur applied with a radius of 8 pixels. As the original image is just over 6,000 pixels across, when reduced to 1,400 pixels across as is commonly used for projected images each resulting pixel will be the average of 16 pixels resulting in further noise reduction.
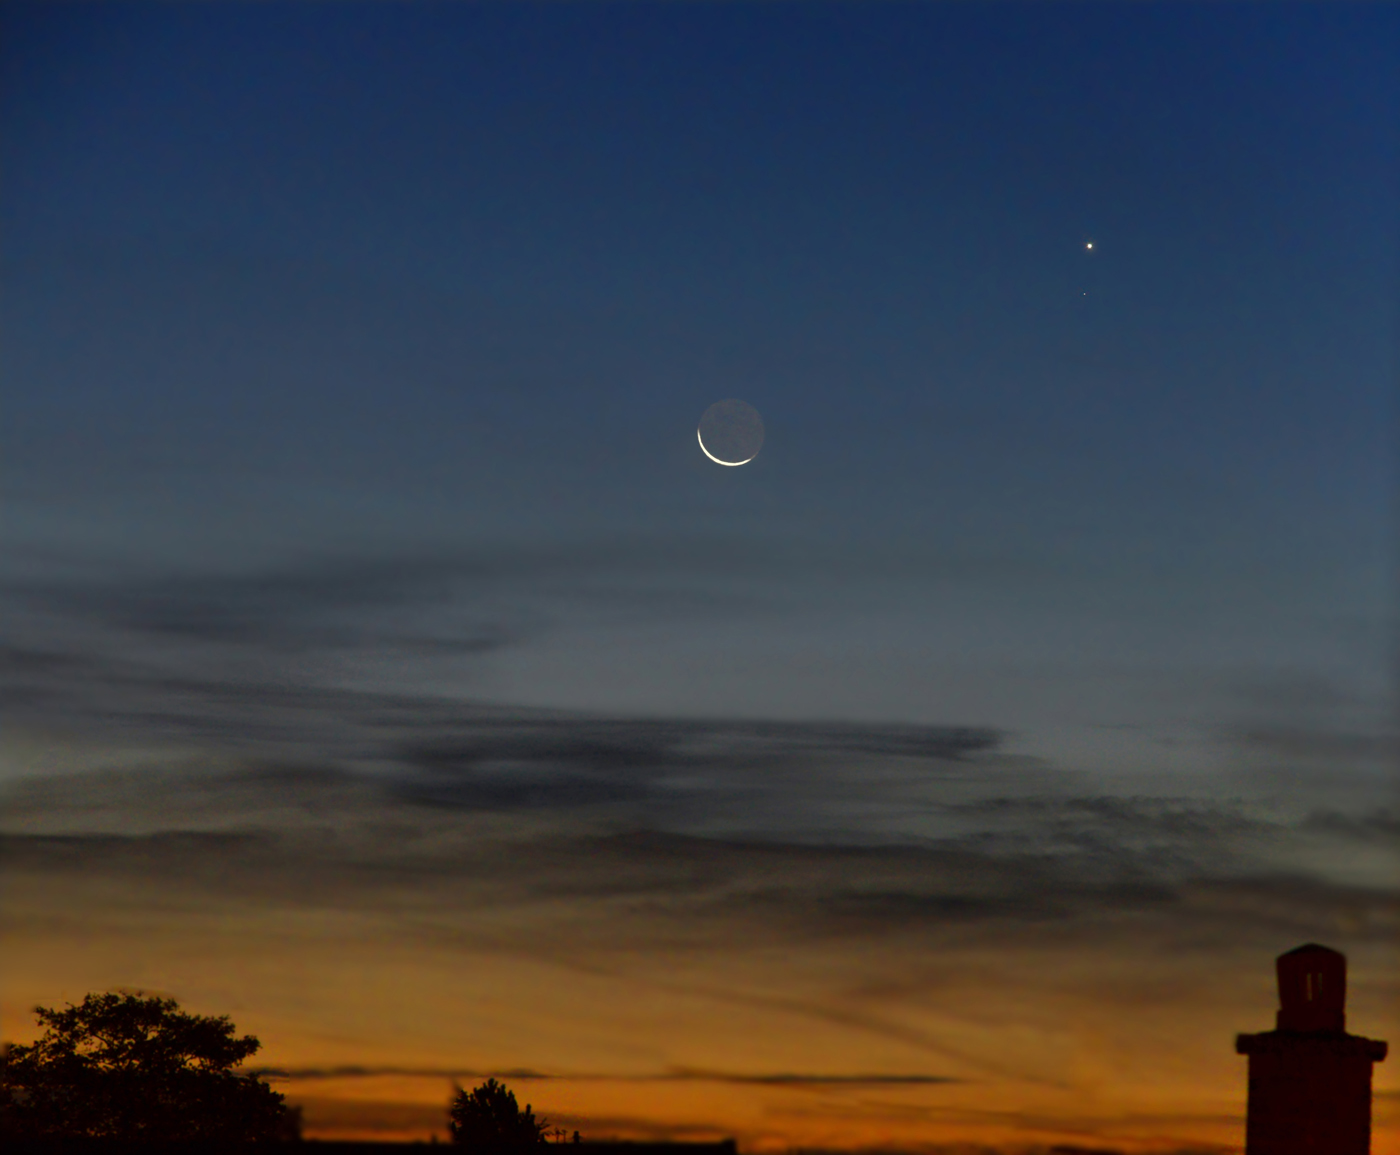
Wide field image
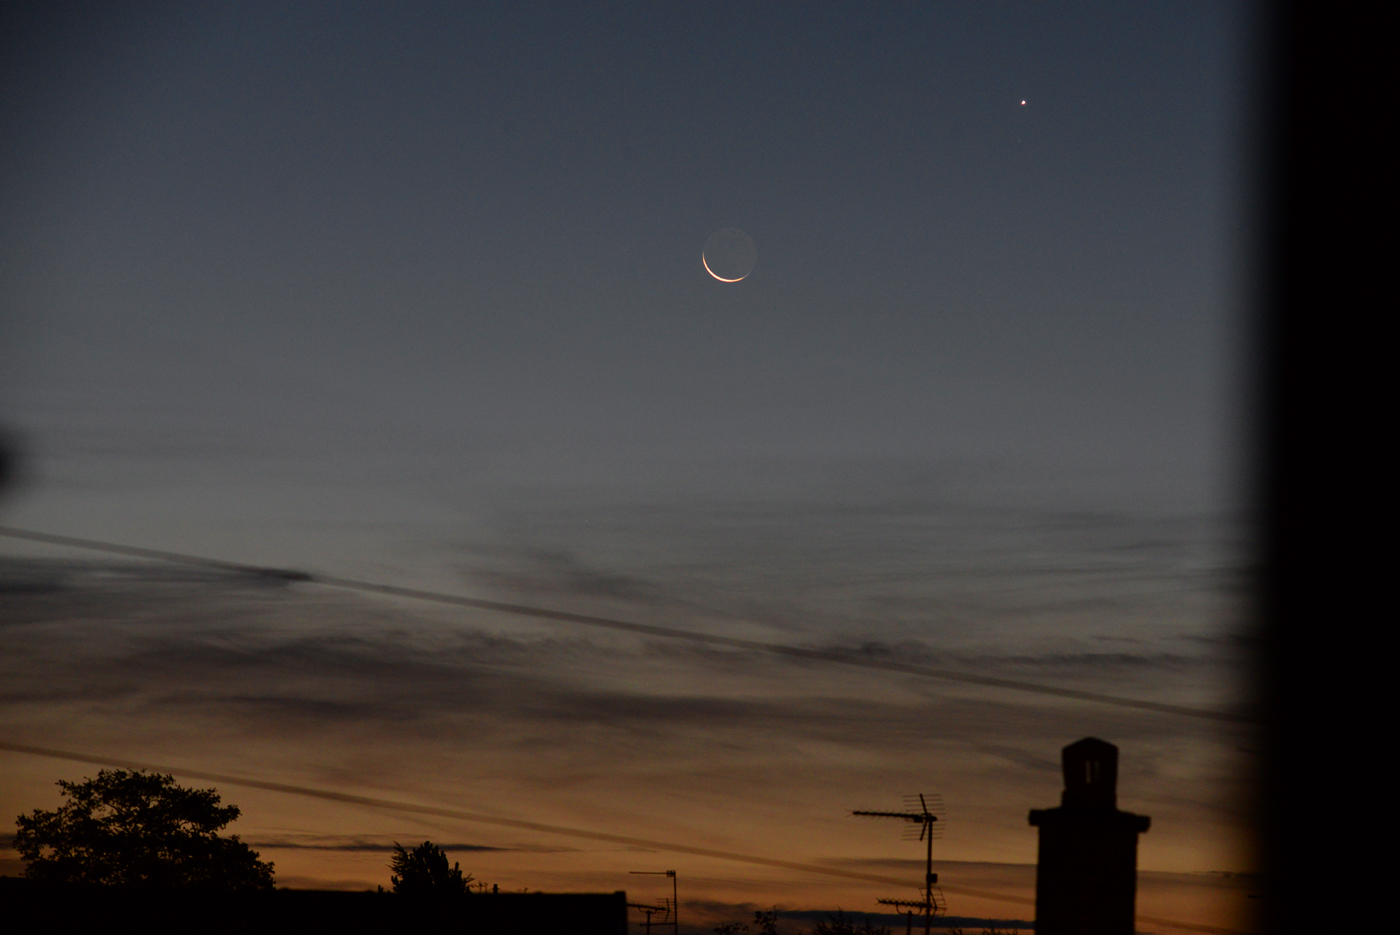
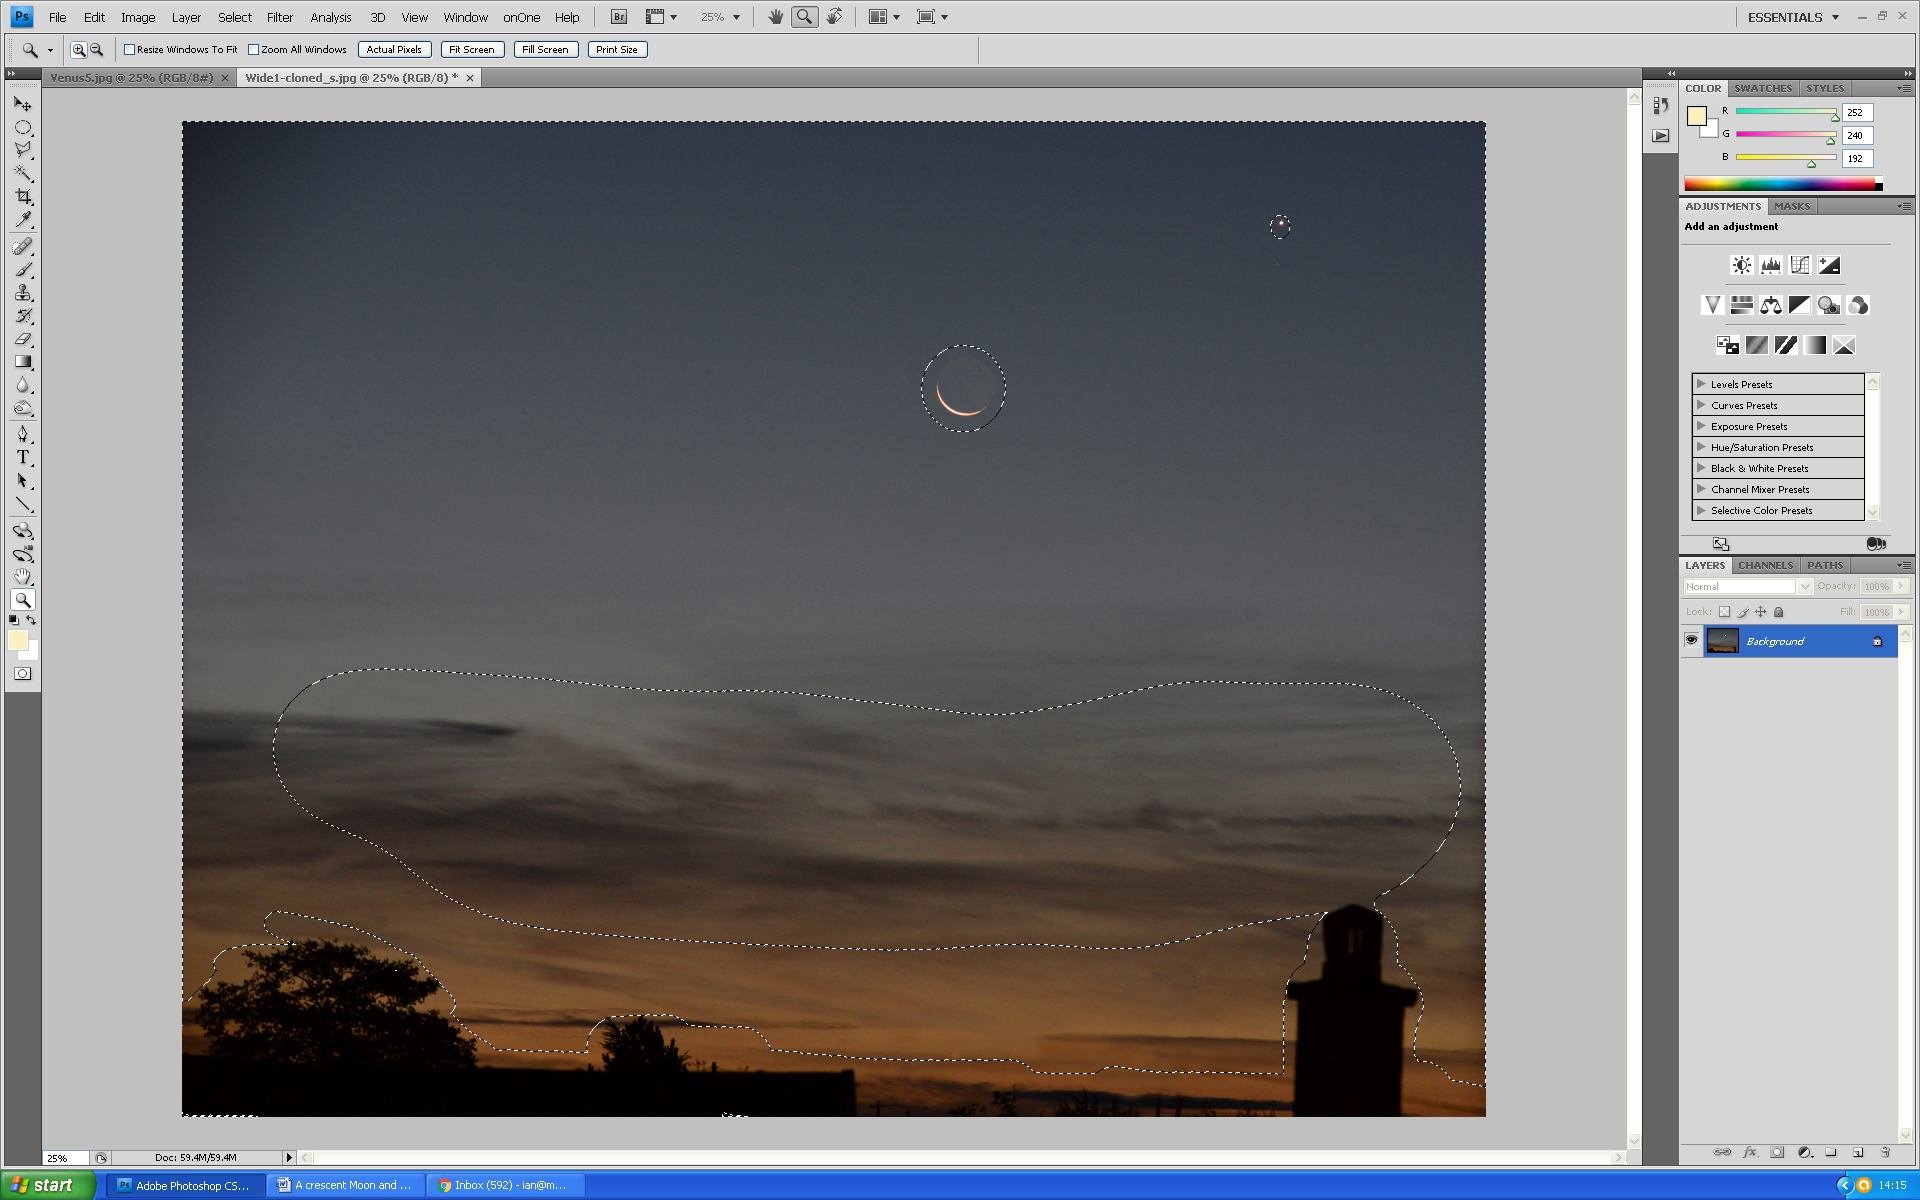
Slightly later, with more light in the pre-dawn sky, I reduced the focal length to its minimum of 150 mm and took a wider field image. There was a problem here as the window frame on the right hand side and a fastener on the left intruding into the image. I was not able to move the camera forwards, so the image was cropped to remove the window frame.
Cloning out unwanted features in the image
The TV aerials and telephone wires did not add to the image and so were cloned out along with the window fastener.
Reducing Noise
The Moon, Venus, cloud structure and skyline were selected, the selection inverted. A Gaussian blur of 8 pixels was then applied to reduce the noise in the sky (where it is most obvious) but keep sharpness elsewhere. Reducing the image size from a width of 5,215 down to 1,400 pixels will also reduce the noise.
Reducing the chromatic aberration in the lunar limb
The Moon’s limb was selected exactly as for the narrow field image, the red fringing removed by reducing the saturation to zero and the correct colour restored using the paint brush which had selected the pale yellow colour from the original image as described above.
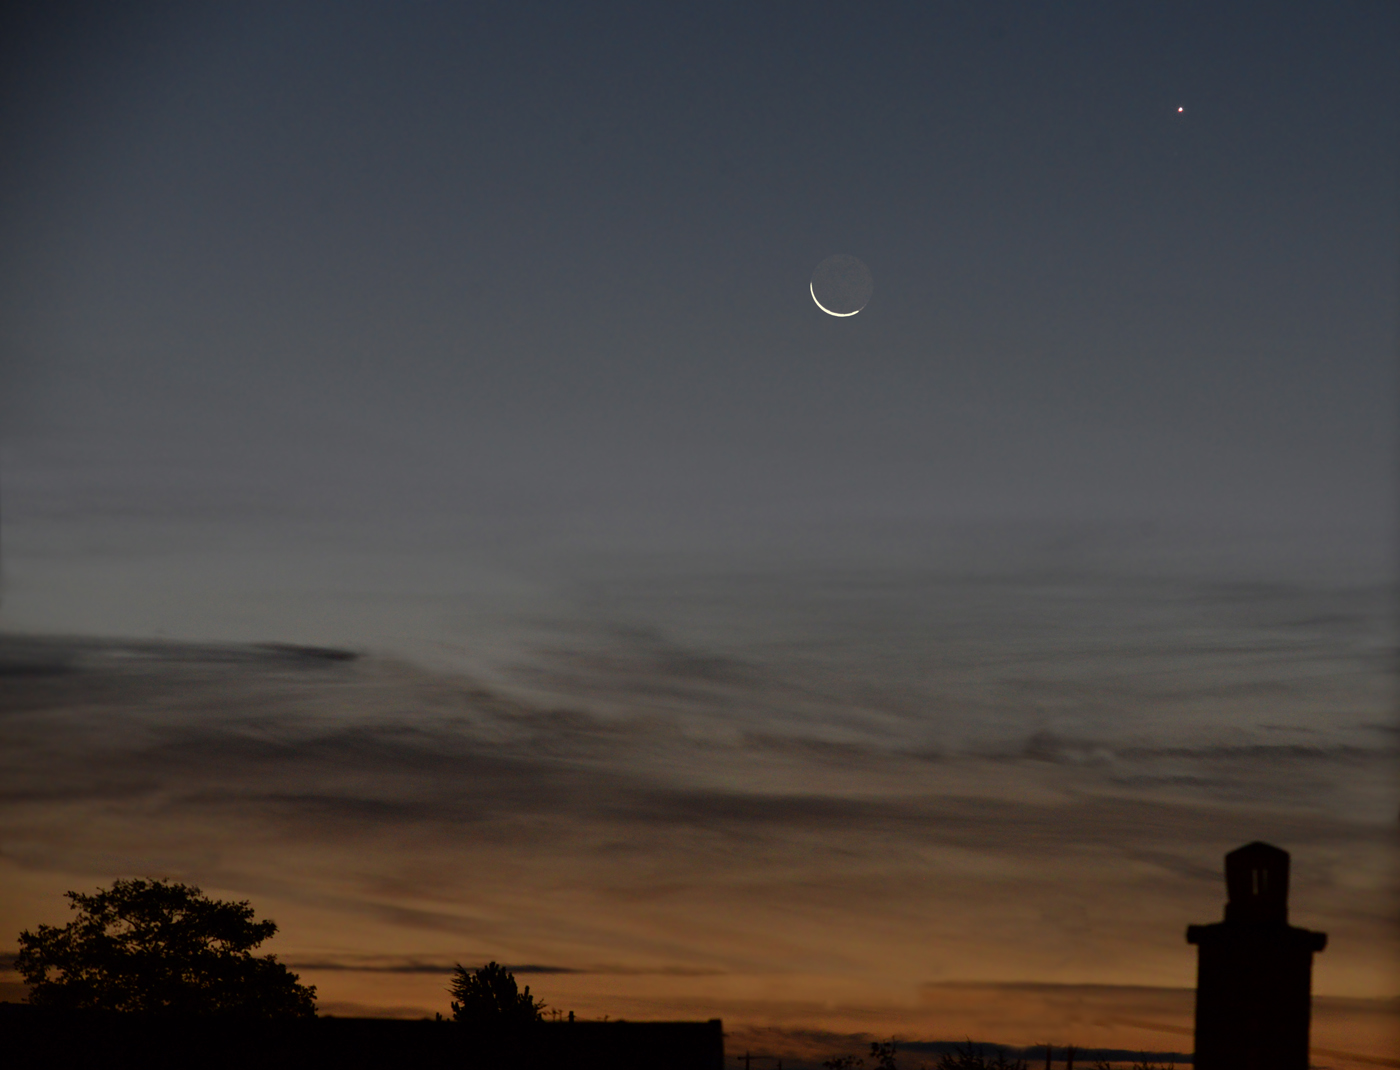
A final adjustment of the saturation
Some might balk at this as it was not ‘correcting’ faults in the image as the previous processes had done but was making the image more appealing to the eye. The hue/saturation tool was simply used to increase the colour saturation in the image to give the final result.