
An article in the author’s Astronomy Digest – http://www.ianmorison.com
Altair Astro (AA) provide lens adapters so that Nikon or Canon Lenses can be used with their CMOS cameras (and, I suspect, those made by ZWO which often look identical to those marketed by Altair Astro). There are two versions; one for the Peltier cooled cameras and one for the fan or uncooled cameras – these requiring a different camera mount. They allow for a 2 inch filter to be mounted within the camera adapter.
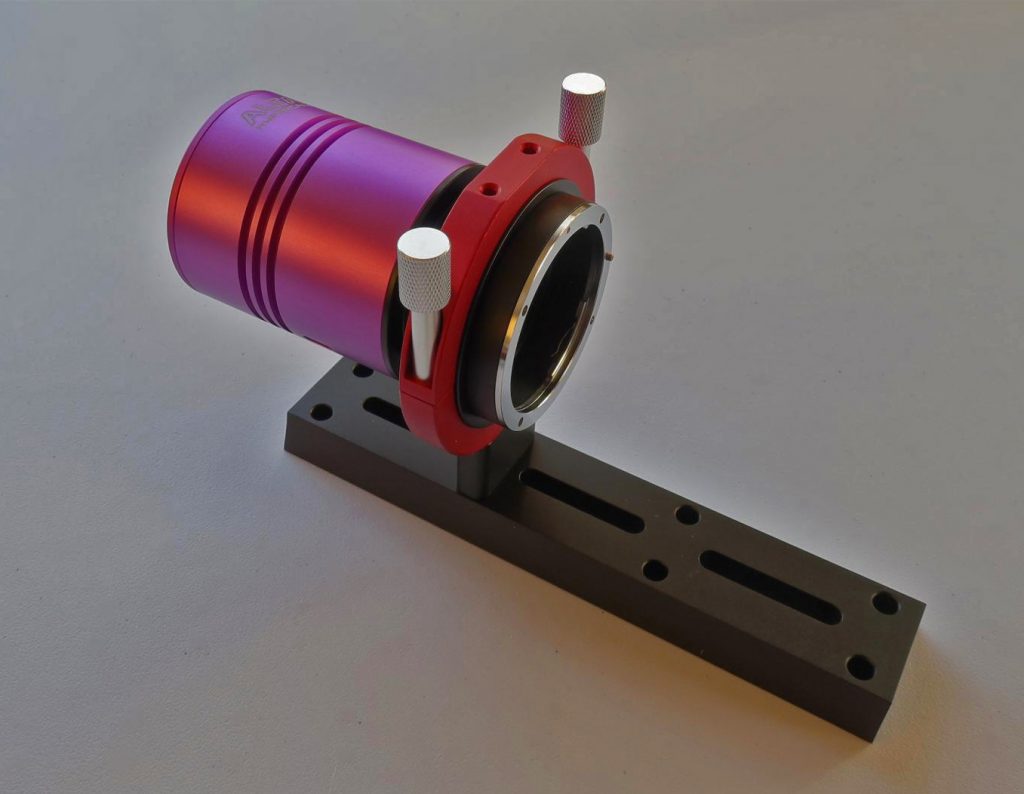
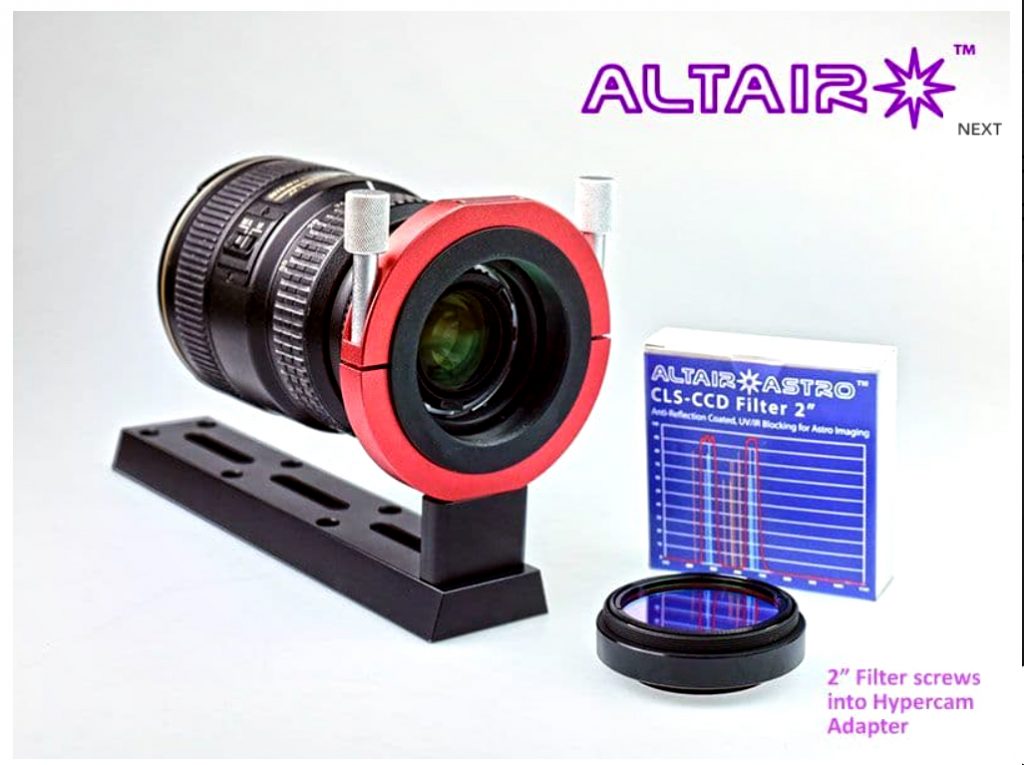
A good length Vixen mounting bar is included which is useful if a long focal length lens were to be used as a support for the lens could be added to the front of the bar and so remove stress from the mounting bracket as seen below. Used with a 200 mm or lesser focal length lens this is not required.
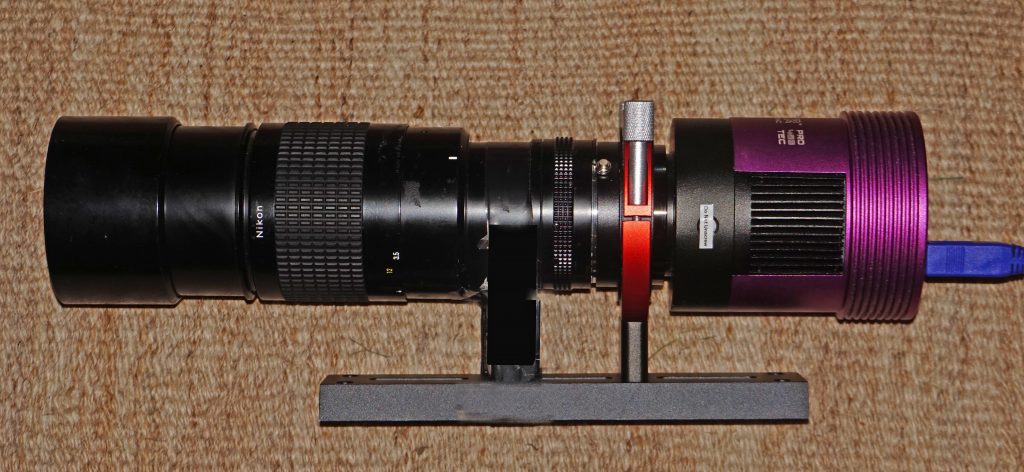
One obvious point, only lenses with a manual aperture control can be easily used. Modern lenses will need the aperture to be opened up by ‘adjusting’ the aperture control tab on the lens by some method. There is no easy way to do this. Happily I have quite a number of manual Nikon and Tamron lenses using their Adaptall II mount.
The advantages of using the adapter and CMOS camera over the DSLR are twofold. Firstly, there will be no gentle cut off filter through the red to the infrared which reduces the sensitivity of the camera to the deep red H-alpha emission to ~25% (which is why many astrophotographers have their DSLRs modified to remove this filter) and secondly the fan, or better, Peltier cooled cameras will have lower dark current noise which can be calibrated out in the case of the Peltier cooled versions by taking a set of dark frames.
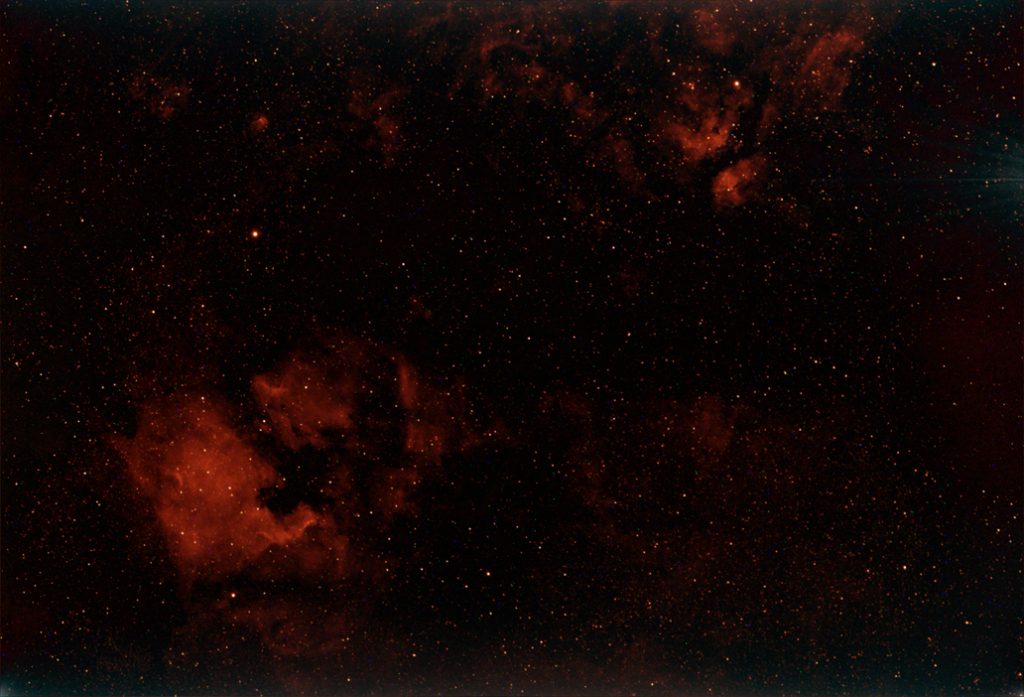
Imaging the North America, Pelican and Butterfly Nebulae in both ‘white light’ and H-alpha emission.
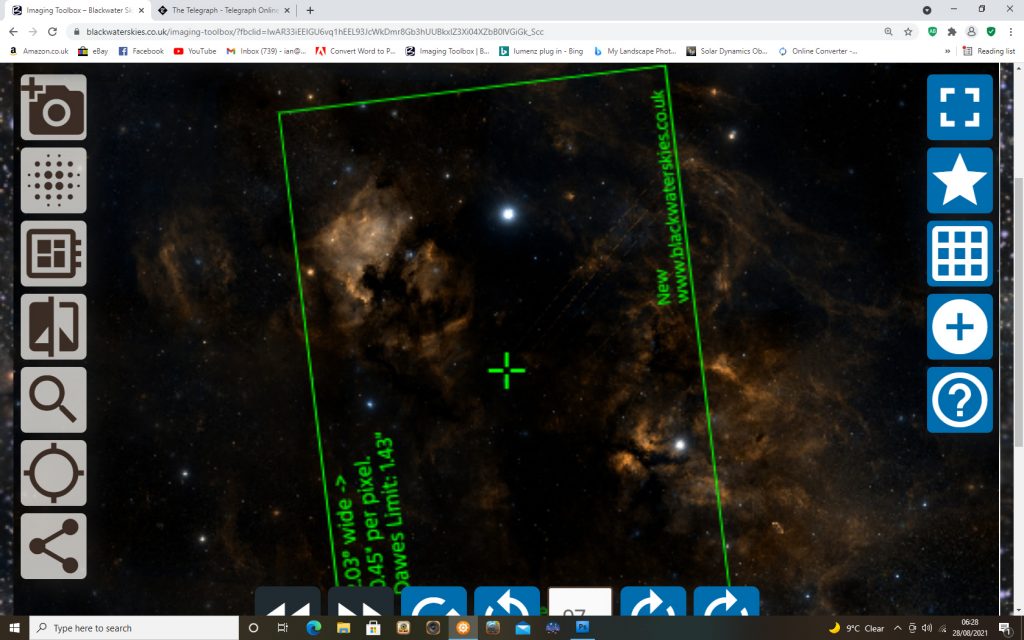
This is a beautiful region, around Deneb and Sadyr in Cygnus, which emits much H-alpha emission. The screen shot from the Blackwater Skies Field of View Calculator shows that the region would be nicely covered using a 90 mm lens coupled with my Altair Hypercam 294C PRO TEC, 11.26 megapixel, colour CMOS camera.
The region was imaged on the evening of 26th August 2021 when an 19 day old waning gibbous Moon rose at 22:00 BST and transited at 04:00 BST at an elevations of 44 degrees. The Tamron 90 mm, f2.5, lens was stopped down to f 3.5 to improve the image quality which was then essentially perfect. So, while the moon was low in the east, I chose to image the region in RGB mode. This was to produce a true colour ‘stars’ image to add to an H-alpha image taken as the Moon rose higher in the sky. I used 60 second exposures as, with such a short focal length, the Astro-Physics Mach 1 mount is easily capable of 60 seconds exposures without any stars trailing. 30 minutes total exposure was acquired at a sensor temperature of -9 C. As I was using a Micro 4/3 sized sensor with a lens having 35mm full frame coverage, no flats were taken as these were not necessary. The sky glow from the rising Moon did not hinder the taking of this image.
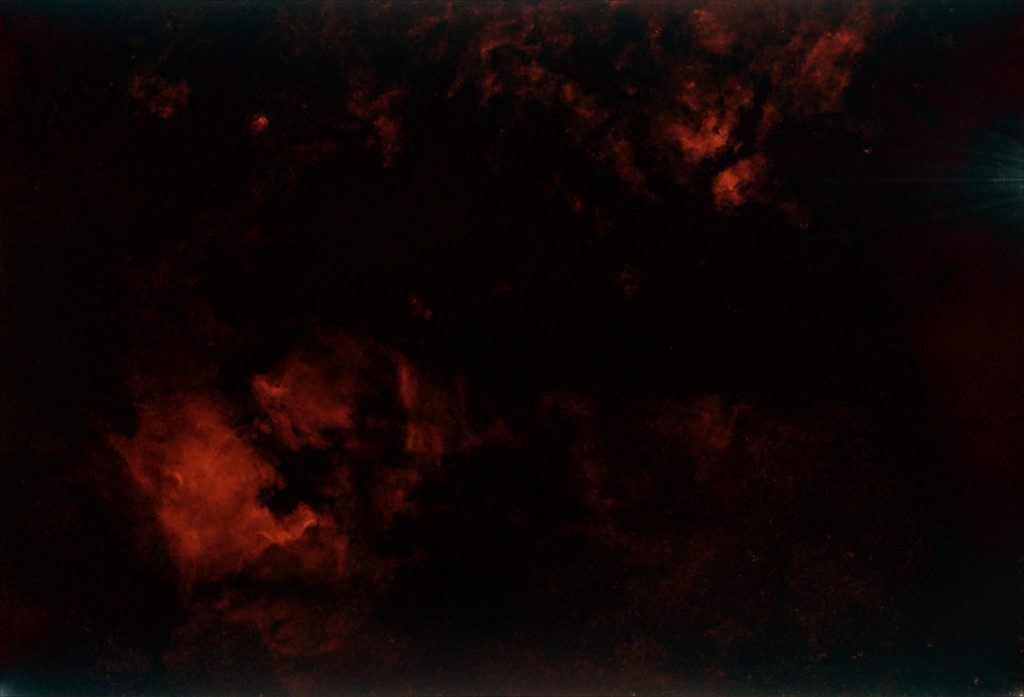
I then mounted a 2″ Baader 7nm H-alpha filter in the adapter and took 38, 60 second, exposures before clouds rolled in – the sensor temperature remaining at -9 C. Given the 60 second exposure time, the gain was determined by the need to have sufficient stars visible to enable the stacking program to align and stack the frames. Using a 7nm bandwidth filter to capture the H-alpha emission essentially removes all the sky glow. Sadly, such filters are not cheap, at around £175.
Finally 20 dark frames were taken with same exposure, gain and sensor temperature.
Processing the stars image
The individual ‘light’ frames were aligned and stacked in Deep Sky Stacker along with the ‘dark’ frames and then the R, G and B histograms were aligned before saving the stacked image. The overall green cast that remained was remove by using the ‘Hasta la Vista Green’ Adobe Photoshop filter which can be downloaded from: http://www.deepskycolors.com/archivo/2010/04/26/hasta-La-Vista-Green.html or just search ‘Hasta La Vista Green’.
The black level was increased to remove the very slight evidence of the North America Nebula.

Processing the Nebula image
I was surprised at the quality of the H-alpha image as I had hoped to take at least 1 hours total exposure.
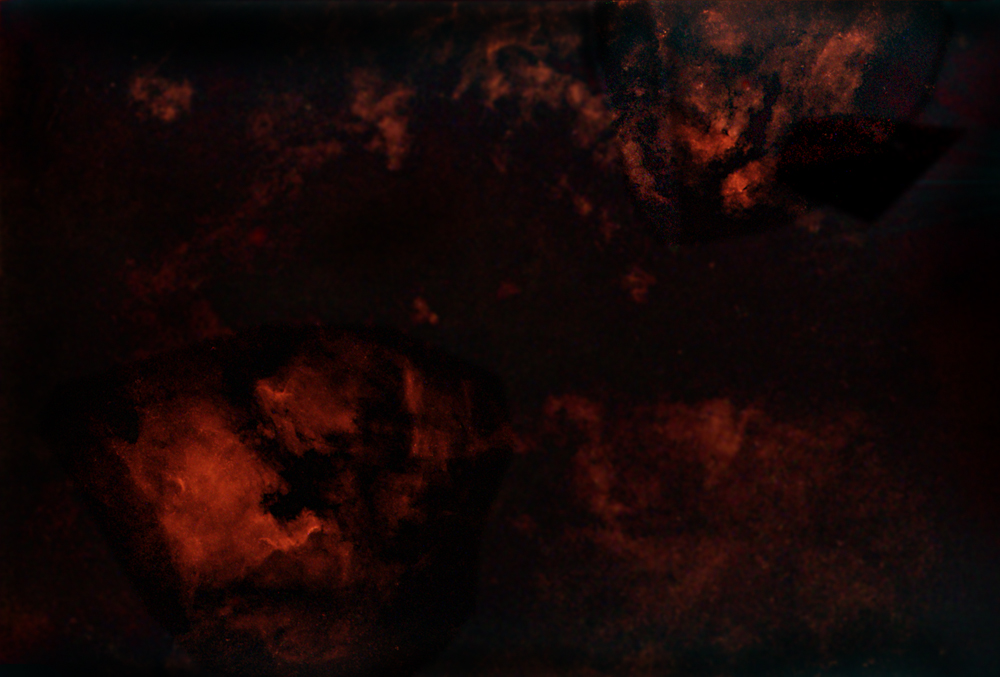
The stars are obviously red so I used the wonderful piece of software, ‘Starnett++’, to remove them. I have written a Digest article showing how to download and use it. Be warned; it can take a long time to run even when using an Intel, i7 based, computer.
The nebula image was then stretched somewhat to bring out the fainter nebulosity and ‘enhanced’ by use of the ‘Unsharp Mask’ filter with a large radius and small amount to increase the local contrast and sharpened a little using the ‘Smart Sharpen’ filter with a small radius and amount.
Combining the two images.
The star’s image was copied and pasted over the nebula image and the ‘Screen’ blending mode selected. There are three faint stars that lie along the bright ‘Cygnus Wall’ below the ‘Gulf of Mexico’ in the North America Nebula. These were very slightly to the right of their true location in the image, so the position of the star layer was adjusted to bring them into their correct position. This was expected due to the slight pointing drift between taking the two images as I was not autoguiding. (See * at the end of article.)
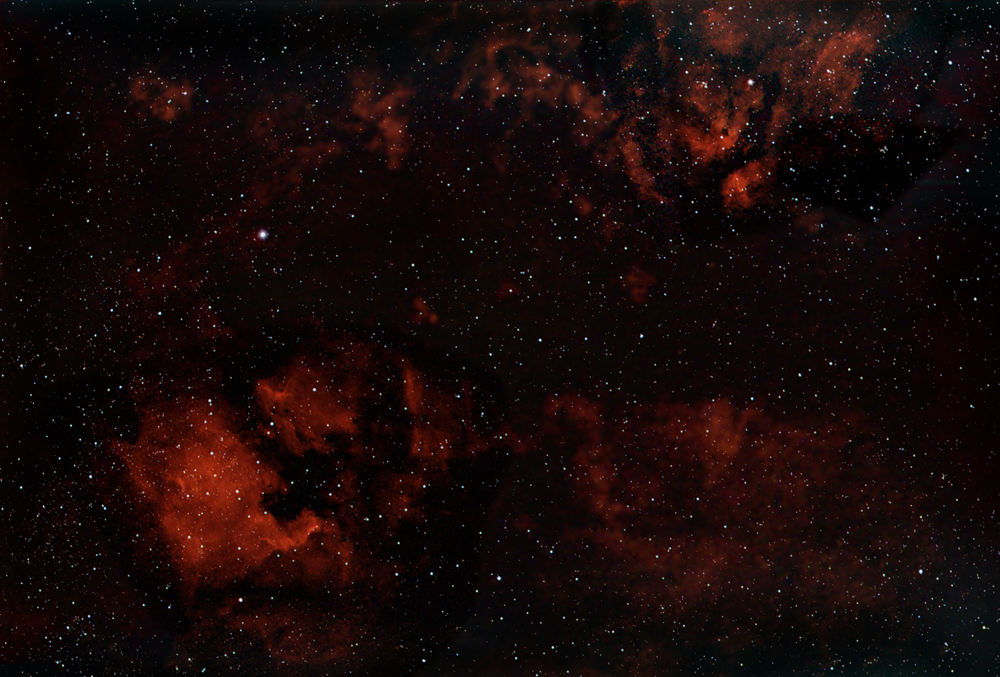
I was quite pleased with this result and expect to use the mount and camera with a range of focal length lenses including a 300 mm Nikon as described below.
Using a 300 mm Nikon lens to image the Andromeda Galaxy under dark skies.
This was a test to see how one could use the adapter with a 300 mm, f/4.5, lens which, as was seen in the Blackwater Skies field of view calculator, would provide a good field of view to cover M31, the Andromeda Galaxy, when used with my AA 294c camera.
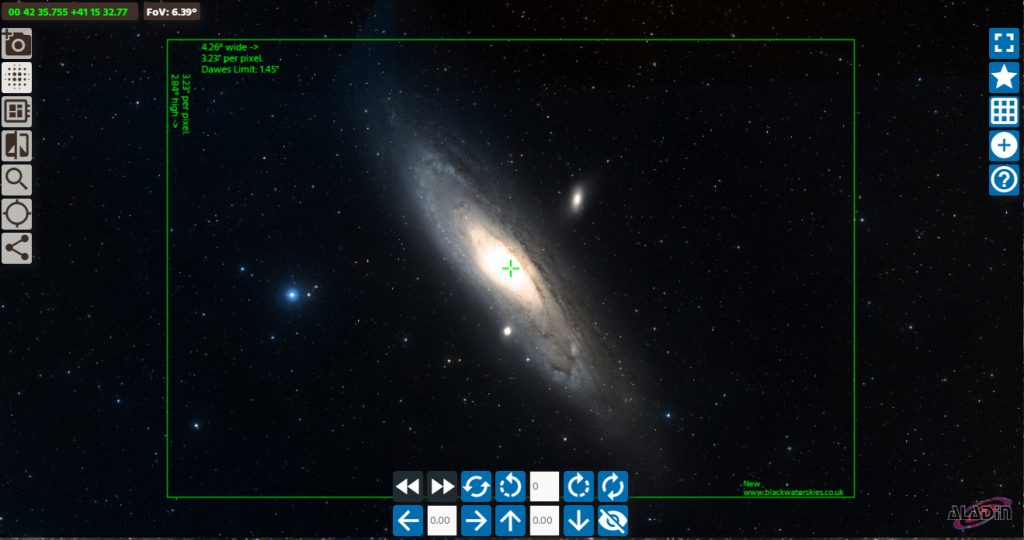
The observing location was in the Isle of Anglesey under dark, transparent skies . The lens, designed for full frame cameras, was used at full aperture and, using a Micro 4/3 sensor, gave excellent stellar images to the corners of the reduced size sensor.
A total of 200 images were taken at a sensor temperature of -10 Celsius. As I was using an iOptron MiniTower mount, I used an exposure of 30 seconds. The gain being adjusted so that sufficient stars were visible in each sub frame so that they could be aligned and stacked in Deep Sky Stacker. The Kappa-Sigma stacking method was used to remove satellite trails. The resulting image was stretched and Starnett++ was used to separate the nebulae and stars into two images which were processed individually and then recombined to give the result shown below.
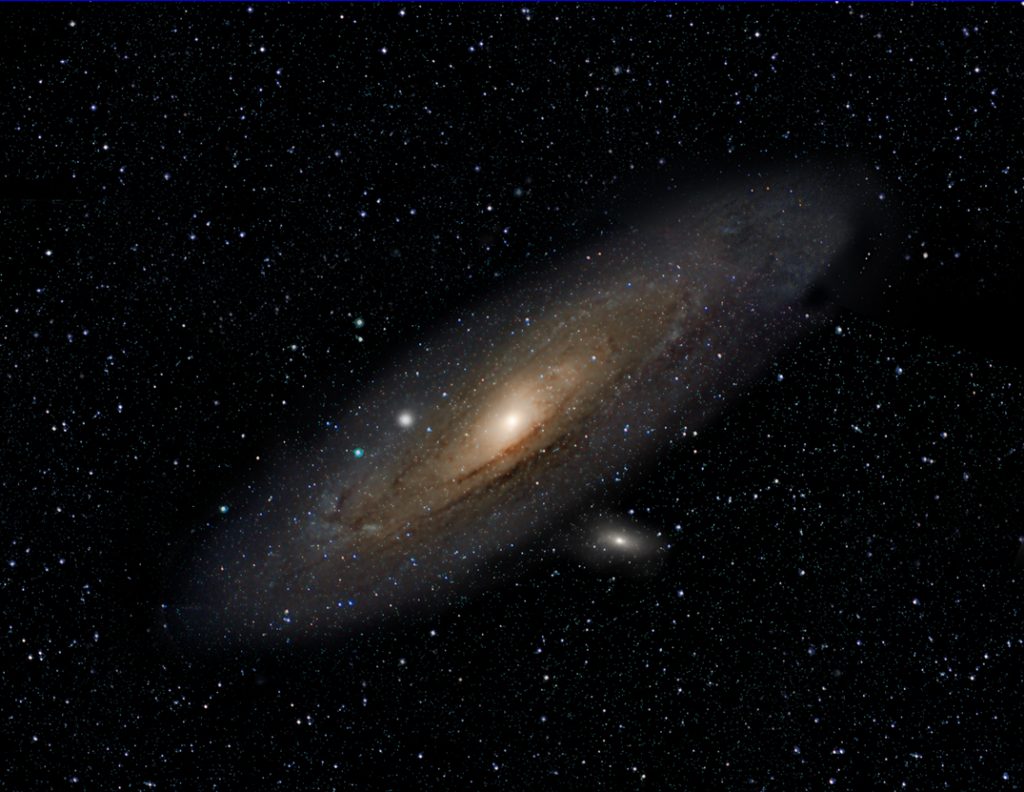
There are many far better images, but I believe that this one holds up well given that it was taken with an old manual camera lens.
(*) I actually want that the captured frames to move slightly over the camera sensor during the period of the exposures as this helps to avoid ‘colour mottling’ due to the uneven sensitivity of individual pixels. [This is why those who use autoguiding ‘dither’ the pointing of their telescope to achieve the same result. Using low read noise CMOS cameras when, due to sky glow, 60 second exposures may well be optimum, autoguiding is no longer necessary given a mount with reasonable tracking unless long focal length telescopes are used.]