
An article in the author’s Astronomy Digest – http://www.ianmorison.com
This is a step-by-step account of, first, using Deep Sky Stacker to align and stack a number of wide field images and then IRIS to ‘stretch’ the image and bring out fainter stars and, in this case, three of Jupiter’s satellites. Both programs are free to download and use and so enable one to produce an image that can be saved and displayed without the use of any image processing programs.
The set of frames were taken as an imaging example during an astrophotography workshop for the Costa Blanca Astronomical Society. The sky was partially cloudy limiting the area of sky that could be imaged and the region around Jupiter in Libra was chosen. Eleven frames were taken with an exposure of 30 seconds using an ISO of 100 with the ‘in-camera dark subtraction’ mode employed. This is usually enabled when exposures of more than ~10 seconds are taken. (The camera takes a second identical exposure with the shutter closed and differences the two to remove the hot (or warm) pixels that show up in long exposures.) A two second delay was employed to eliminate the effects of camera shake as the shutter was depressed. The camera was mounted on a tracking mount to eliminate any star trailing.
Aligning and Stacking the 11 frames in Deep Sky Stacker (DSS)
Deep Sky Stacker will correct for any ‘frame rotation’ that will occur if the camera is mounted on a fixed tripod. In this case shorter exposures will be needed.
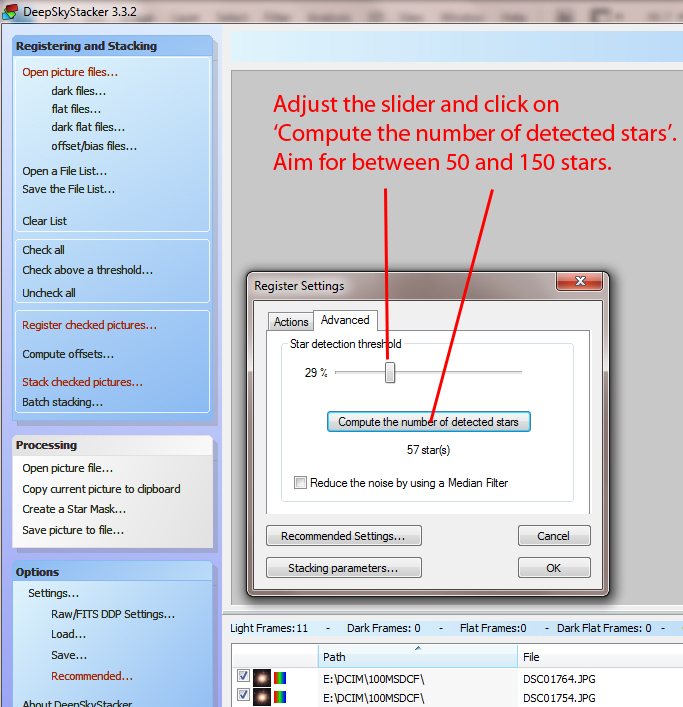
The 11 frames were loaded (Click on ‘Open picture files’) into DSS and ‘Check all’ clicked on. The screenshots below then show the process of first setting the star sensitivity threshold and then aligning and stacking them.
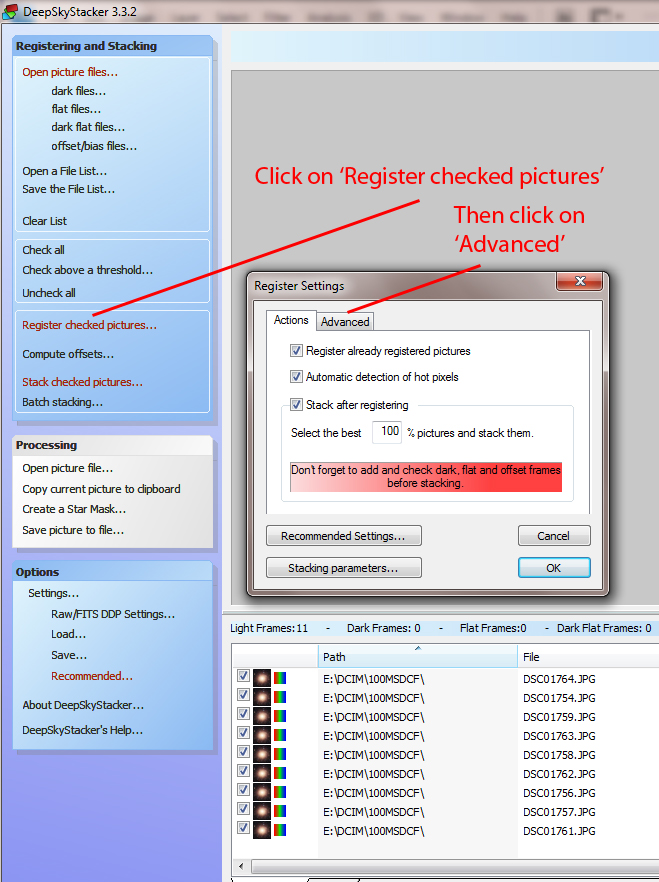
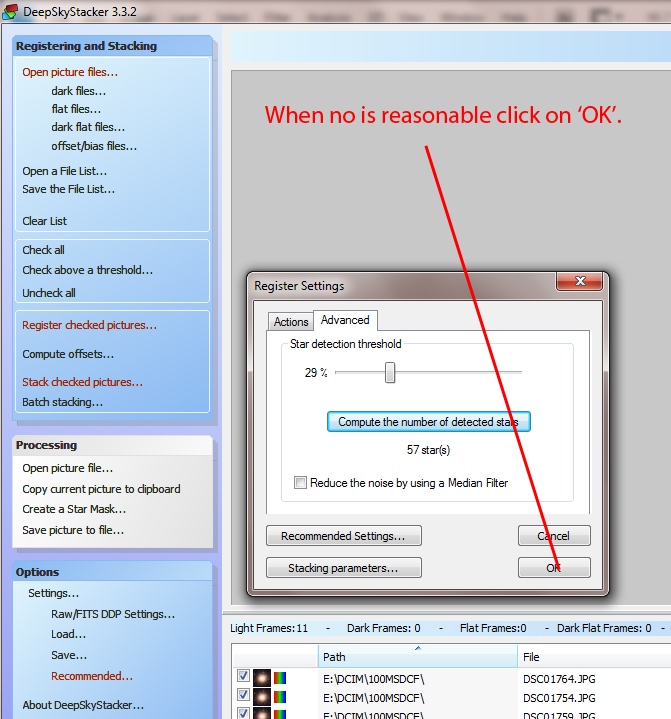
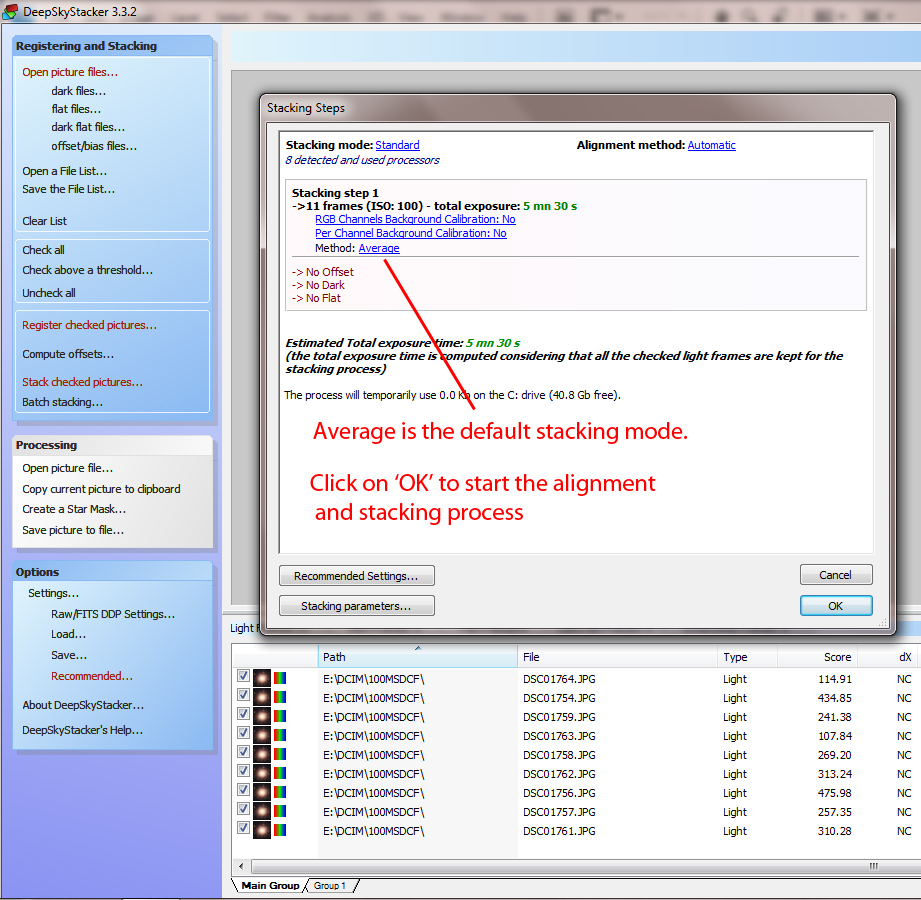
The stacking steps are now shown. The following screen will appear automatically as the ‘OK’ is clicked above.
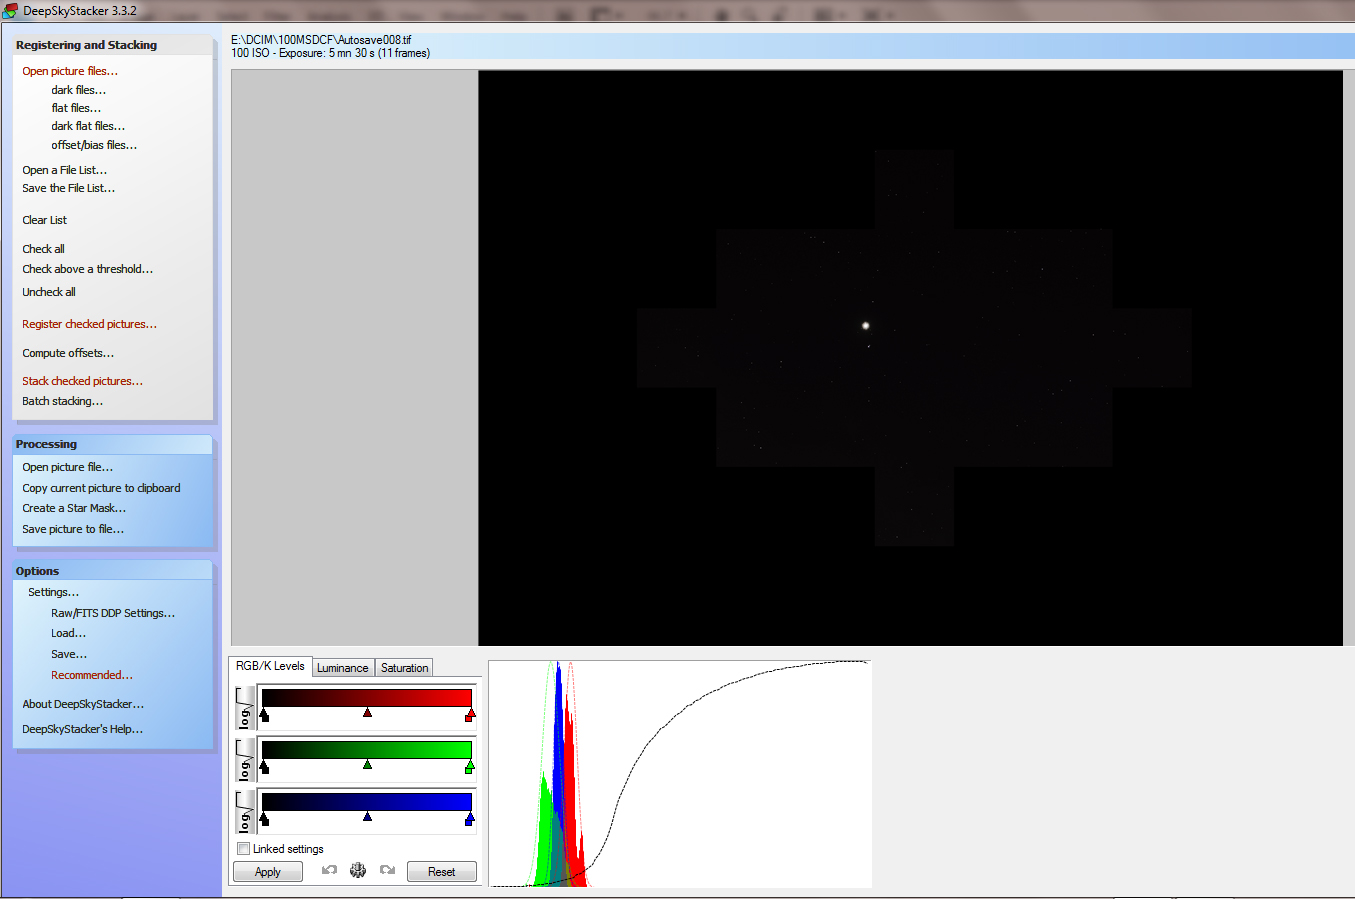
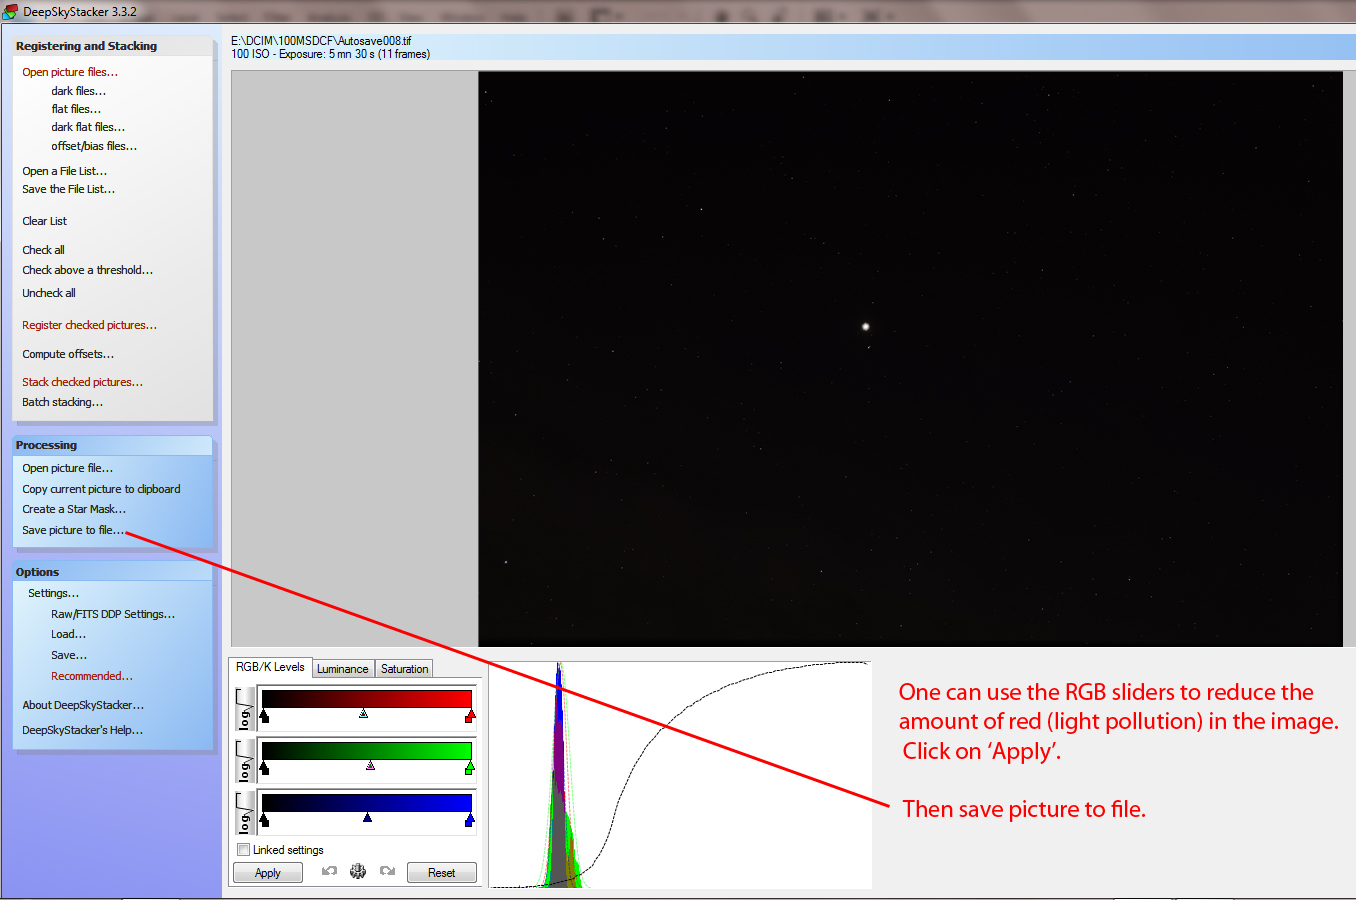
The histogram shows an excess of red due to light pollution. By adjusting the sliders to its left one can reduce the amount of red in the image and increase that of green to give a more neutral colour balance.
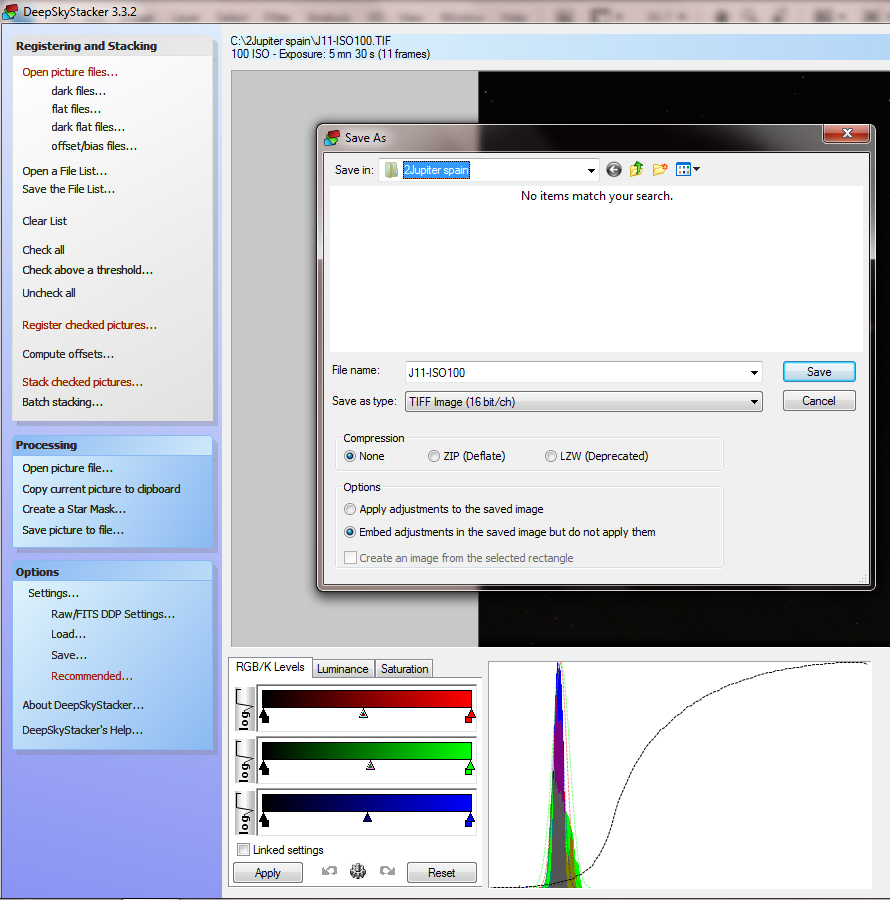
Saving the image as a 16-bit tiff.
Stretching the image in IRIS
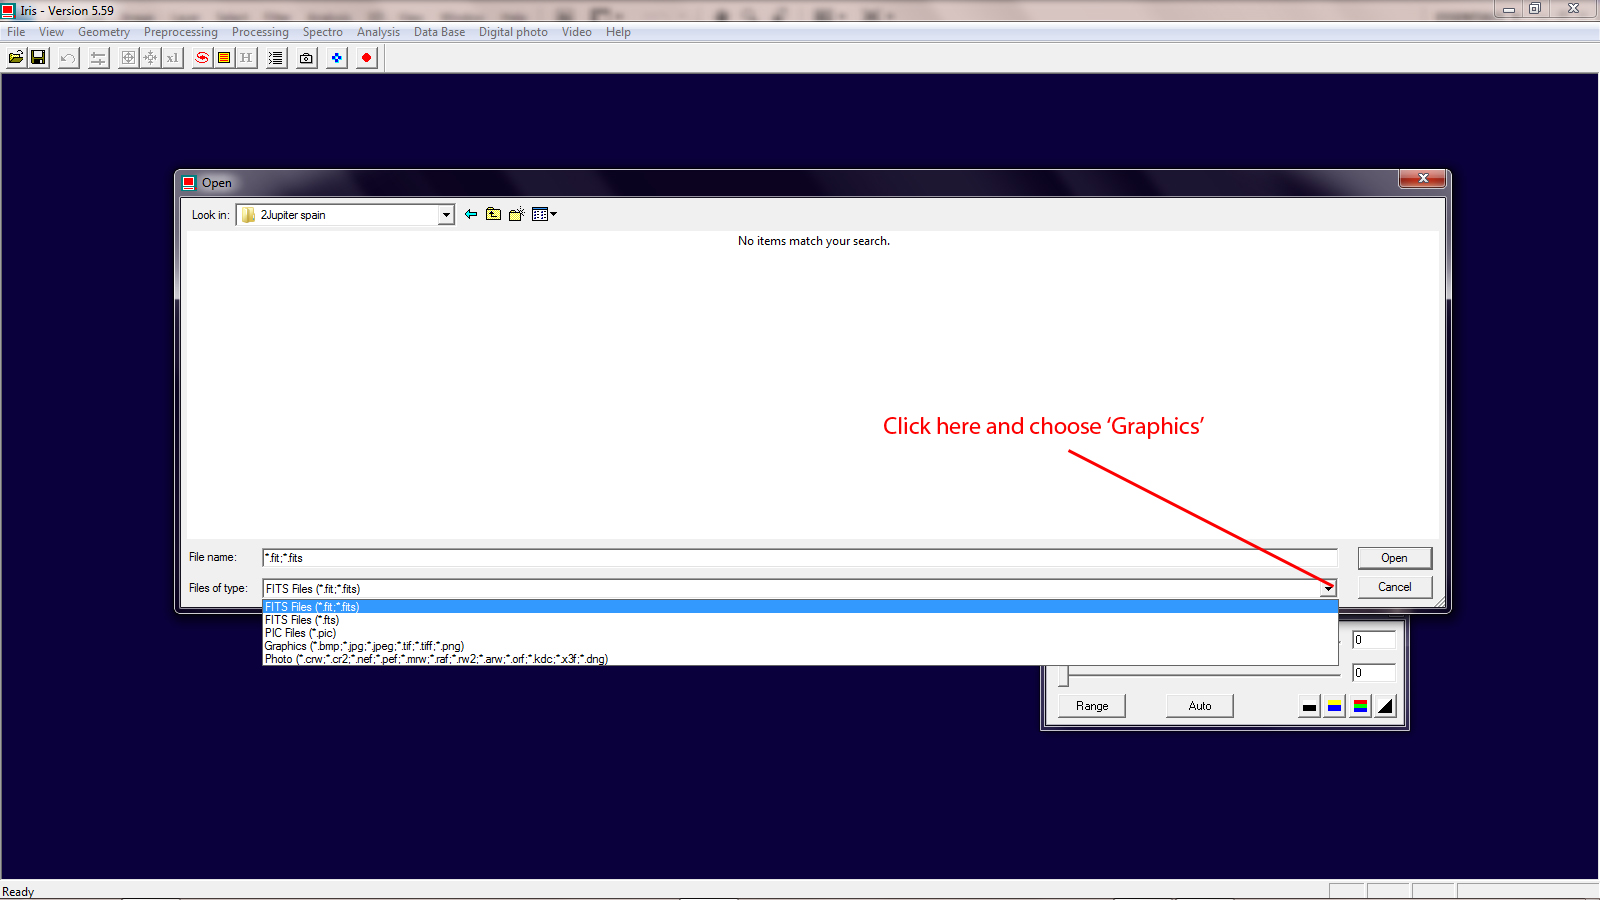
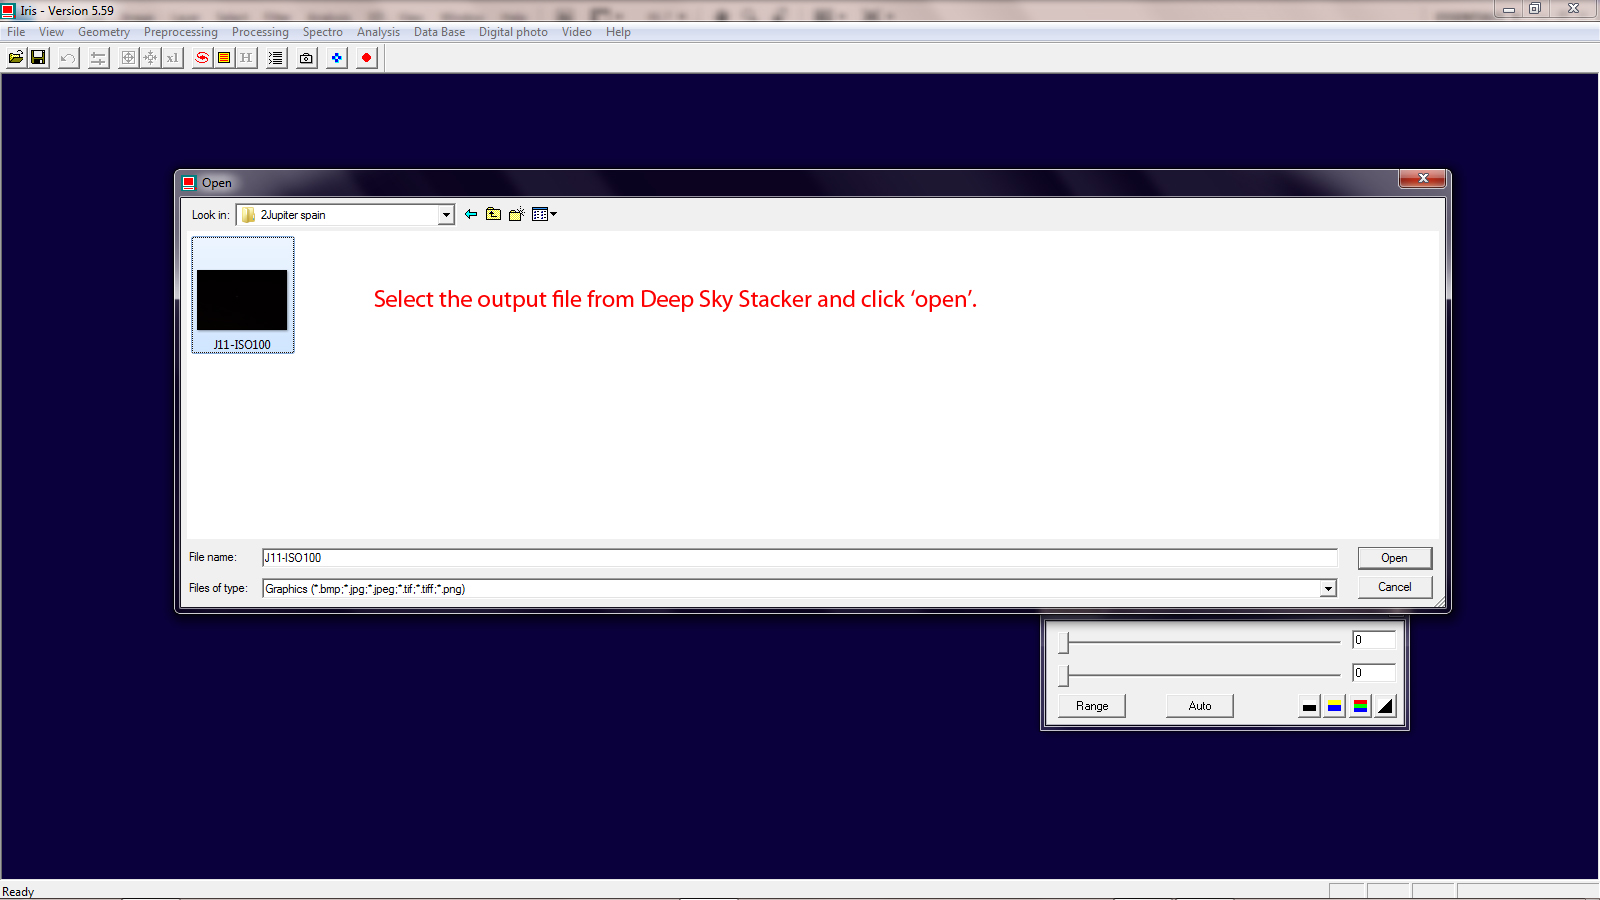
The output Tiff file from DSS is loaded into IRIS and the following screen shots show how the image can be stretched in two ways. The ‘Logarithm’ method is probably better. The screen shots show the relatively small area around Jupiter.
Select the type of input file. (FITS is default, so one has to select ‘Graphics’ files:
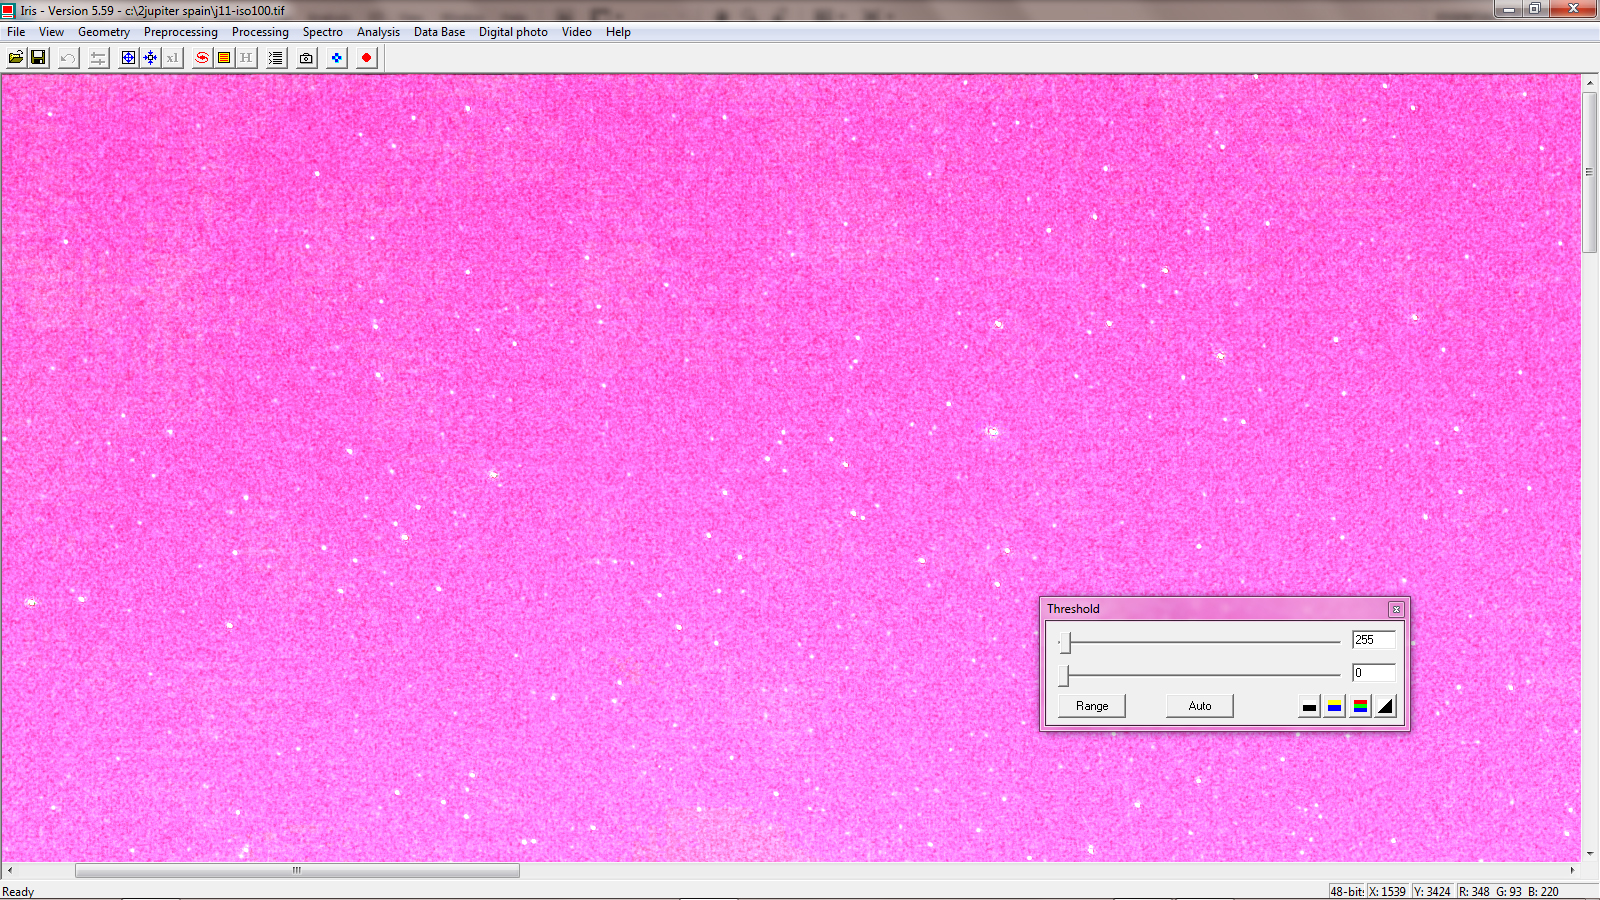
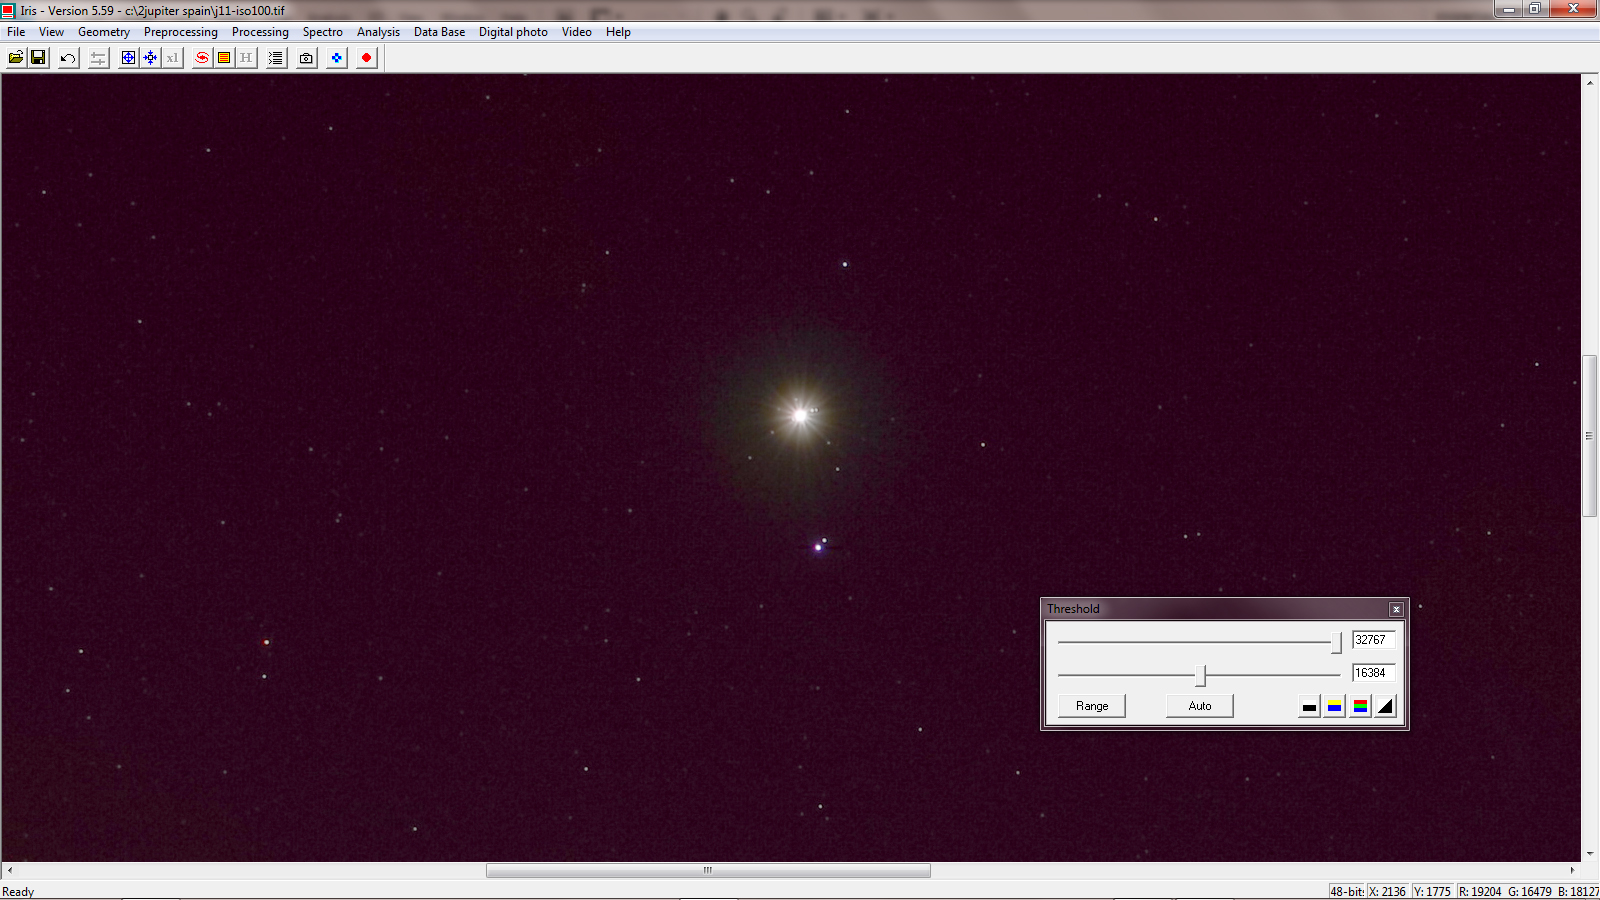
Initially this gives an ‘interesting’ result but you can see that many stars are visible above the noise – which is still affected by light pollution.
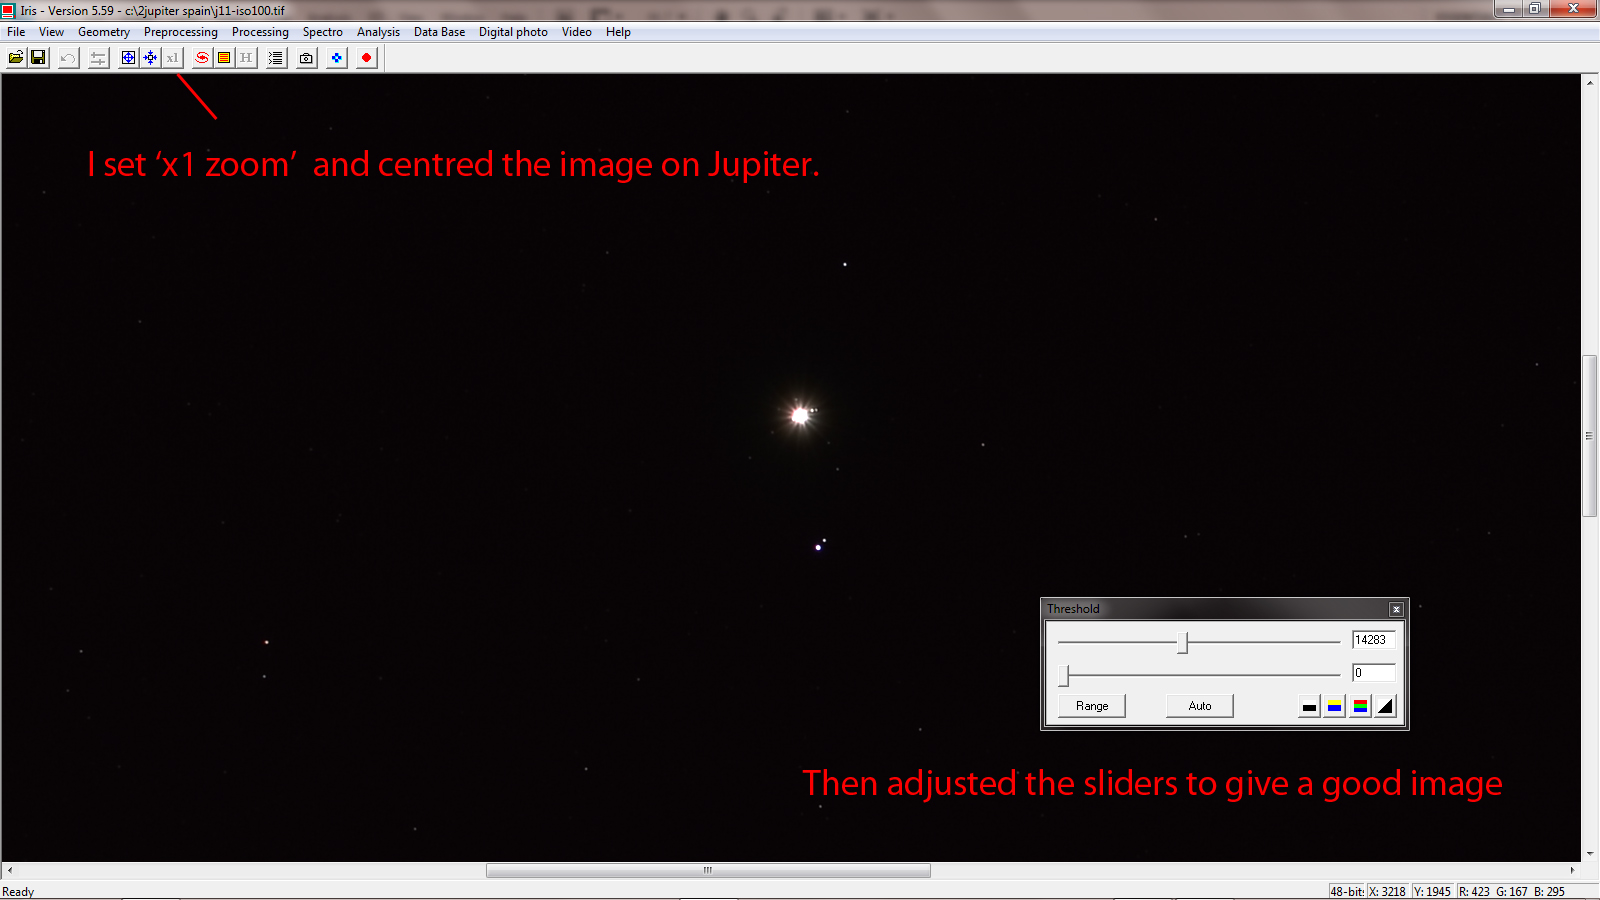
However by adjusting the two sliders a reasonable image can be seen.
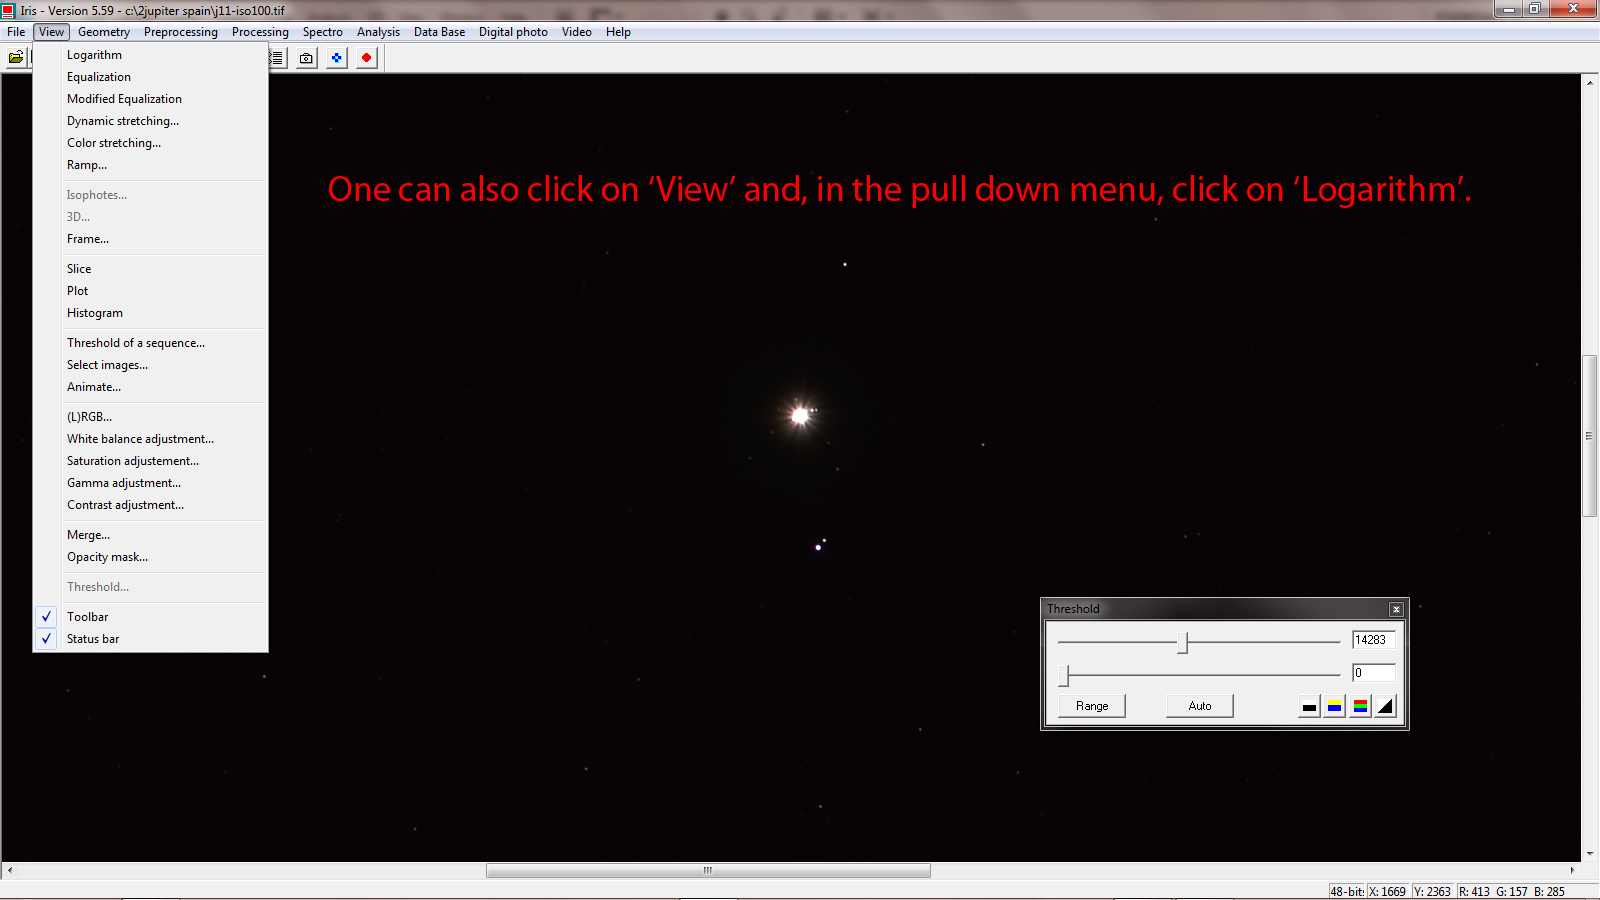
A more sophisticated way to ‘stretch’ the image:
The result still shows a deep red background:
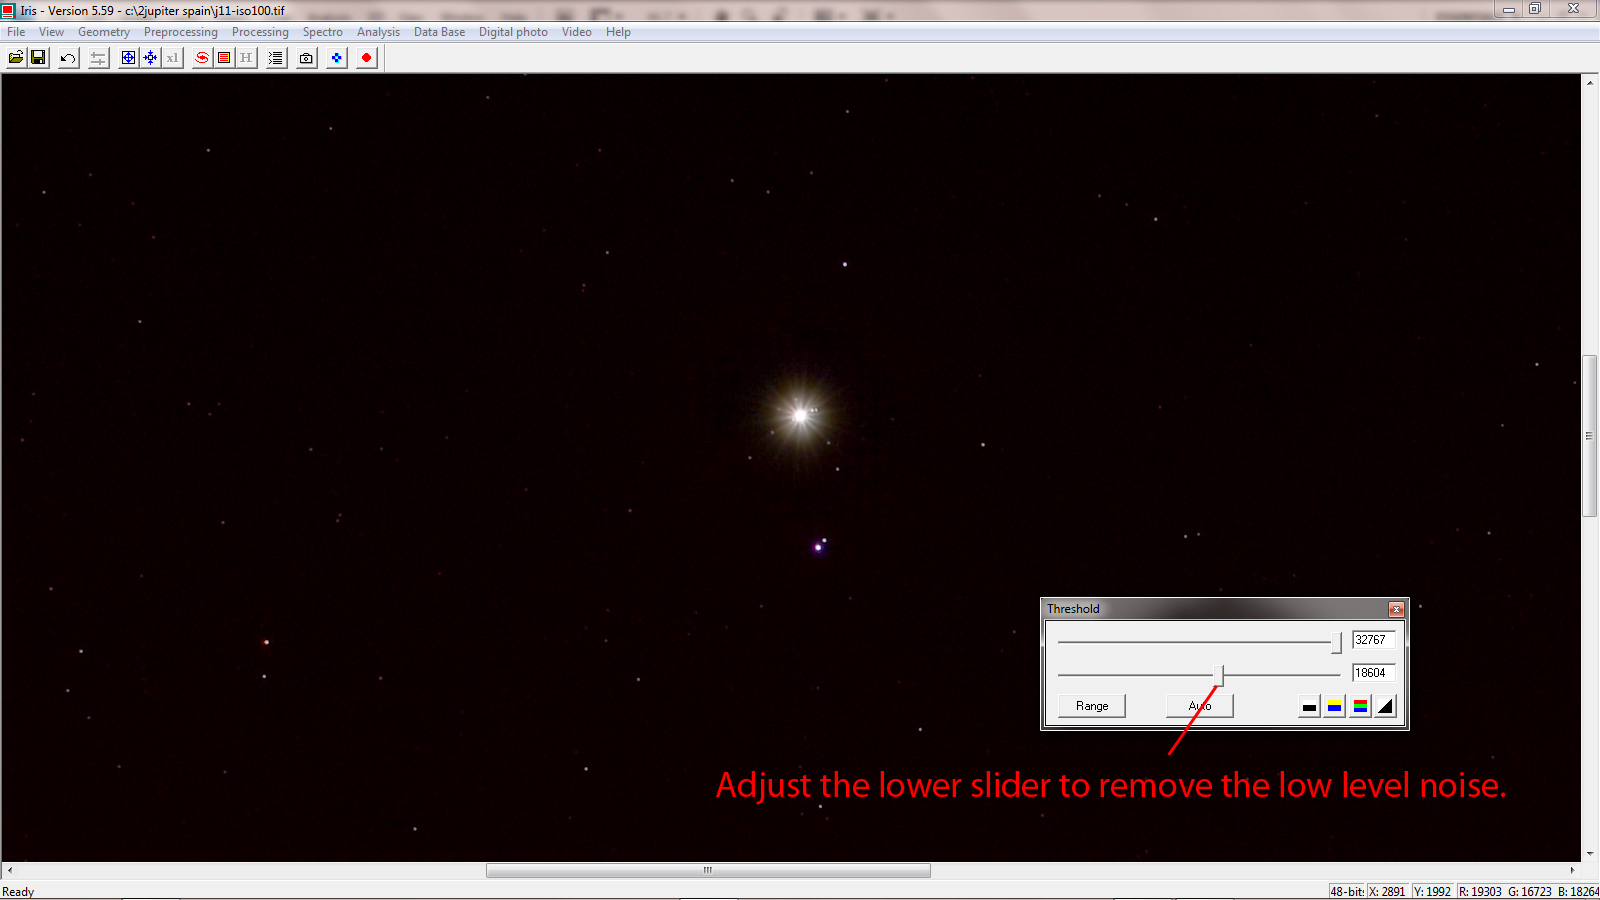
By adjusting the lower slider, any low level noise and, in this case, the residual light pollution can be eliminated:
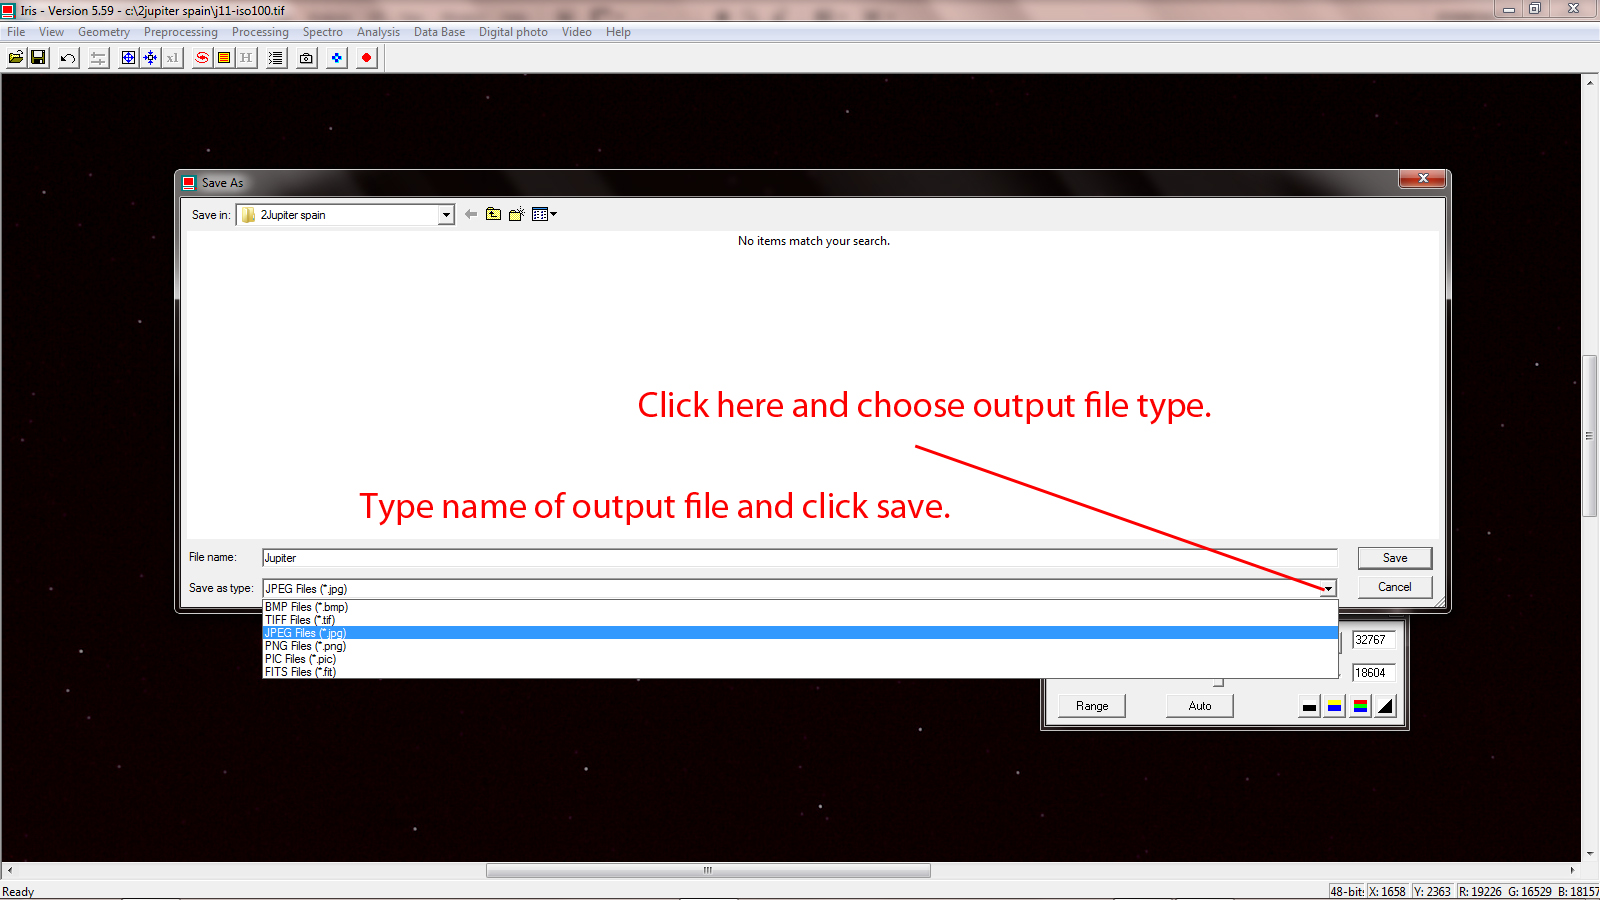
Now output the result in your desired format:
This is a very tight crop of the central region around Jupiter.
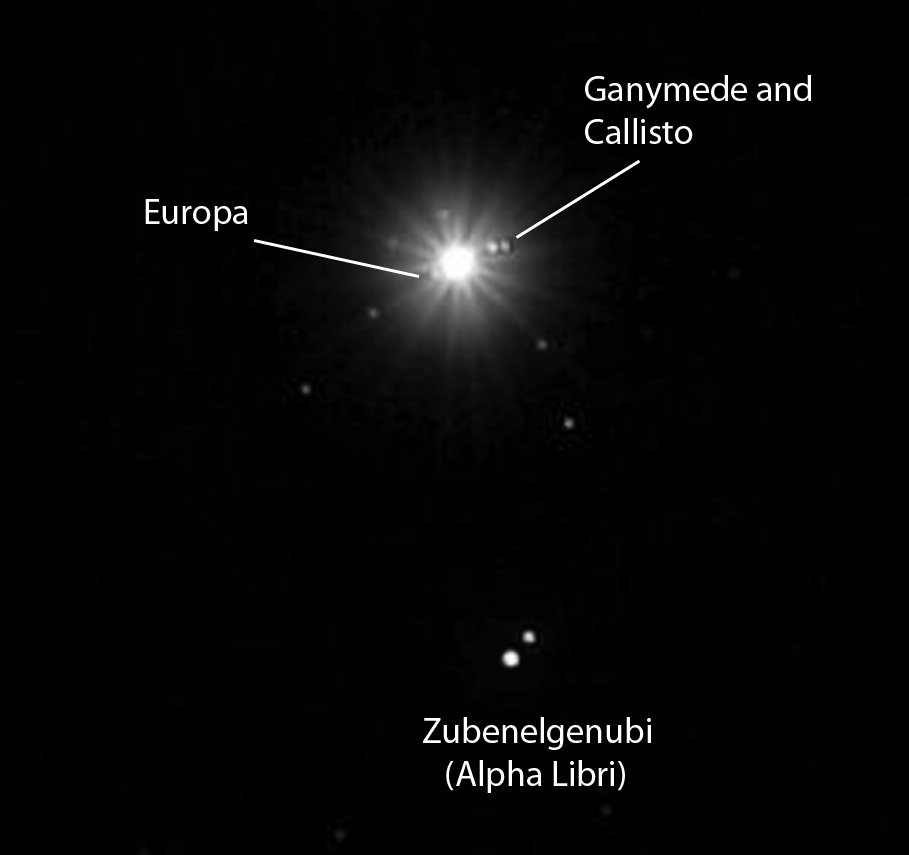
The stars in Libra are pretty faint with its brightest star, Alpha Libri or Zubenelgenubi, lying some 77 light years away and of only +2.5 magnitudes. This was just below Jupiter and the image showed that it appears as a double star – with a very long period of 70,000 years (or more)! (I had not known that so the image taught me something .)
Three of Jupiter’s Moons are visible amongst Jupiter’s glare, Europa to the left and Callisto and Ganymede on the right. Io was too close to Jupiter to be seen. Otherwise it is not a very impressive image (just hundreds of faint stars so I have not shown it all). Wide field images showing the Pleiades and Hyades in Taurus, the Orion constellation or the Cygnus region around Deneb and Sadr will be much more rewarding.
Return to Astronomy Digest home page