
[This is just one of many articles in the author’s Astronomy Digest.]
On July 7th 2017 whilst using my 127 mm refractor and Herschel Wedge to observe the Sun, I spotted a sunspot near to the north-west limb and thought it worthwhile to observe it with my Lunt 60 mm pressure tuned H-alpha telescope which is described in a further astronomy digest article.
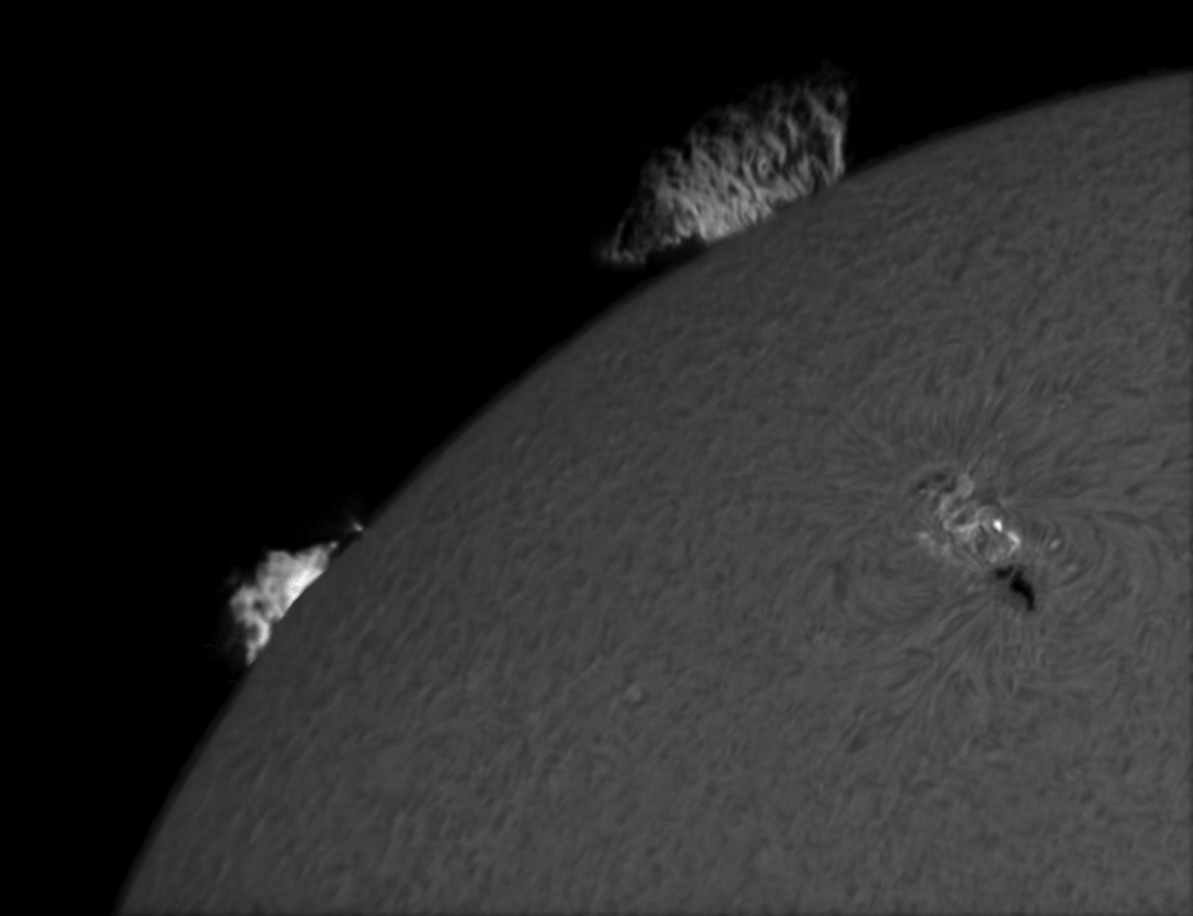
The final image whose production is described below
I was really impressed by two prominences that were present on the Sun’s limb nearby and so decided to image the region. I used a, newly acquired, Point Grey Chameleon, 1.3 megapixel, monochrome webcam. This has an array of 1296 x 964, 3.75 micron square, pixels. The sensor size is sufficiently large so that only two frames are needed to cover the full solar disk when using the Lunt H-alpha telescope. To image the sunspot/prominence region in greater detail I placed a TeleVue x2.5 Powermate prior to the camera and took quite a number of video sequences each of around 600 frames and requiring ~2 Gbytes of storage to save. At the time when these were taken, the Intel i5 laptop used to acquire the data was not sufficiently fast enough to write the data to disk in real time and so, having acquired the data into a RAM buffer, some time was spent to complete its writing to disk. [I have since upgraded the laptop with a SSD hard drive to use with a USB3 external SSD hard drive so this is no longer a problem.]
The prominences are significantly fainter that the solar disk, so two exposures were used; one correctly exposed for the sunspot on the solar surface and the other for the two prominences. The aim was to process both in Registax 6 and then ‘add’ the two prominences to the sunspot image using Adobe Photoshop.
The sunspot image
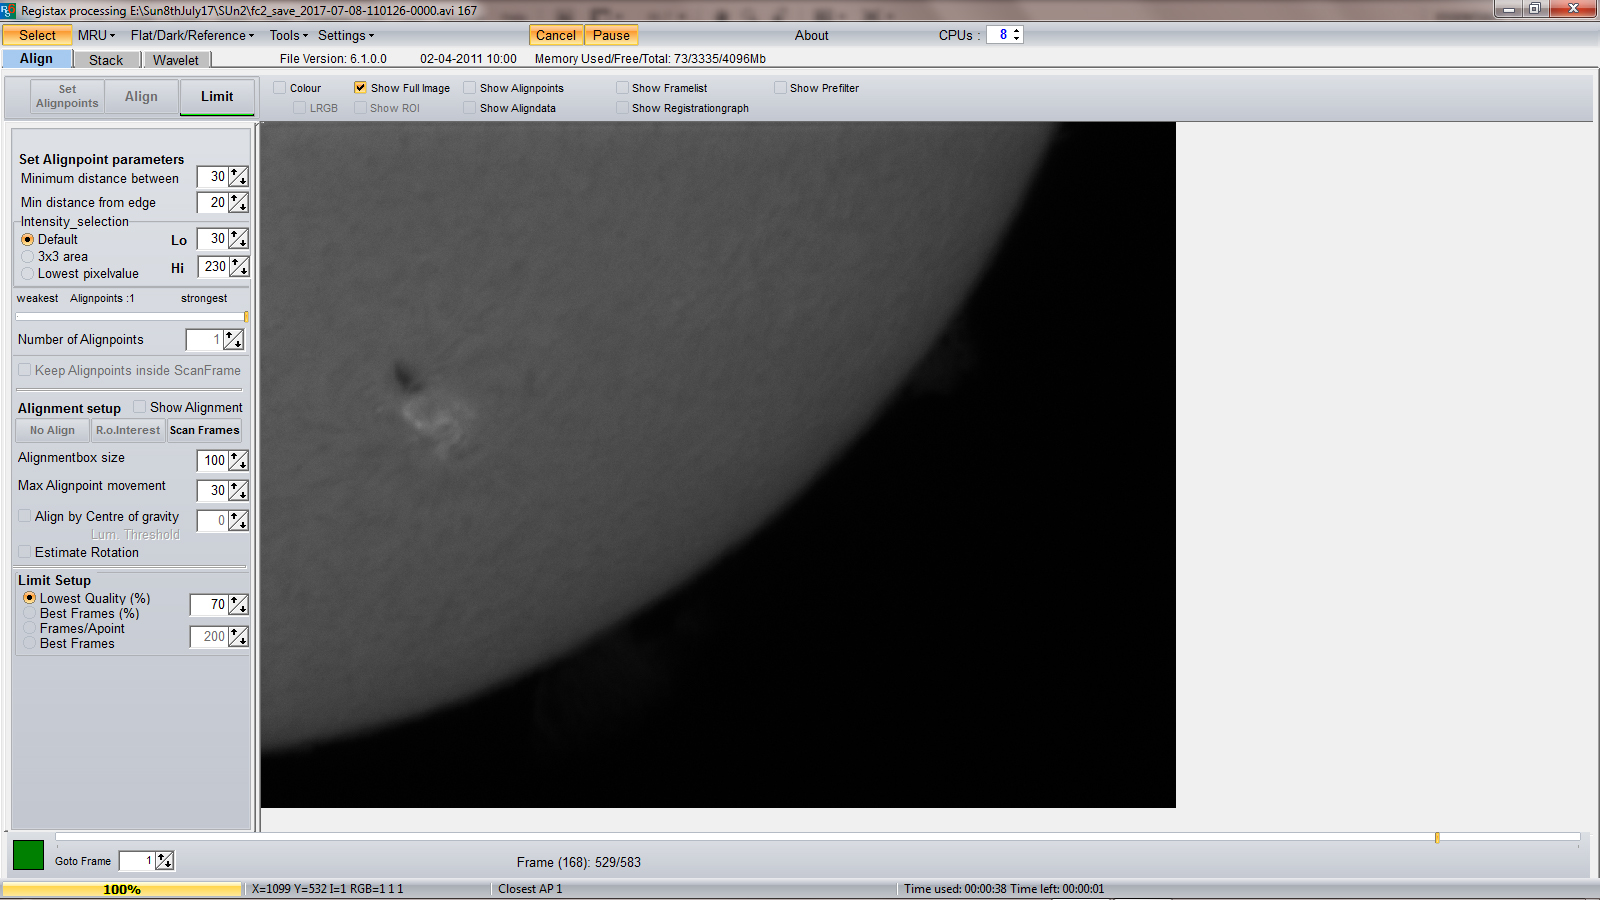
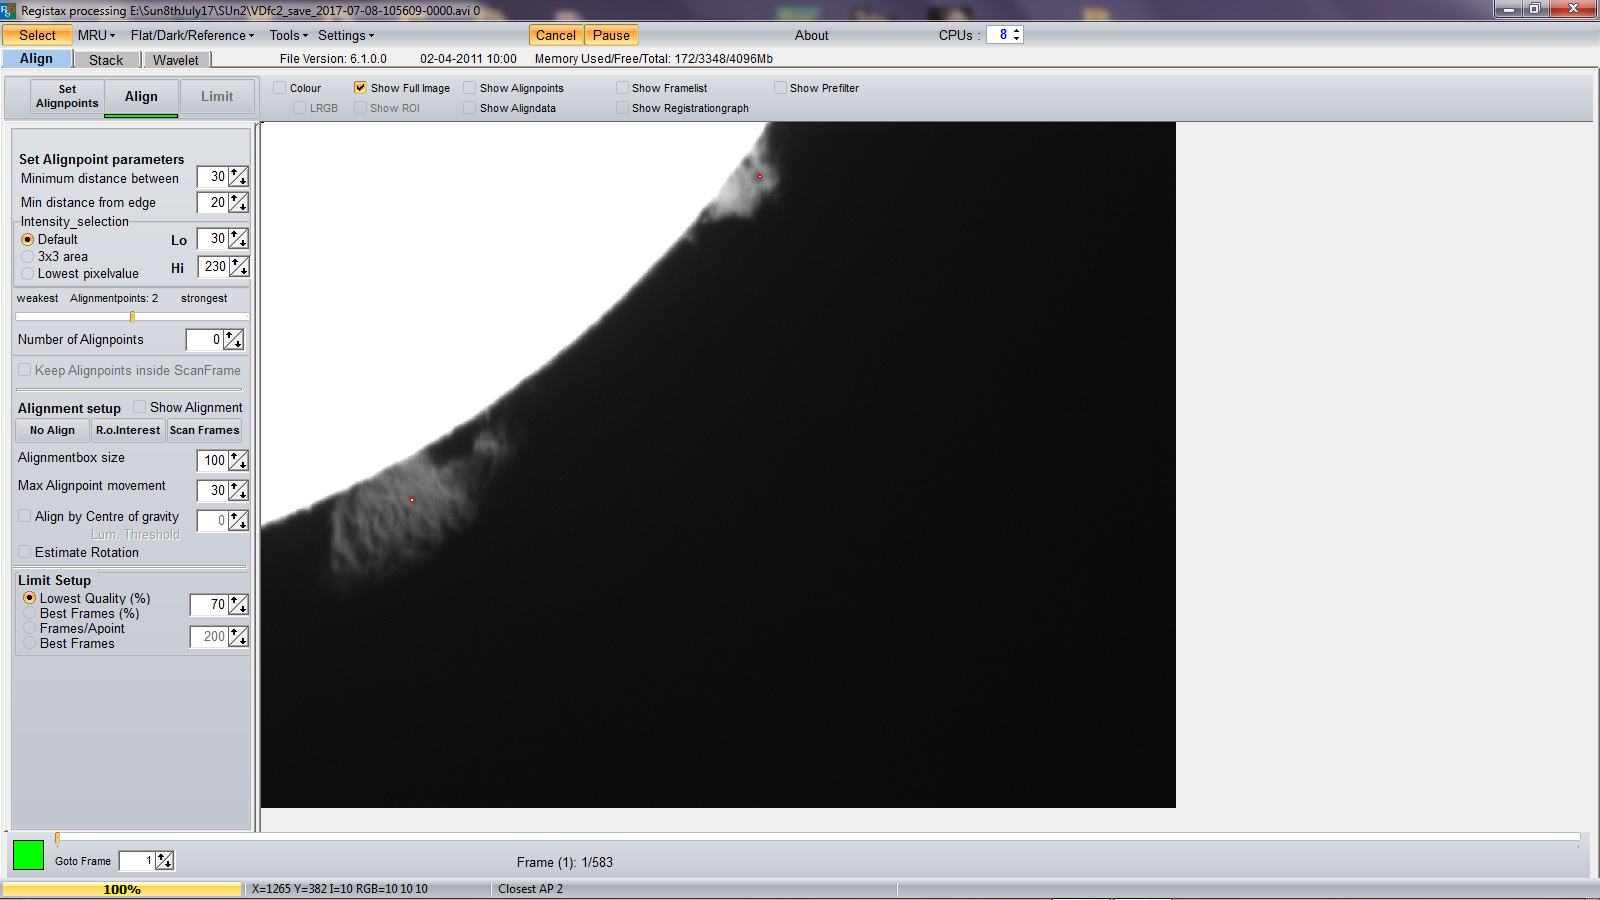
One of the videos correctly exposed for the sunspot region was imported into Registax 6. The ‘Show Full Image’ box should be clicked. The slider below the frame can be moved to select one of the sharper images and the ‘Set Align Points’ tab clicked.
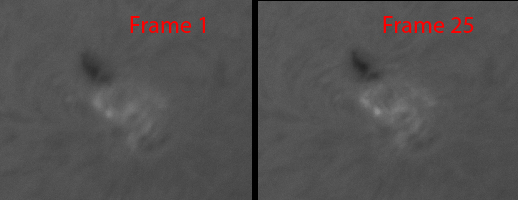
The sunspot region in frame 25 was significantly sharper than that in frame 1
Registax then placed very large number of align points across the image − far too many as seen below.
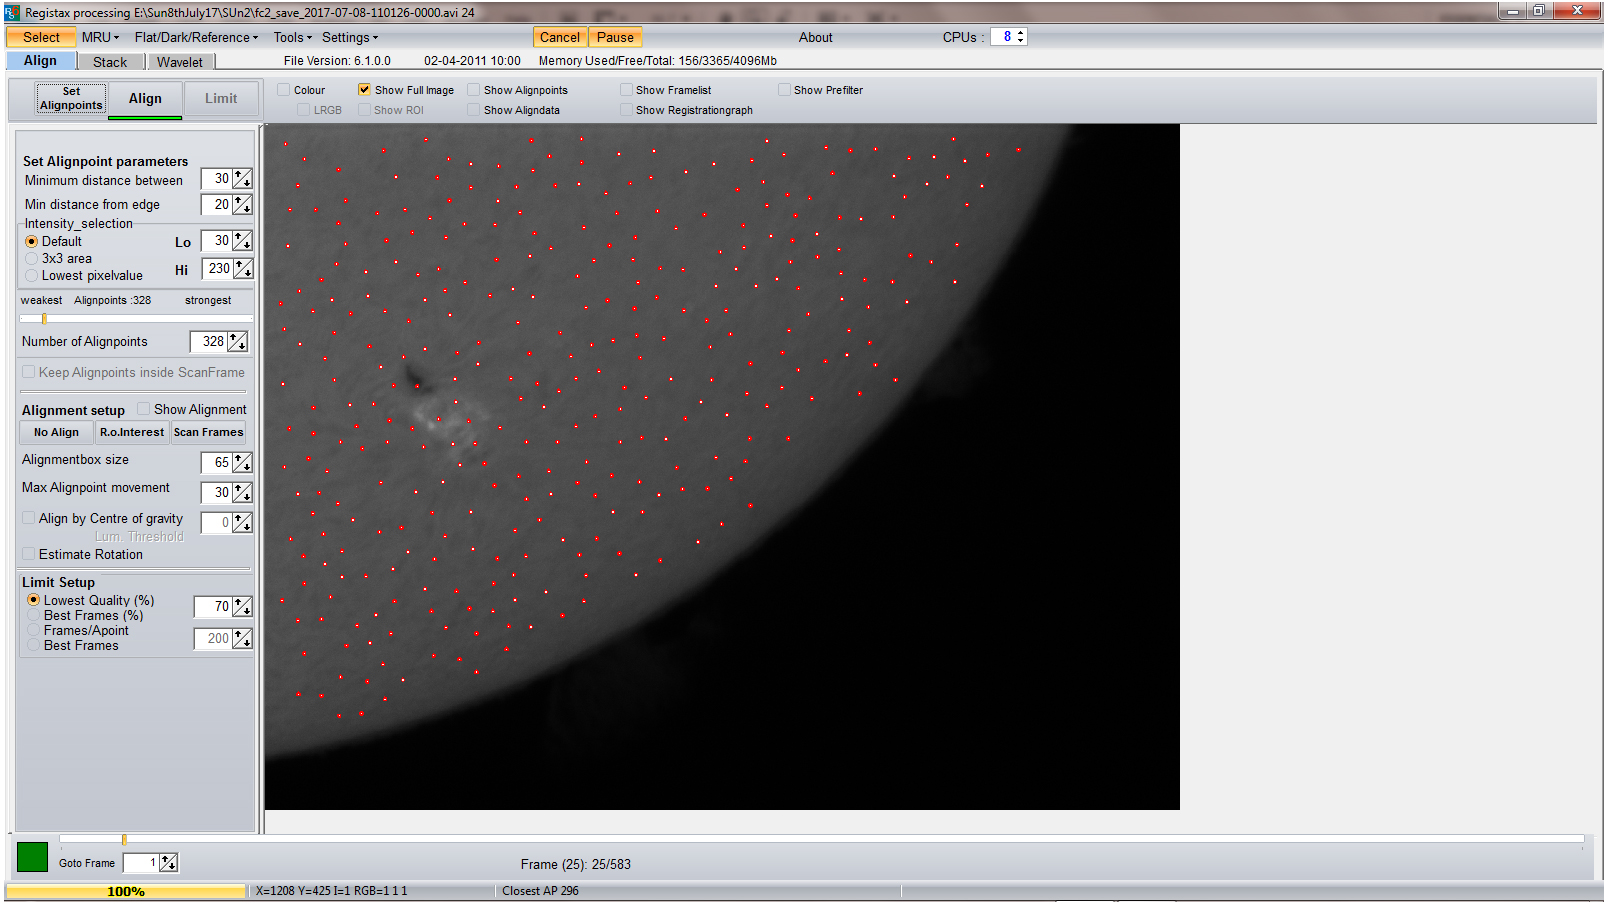
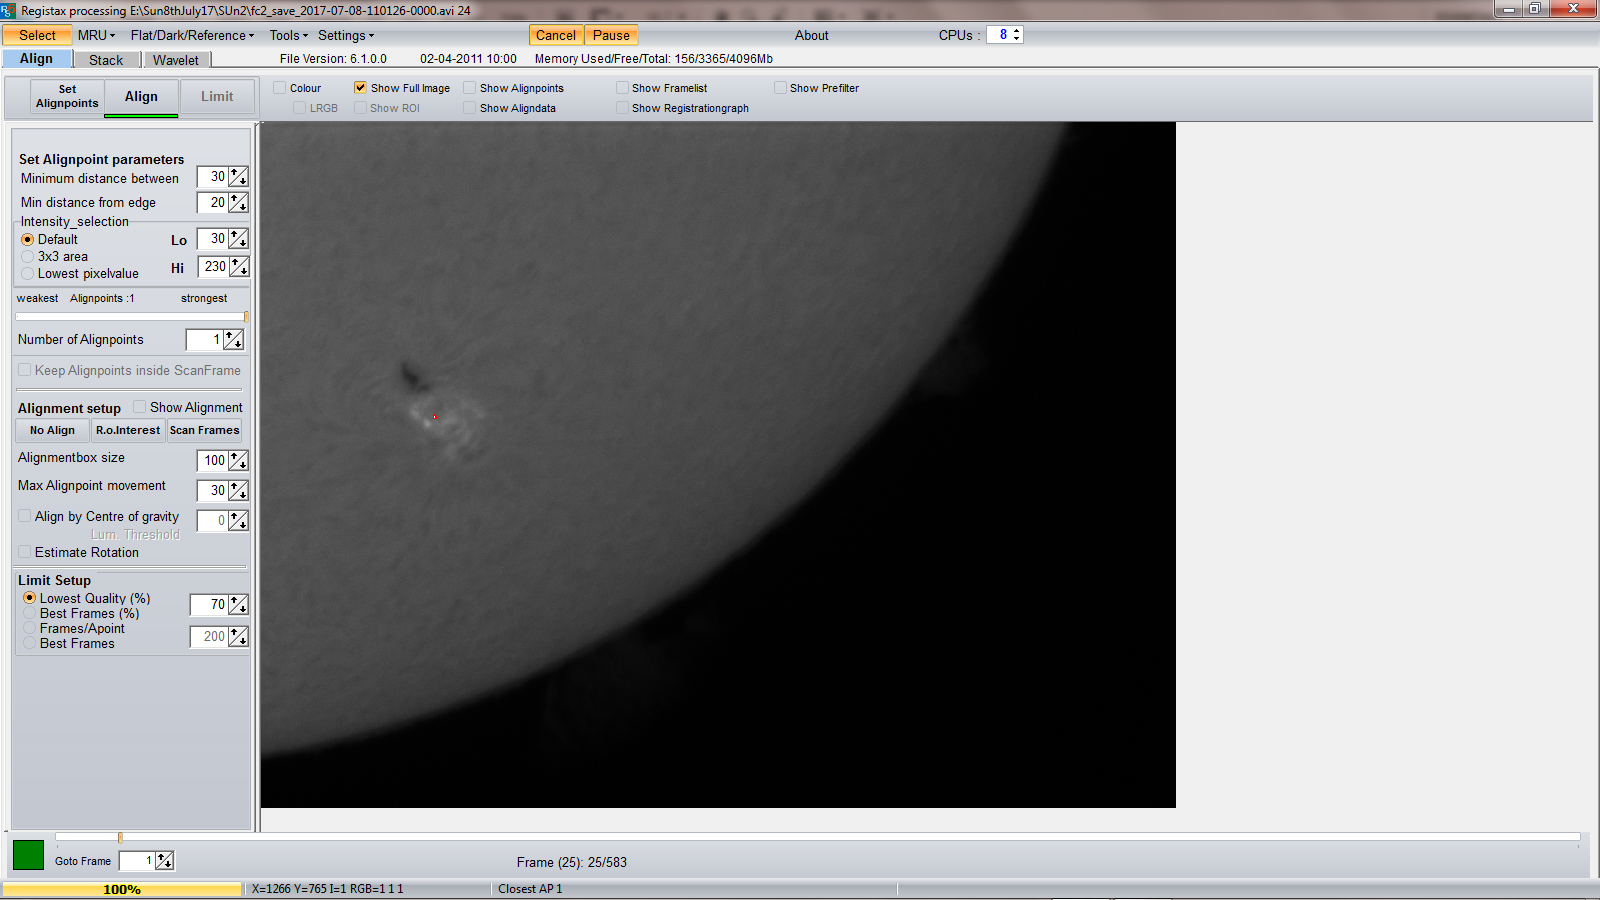
A slider can be moved over to the right to remove all but a small number across the frame. This can produce a problem in the final image. Registax will align the regions around each align point and, having stacked the aligned frames, will combine these regions into the final image. I have found that this can produce linear artefacts in the image at the boundaries of the regions. These can be ‘cloned out’ in Photoshop but, in this case, it can be better to use just one align point centred on the sunspot. To achieve this, the number of align points can be set to zero (in a box to the right of the slider) and a single align point, with the align box size set to 100 pixels, placed over the sunspot region by simply clicking the mouse upon it.
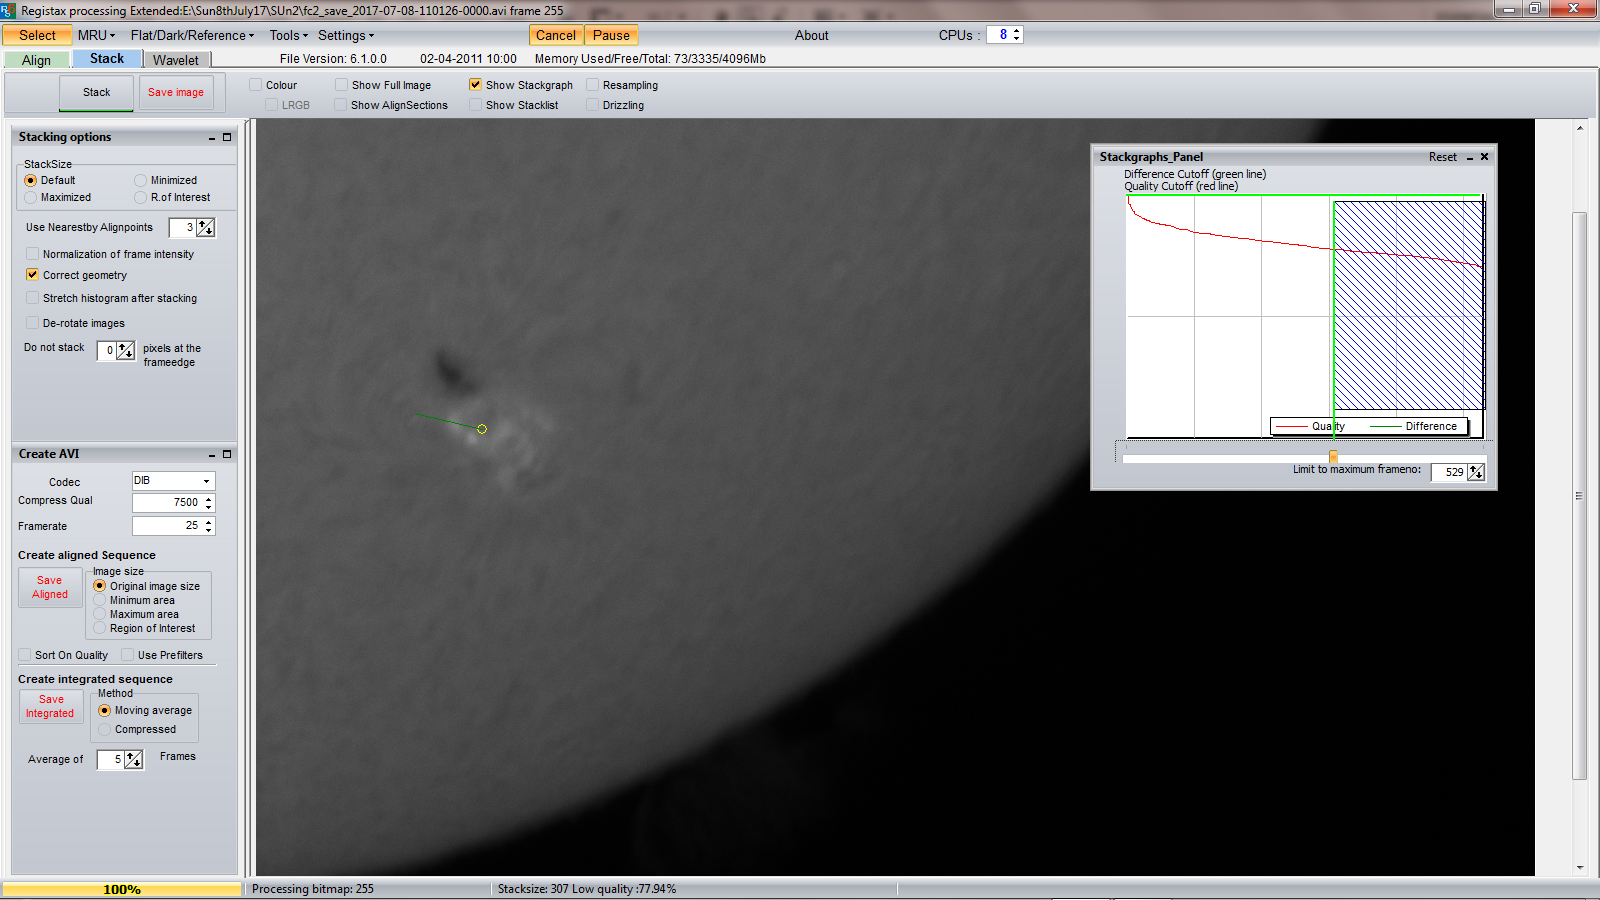
The set of frames was then aligned and the ‘Limit’ tab clicked upon. A green line shows the motion of the align point during the capture of the video sequence. In this case this was due to a small drift of the image over the sensor. I advocate a small movement of the image over the sensor during the capture of the video sequence and so do not have the telescope perfectly aligned on the North Celestial Pole. This will help to reduce the effects of dust moats and also slight variations in the sensitivity of individual pixels.
The ‘Show Stackgraph’ box was clicked upon and a plot appears to show the frames ranked in quality (sharpness) from left to right. The slider below was shifted to the left to remove the lesser quality frames from the stack and the ‘Stack’ tab clicked upon.
When the stacked image appeared, the wavelets tab was clicked upon, the 6 sliders set (in this case) to ~20 and the ‘Do All’ tab clicked upon.
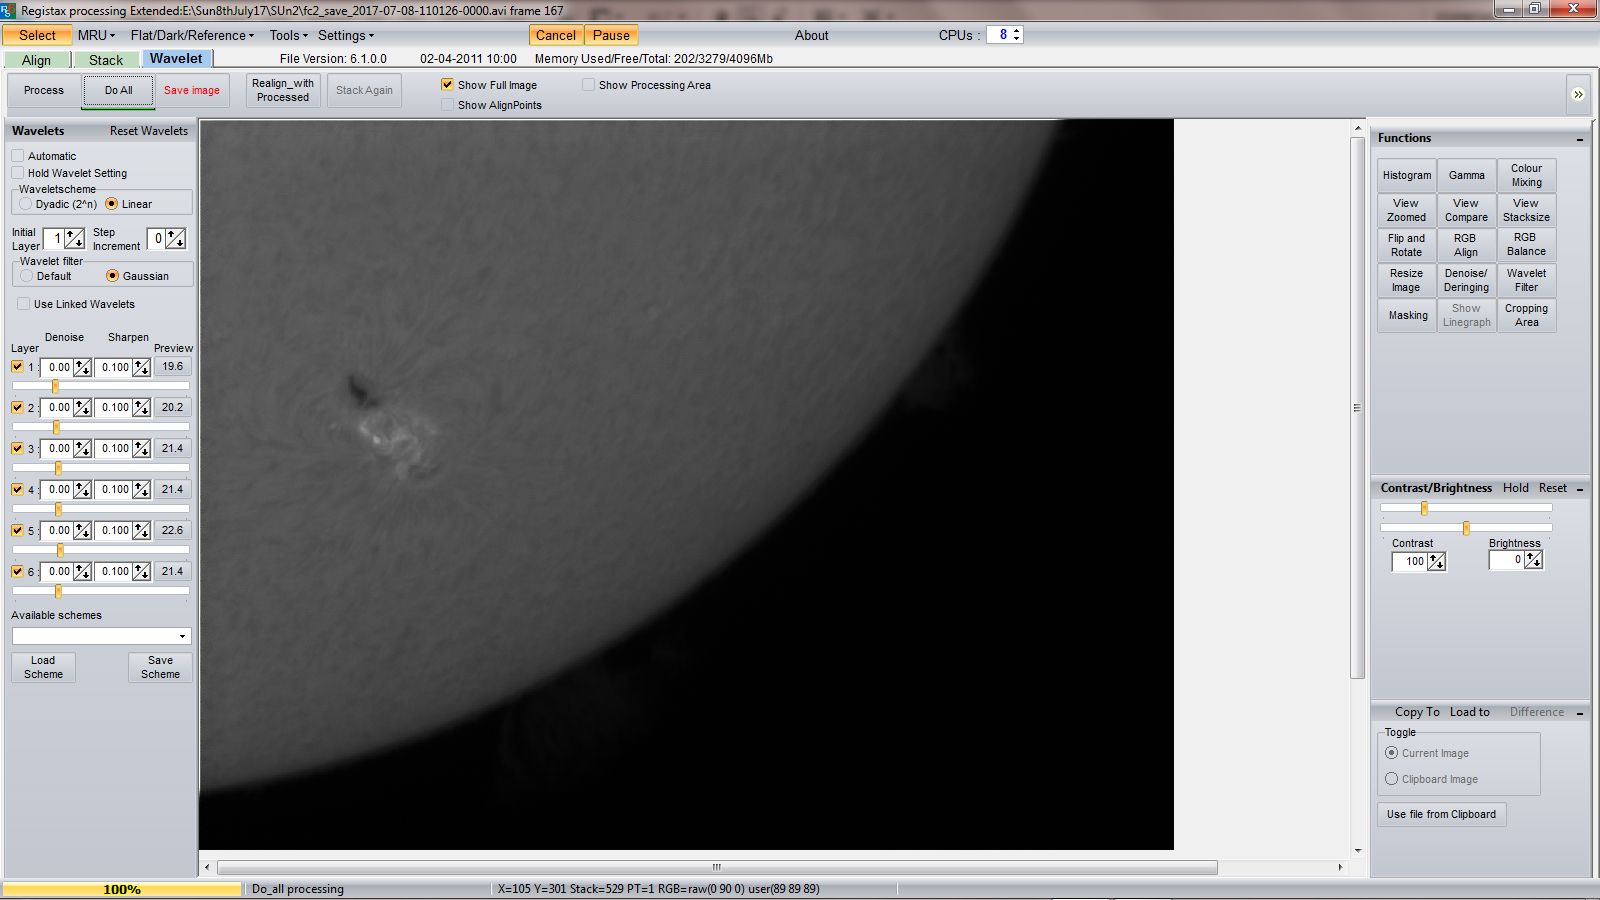
The sharpened result was saved and some further enhancements made in Photoshop applying some local contrast (using the ‘Unsharp Mask’ filter with a large radius and small amount) and ‘Smart Sharpening’ to the image.
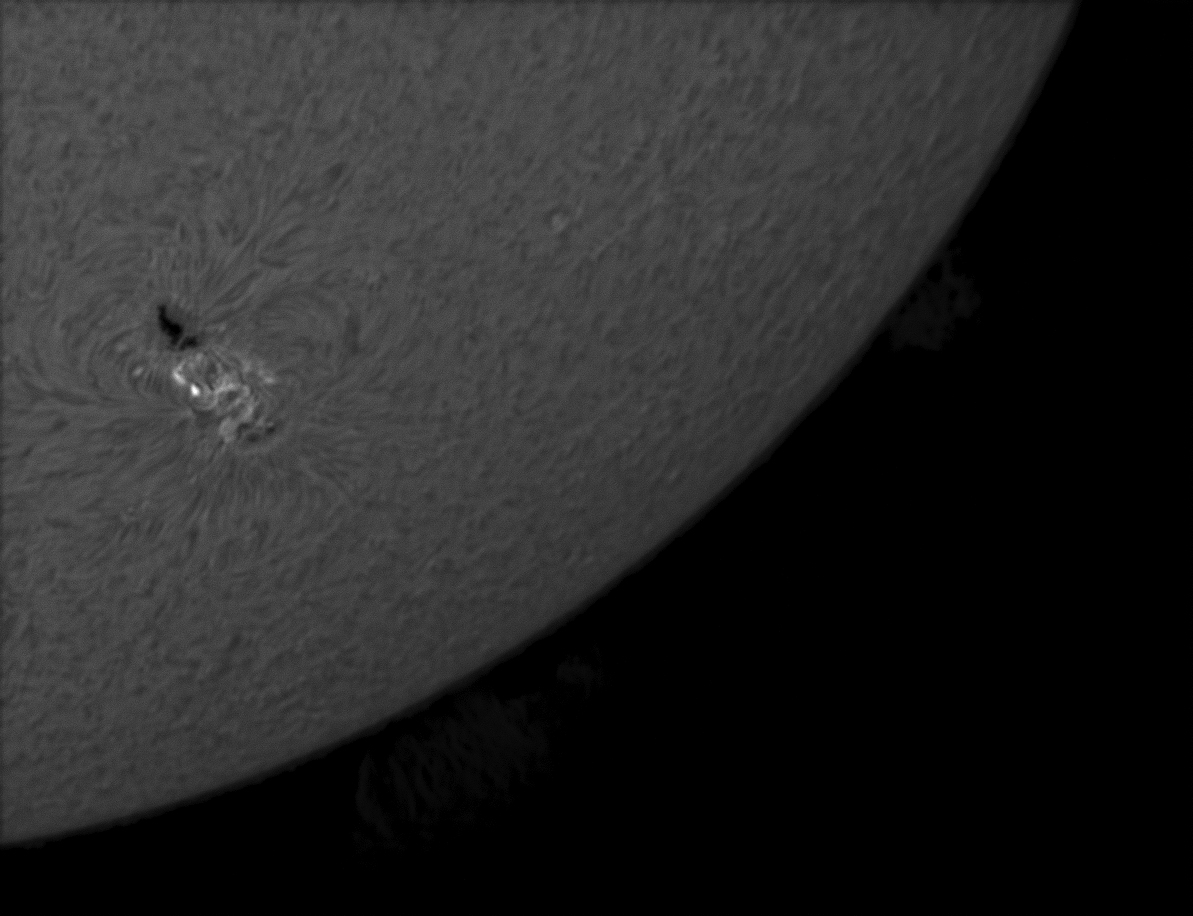
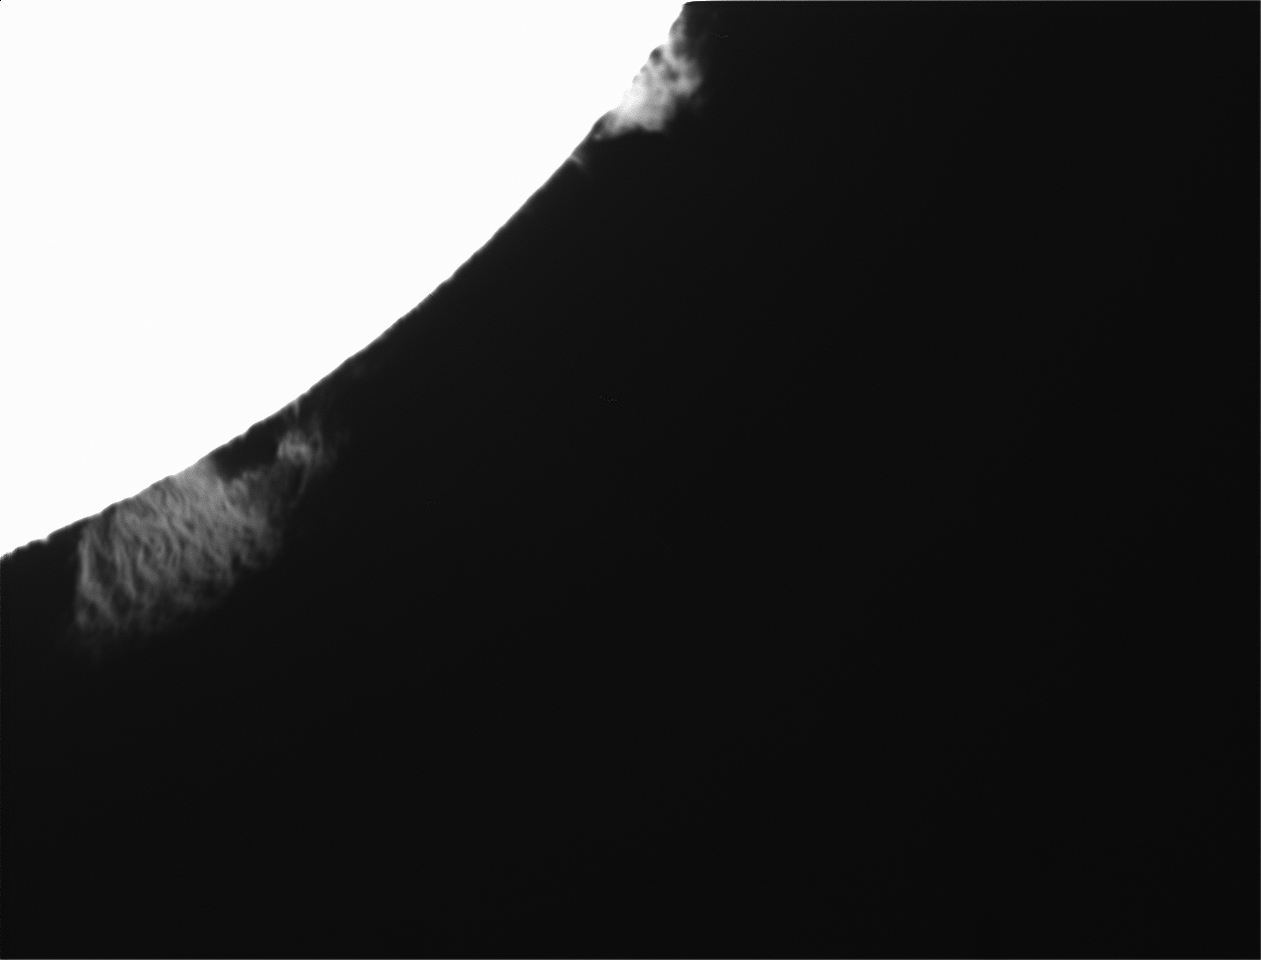
The final ‘sunspot’ image
The prominences image
One video, exposed for the prominences, was then loaded into Registax 6 and, this time, two align points were manually set, one for each prominence.
The better frames were stacked and the result sharpened using wavelets as for the sunspot image.
Combining the two images.
On the sunspot image the positions of the two prominences could just be seen. Both images were opened in Photoshop and, with great care, the two prominences were ‘cloned’ from the prominences image onto the sunspot image. Zooming in, some noise was visible and this was removed with a single application of the ‘Despeckle’ filter within the ‘Noise’ submenu to give the result shown at the head of this article having rotated the image horizontally and vertically to give the image the correct orientation.