[This is just one of many articles in the author’s Astronomy Digest.]
This essay is to give a further example of how a DSLR and tripod can be used to make high quality wide field images of constellations as discussed in Chapter 2 of ‘The Art of Astrophotography’. It will describe an additional method of enhancing the stellar images and also update Chapter 3 with details of two new tracking mounts that became available in 2016 as the book was in press.
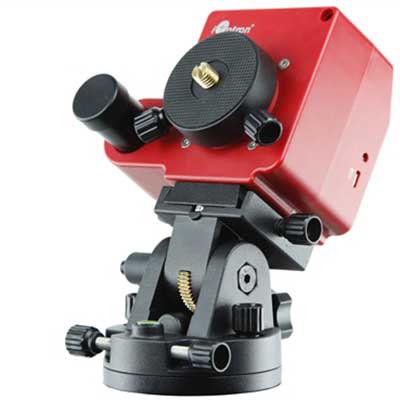
The iOptron ‘SkyTracker Pro’ DSLR camera mount with polar scope at ~£369
Upgraded from the SkyTracker, the SkyTracker Pro is a very compact unit which has better precision and silent tracking. It has a built-in rechargeable power source that runs for over 24 hours of continuous operation. The new precision polar scope employs a fine engraved reticule and features adjustable illumination. There are tracking rates for sidereal, solar and lunar imaging. The removable alt-azimuth base now features a precision bubble level and degree markings in altitude.
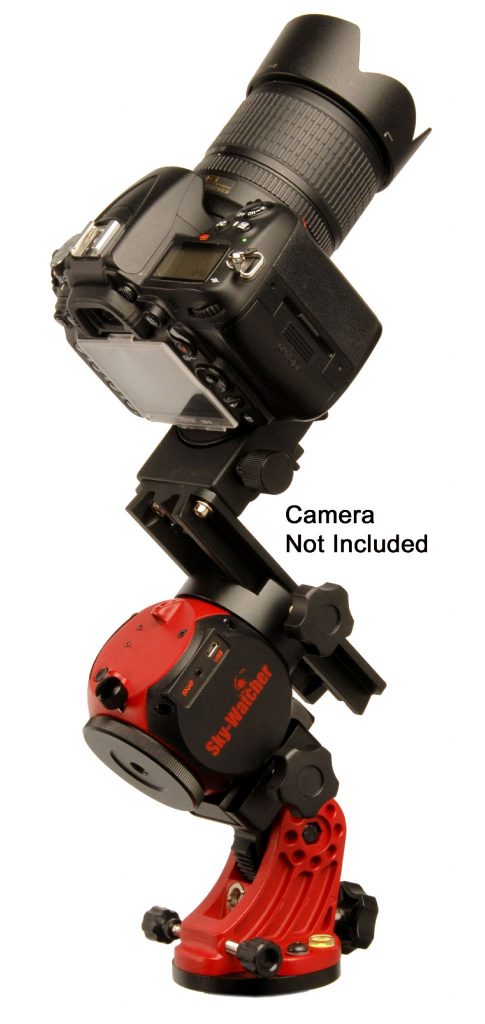
The Sky-Watcher Star Adventurer Mini with WiFi at ~£185
This is designed to be used with DSLR lenses of 55mm or less for wide field imaging and can carry a load of up to 7lb (3kg). It comes with built-in WiFi and the free Star Adventurer Mini Console App for Android and iOS platforms allowing it to be remotely controlled from a smartphone. The package includes a ball head adaptor, polarscope and polarscope illuminator. An optional equatorial wedge is available. Given an appropriate cable, it can also connect to Canon and Nikon DSLRs to trigger exposures. It is powered either through mini USB port or can operate from two AA batteries.
Imaging a constellation
A digital camera is used with a wide angle lens that should be chosen to nicely encompass the constellation (or constellations) to be imaged. The camera could be simply mounted on a fixed tripod but, in this case, the exposure length must be kept quite short to prevent star trailing. Close to the celestial equator, even using a wide angle lens, exposures should not be longer than ~15 seconds. If a fixed tripod is used, the image will move over the sensor (a good thing, as described below) and there will be some field rotation so that the final image will need to be cropped down somewhat after the set of short exposures images have been aligned and stacked in, for example, the free program Deep Sky Stacker (DSS).
Tracking Mounts
The use of a tracking mount will prevent frame rotation and, should it be perfectly aligned, allow the full image to be used. However, it is best not to have perfect alignment so that the image does move across the sensor a small amount during the image capture. This will remove what Tony Hallas has termed ‘colour mottling’ which is caused by small changes in the sensitivity of the red, green and blue pixels across the sensor.
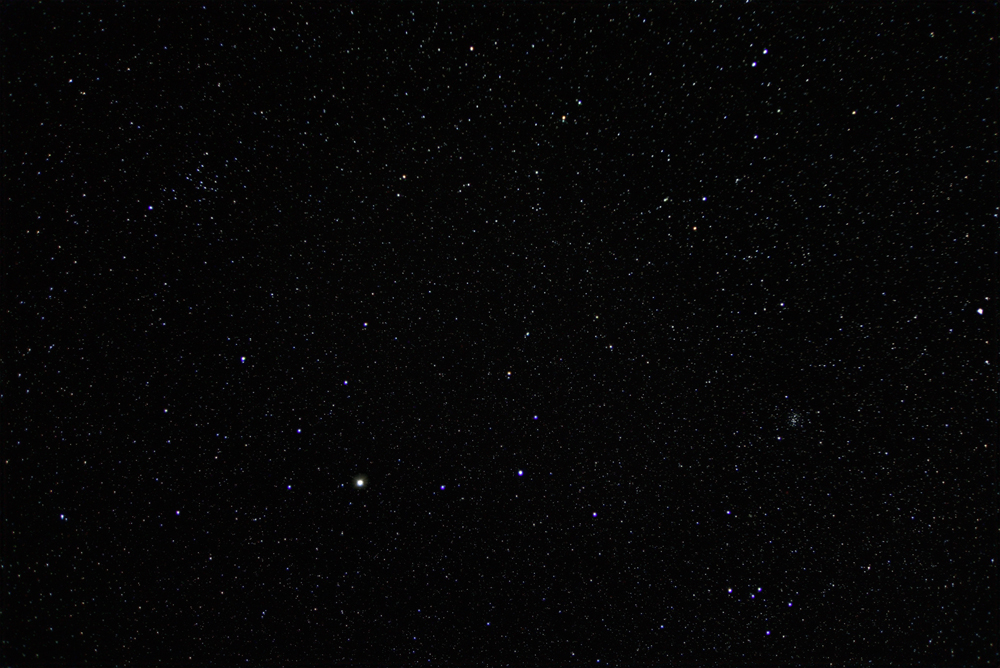
In this example, a full frame Nikon D610 DSLR on an Astrotrak mount was used with a Tamron 24mm lens to image the constellations Leo and Cancer at the beginning of March 2016 from the Dordogne region of France. A total exposure time of ~10 minutes is able to bring out very faint stars so, with an ISO of 800, I took 23, 30 second, exposures using an intervalometer to trigger each exposure. Images were stored in both raw and Jpeg formats. The raw files were aligned and stacked in DSS before being exported as a 16 bit Tiff file. The Astrotrak TT320X-AG tracking mount was pretty accurately aligned but there was a movement of 19 pixels in Right Ascension during the exposure period which was sufficient to remove any colour mottling.
Stretching the output of Deep Sky Stacker
There are several ways of stretching the output of DSS, the simplest of which is to make repeated applications of the Levels tool with the mid slider moved to the left to the point 1.2. (One can make this process an action to speed this process.) The result below is the stretched output of DSS. It is a very accurate image of the sky (which we will call the ‘Stars’ image) but the main constellation stars do not stand out and it does not look nearly as attractive as constellation images that used to be taken using film cameras.
[Note: the small size of these images cannot really show the image quality achieved but will, I hope help to make the processes clear.]
Enhancing the Image
The problem is that DSLR sensors are far better than film. When looking at a constellation image produced by a film camera, the brighter stars are perceived as such not so much by the fact that their images are brighter than others − all but the faintest stars will actually have a very similar brightness − but that their images are larger than fainter stars. This is similar to the way that star charts show stars of differing magnitudes. The reason is that film suffers from a problem called ‘halation’: the light from very bright objects can scatter off the back of the film and expose adjacent area of the image so making these regions, in our case bright stars, larger and more prominent. Though DSLR sensors do make the bright star images a little larger than fainter ones, the effect is far less and the initial image will not make the constellation patterns stand out. Digital constellation images can thus appear somewhat disappointing. Fear not, image processing programs such as Adobe Photoshop can be used to process the sky image to make the brighter stars more prominent and also bring out their colours.
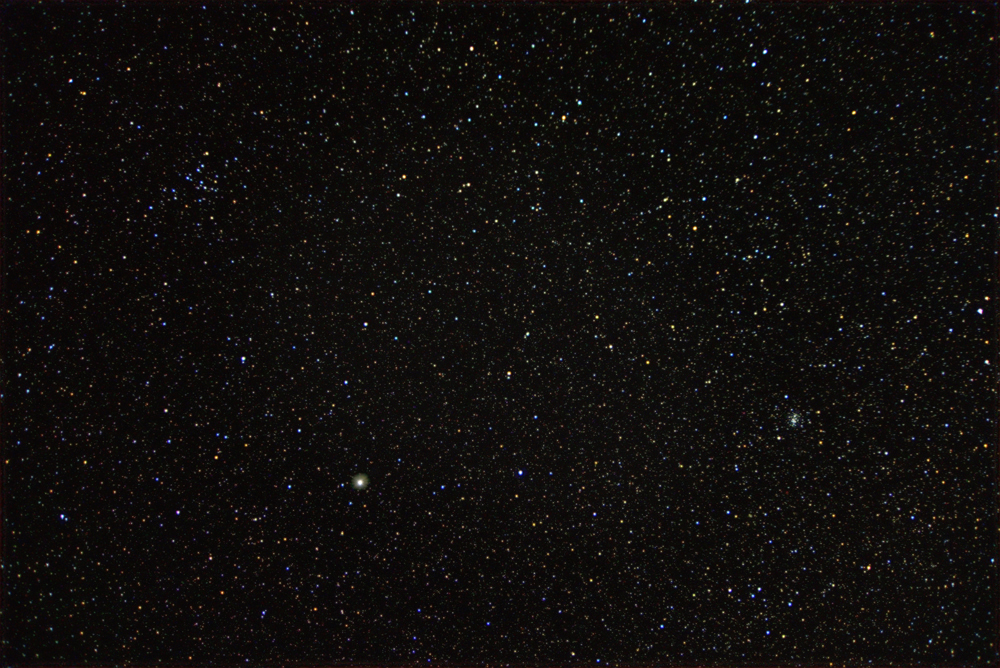
Making the brighter stars stand out.
The aim is to make the brightest stars significantly larger and the medium bright stars somewhat larger. The following technique is an alternative method to that described in Chapter 2 of ‘The Art of Astrophotography’. When DSS is used, the resulting image is often very disappointing with only the brightest stars visible. As described above, the image needs to be ‘stretched’ to bring out the fainter stars. But, for this exercise, this just what we want. The direct output from DSS image should be saved as, say, ‘Bright Stars’. One can then apply a few applications of levels or curves to stretch the DSS output image to bring out the medium brightness stars (along with the bright stars of course). This should be saved as ‘Medium Stars’. Additional stretches can then be made until the background noise becomes obvious. The ‘Levels’ tool can then be used to move the black point to the right to suppress the noise and this gives the ‘Stars image’ as shown above. The ‘Stars’ image may well show some light pollution. This can be removed by duplicating the image and applying the ‘Dust and Scratches’ filter to the duplicate image with ~12 pixels radius. This removes all but the very brightest stars which may be cloned out from adjacent parts of the image. One can then apply a Gaussian blur filter with ~30 pixels radius to give a very smooth image of the light pollution. If the two layers are now flattened with the ‘Difference’ blending mode selected, the light pollution will be removed from the image.
The Bright Stars image is opened, and the ‘Gaussian blur’ filter applied with a radius of a few pixels. This makes the bright stars larger (and so will become more obvious) but also fainter. Their brightness can then be restored by using the ‘Brightness/Contrast’ tool. This also enhances their colour. Further colour enhancement can be made by duplicating the image, applying a Gaussian blur filter of a few pixels, bringing up the brightness using the Brightness/Contrast tool and then increasing the colour saturation of the stars using the Hue/Saturation tool. The two layers are then flattened using the ‘Color’ blending mode (American spelling!). The colour enhancement can be controlled by adjusting the ‘Opacity’ of the blending mode. The resulting ‘Bright Stars’ image is shown below.
The same procedure can be applied to the ‘Medium Stars’ image but with a lesser blur radius. In turn, these enhanced images are copied and pasted over the ‘Stars’ image and the two layers flattened using the ‘Screen’ blending tool. This, two step process, overlays the Stars image with the enhanced star images and gives the image a nice gradation in star sizes and show the star colours well.
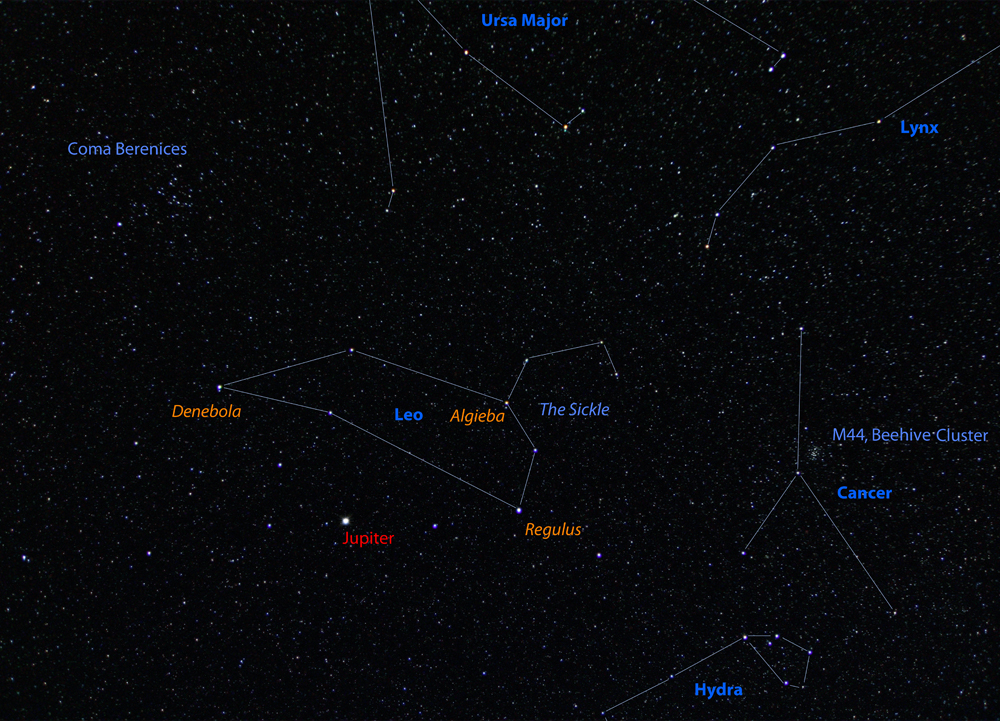
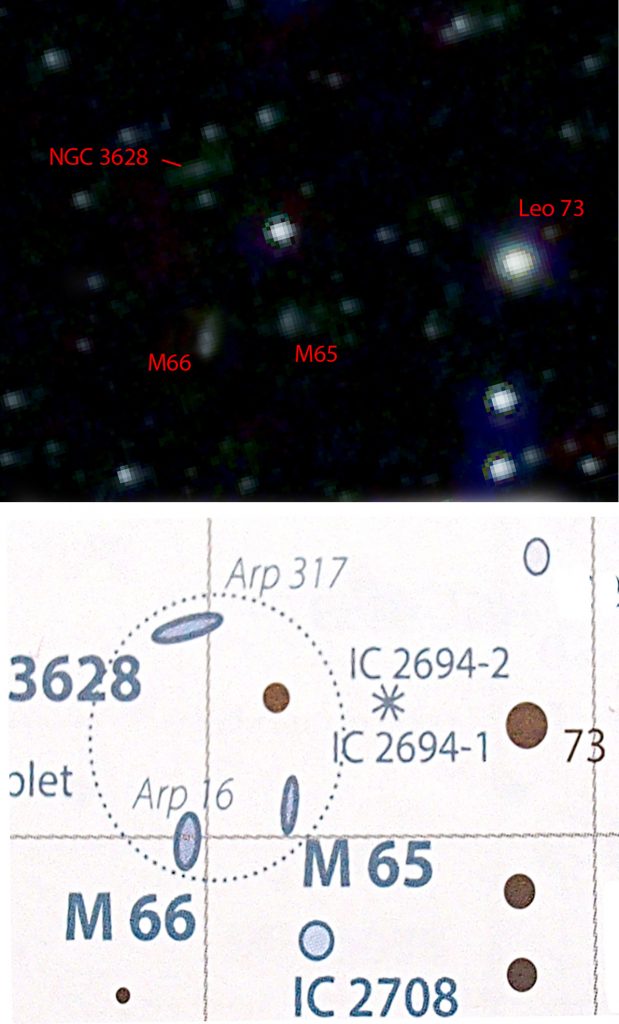
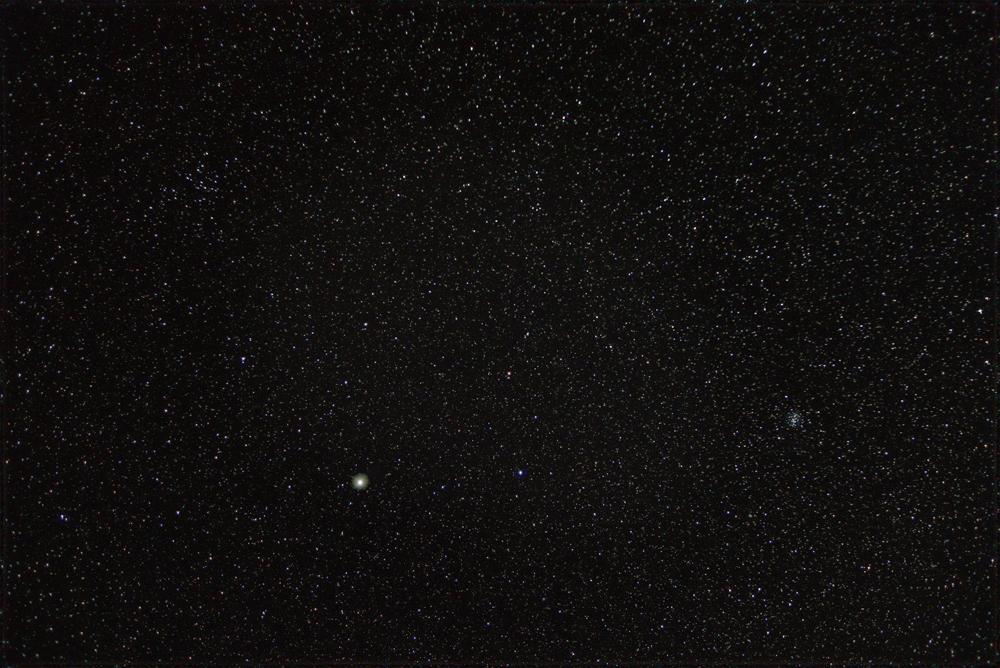
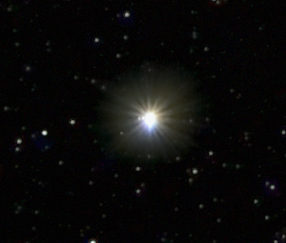
As shown in the highly cropped image below, two of Jupiter’s moons were visible.
Perhaps more surprisingly, the three galaxies that make up the Leo Triplet were also just visible.