[This is just one of many articles in the author’s Astronomy Digest.]
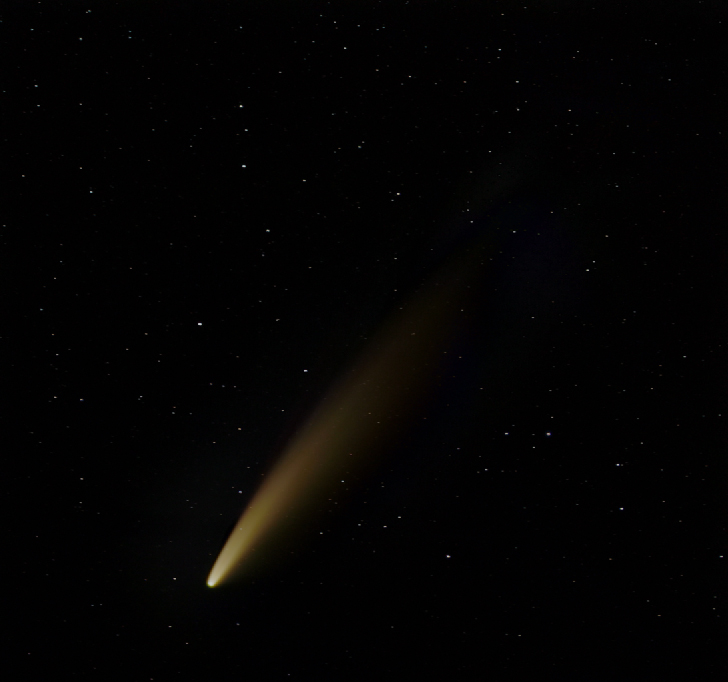
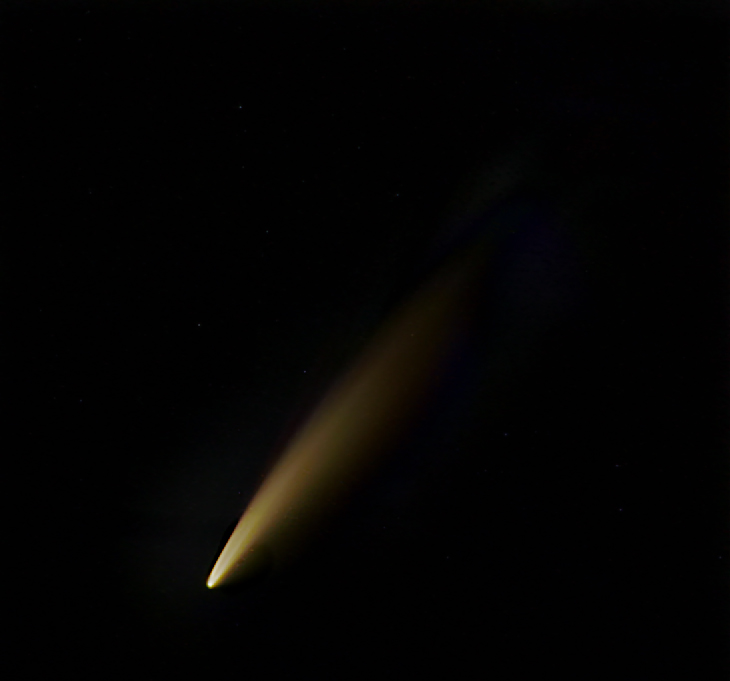
In July 2020 a bright comet graced our northern skies and virtually all astrophotographers aimed to image it. There appear to be two types of images; those where the comet is quite small within a beautiful skyscape or those that aim to get a higher resolution image of the comet against the stars. For my first attempt I chose the latter and, with five of the members of my local astronomical society, drove into the Derbyshire hills where we had excellent views towards the North. I was equipped with a Sony A7S, 12 megapixel camera, 200mm Nikon, f/4, prime lens and lightweight tripod. It would have been good to have a tracking mount with me, but my lightweight ‘Nanotracker’ would have struggled with the weight of the camera and lens and so I had to take untracked exposures which I kept down to 5 seconds at an ISO of 640 with the aim of reducing the length of the star (and comet) trails that would result. To prevent camera shake, the exposures were initiated with an external shutter release. It is said that the Sony A7S can’ see in the dark’ and a great feature is that the live view is sensitive enough to discern the stars (and in this case the comet) in the frame so greatly helping to compose the image. The camera’s ‘focus peaking’ mode also makes it very easy to achieve accurate focus.
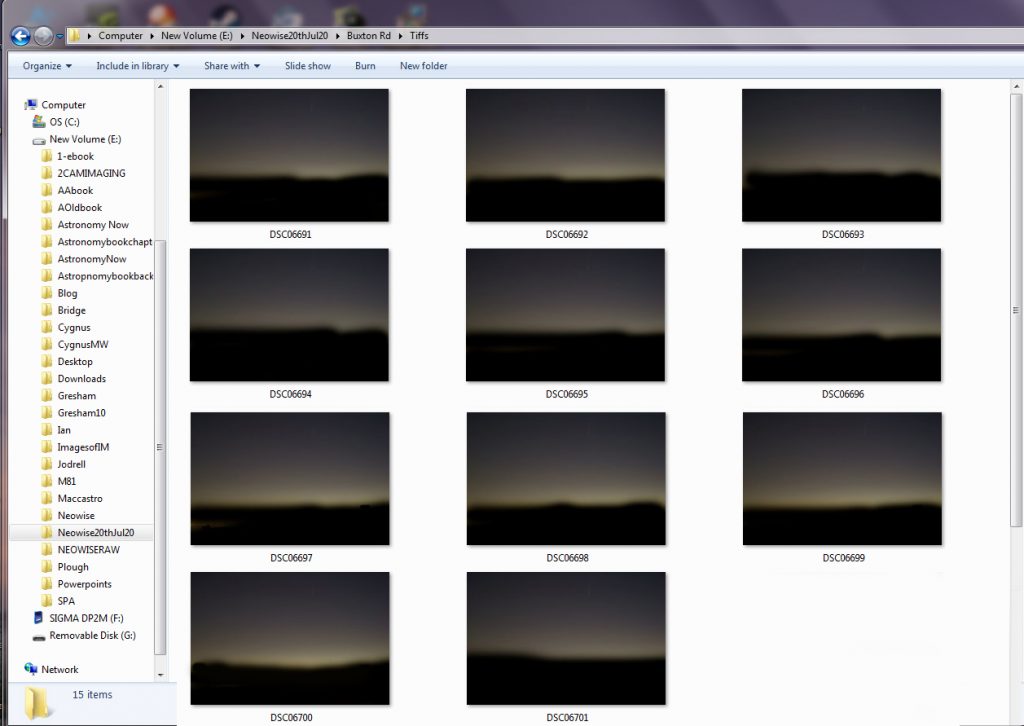
Series of images were taken as the sky darkened and I chose to process the ~35 frames taken in the last sequence giving a total exposure of ~3 minutes. The camera was set to capture both Jpeg and raw frames. This was quite key. Sometimes, as in this case, I find that Deep Sky Stacker cannot find enough stars in each raw frame to be able to align them. If one then first aligns and stacks the Jpeg frames (which have applied a stretch to the images so making the stars more prominent), the align data can then be applied to the raw files. The raw files should provide a better image. However, there is a further, and often better, alternative that is to first convert the raw files to Tiff files. It appears that the conversion does ‘stretch’ the images somewhat so that DSS was then able to align and stack them. I use the excellent free program Raw Therapee to carry out the raw to Tiff conversion. Raw Therapee is believed to use a better raw conversion algorithm than Deep Sky Stacker. [There is a article’ Deep Sky Stacker……’ in the digest that goes into this in some depth and I do really believe that this is the best way to treat raw files.]
DSS produced a 32-bit image which was imported into Adobe Photoshop and converted to 16-bit. (One could just as easily use Affinity Photo.)
Removing the sky background
The image was duplicated and the ‘Dust and Scratches’ filter applied with a few pixels to remove the fainter ones and then those still visible cloned out from neighbouring parts of the image. The comet was also cloned out with a far larger brush and then a ‘Gaussian Blur’ filter was applied with a radius of 40 pixels to give a very smooth rendition of the sky background.

This skyglow was then removed from the image by flattening the two layers using the ‘Difference’ blending mode. The resultant image was stretched slightly which can be done by either by using a curves function lifting up the lower (towards the black) part of the curve or using the levels function moving the middle slider to the left to ~1.2. One or more applications can be used as required. This gave the result below in which the stars were, as expected, slightly trailed.
Correcting for star (and comet) trailing
To correct for this trailing, the image was duplicated and the blending mode set to ‘Darken’. Clicking on the move tool (at top of the tools bar) and first clicking on the image the arrow keys can be used to shift the upper layer over the base image and the trailing can be removed. (Finer control can sometimes be needed and, if so, one can first increase the size of the image to 200% so each use of an arrow only has the effect of shifting by one half a pixel.) This is the result.

Lifting up the stars
The image does not show that many stars. Fainter stars would become visible if the image were stretched further. But the problem is that if one were to do this, the comet would be ‘blown out’. The solution is to separate the comet and stars into two images, stretch the stars image and then combine them back together again.
The ‘Dust and Scratches’ filter is applied to the image with a small pixel radius to remove most of the stars. One does not want to use a large radius otherwise the comet will lose definition. Any remaining stars can be cloned out. The filter also has the effect of ‘smoothing’ the fainter parts of the comet’s tail. The resulting image is then just that of the comet and saved as ‘comet’.
The original image is brought back and the comet image is copied and pasted over it to give two layers which are flattened using the ‘Difference’ blending mode. This gives an image containing just the stars and saved as ‘stars’.

This image can then be stretched as described above and the stars image saved.
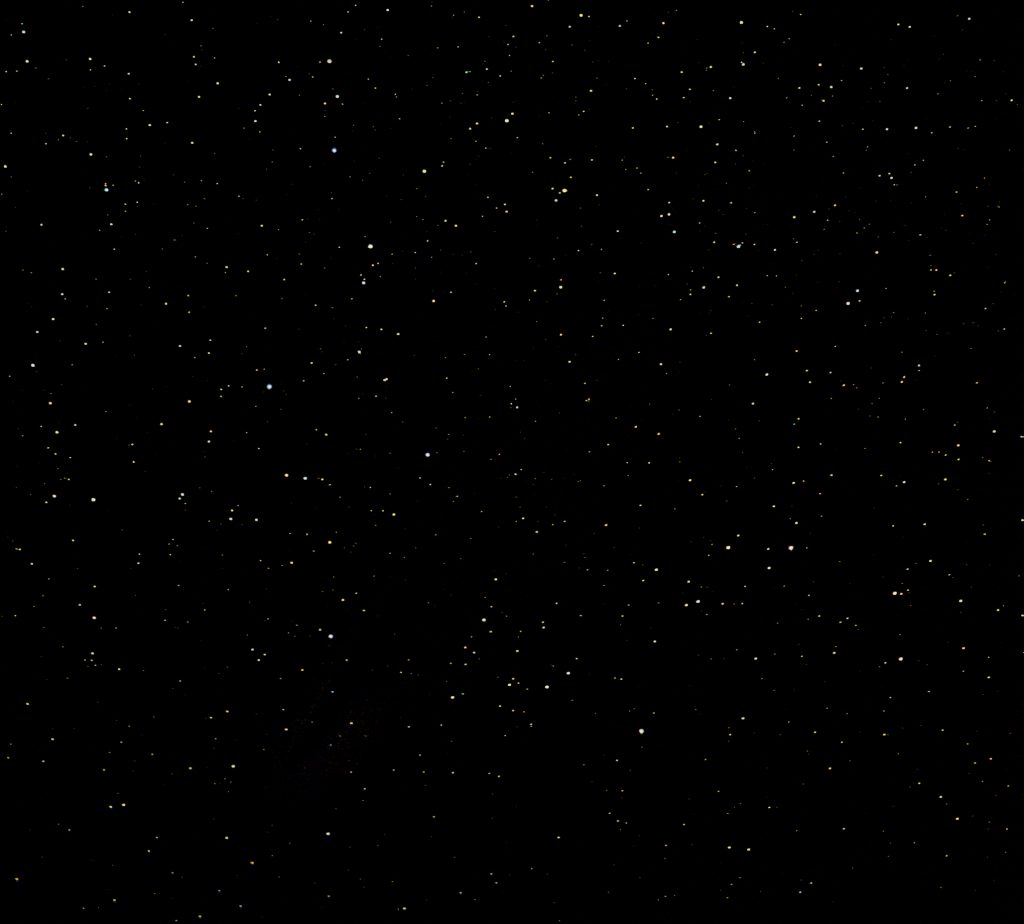
The comet image is opened up and the stars image copied and pasted on top to give two layers which are flattened using the ‘Screen’ blending mode. The opacity can be adjusted to give the stars their desired prominence within the overall image.
Final tweaking of the comet image
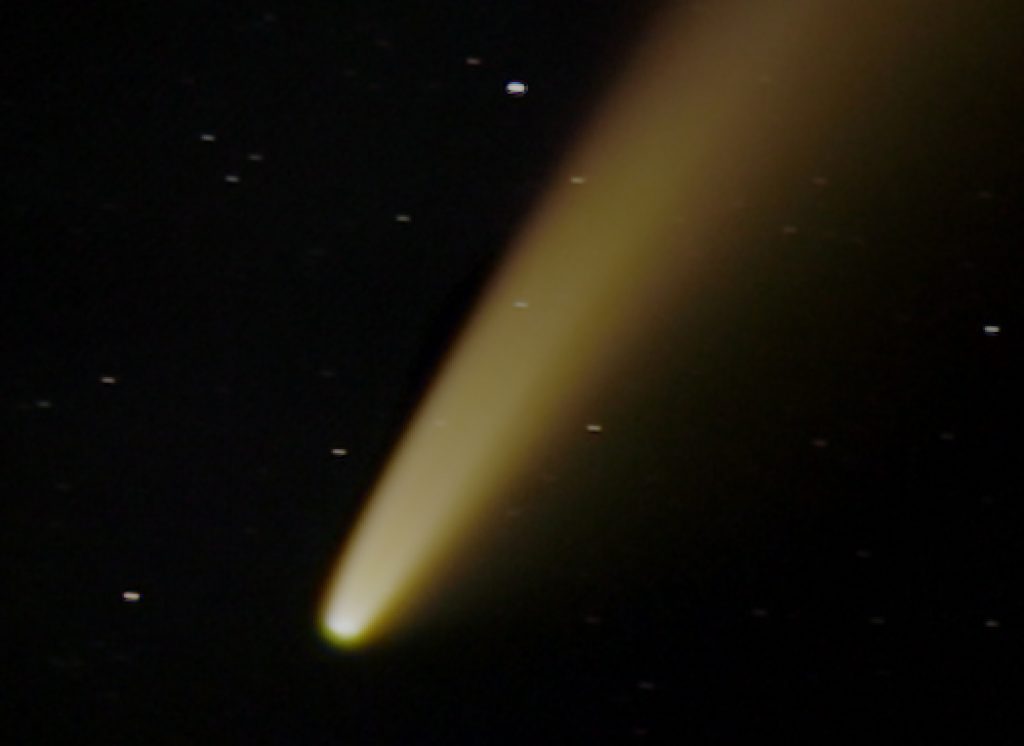
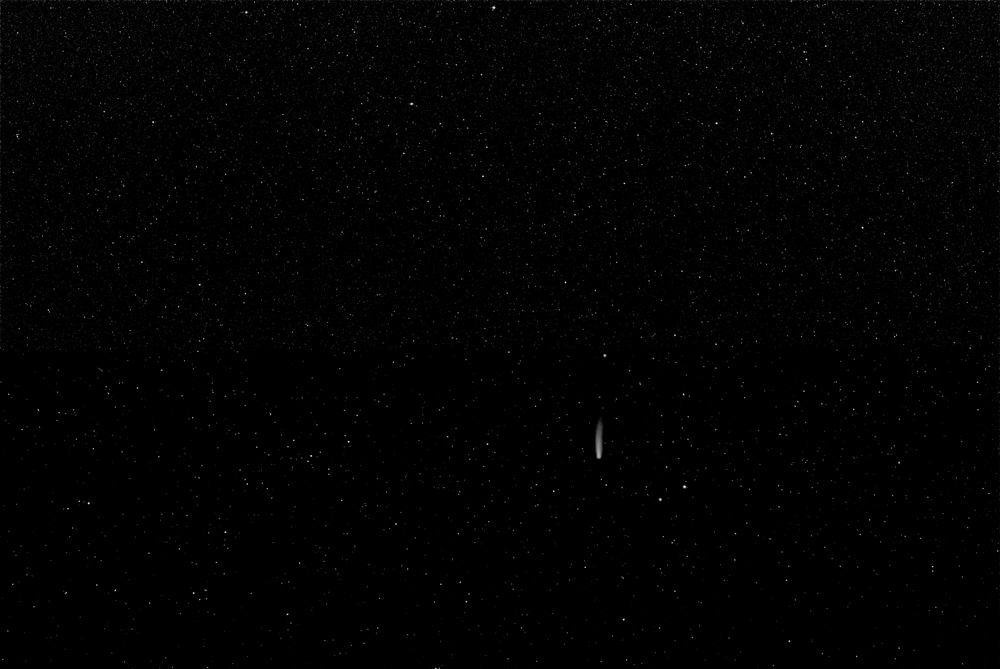
The head of the comet and nearby part of the tail were selected and the ‘Unsharp Filter’ applied with a large radius and small amount. This applies some local contrast enhancement which helped bring out the bifurcation.

As an image of the comet itself, this is not too bad, but to be honest, I much prefer the wide field images where the comet makes up part of a beautiful skyscape.
The following weekend
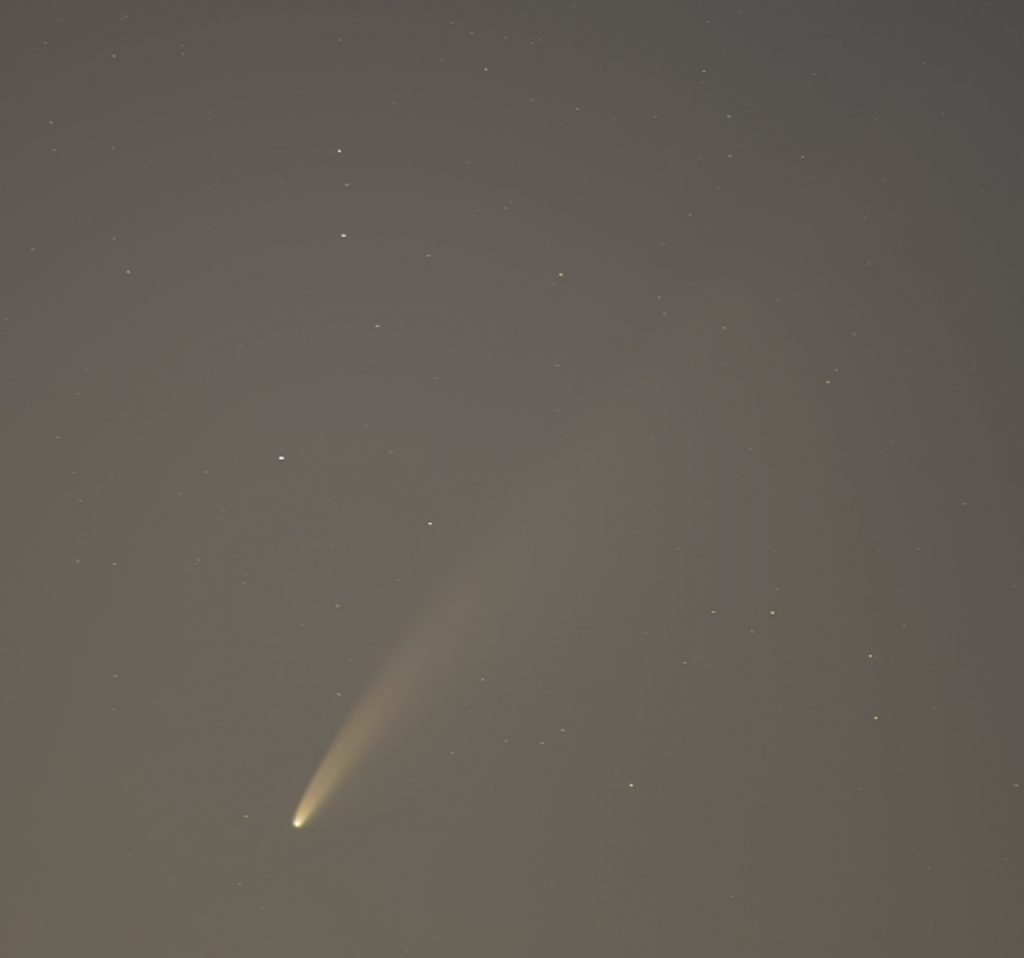
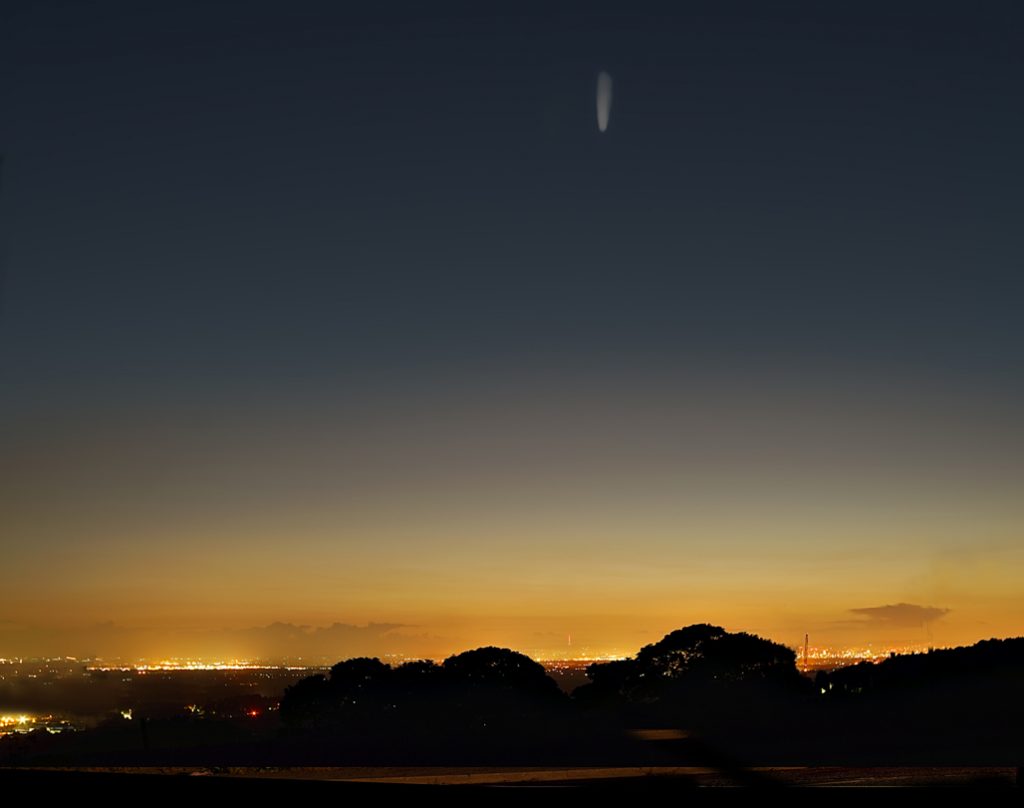
There was a second clear night the following weekend and so I attempted to make some wide field images including the comet – which was now much fainter and higher in the sky.
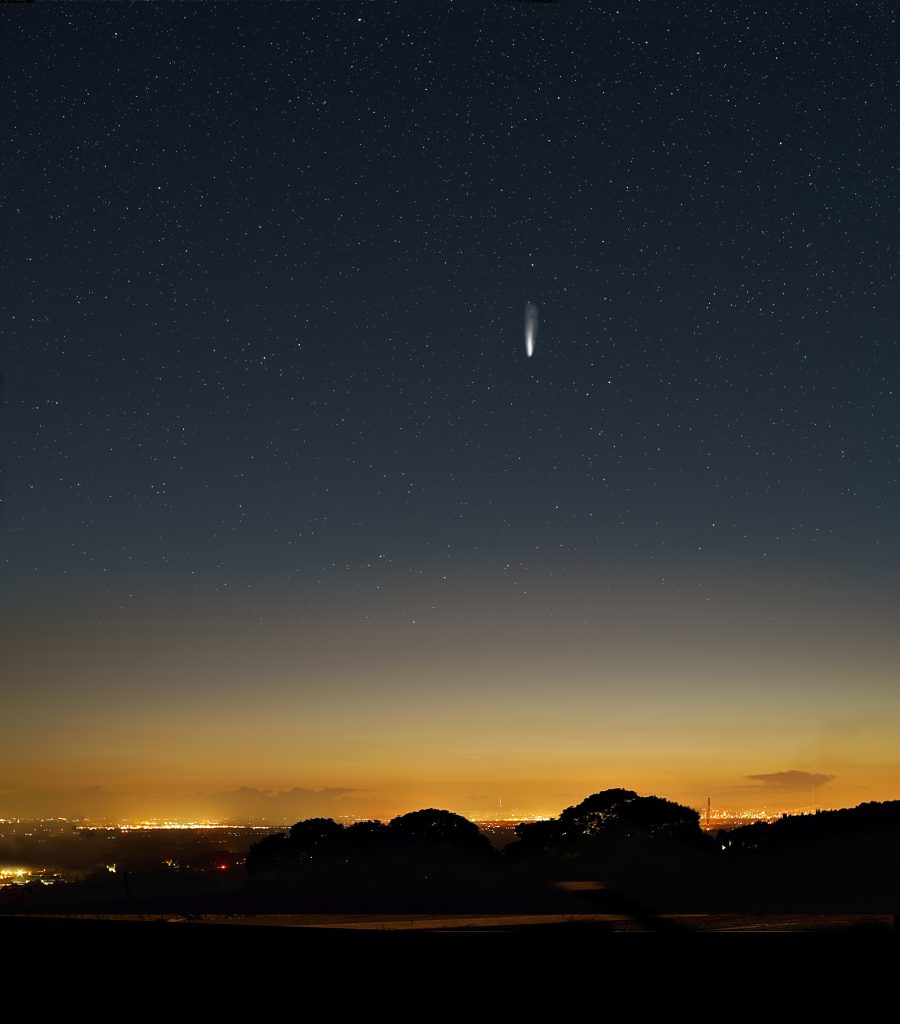
The first image was taken overlooking Manchester at ~11pm on Saturday 19th July 2020. The Sony A7S Camera was used with a Zeiss 45mm, f/2, Planar lens stopped down to f/4 and used at an ISO of 800. A total of 35, 5 second exposure, frames were aligned in Sequator to produce 3 images. The camera was mounted on a fixed tripod and the exposures were remotely triggered.
The first (Image 1) showed the foreground with the comet very close to the top of the frame and was a stack of 11 exposures captured in raw. There is a fundamental problem when stacking an image with a foreground and stars. If Sequator aligns on the stars, the foreground will be slightly blurred and vice-versa. Looking at the result with the stars and comet barely visible I was not surprised to find that the image was aligned on the foreground.
But I could see a slight problem with the stars. I wanted to produce an image aligned on the stars, so I converted the raw files into Tiff files and painted over the foreground area in black for each of the 10 frames. This meant that Sequator could not align on the foreground. But the stars in the image were faint, so each frame was identically stretched with one application of the curves function to lift their brightness.
Sequator was then able to align and stack them. The stars in the image were extracted as described above to give an image of the comet and stars towards the horizon.

The second image (Image 2) was an aligned and stacked image of the sky derived from 10 raw frames with the comet towards the bottom of the frame and showing the stars above. Again the stars and comet were extracted. The two star images were stretched using the curves function to lift up the fainter stars. As there was reasonable overlap in the two star images, it was easy to combine them into a single ‘Stars and Comet’ image to give Image 3.
To give a good result, it was important that the background sky faded seamlessly from the ground to the top of the image. There were two possible approaches. The first was to increase the canvas size of the first image vertically so as to cover the area that would be required to contain the combined stars image and then stretch the image into the extended canvas area using the distort function. The second, which I believed would give a better result, but requiring more effort, was to use a ‘portrait’ image (Image 4) of the scene instead of a ‘landscape’ image. This did cover the full required image height but was narrower (at 2848 pixels rather than 4256 pixels). As the aim was just to get a very smooth sky gradation and so this image was increased in width to 4256 pixels with the ‘constrain proportions’ deactivated. To this image the ‘Noise and Scratches’ filter was applied to remove the stars and comet. The change of width had distorted its foreground and so the foreground of image 1 was ‘cloned’ over it. This resulted with an image having the foreground of image 1 but with a greater height and a very smooth background sky gradation (image 5).

The final process was to add the stars (Image 3) into image 5 by copying and pasting it over image 5 and flattening the two images using the ‘Screen’ (or ‘Lighten’) blending mode to give the final result.
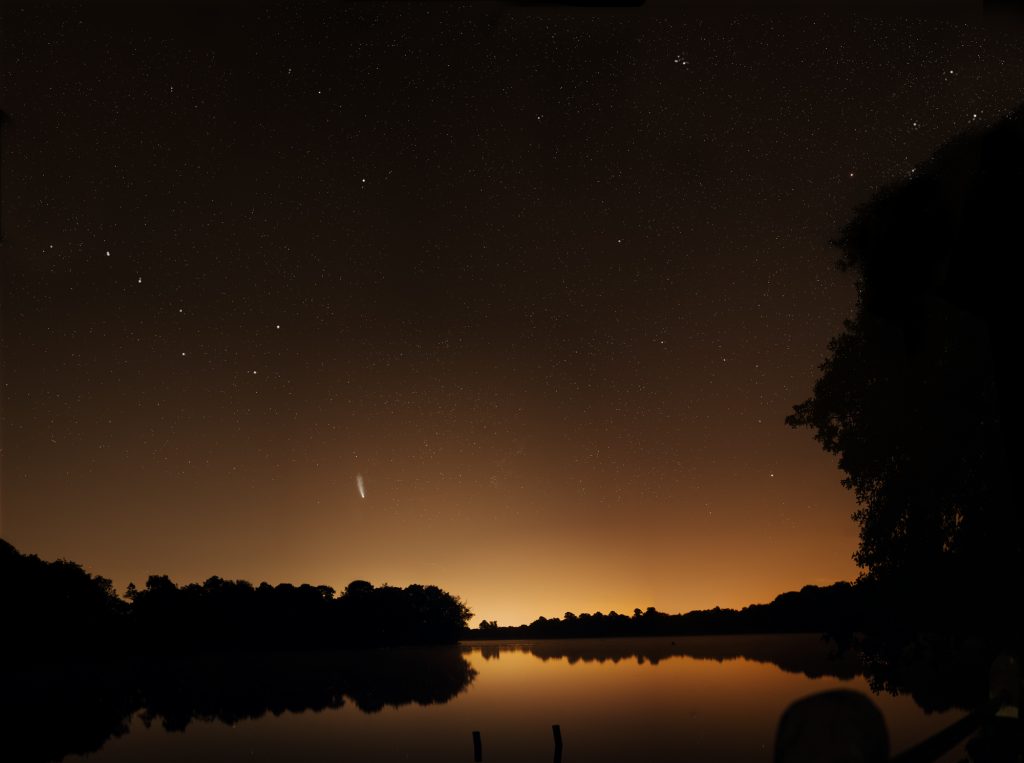
Imaging the comet over Redesmere.
I then drove to a small lake in Cheshire, called Redesmere, to take a very wide field image to put the comet into context within the northern sky. It was then ~01:00 on Sunday morning, the 20th July 2020. A total of 23 frames covering the foreground and sky were taken with a Sony A7S and Zeiss 45mm, f/1.8, Planar lens stopped down to f/4 and using 13 second exposures at an ISO of 800. The raw files were converted into Tiffs using Raw Therapee and Microsoft ICE was used to combine them into a 100 megapixel panorama.
The stars barely showed in the image, so were separated from the sky background as described above, brightened, and added back to give the result below.