
[This is just one of many articles in the author’s Astronomy Digest.]
The classic method of capturing meteors is when a DSLR or mirrorless camera is used to take many short exposures – perhaps in the hundreds – where it is hoped that some will have captured a meteor. With exposures of, say, 30 seconds, the ISO used has to be limited so that sky glow and dark current do not overwhelm the sensor. Typically ISOs of 1,600 or 3,200 are used – the darker the skies the higher the ISO that can be employed. However, as cameras are now capable of using ISOs of up to ~102,400 it is possible to use an alternative technique in which, as described below, the meteor trails are extracted from video sequences with frames being exposed for, typically, 1/30th second.
A given meteor trail will spend the same time over a given pixel in both the 30 second and the 1/30th second exposures. If one assumes, as in the examples below, that an ISO of 1,600 is used for the 30 second exposures and, for the video sequences, an ISO of 51,200 is used with an exposure time of 1/30 second, the video exposures are 1/900 that of the 30 second exposure but, taking into account that the ISO is 32 times higher, the exposure of the sky background in the video sequences are effectively 28 times less but the brightness of the meteor trail will be the same. A factor of 28 corresponds to a difference of 3.6 magnitudes which is why fainter meteors should be able to be detected.
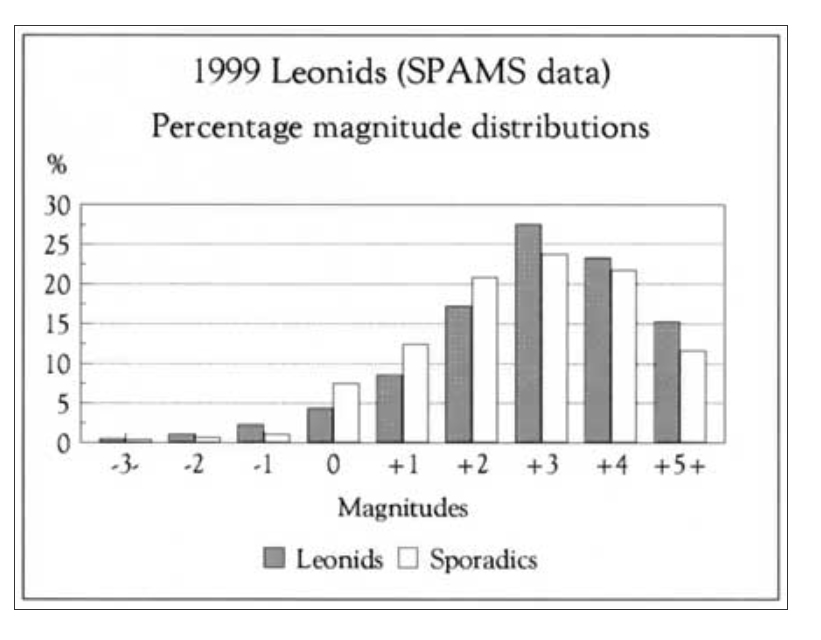
It is generally agreed that the standard DSLR technique will capture meteors brighter than around magnitude +1. In an analysis of 113 meteors captured during a period of the Leonid shower in 1999, 16 were equal to or above magnitude +1 but 26 down to magnitude +2 and 63 down to magnitude +3, so the video technique should be able to detect many more meteors during a shower. It will be particularly useful when imaging from somewhat light polluted sites and especially so when moonlight is hindering our view.
As video frames typically have an image size of 1980 x 1080 pixels the images derived from the video sequences will have a lesser quality than those taken using the standard technique so perhaps the ideal scenario would be to first produce a high quality ‘skyscape’ into which the meteors captured by the video techniques are added as has been described in Part 1.
Taking the meteor capture sequences
An excellent system with which to capture the video sequences uses a Samyang (Rokinon in the USA) 18mm, f/2.8, lens mounted on a Sony A7 S camera. This camera, which was designed with video in mind, employs a 12 megapixel full frame sensor (so having bigger pixels than are now typically found). When capturing in video mode, 4 pixels are binned to provide each pixel of the video stream. Together with the large 8.2 micron pixel size this means that the meteor’s light spends more time on each combined pixel – effectively 16 microns in size – and so the A7S series are, perhaps, the very best for using this technique as, even with the ISO of 51,200 used, the images are still relatively ‘clean’. [I have carried out a simple experiment: I took a single 1/30th second frame and then extracted a single frame from a video stream of the same sky using the same high ISO. The extracted video frame showed more stars, so I suspect that the reviews stating that the pixels are binned in video mode are correct. Good.]
The technique of imaging a meteor trail from a video sequence
1) Selecting a video sequence which contain a meteor track
The video sequence which contains a meteor is viewed and the time when a meteor seen noted. The sequence can then be loaded into the free video editing software included in Windows 10 – search for ‘Video Editor’. Knowing the time at which the meteor was seen, a short section of the video can be selected from the full sequence. The figure below shows when part of the meteor trail was in one frame.
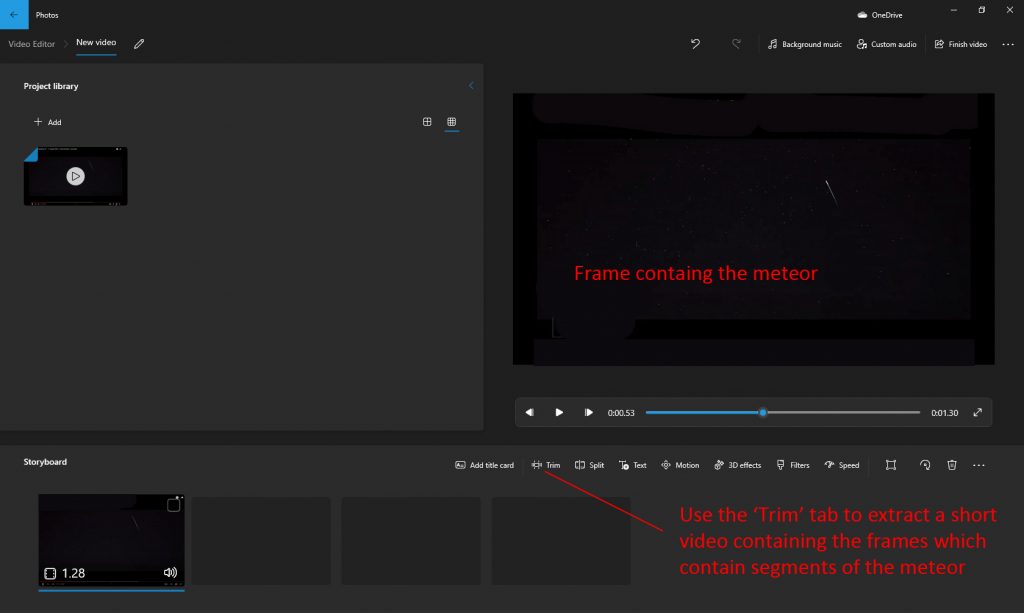
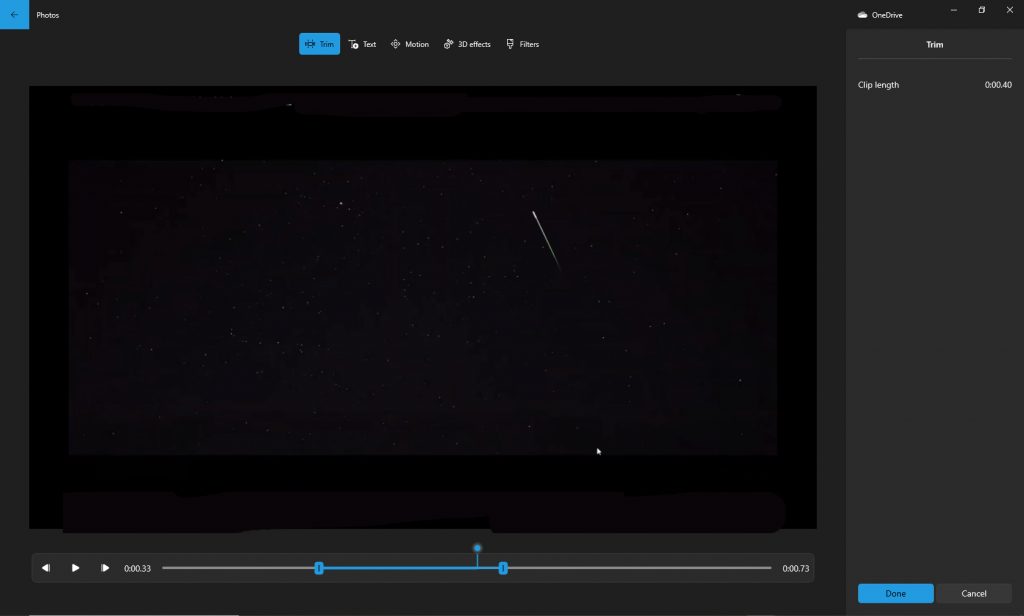
The ‘Trim’ tab is clicked upon and the start and end blue ‘dots’ used to select the part containing the frames that include the meteor. The number of frames selected should obviously be greater than those that contain parts of the trail but the total number is not critical.
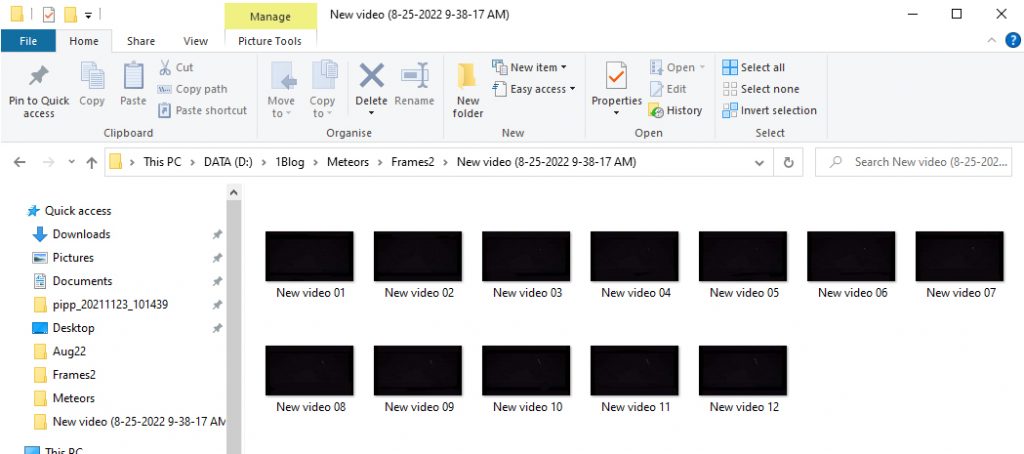
2) Converting the video sequence into individual Jpeg images.
One free program that will easily do this is the ‘Free Video to Jpeg Converter’. The reduced video sequence is selected and, having selected ‘Every Frame’ and chosen the output file, the ‘Convert’ tab is clicked upon to export all the frames as individual Jpeg images.

They are exported as 1980 x 1080 Jpeg files as had been captured in the video sequence.
3) Using StarStaX to combine the individual frames into an image of the meteor trail
This free software is normally used to build up a star trails images but, very usefully, it can be used to build up the meteor trail from the frames in which it appeared. The frames including the meteor are simply loaded into StarStaX.
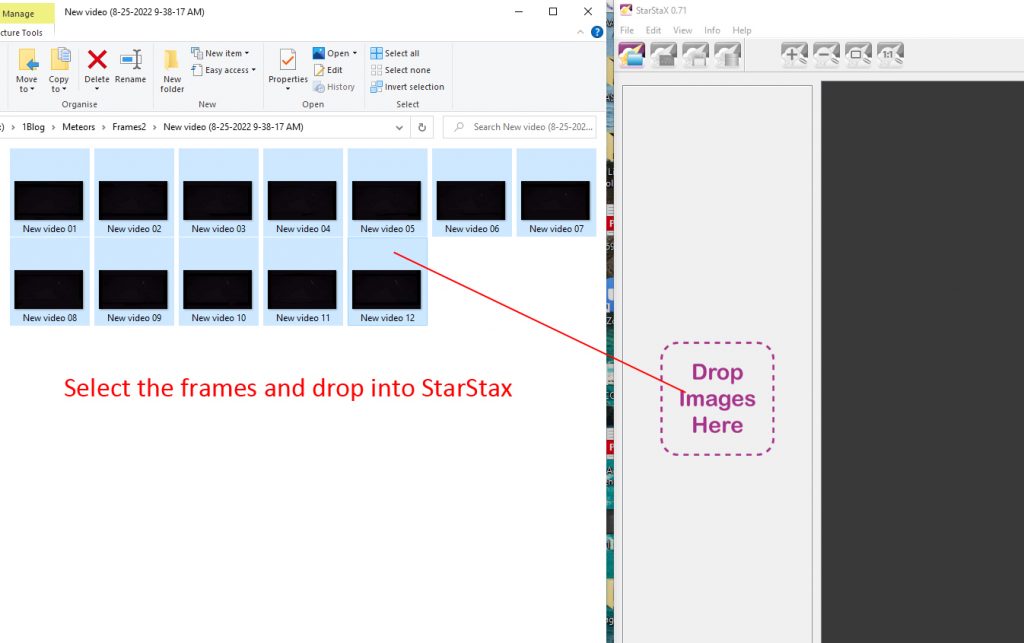
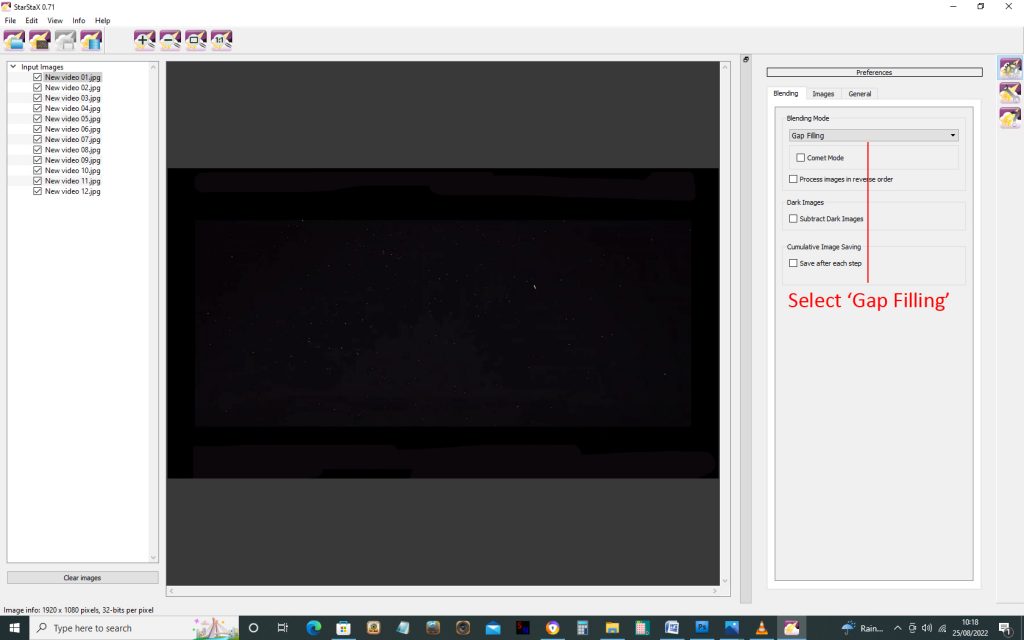
The ‘Gap Filling’ option can be employed to fill in the short gaps between each exposure as the camera saves each frame.
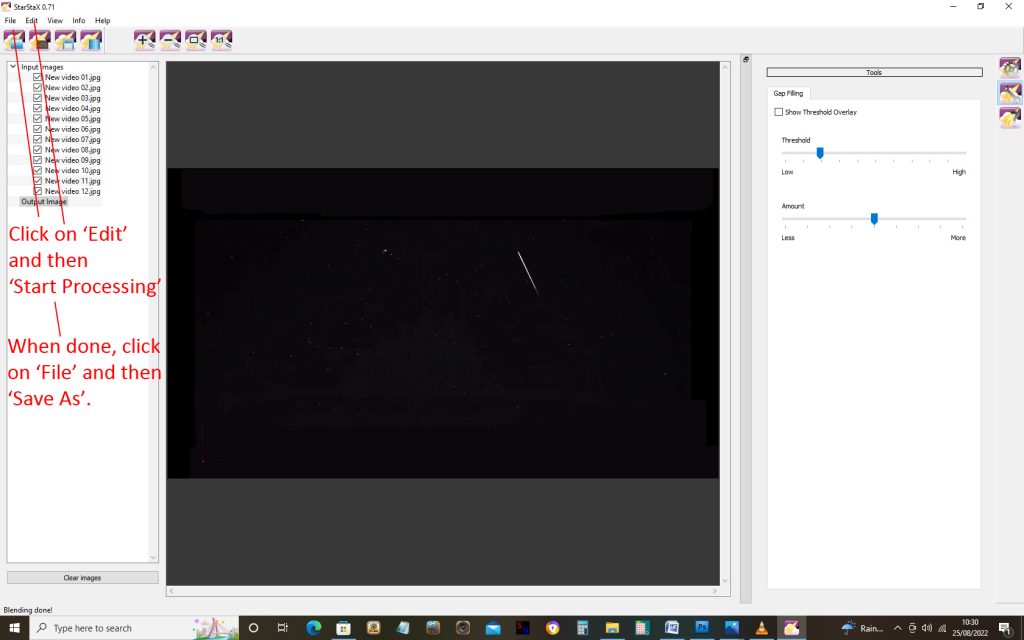
The making of the meteor image is initiated.
Imaging three Geminid meteors from a suburban location
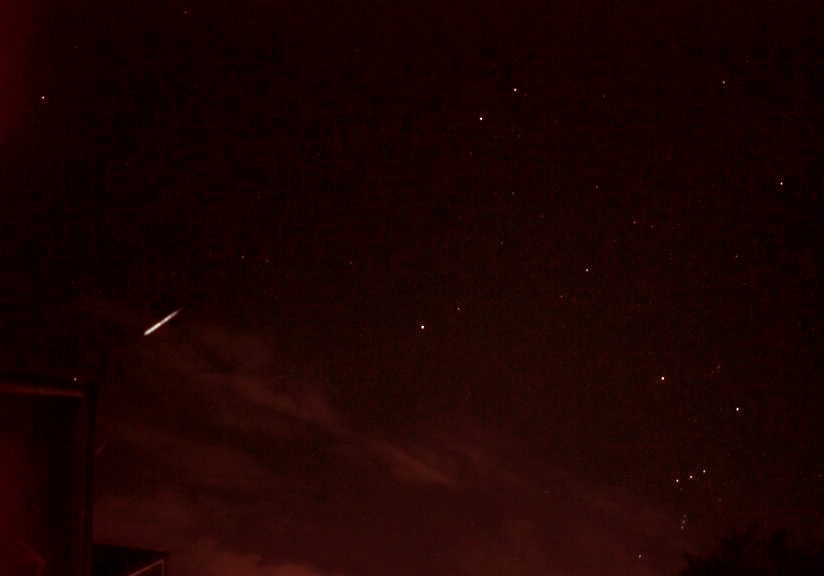
Not surprisingly, from my urban back garden (which happily has a good view to the south) the results will not be as good as when imaging from a dark sky site. On a night following the Geminid peak (when fewer meteors would be expected to be seen), 9 video sequences, totalling 20 minutes were taken, in which three meteors were captured before clouds rolled in. The image below shows a single, annotated frame with stars down to magnitude ~3.5 visible. [Stellarium was used to determine the star magnitudes.] Clouds were approaching from the south-west.
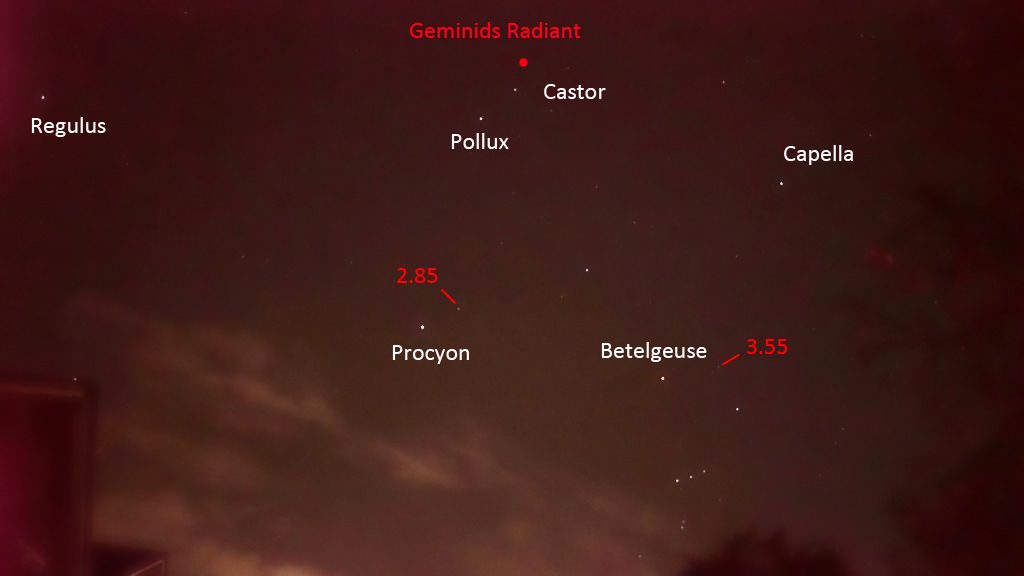
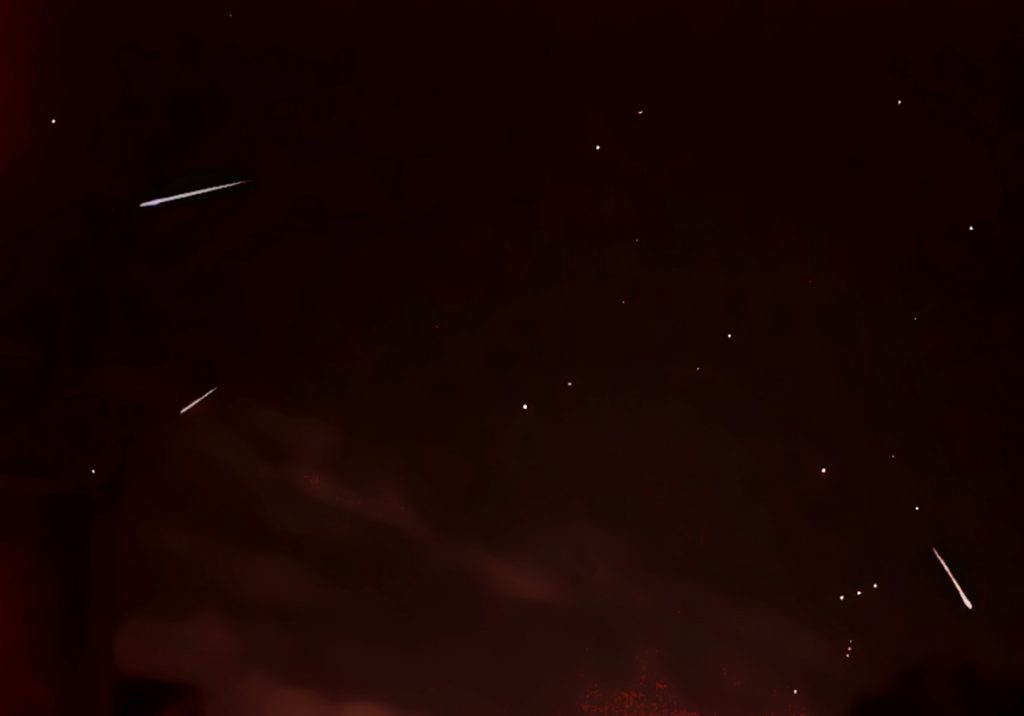
The same technique as described above was used to produce images of the Geminid meteors. The result of using StarStaX on the first video sequence including a meteor is shown below. The meteor had been visible in just 12 frames.
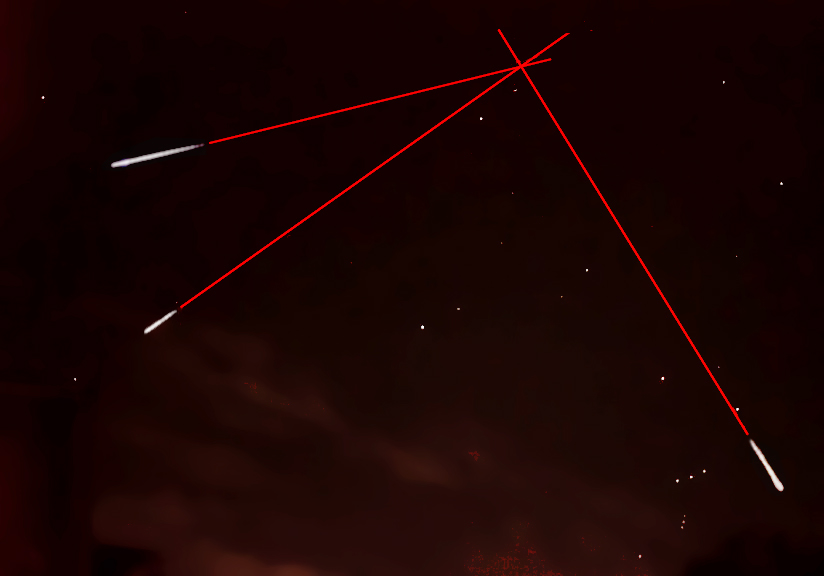
The three captured meteors came from the Geminids’ radiant.
The quality – just 1920 x 1080 in size – cannot be compared with that produced from long exposures taken from a dark sky location. The composite image was enhanced by selecting the meteor trails and applying the ‘Minimum’ filter to give the final result.
As an alternative, the captured meteors could be composited into a high quality sky background as shown in the first article. As the technique greatly reduces the effects of light pollution, it does show that meteors can be captured with this technique in non ideal situations – and, when used at a dark sky location, I suspect many meteors will be captured during a meteor shower.
Sadly in 2022, as for the Perseid shower, there will be a bright Moon in the sky during the Geminid shower but I suspect that the video method, as it reduces the sky background, may enable more meteors to be captured. However, prospects for the Leonid shower in mid November are better as a waning Moon will not rise until around midnight.