[This is just one of many articles in the author’s Astronomy Digest.]
There is a fundamental problem when taking images of the Milky Way, that of light pollution, formally called skyglow. In other articles in the digest, the method of removing light pollution from images is described, but this will not work when there are large areas of nebulosity in the image, as there will be, of course, when imaging the Milky Way. It would be difficult for any procedure to distinguish between skyglow and faint nebulosity. The obvious solution is to image from a very dark sky location where there is no skyglow as was done for the second and third images described below. However, if the region of the Milky Way to be imaged is overhead and the skyglow is not too prominent (meaning that one could see the Milky Way above) it is possible to remove it as in the first example.
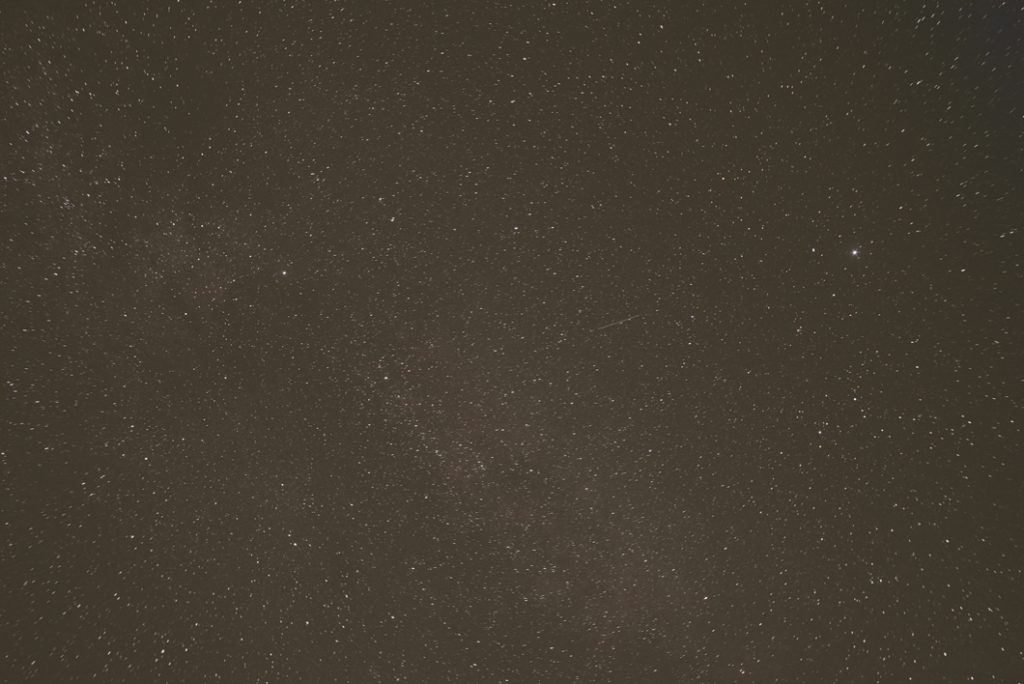
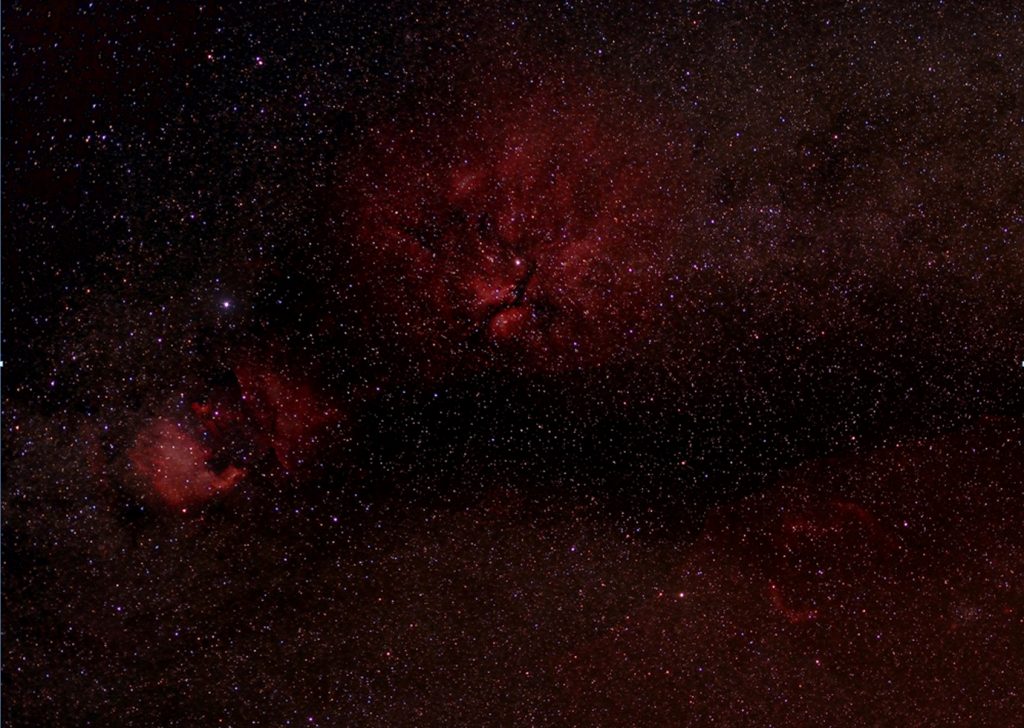
Imaging the Cygnus region of the Milky Way
A total of 35, 13 second, frames were taken of this region from a relatively dark sky location in Cheshire where the Milky Way could just be discerned overhead. A Sony A7S was used at an ISO of 800 with a (very sharp) Zeiss 45mm, f/2, Planar lens stopped down to f/4. Both Jpeg and raw frames were captured. As I have sometimes found, a better result was obtained from processing the Jpeg frames which brought out the H-alpha emission better. The frames were stacked using Sequator and the resulting 16-bit Tiff file imported into Adobe Photoshop for processing (Affinity Photo could have been used equally well). The image below shows the output image produced by Sequator having stretched it somewhat to bring out the skyglow.
Removing the skyglow
This was only possible as the Cygnus region was virtually overhead. In this case, it is a reasonable assumption to assume that it will be constant across the image and so a sample of the image at its darkest point away from any nebulosity could reasonably be used to represent the skyglow in the image. Pleasingly, Cygnus includes the dark band of dust that obscures the Milky Way in the Cygnus Rift. The image was duplicated and a Gaussian Blur of 10 pixels applied to average out the sky background which was then sampled with the brush tool in the darkest region of the image that could be seen. This colour was then used to completely paint over the upper layer hoping that it would represent the skyglow across the whole of the image.
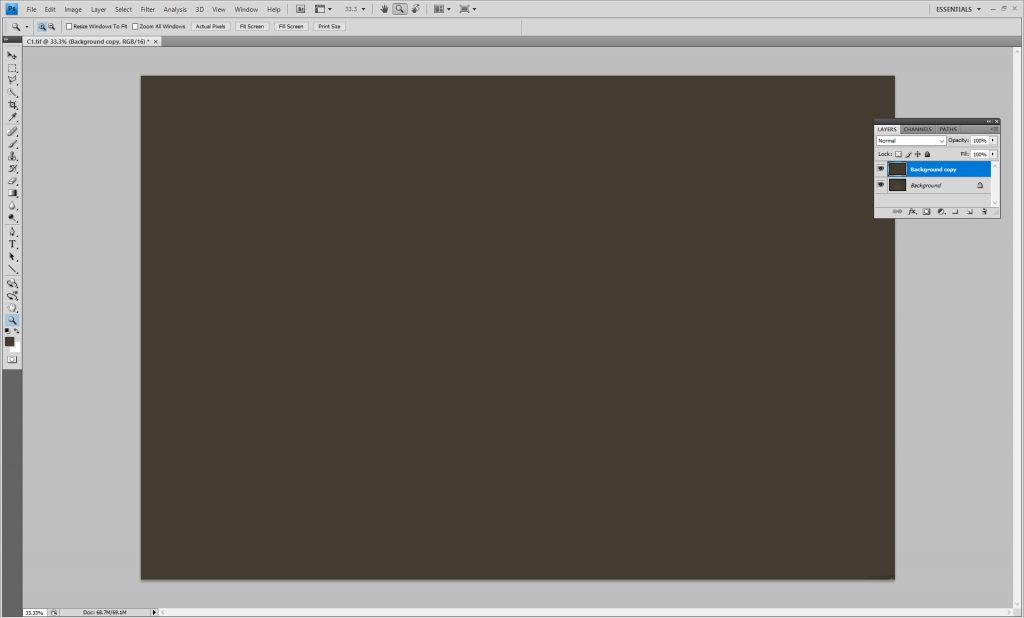
The two layers were then flattened using the ‘Difference’ blending mode to give an image showing just the brighter stars and no evidence of the Milky Way.
Stretching the image
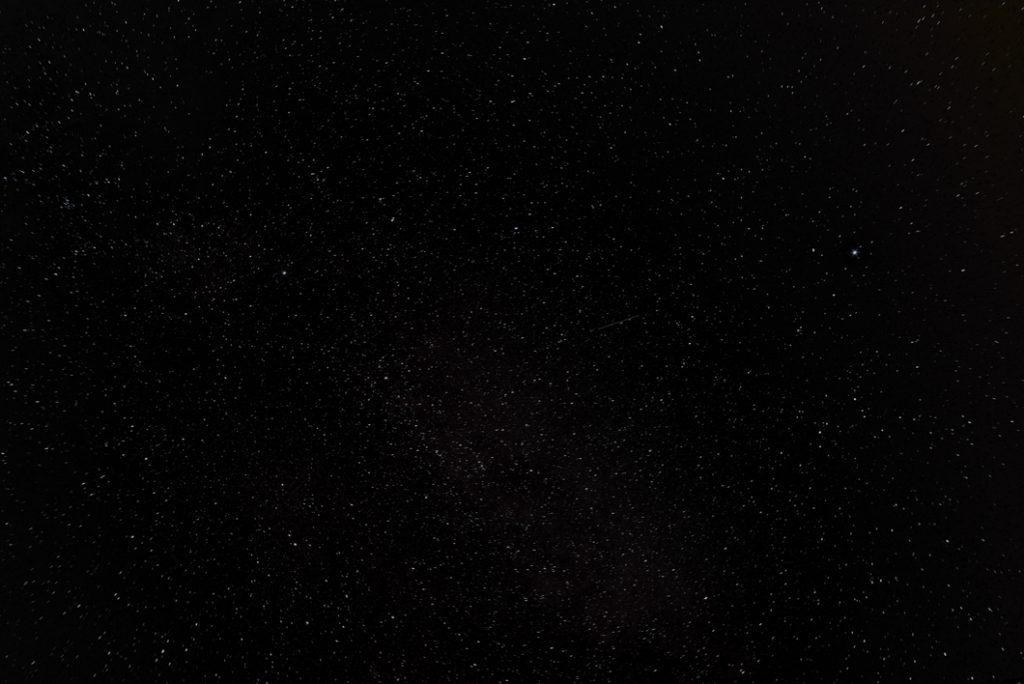
The image was stretched using several applications of the curves function as shown in the figure below .
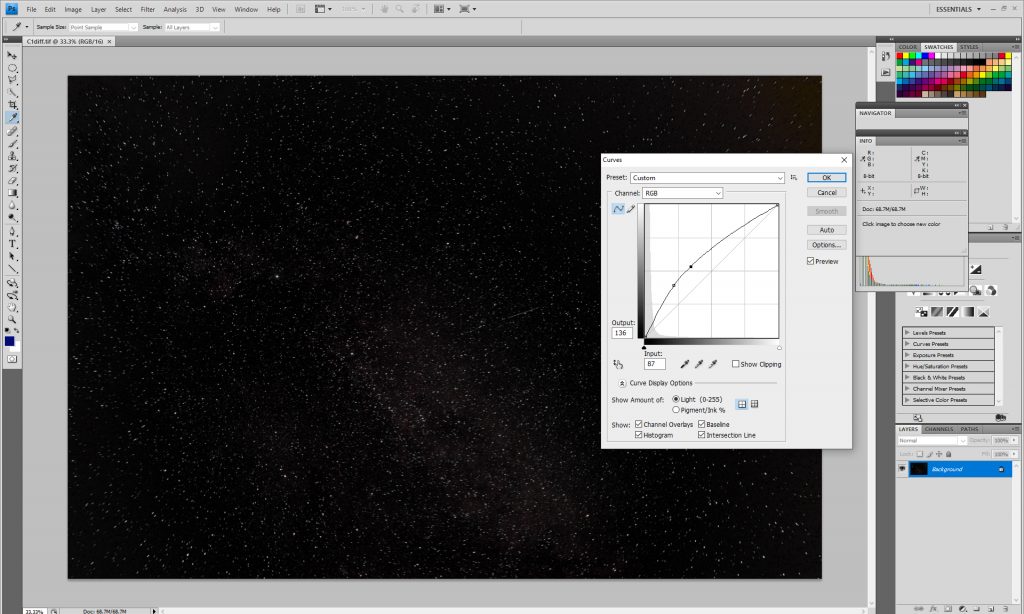
The stretched result showed the Milky Way well.
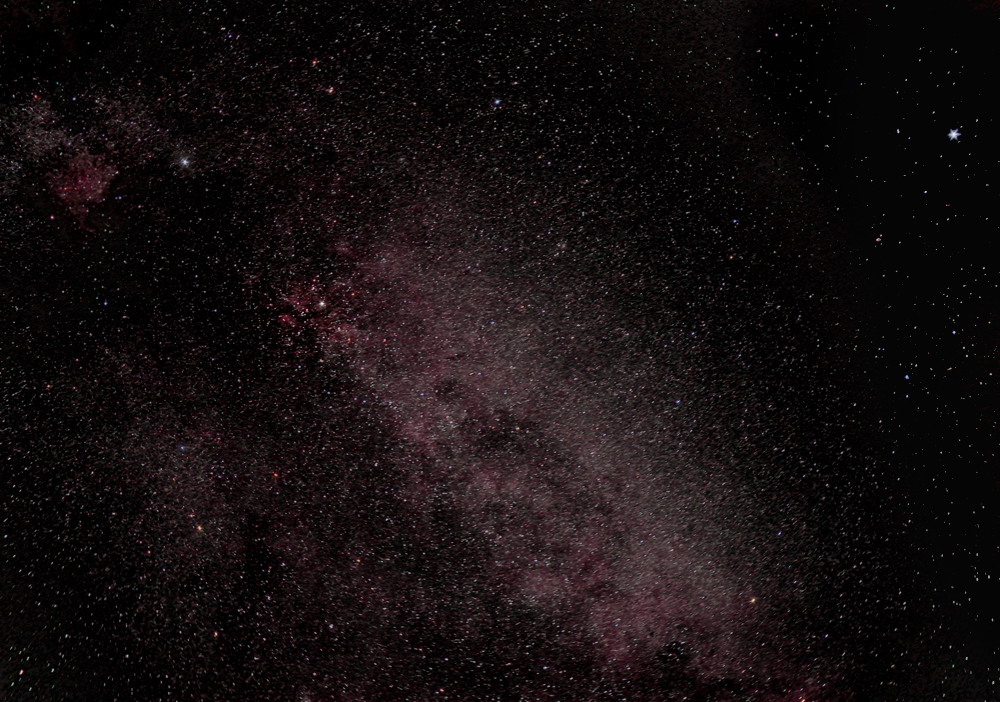
A method of increasing the local contrast to better delineate the Milky Way is to use the ‘Unsharp Mask’ filter with a very large radius but small amount (the opposite of its use to sharpen an image).
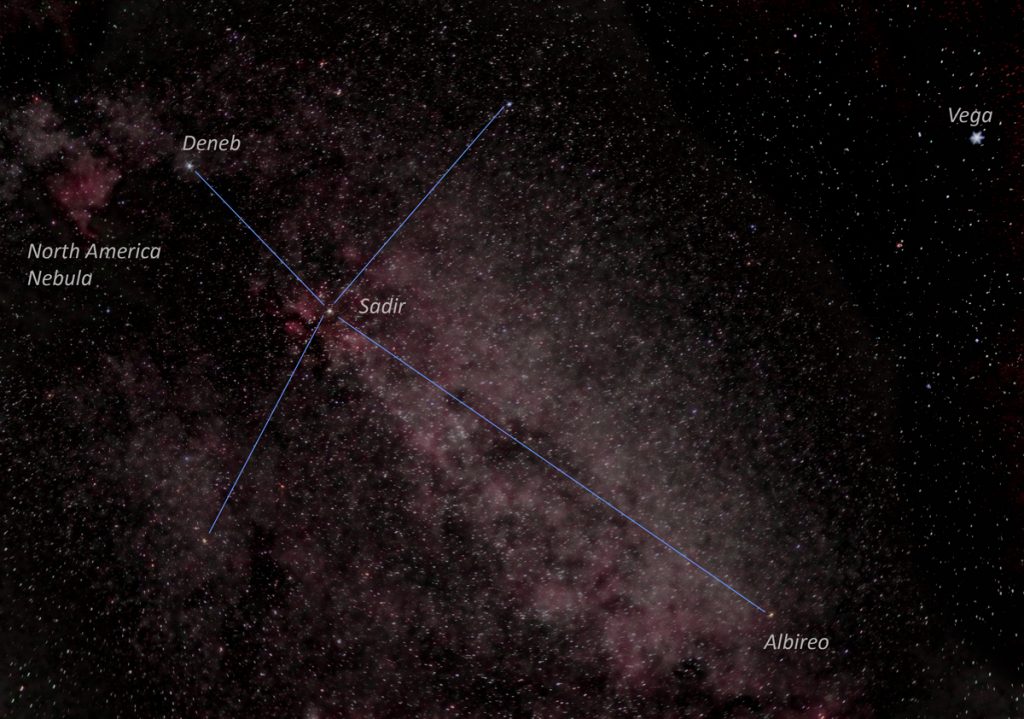
In this image, applying local contrast to the stretched image including the stars gave a good result as shown below along with an annotated version.
[A sometimes better approach is to separate out the ‘stars’ and the background Milky Way, enhance the Milky Way applying some local contrast and then ‘put’ the stars back again. One advantage is that, using the opacity slider when using the ‘Screen’ blending mode as the Milky Way and stars layers are flattened one can control how prominent one wishes the stars to be. To separate out the stars and Milky Way, the ‘Dust and Scratches’ filter is applied to the stretched image with a radius of ~15 pixels. The stars will disappear leaving just the background Milky Way image. This is saved as ‘Milky Way’. The original image is brought back and copied and pasted over the Milky Way image to give two layers which are flattened using the ‘Difference’ blending mode. This leaves the ‘Stars’ image that can be saved or left in the workspace. Local contrast is applied to the Milky Way image and the Stars image copied and pasted over it. The stars are then added into the image using the ‘Screen’ (or ‘Lighten’ – try both) blending mode when flattening the two layers using the opacity slider if desired.]
I was impressed, and somewhat surprised, as to how well the H-alpha emission had been captured despite the fact that the IR cut-off filter has not been modified to allow more of its light to fall on the sensor. I know that the H-alpha emission shown is real as I have imaged the region including Deneb and Sadir using a monochrome cooled CCD camera and H-alpha filter to overlay an H-alpha layer onto a RGB image.
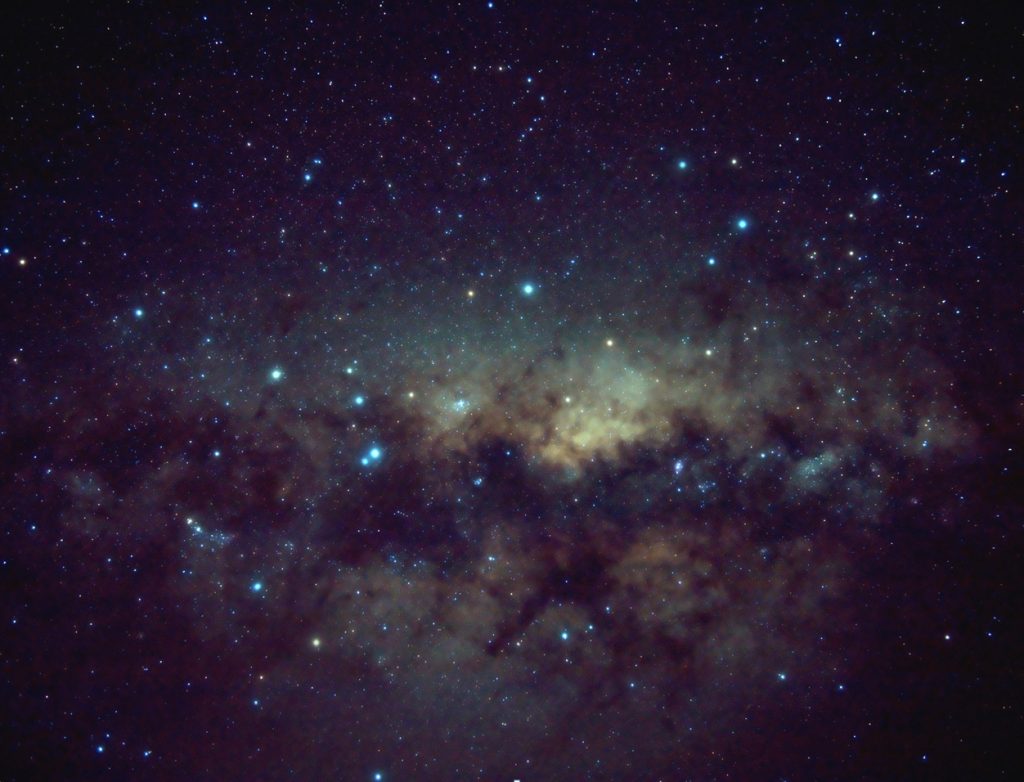
The Heart of the Milky Way imaged from New Zealand
This first image of the central part of the Milky Way was taken from a dark sky location in New Zealand using my first lightweight imaging system. This used a Panasonic GX1 Micro 4/3 camera and Panasonic 20 mm, f/1.7, lens stopped down to f/4 (giving an effective 35mm focal length of 40 mm) mounted on a Nanotracker. It was not necessary to remove any skyglow and the image was simply stretched a little and its local contrast increased as described above. An annotated version is added.
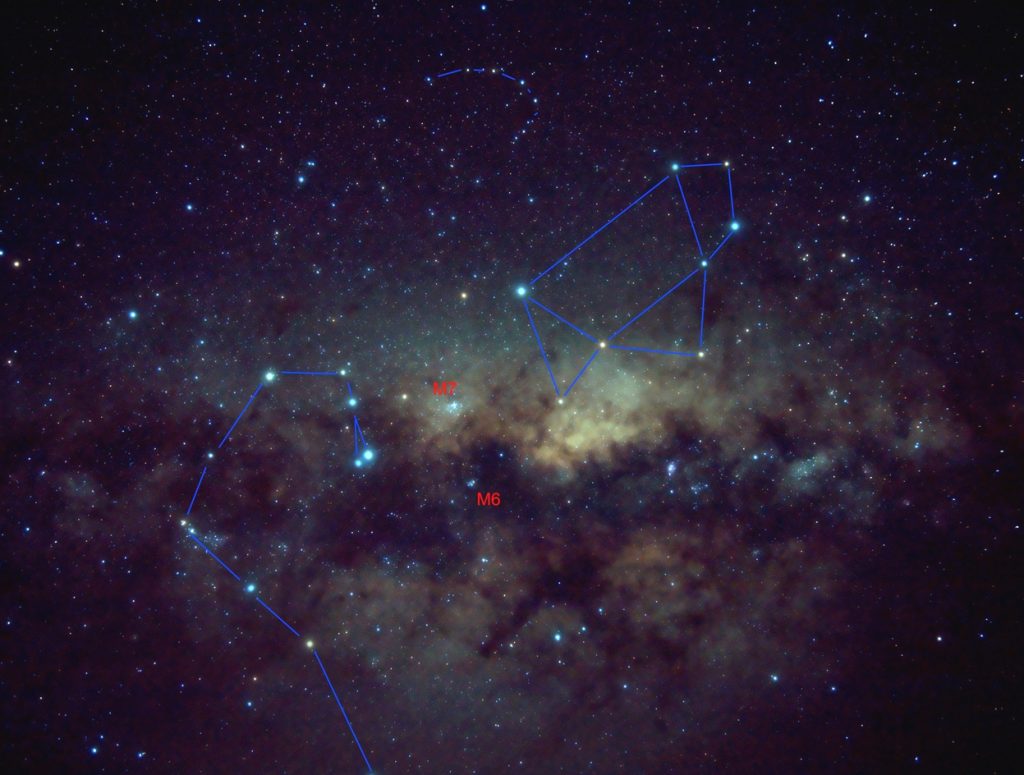
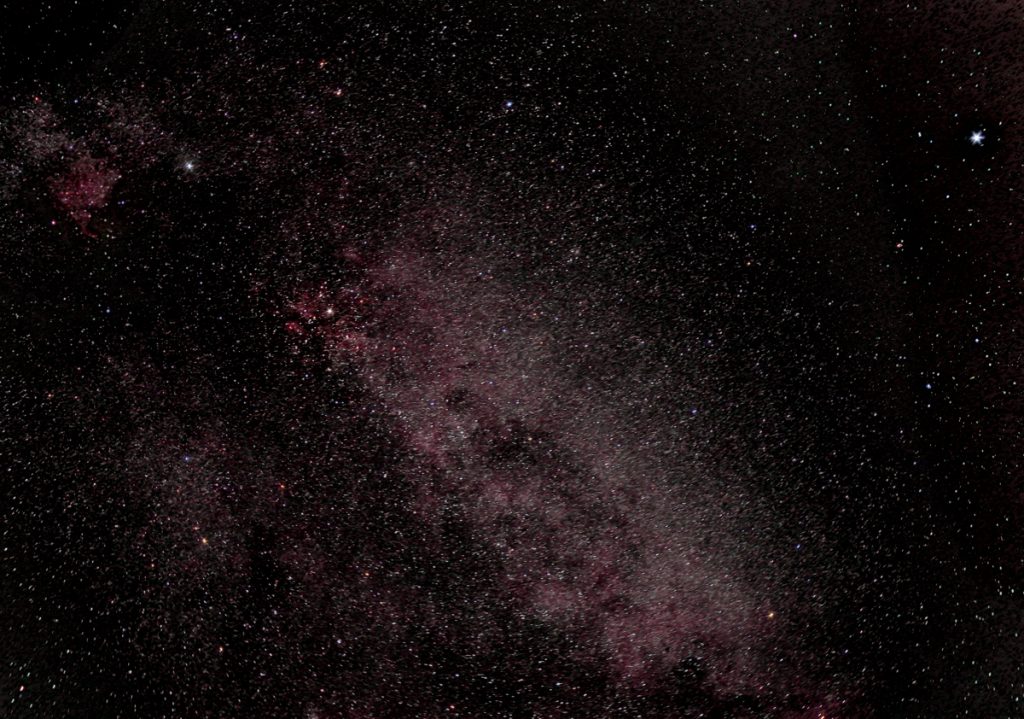
The Central Region of the Milky Way imaged from New Zealand
On a second trip to New Zealand, I used a Sony A5000 camera with, for this image, a Samyang 12 mm, f/2, lens stopped down to f/4.
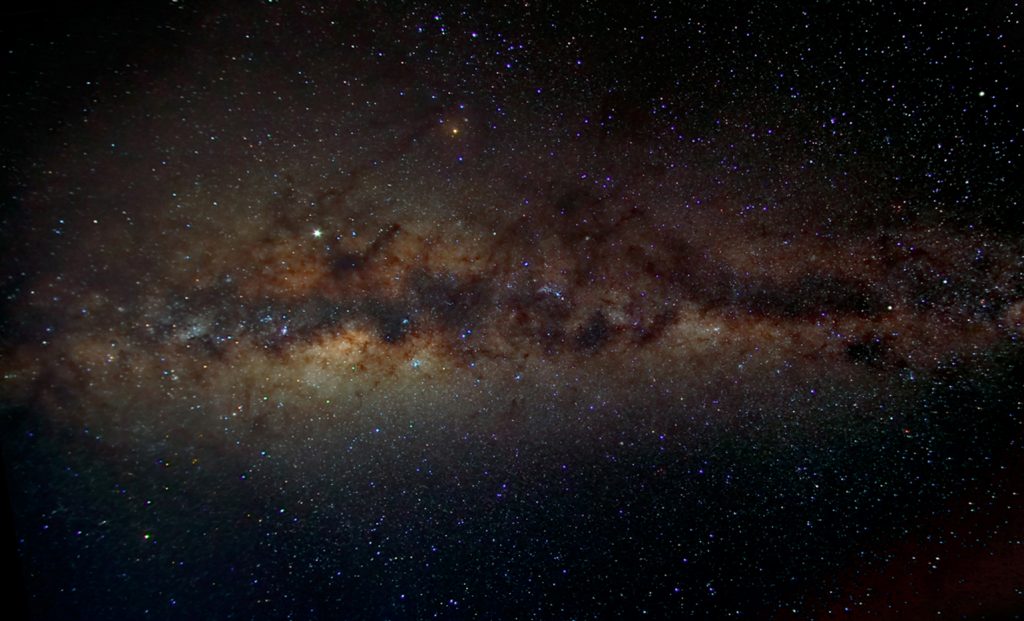
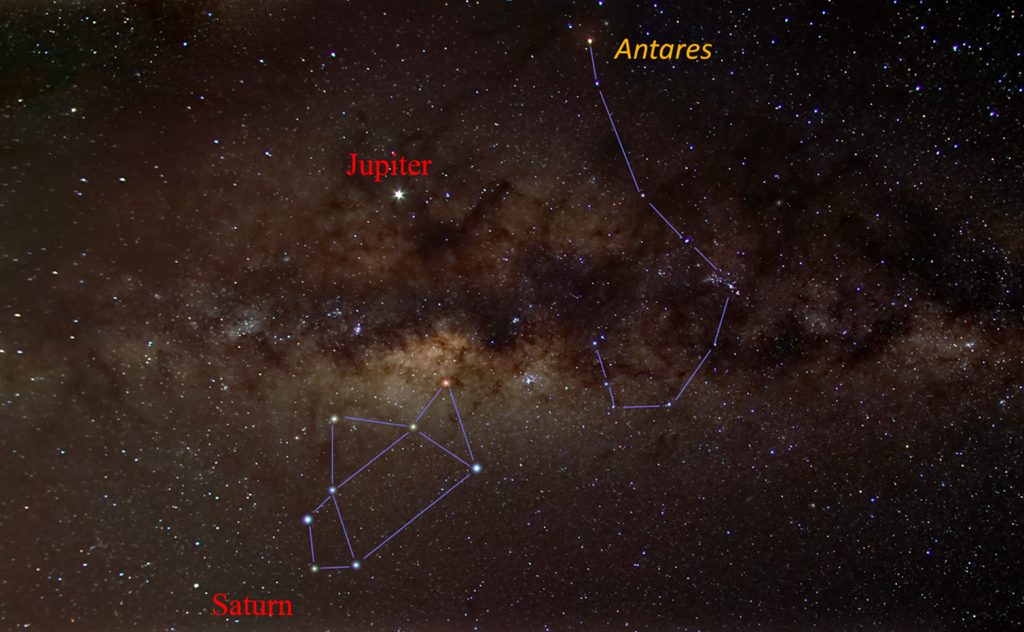
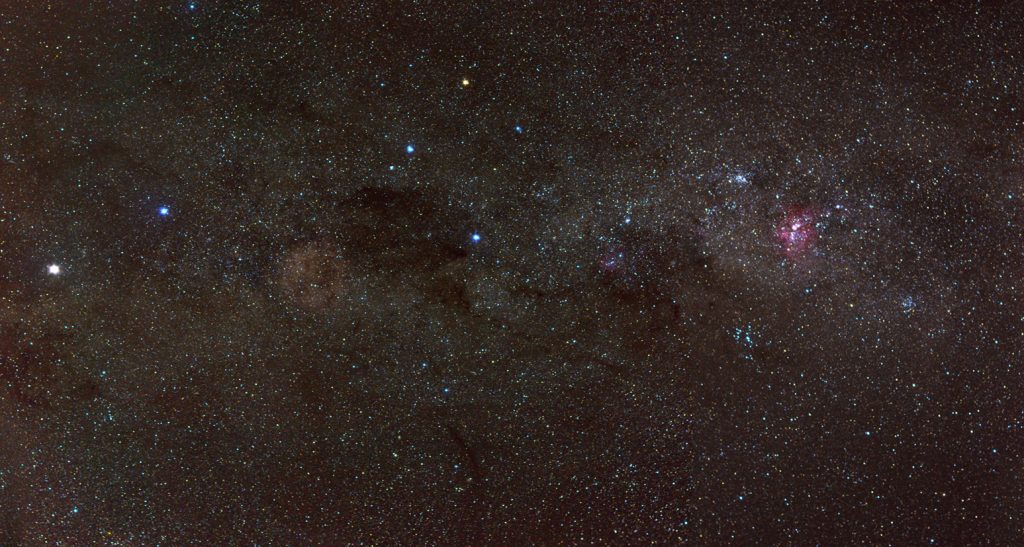
The Southern Cross Region of the Milky Way imaged from Lake Tekapo in the Aoraki Mackenzie Dark Sky Reserve
This is a ‘gold tier’ dark sky site which has one of the darkest skies in the world and home to the Mt John Observatory. The same imaging setup was employed but, this time, the Sony A5000 APS-C camera was coupled with the Zeiss lens 45mm, f/2, as used for the Cygnus region image. A total of 4 panes were taken each derived from 20, 15 second, exposures captured at an ISO of 800 in both raw and Jpeg. The raw files were converted into Tiff files using Raw Therapee and stacked in Sequator. These overlapping panes were then composited into one image using Microsoft ICE. A little stretching and local contrast enhancement was done as described above to give the image below.