
[This is just one of many articles in the author’s Astronomy Digest.]
Trying to image a constellation, in this case Orion, seemed a silly thing to do on a night when the Moon, one day before full, was at an elevation of 51 degrees and only 30 degrees away from Orion’s belt. However, I had just acquired an invalometer so that the individual frames could be taken automatically and was keen to try it out along with two other changes from my usual procedure.
As I had expected, the image that resulted from aligning and stacking the frames was heavily light polluted both with moonlight and also some sky glow. (As our local area now uses LED street lights the sky glow is less than that it was.) But having removed the light pollution, the result was far better than I had expected and so I felt that it was worth including the exercise in the digest.
Equipment:
Sony A5000 camera with a legacy Zeiss 40 mm lens at f/4 mounted using an adapter. This came from my Contax G2 film camera system and is reputed to be exceedingly sharp.
[One great thing about using these mirrorless cameras is that they can be used with lenses from other older camera systems given suitable adapters. Thus prime lenses that are best for astrophotography can be acquired for no great cost and the adapters are not too expensive.]
The digest includes an article about the Sony A5000 which can still be bought second hand for £100 pounds or so and which, being small and light, is excellent for taking by air to dark sites across the world.
The camera was mounted on a Nano Tracker – the smallest camera tracking mount which was also bought for taking by air − aligned on the pole star. I deliberately try not to have this too precise as then the image of the sky will move slowly across the sensor − in this case by about 40 pixels during the imaging period. This will tend to average out what Tony Hallas has called ‘Colour Mottling’ and there was no evidence of this in the final image. (Search for him on You Tube.)
Its view screen is tiltable upwards so allowing air to the back of the camera behind which are the internal electronics so helping to keep them and the sensor cooler that they otherwise might be. [It is also possible to make a bracket to hold a small ice pack against the camera’s back wall so further helping to keep it cool.]
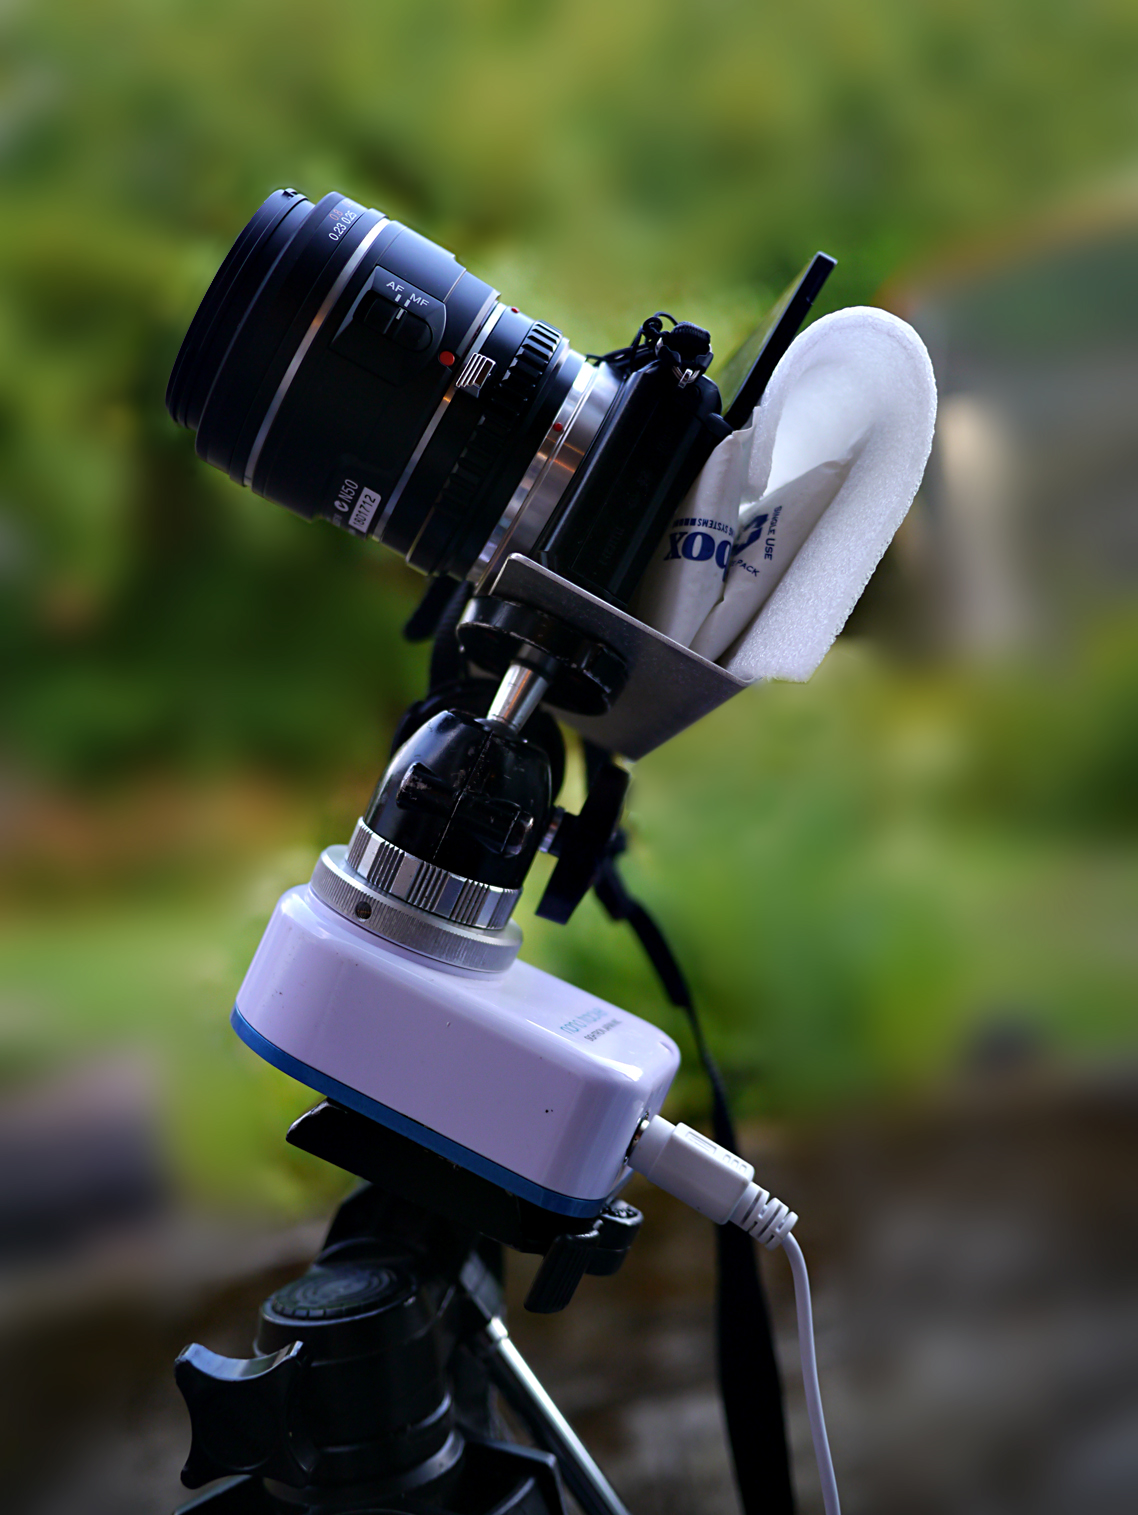 Sony A5000 mounted on a Nano Tracker
Taking the individual frames
I chose not to employ the ‘Long Exposure Noise Reduction’ mode which, after each ‘light frame’ takes a dark frame of the same exposure time with the shutter closed. This was the first time I had tried this with the A5000. If used, it will remove hot pixels but actually adds some noise into each light frame. In a given imaging time this mode, if used, will also halve the time collecting photons from the sky! Except on a hot summer’s night, I suspect that it is better not to use the noise reduction mode. The A5000 uses this mode by default for long exposures and it cannot be turned off in the camera’s menus. However, there is a work around described in the A5000 article.
I have usually taken frames in the past using an ISO of ~800 but, as described in the article ‘What ISO to use….’, the A5000 camera/sensor is ‘ISO invariant’ and a lower ISO may well give better results so, for this example, I used ISO 100.
[Increasing ISO will increase the brightness of all stars and increase the noise in the image. A low ISO will be less likely to over expose the brighter stars and give less noise so the image can then be stretched to a greater extent, increasing the brightness of the fainter stars more than the brighter ones. Good.]
An exposure time of 25 seconds was used. As a result, there was absolutely no trailing of the stars. Using my Astrotrak a longer exposure could have been used so requiring less work by the camera’s processor and this might reduce the dark current noise. But the stacked image was virtually noise free.
Aligning and Stacking the frames in Sequator
I was not expecting any sensible result, so left the camera to save Jpeg files only. These are compressed and of only 8-bit depth rather than uncompressed 12 or 14-bit raw files. This looks bad, but by averaging a reasonable number, in this case 25, frames actually increases the bit depth (honest) so the difference in the result may not be as great as might be expected.
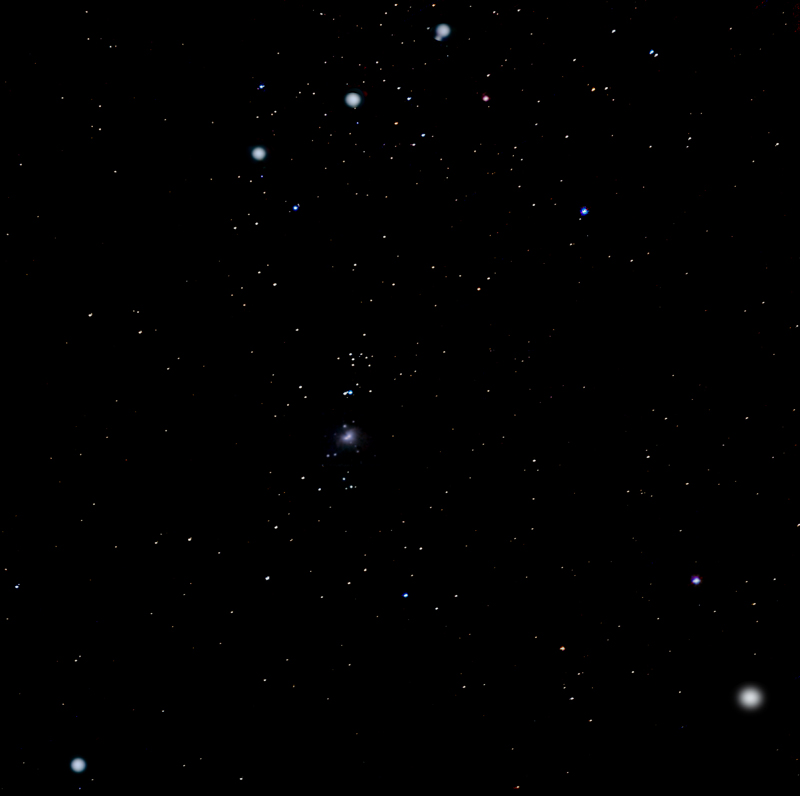
I have written a complete article about the use of Sequator which could well be read at this point, so here I will only state that the frames were loaded and then aligned and stacked with none of the possible options checked. It took only a few seconds to process the data to give the result below.
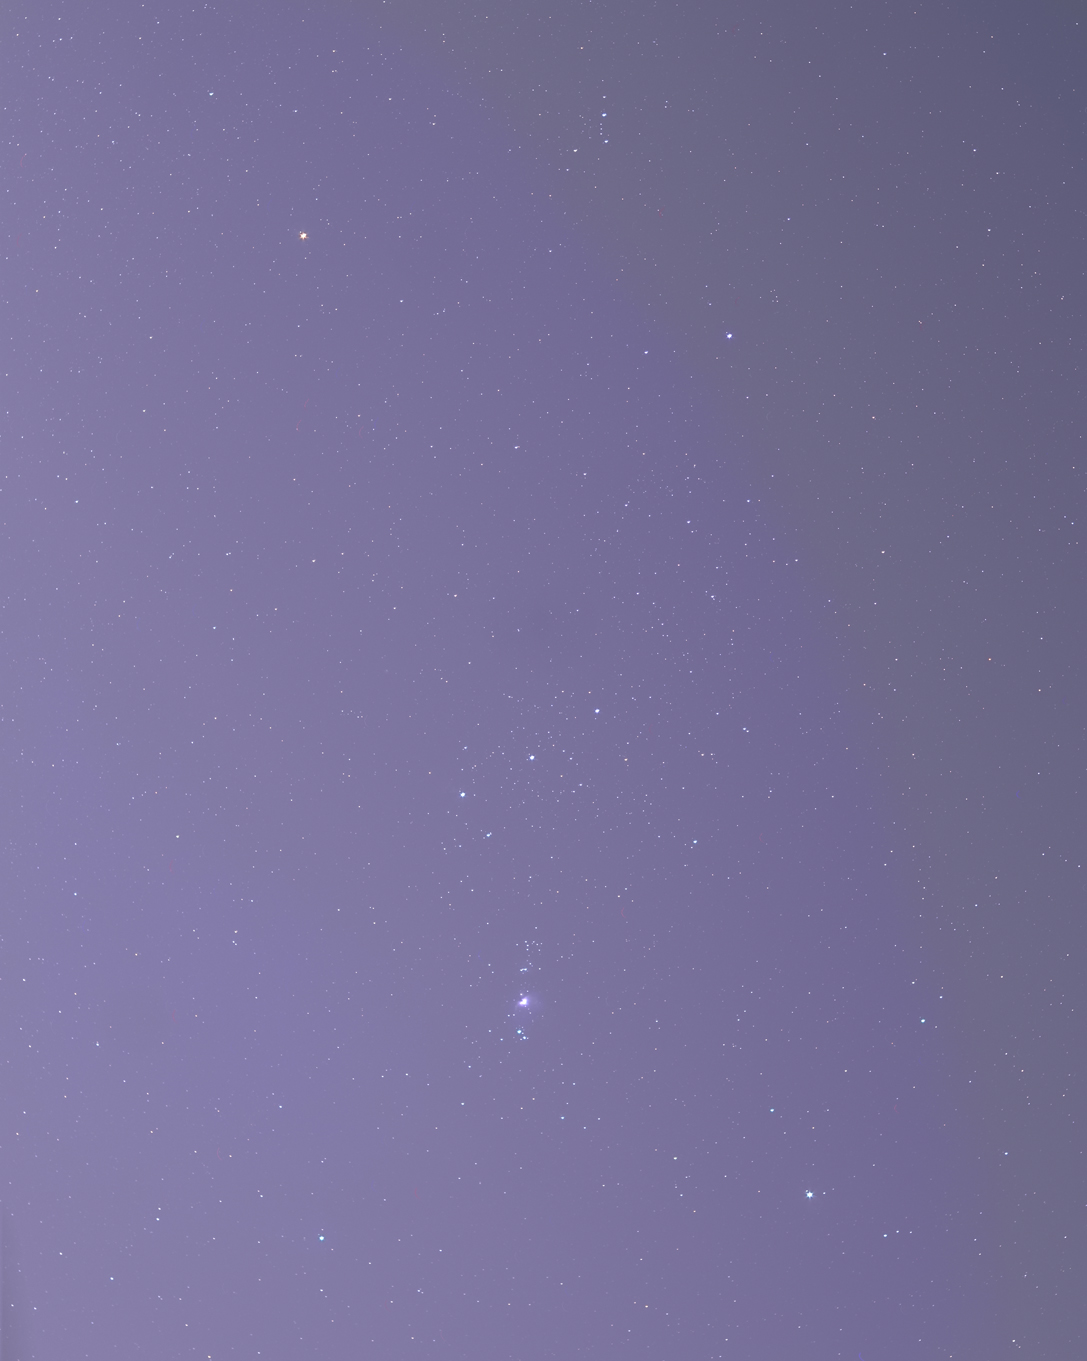
As expected, the image was blue and only the brightest stars were easily visible. [Analysis using Deep Sky Stacker showed that there was also a slight excess of red due to light pollution.]
Removing the skylight and light pollution from the image
To achieve this I used the ‘Dust and Scratches’ filter in Adobe Photoshop as described in the article ‘Removing Light Pollution in Adobe Photoshop and GIMP’. As suggested in the article, two passes were made, the first only removing 50% of the background light.
Stretching the image
This image was then stretched using a few applications of the ‘curves’ function designed to brighten the fainter stars far more than the brightest so effectively increasing the dynamic range of the image. If one stretches the image too far, noise will become apparent. This can be removed by using the ‘levels’ command to bring up the ‘black point’ by shifting the left hand slider a little to the right whilst observing the result. As I had not used the in camera noise reduction mode, red and blue hot pixels were visible having formed little trails as the image moved across the sensor. These were easily painted out.
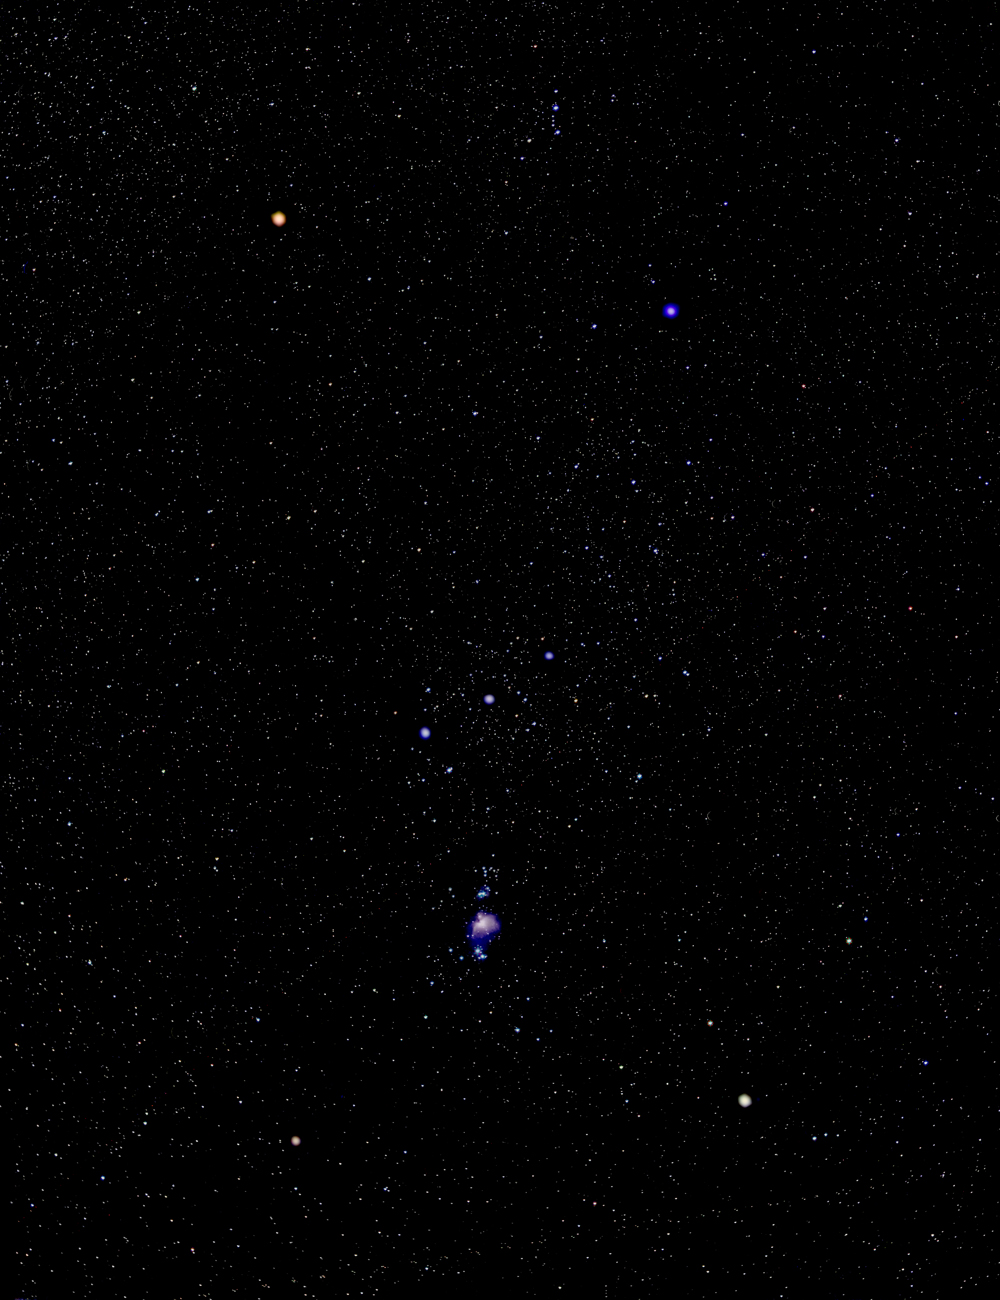
The constellation image

I had carefully manually focussed on infinity prior to taking the frames and a small crop of the image showed this to be the case. The effect of the iris blades could easily be seen on the brightest stars and the ‘fish’s mouth’ in the Orion Nebula showed up well. (As shown better in the crop below) This also showed that the use of ISO 100 had not over exposed this very bright part of the image. I had never expected to see so many faint stars within the image.
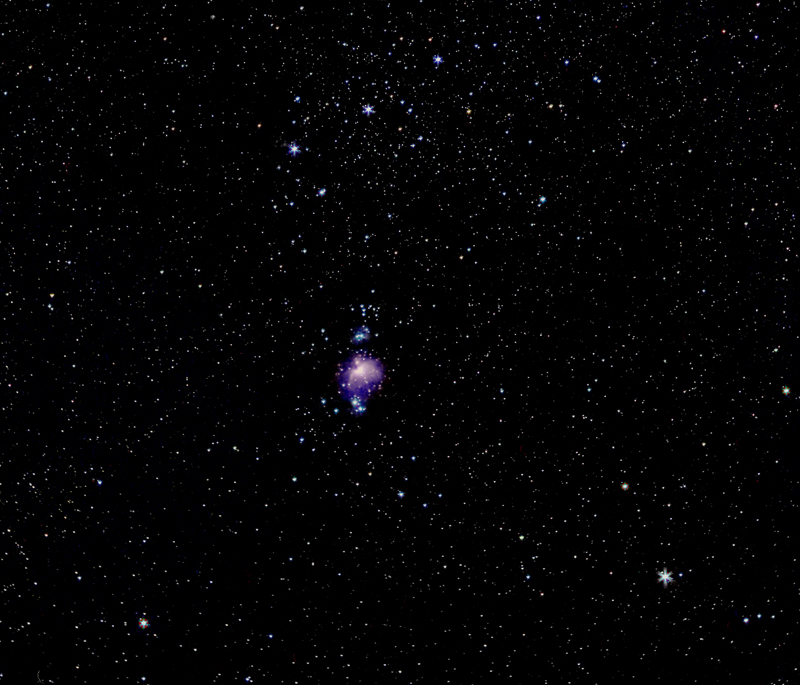
Enhancing the brighter stars
Digital images are more accurate than film – which tends to make the brightest stars larger and so more prominent. (This is the result of ‘halation’ within the emulsion.) By selecting the brightest stars using the oval selection tool and applying a Gaussian blur, they become larger but fainter. Their brightness can then be brought back using the ‘Brightness Contrast’ tool or an application of the ‘Curves’ tool. This gives the result below which one might (or might not) prefer.
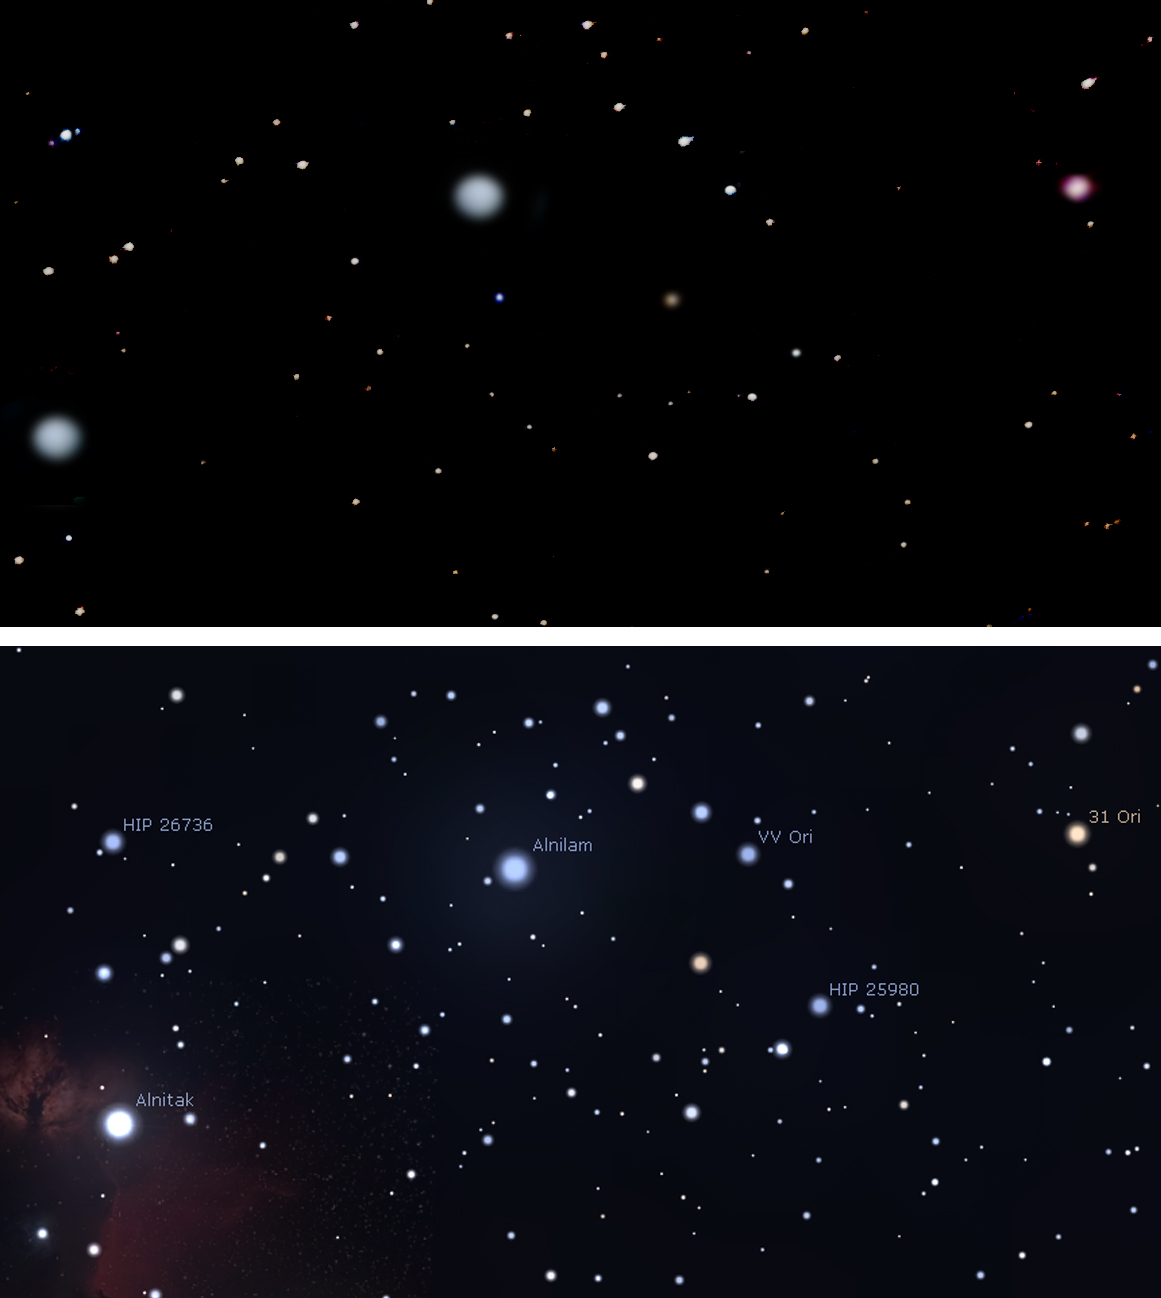
The images below show the region around the central star of Orion’s Belt, Alnilam, with that of Stellarium. A 10.3 magnitude star is easily visible. I suspect stars down to magnitude 11 had been imaged.

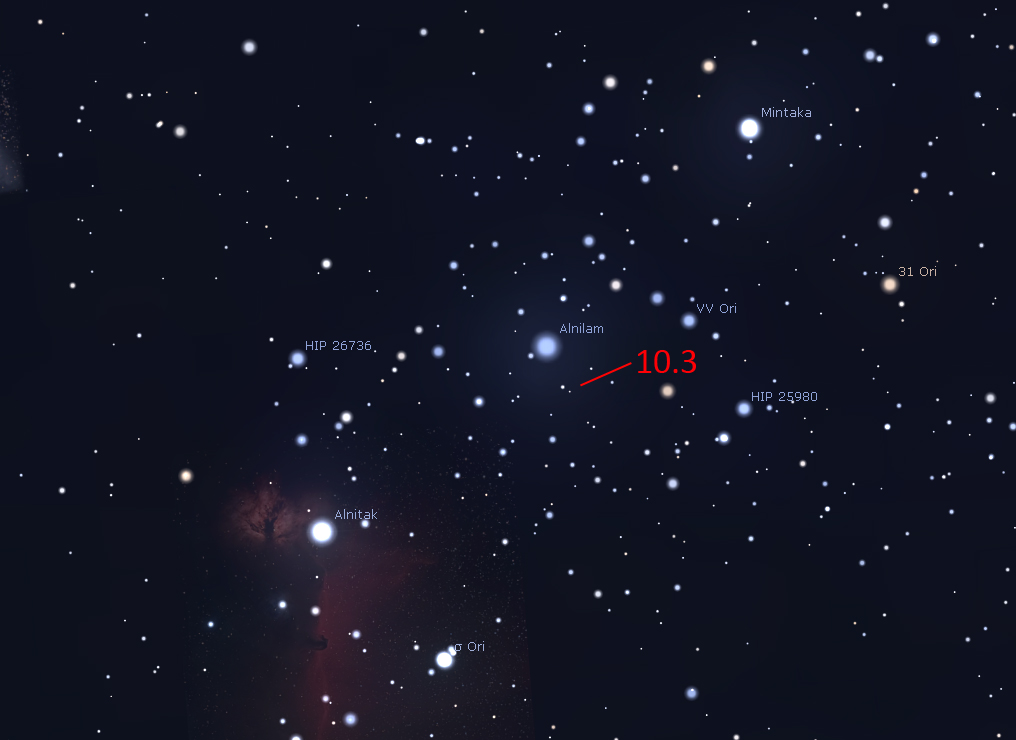 Stellarium
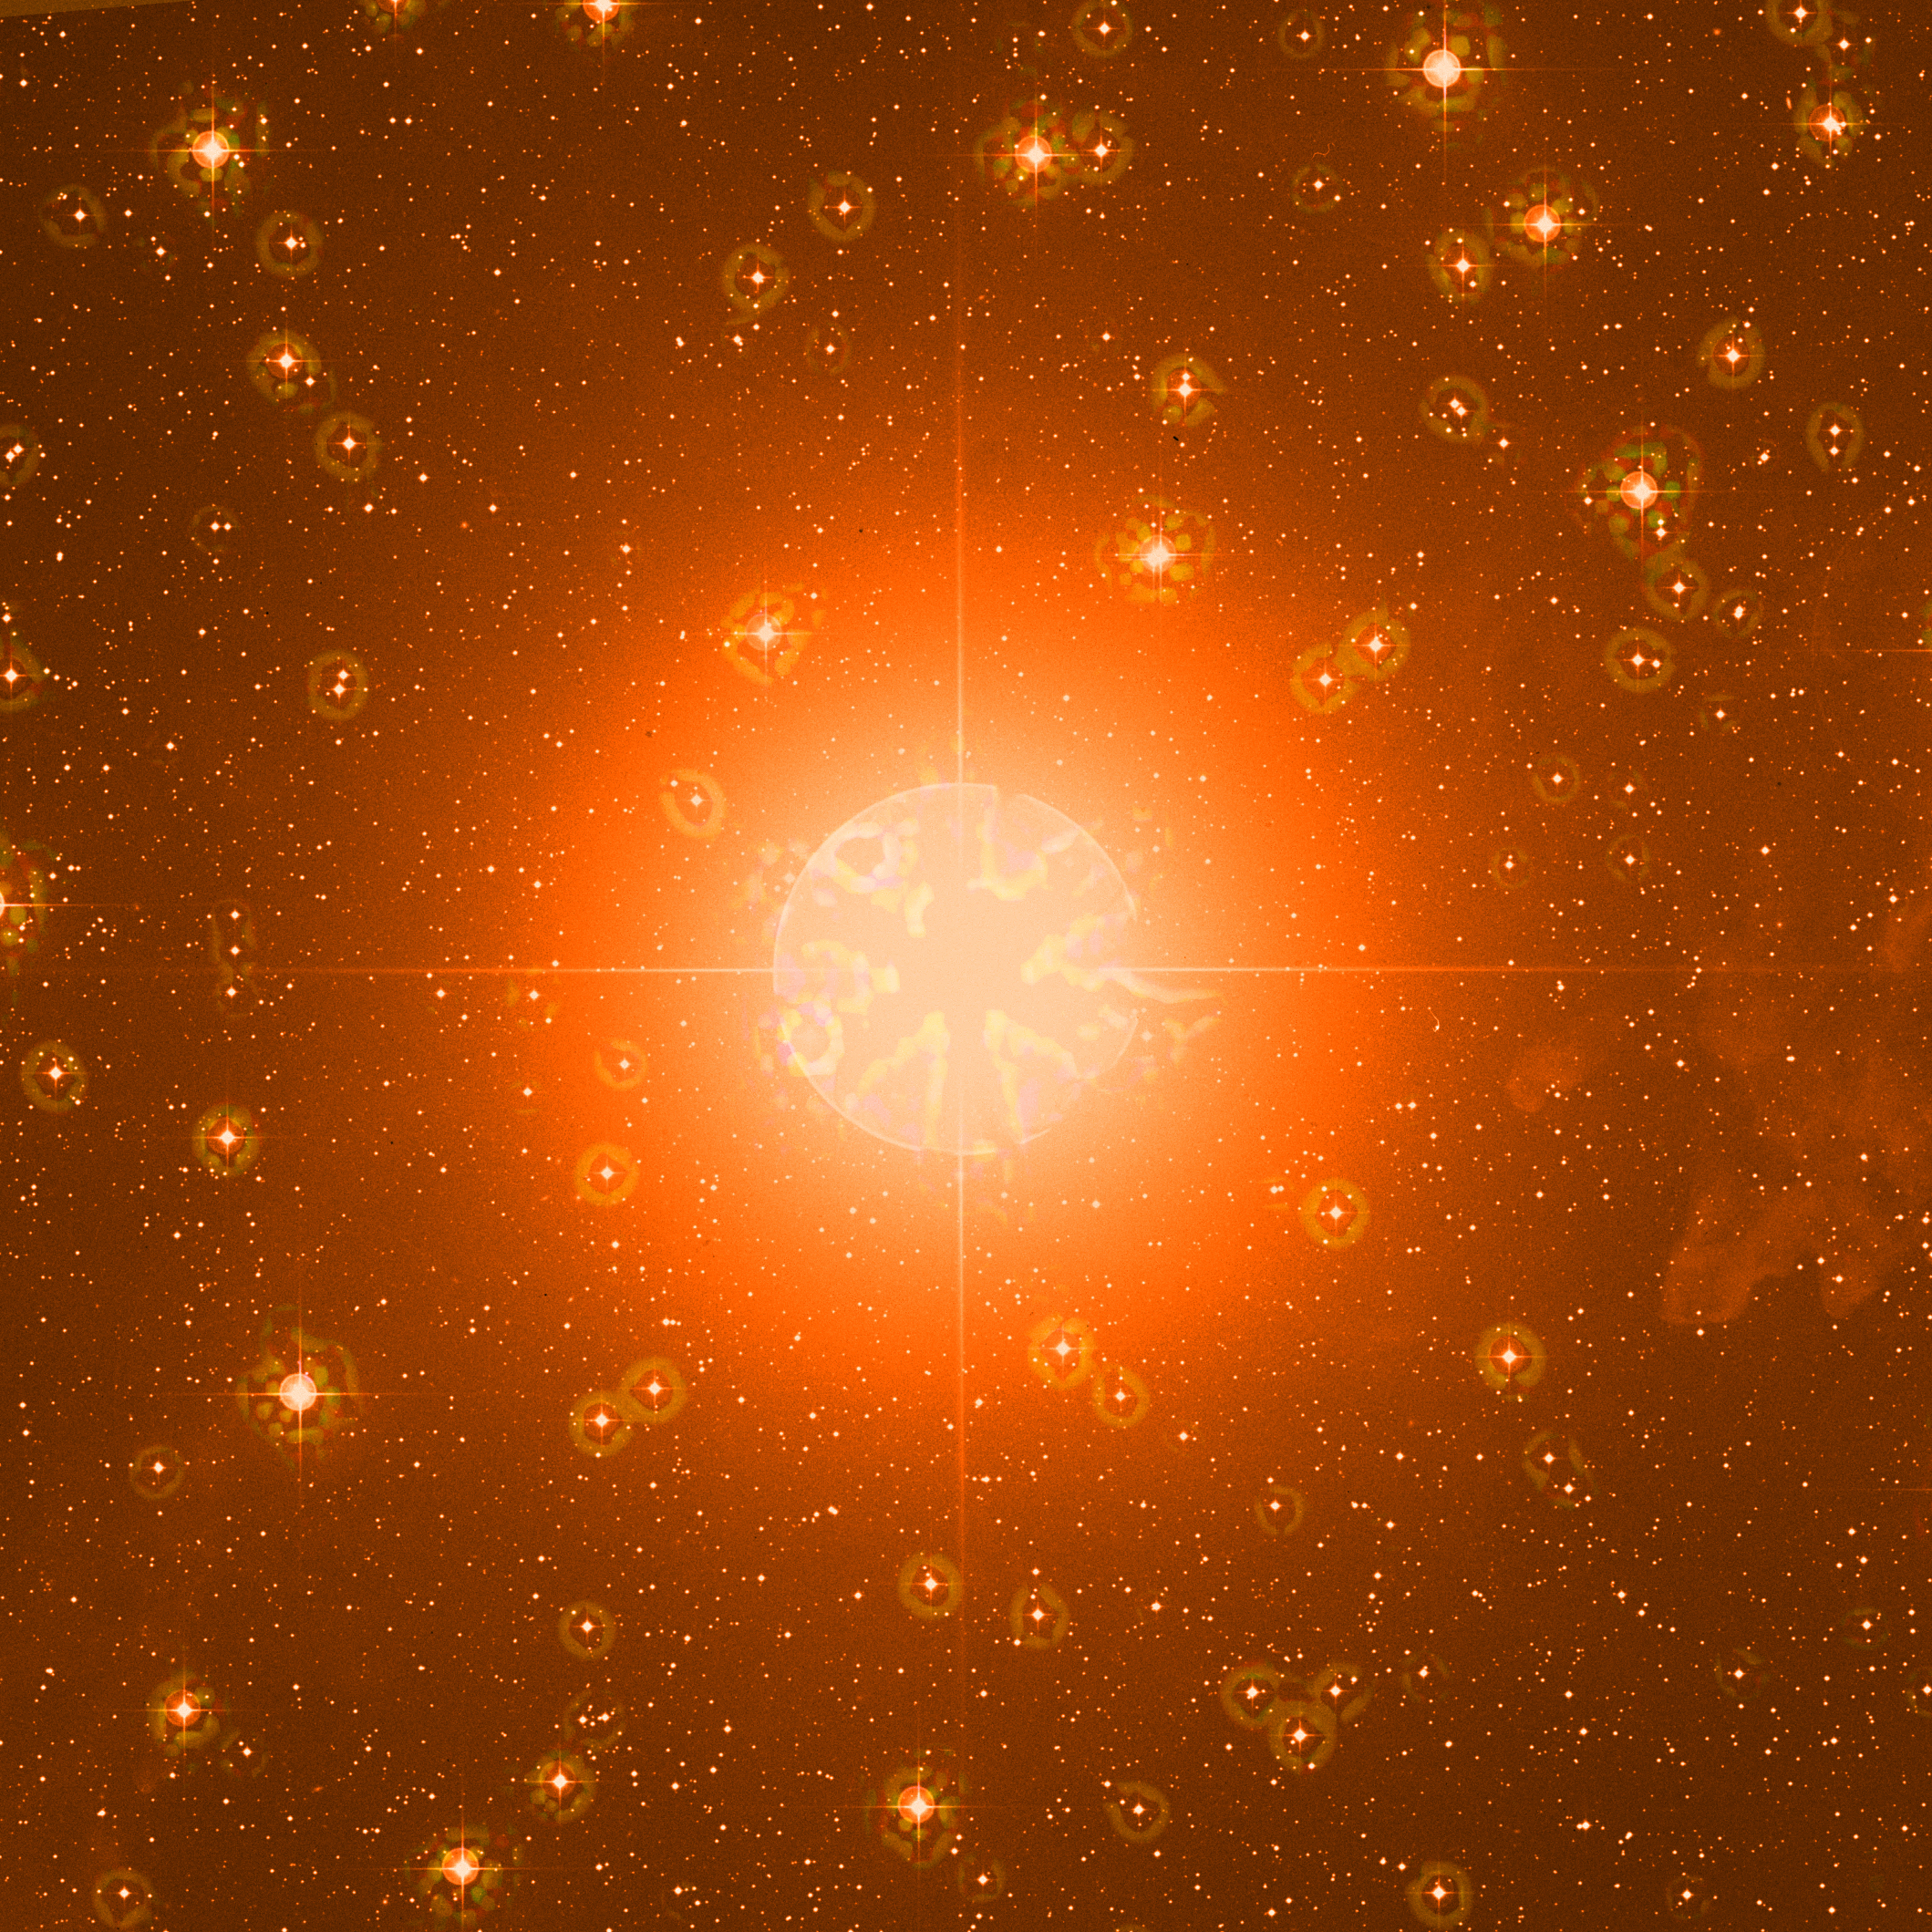
For interest, I converted the stars into rings and overlaid them of an image from Digital star Survey.
I was initially surprised now many stars were visible but realised that there were two factors that had contributed. The first was that the lens is very, very sharp so that the stellar images were very tight. From measurements, I suspect that the faintest stars had a half power beam-width of just 1.5 pixels. Though I had purposefully aligned the Nano Trackers a little away from the North Celestial Pole to reduce ‘Colour Mottling’, there was absolutely no evidence of any star trailing. (The relatively short exposures helped.) Together this meant that all the light from a single faint star would be fall on one or two pixels. Lets say for, example, that 1,000 electrons would result in the pixel wells. Now assume that the light pollution gave rise to the same number of electrons. I suspect that the star would be visible. Now let’s assume a shift of 4 pixels during the exposure. As the light pollution is uniform over localised regions, there would still be 1,000 electrons in each of the pixels in the small region over which the star’s image fell during the exposure. But now the total light from the star would be spread over several pixels so each pixel well would gain fewer electrons, half at most, so bringing it well below the level of light pollution and thus no longer visible. This is one reason why the Hubble Space Telescope is very sensitive as there is no turbulence to spread the stellar images across the sensor. [There is also no sky glow or air glow (which affects all ground based telescopes even in very dark sights).]
Imaging under heavily light polluted skies
The following night there was high cloud so that Orion could be barely seen. However, I did want to try out a Tamron 90 mm f/2.8 macro lens. This is a Sony A-mount lens used with an adapter and focussed on infinity during daylight.
As the lens is quite heavy I used my ‘prototype’ StarSync tracker. This is exceedingly sturdy and does not require a ball and socket head on which to mount the camera. It is described in detail in the article ‘Three tracking mounts’.

 The final version
An intervalometer was use to take 47, 25 second, frames at an ISO of 100 with the mount aligned closely on the North Celestial Pole using a laser pointer. As I had not used the in-camera noise reduction mode I did have to clone out the streaks caused by hot pixels. The brightest stars were worked on in Adobe Photoshop to ‘clean-up’ their images. As expected, far fewer stars were seen than on the 40 mm image.
Comparing a crop close to the Belt of Orion with that of the Stellarium image showed that the faintest stars visible were 9th magnitude – 2 magnitudes brighter than the 40 mm image. This does prove the point that, no matter how long a total exposure, stars fainter than the level of the light pollution cannot be imaged.
The exercise had showed that the Tamron lens produces excellent star images even into the extreme corners (it is a full frame lens used with an APSC sensor which no doubt helps) and that the StarSync tracker performed flawlessly with this 90 mm (effective full frame focal length of 135 mm) lens. So it was a worthwhile exercise.
Return to Astronomy Digest home page