This is just one of many articles in the author’s Astronomy Digest: http://www.ianmorison.com
One usually needs to do some final adjustments of an astronomical image in an image processing program such as Adobe Photoshop or the, far less expensive alternative, Affinity Photo. But a free program which is a development of GIMP, called Glimpse, is available and this means that it is now possible to complete the image processing using free software.
Imaging the globular cluster M13 in Hercules
M13 is the brightest globular cluster in the northern hemisphere sky. It was discovered by Edmond Halley in 1714 and catalogued by Charles Messier in 1764 as the 13th object in his catalogue. With an apparent magnitude of 5.8, it can just be seen with the unaided eye as a ‘fuzzy patch’ in the ‘keystone’ of Hercules. Located at a distance of 25,000 light years and around 165 light years across, it contains over 300,000 closely packed stars.
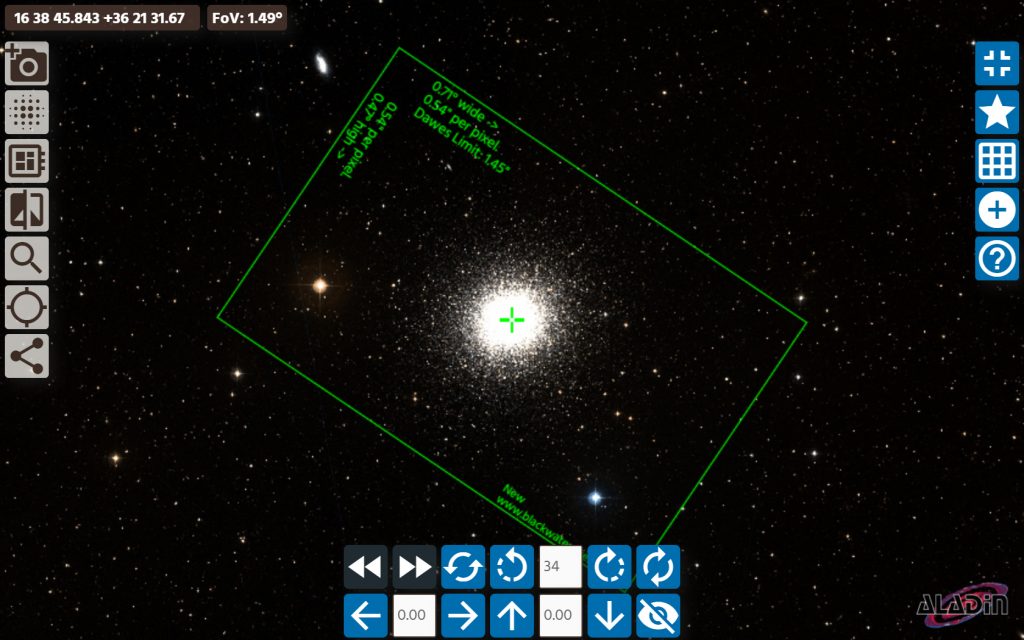
To image M13, 369, 20 second, frames were taken using a Vixen VC 200L telescope having a focal length of 1,800 mm with a cooled, Micro 4/3 sensor, astro camera. As seen in the Blackwater Skies Field of View calculator below, this combination nicely encompasses the cluster. The mount was unguided so the exposures were kept short to avoid any star trailing in the captured frames.
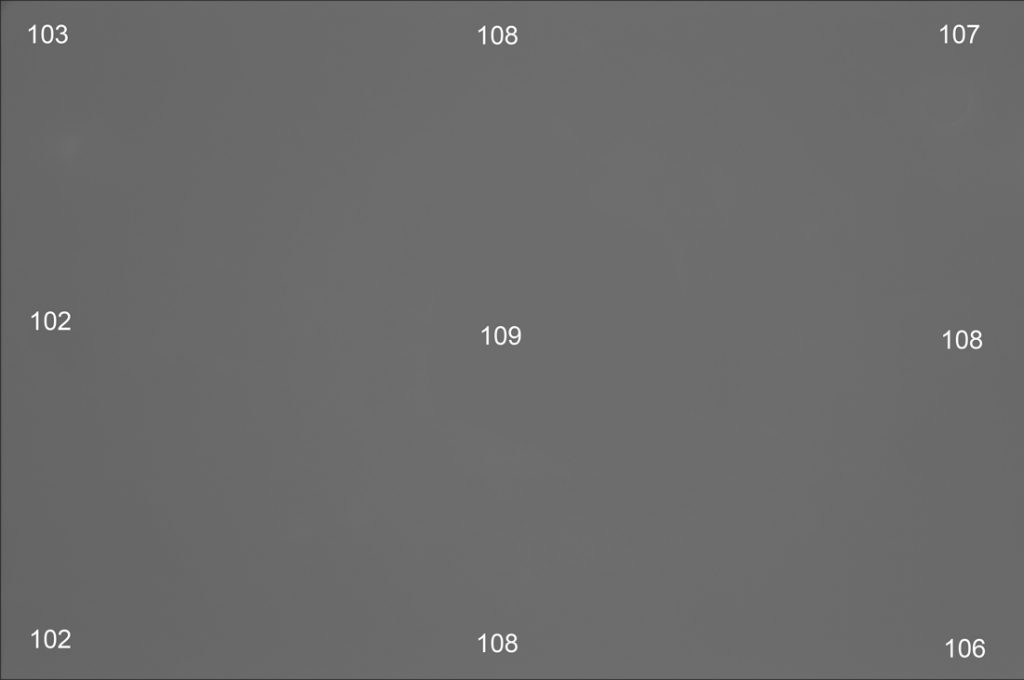
No Flat Frames were taken as the telescope/camera combination does not sensibly vignette and, with a clean optical window above the sensor, no ‘dust bunnies’ were present. As described in an article in the digest, it is possible to produce a flat frame from the captured data providing a significant amount of sky glow is present. The image below shows that, whilst not totally uniform, the vignetting was only a few percent.
The taking of Dark Frames
I also took 50 dark frames but as, with the camera sensor at -20C, the dark current is very low and, as I was imaging under light polluted skies, the sky glow may well have overwhelmed the dark current noise so dark frames would not have make a material difference. There was very little difference in the final result, but the use of dark frames did remove some hot pixels and ‘amp glow’ so was worthwhile. (For simplicity, the description of the Sequator and Deep Sky Stacker stacking programs only used the light frames.)
Aligning and stacking the frames.
The aligning and stacking of the 369, Tiff frames was initially carried out in Sequator, which processes the data quickly and gives nicely coloured results. Sequator can accept uncompressed Tiffs, many types of raw files or Jpegs.
A second free program (whose use is described at the end of the article) that can align and stack frames is called Deep Sky Stacker which has been around for many years. It is somewhat harder to use than Sequator. It has a’Kappa-Sigma’ stacking mode which, given a reasonable number of frames to stack, can remove satellite trails. It also has the ability to use the ‘Drizzle’ technique, developed for the first images captured by the Hubble Space Telescope when its first camera had a pixel size that could not fully sample the full resolution of the telescope. With a 2x Drizzle, the individual frames are doubled in size and stacked into a twice sized image accumulator to give a finer resolution (in principle) result. Given many frames, a sharper image can result – perhaps 20 to 30% better than an undrizzled image.
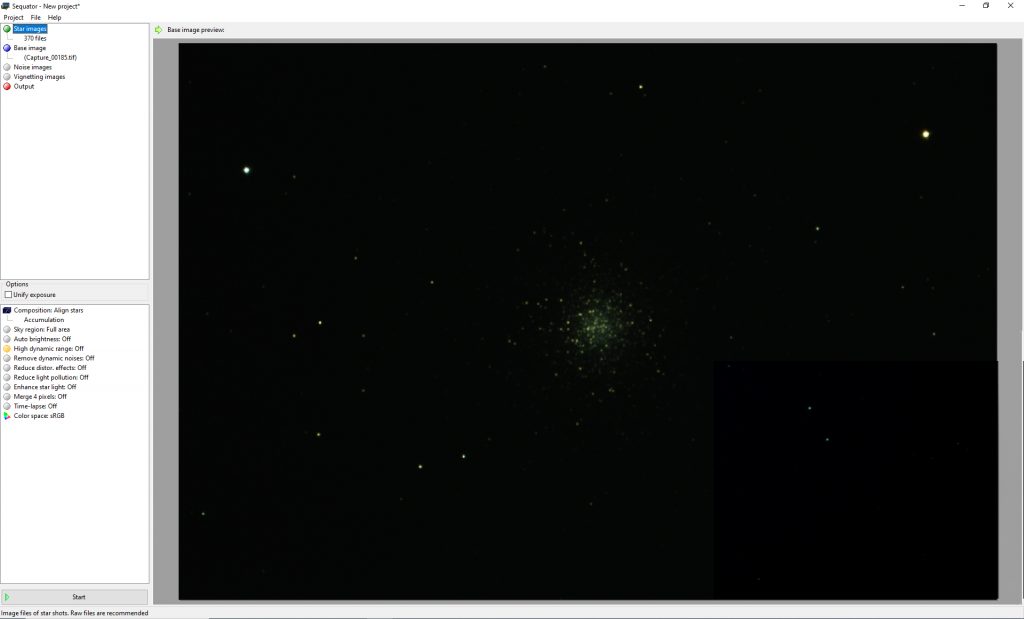
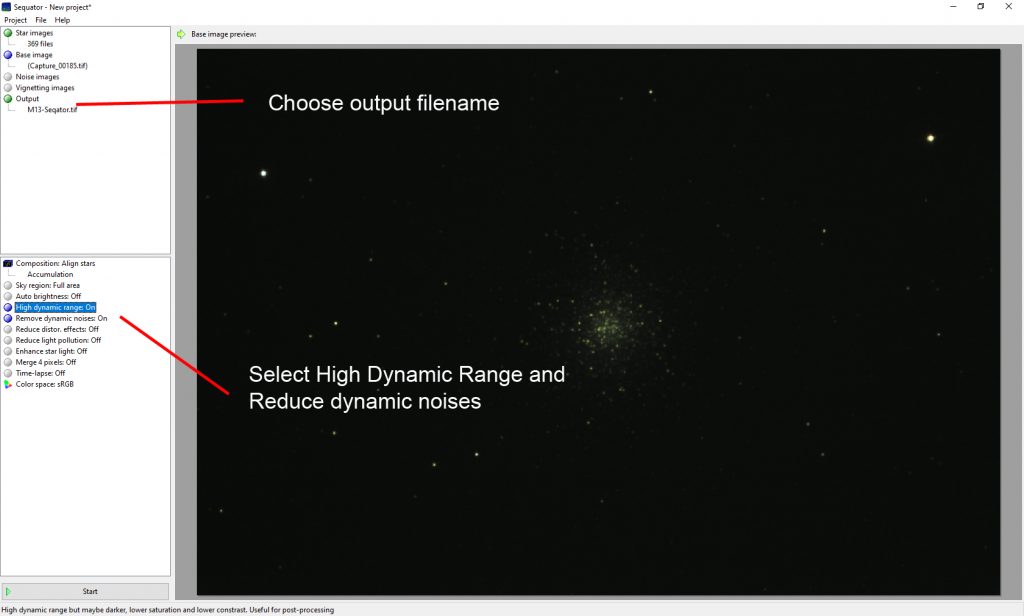
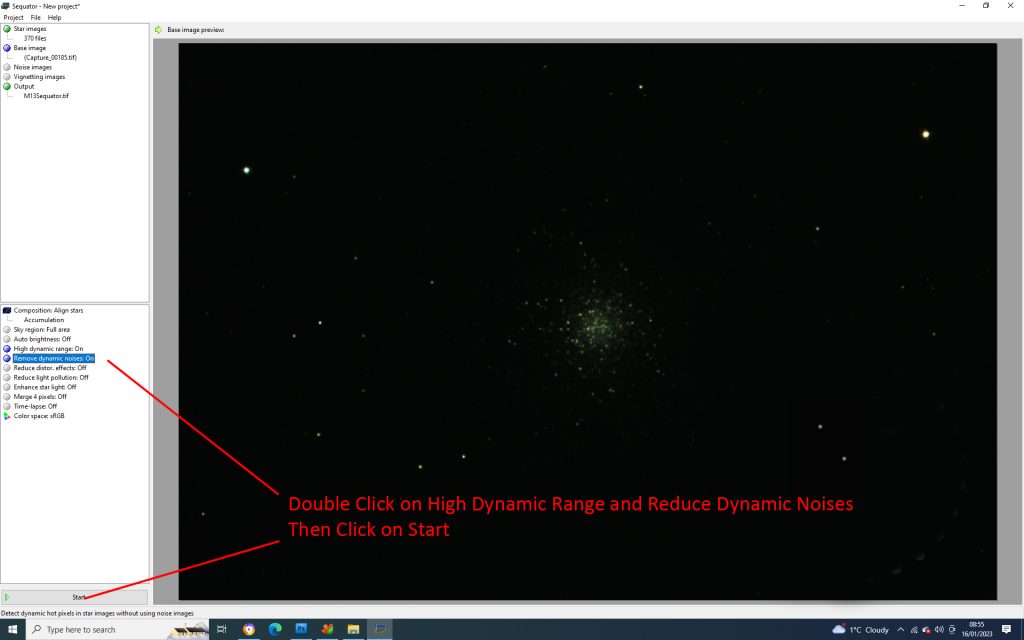
Aligning and Stacking in Sequator
The captured frames are selected then the output file name is chosen. I usually then double click on ‘High Dynamic Range’ and ‘Remove dynamic noises’; the former helps prevent the brighter parts of an image blowing out and the latter may well remove any hot pixels and even satellite trails. Then ‘Start’ is clicked on and frames are aligned and stacked. The steps are shown in the screen shots below.
The frames are loaded into Sequator.
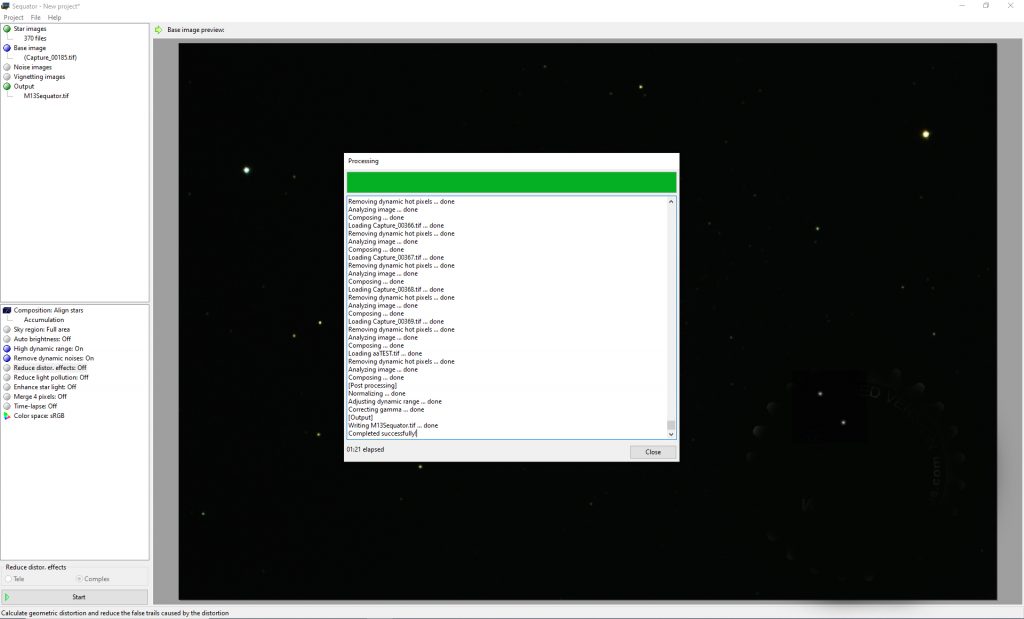
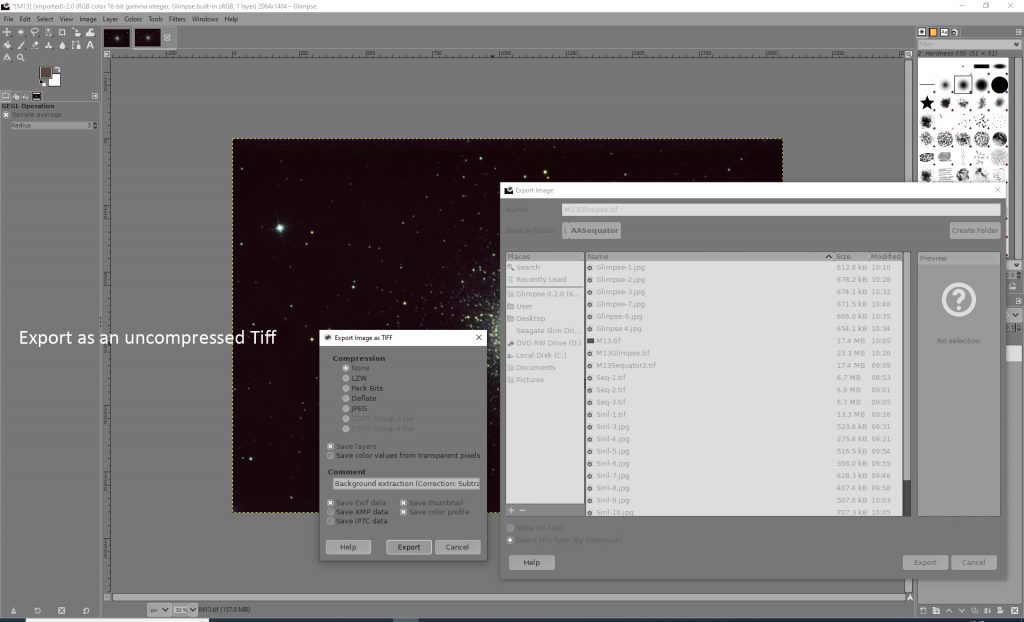
The result had been saved as a 16 bit Tif file to then be imported into Siril.
Processing the aligned and stacked result in Siril
Siril is a free, relatively new, astro imaging program which has some superb processing tools – some of which are only available in the, somewhat expensive and with a high learning curve, program Pixinsight. It is being actively enhanced and I strongly recommend its use. It was used to first, remove the sky background from the stacked image , then colour calibrate it before stretching and increasing its saturation.
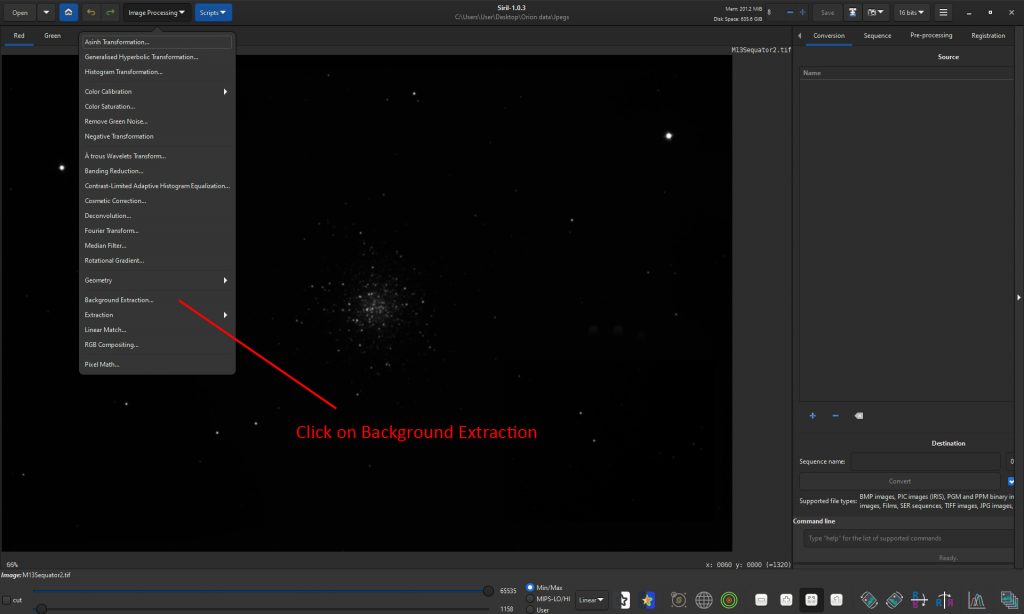
Using the ‘Background Extraction’ Tool in Siril
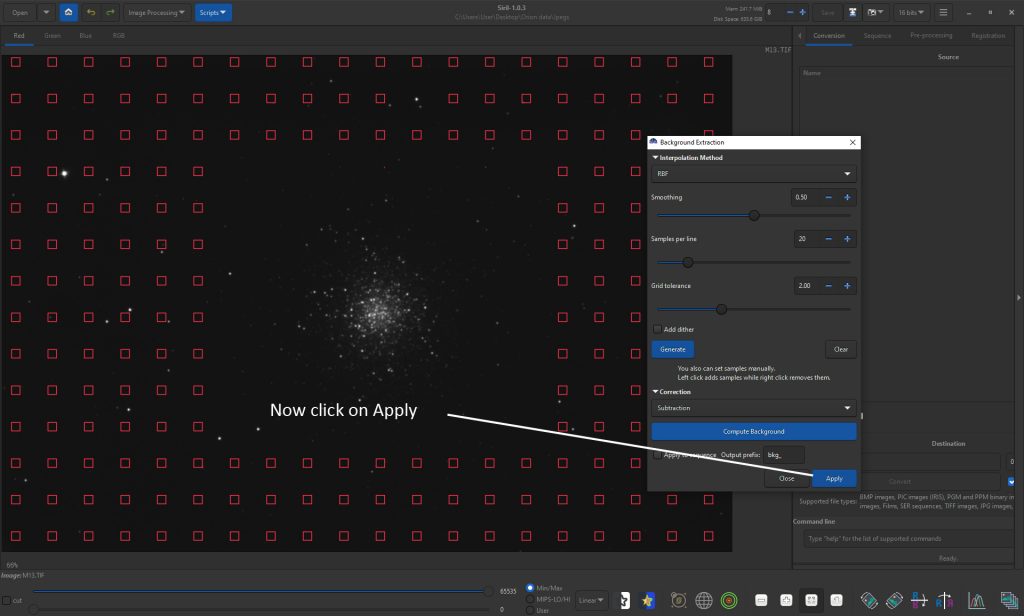
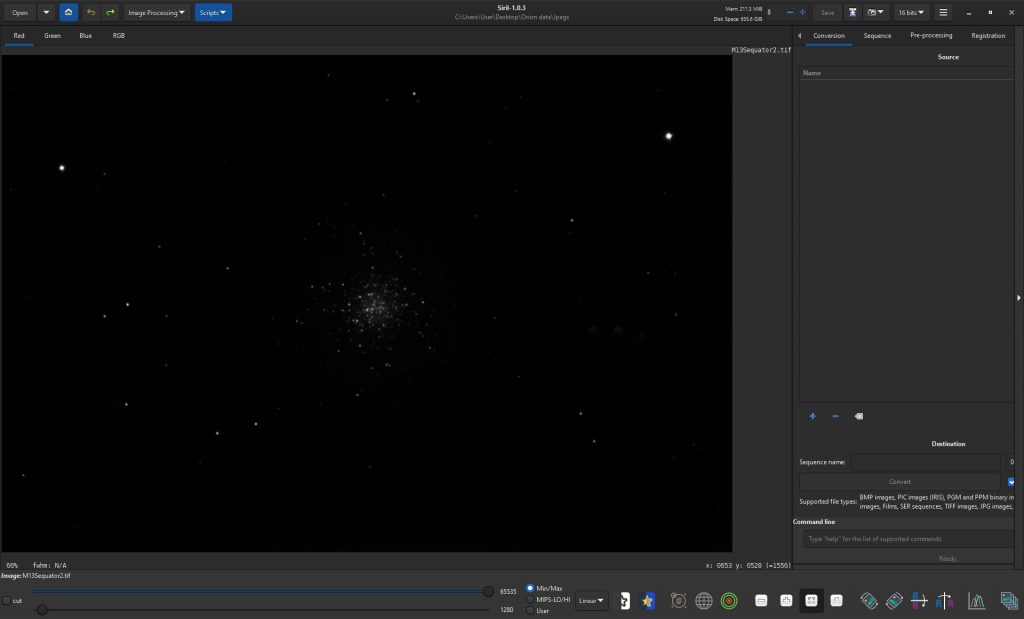
The tool used in Siril to remove the sky background is selected from the ‘Image Processing’ drop down menu. The background extraction tool builds up a model of the sky background (mostly light pollution) and will then subtract this from the image. An excellent feature is the fact that, as it sets a grid of points across the image from which to make a model of the sky background, it attempts to avoid nebulae or in this case the globular cluster. I have increased the size of the avoided region in the steps that are shown below.


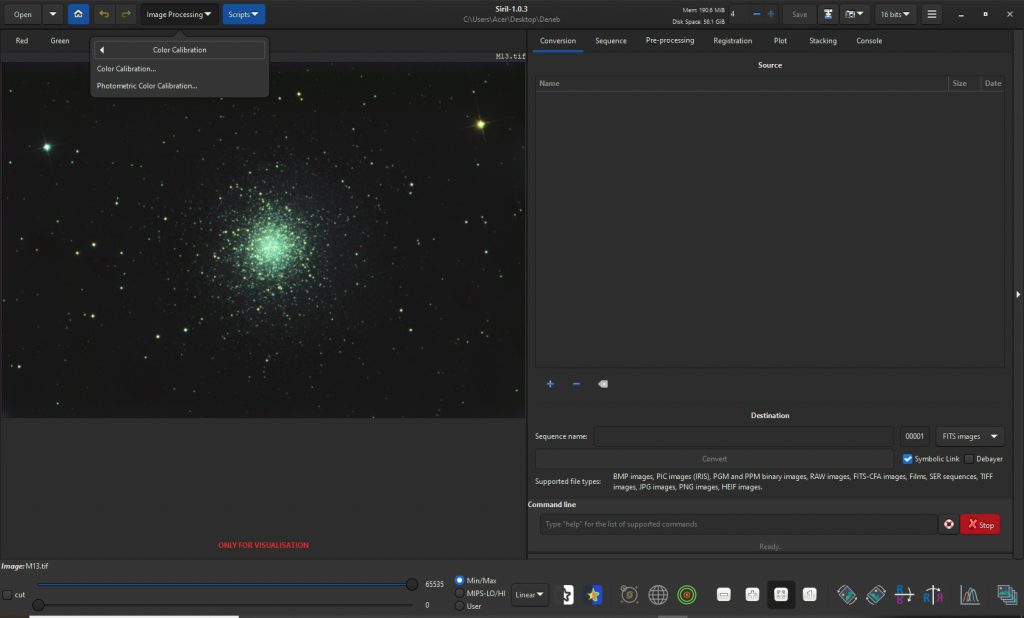
Photometric Colour Calibration in Siril
This is a rather special tool to correct the colour balance in a stellar image. In the ‘Image Processing’ menu is ‘Colour Calibration’ which, when clicked upon, gives two options, one of which is ‘Photometric Colour Calibration’. If applied, Siril ‘plate solves’ the image and compares the star colours in the image with those in either the NOMAD or APASS star catalogues (I use APASS). It then colour balances the image to give the stars the correct colour. There is one thing that has to born in mind in that it will not work on images that have been non-linearly stretched – so any stretching must be applied after the colour calibration. Before its use, one must first remove any sky glow by using the Background Extraction tool as described above. It can be that the the image after background extraction does not show sufficient stars for the plate solving to work. If so, one can first open the ‘Histogram Transformation’ tool and move the right hand slider to the left to linearly increase the image brightness.
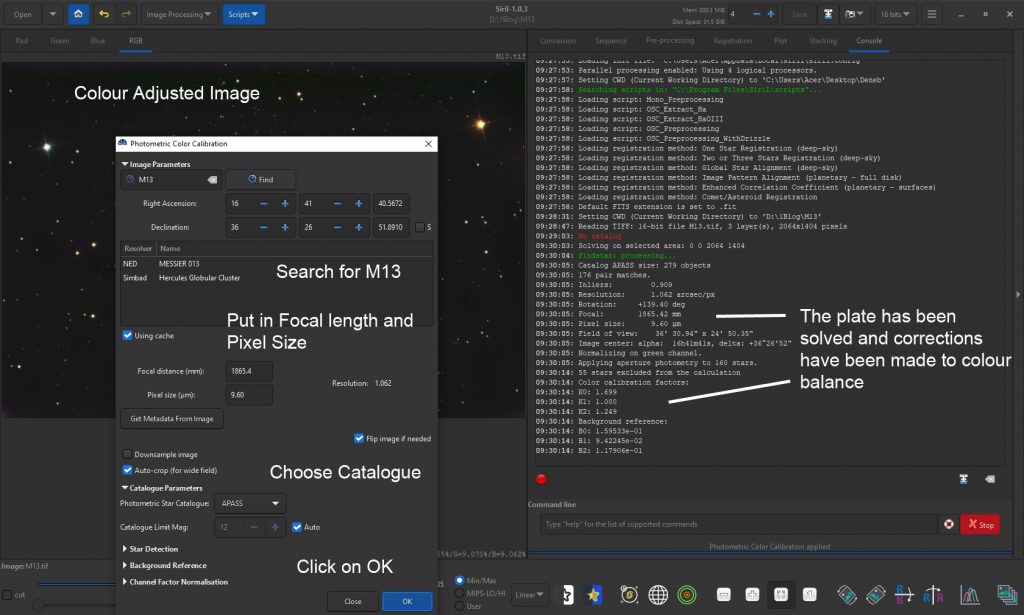
First Choose Photometric Colour Calibration
One now has to the define the centre of the field. In this case by simply using ‘Find’ to give the RA and Dec of M13. One then needs to enter in the telescope focal length and the pixel size of the camera and select one of the two star catalogues. I selected the APASS star catalogue. One then clicks on ‘OK’ and, in the log, one will see the corrections that will be made to the colour balance.
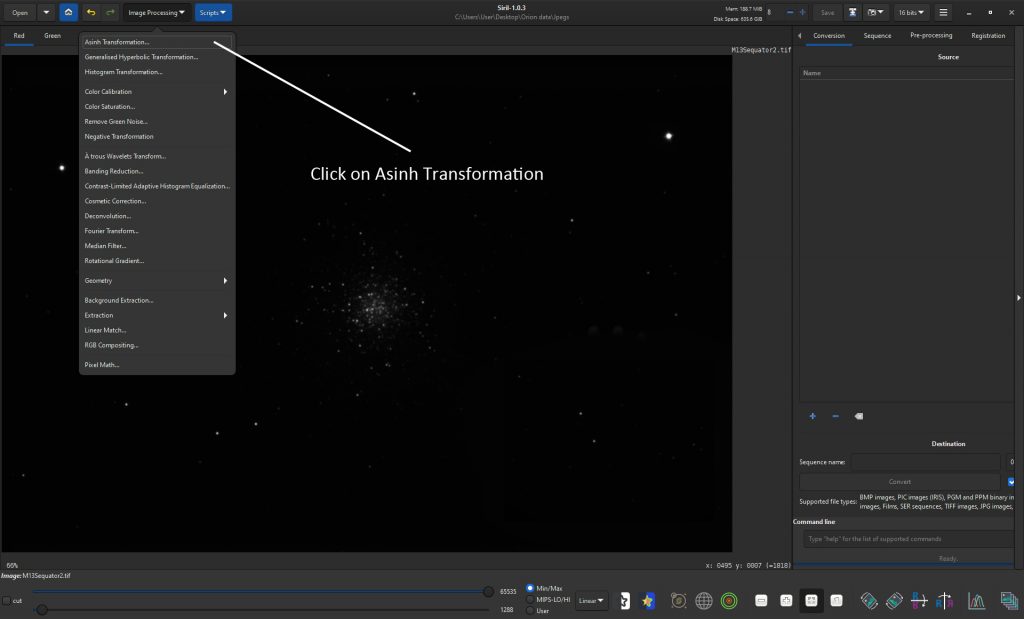
Using the Asinh stretch to produce the stretched result.
This uses what is generally regarded as the best ‘curve’ to stretch astronomical images – that is to brighten the fainter parts of the image, nebulae or stars, whilst not over exposing the brighter parts of the image which, in this case, is the central part of the cluster.
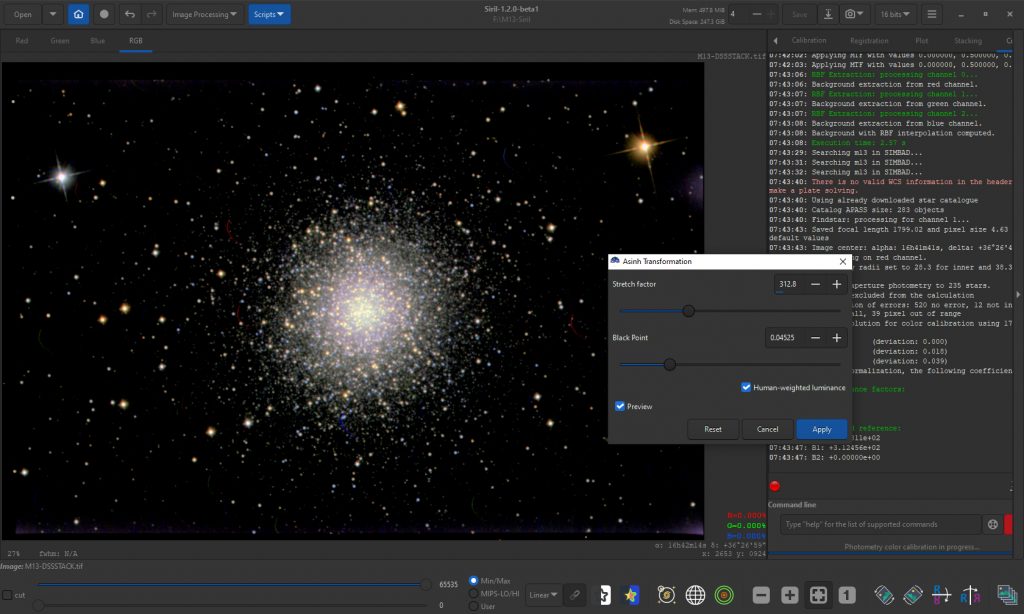
The ‘Stretch factor’ and ‘Black Point’ are then adjusted to give the optimum result – which I found somewhat amazing.
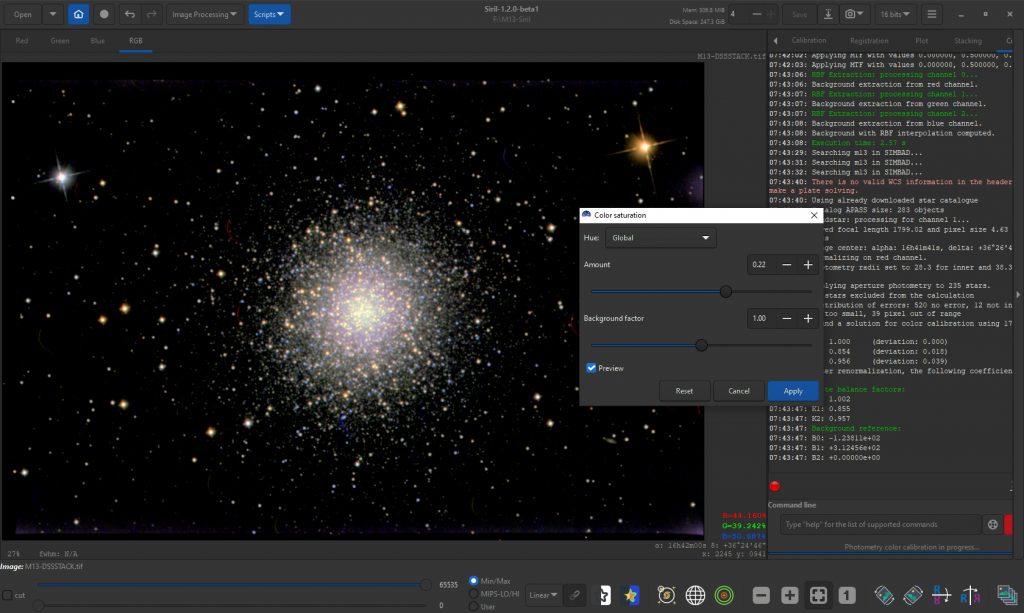
The ‘Colour Saturation’ tool could then be sparingly used
The Siril result is then exported to have some minor tweaks made in a standard image processing program such as Adobe Photoshop, Affinity Photo or the free program Glimpse.
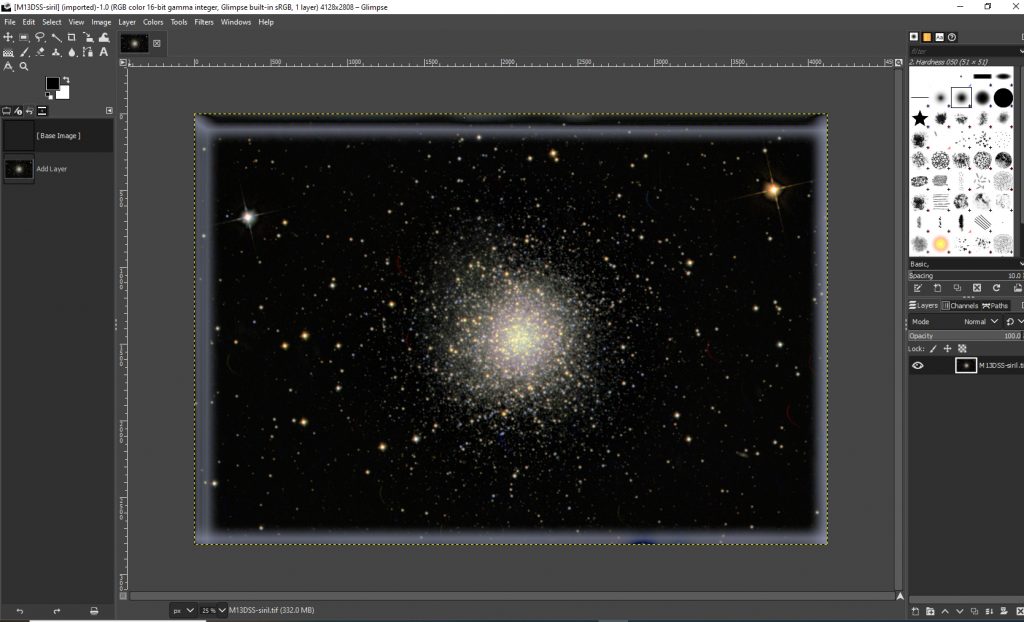
Making final adjustments in Glimpse
The saved image produced by Siril was imported into Glimpse for some final ‘tweaks’ as shown in the steps below.
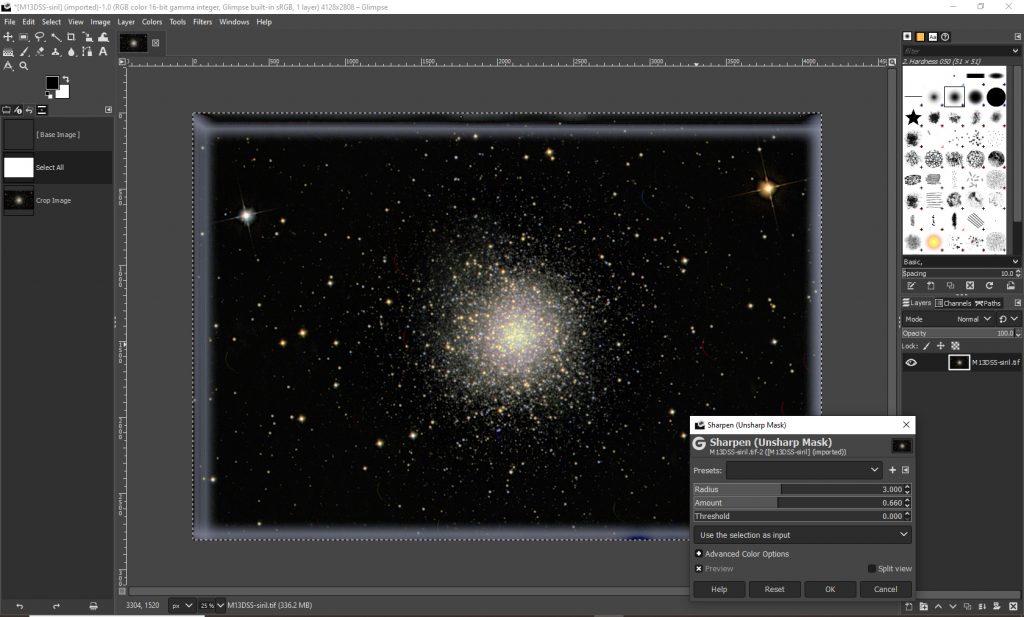
The ‘Unsharp Mask’ filter can be used to apply a little sharpening. There is a better method using the ‘High Pass Filter’ and I have shown how to use this at the end of the article.

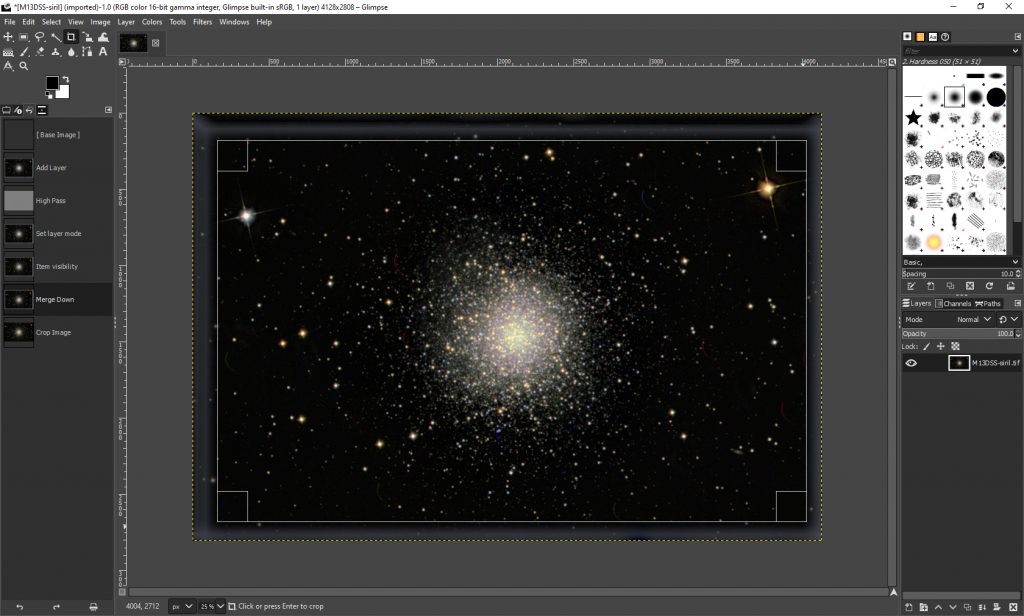
The image can then be cropped.
The final result:
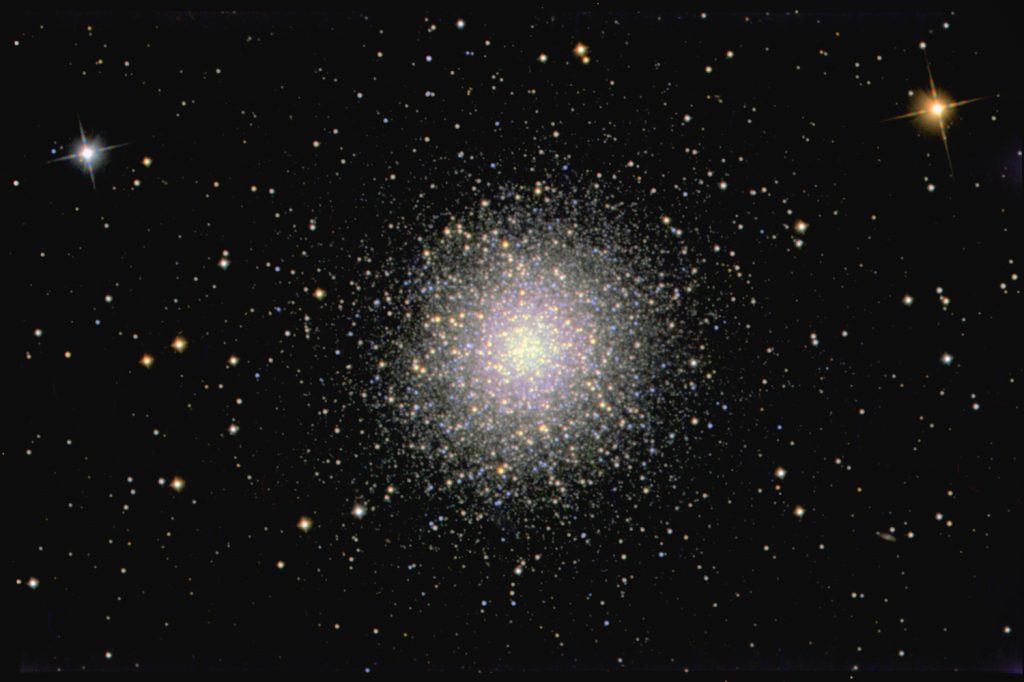
This result was really pleasing and, I think, one of the best that I have taken given that the total exposure was only 123 minutes and it was imaged from a Bortle class 5 light polluted location.
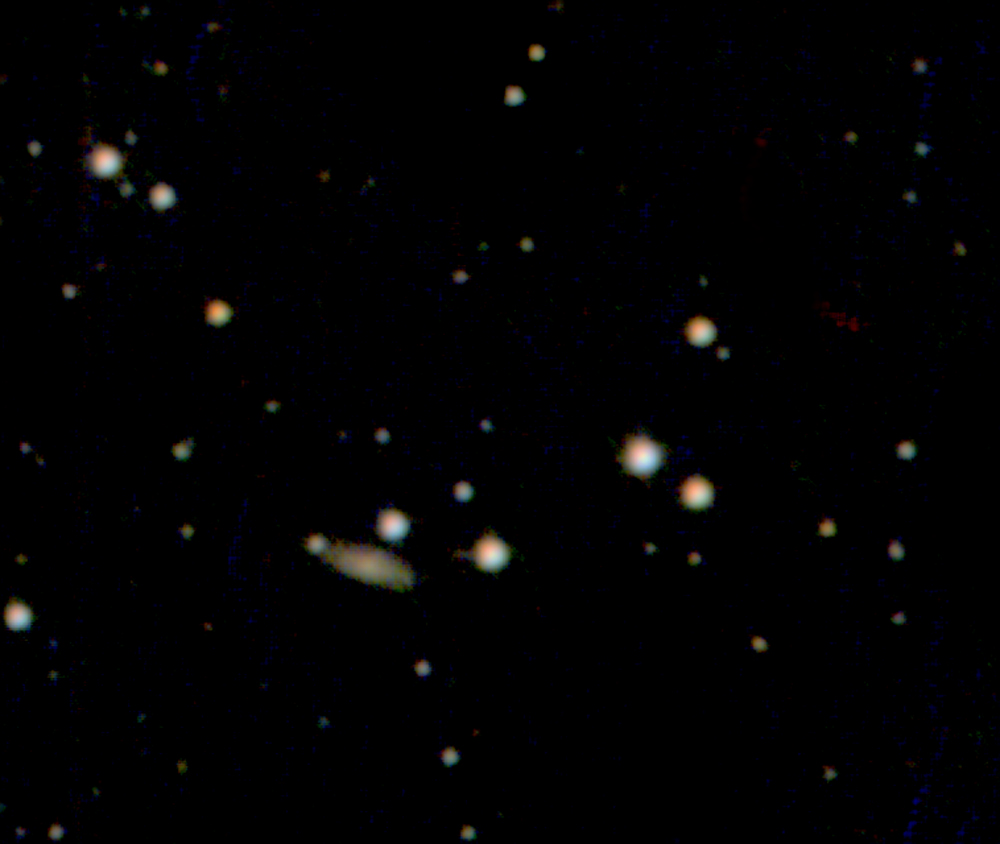
A monochrome version of the final image was plate solved in Astrometry.net which overlayed the image as seen below.

Very pleasingly, it showed the 15th magnitude Galaxy IC 4617 as seen in the 200% crop below.
Addendums: High Pass Sharpening and use of Deep Sky Stacker.
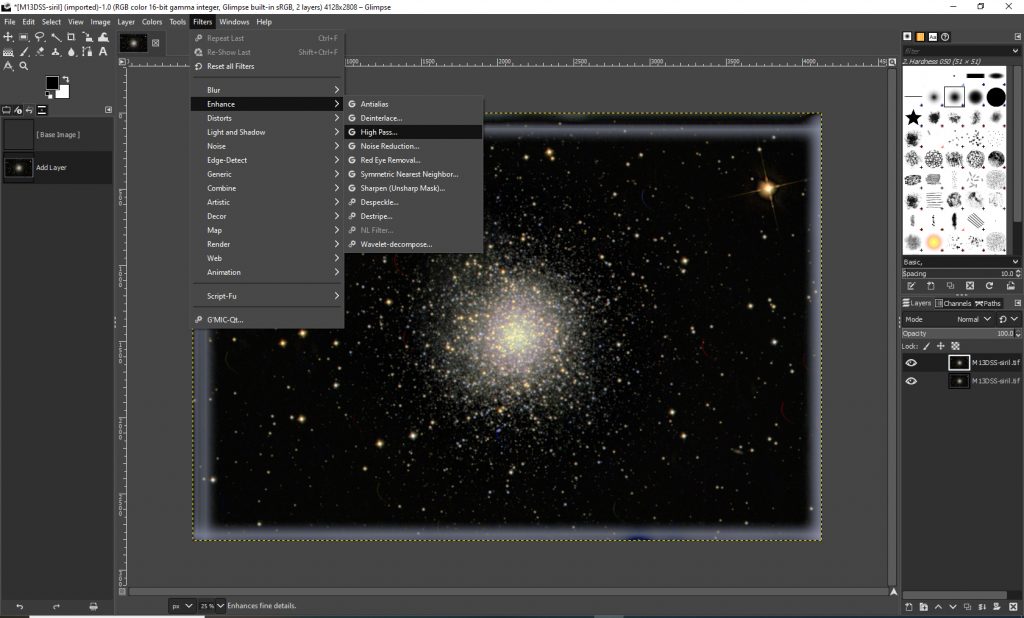
Sharpening using the ‘High Pass Filter’
This is regarded as a better way to sharpen an image than the Unsharp Mask filter. It is a two step process. First the image is duplicated and the ‘High Pass Filter’ (found in Filters drop down menu; Filters>Enhance>High Pass…) ) is applied with a very small radius, say, 4 pixels to the upper layer.
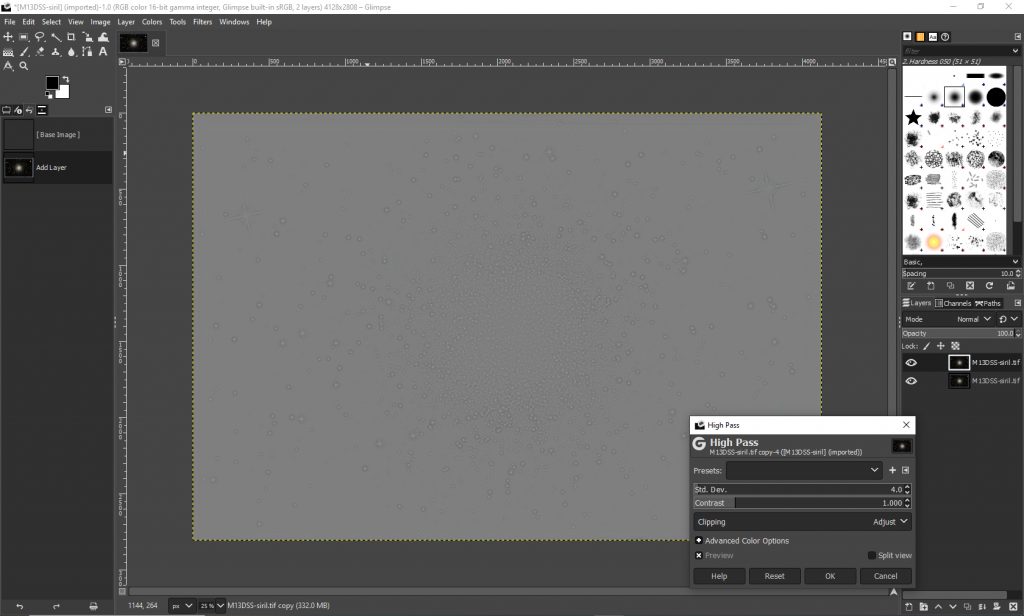
The layer blending mode is set to ‘Overlay’ and the opacity is adjusted to apply the desired amount of sharpening before the two layers are merged down.

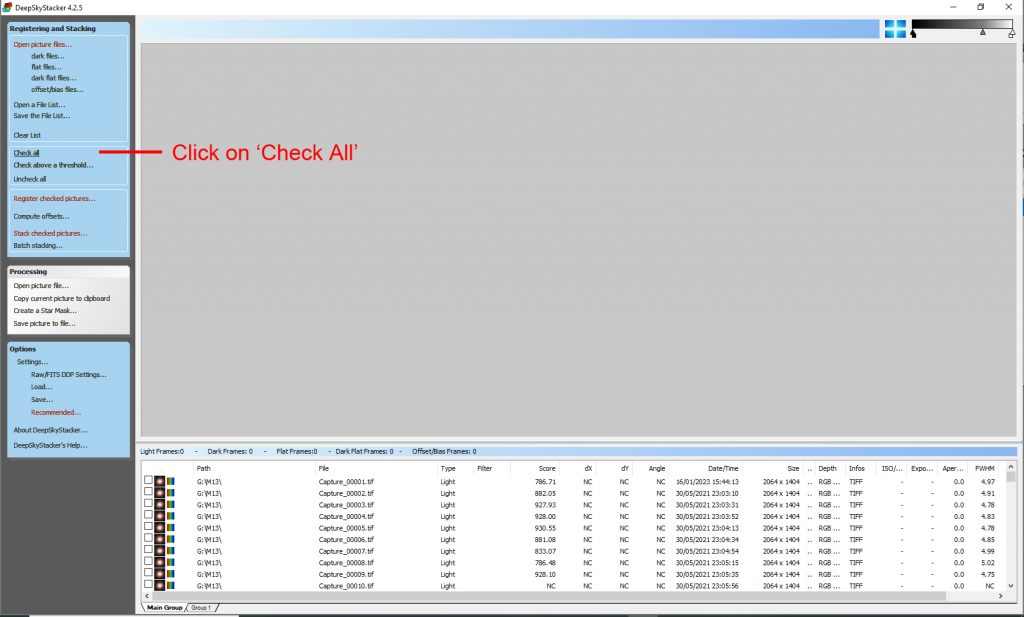
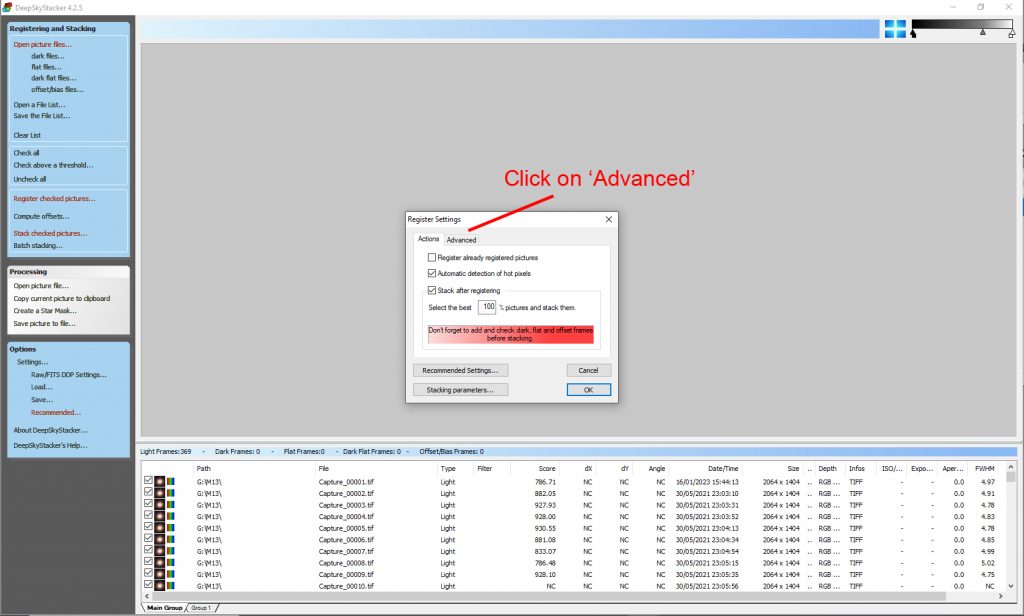
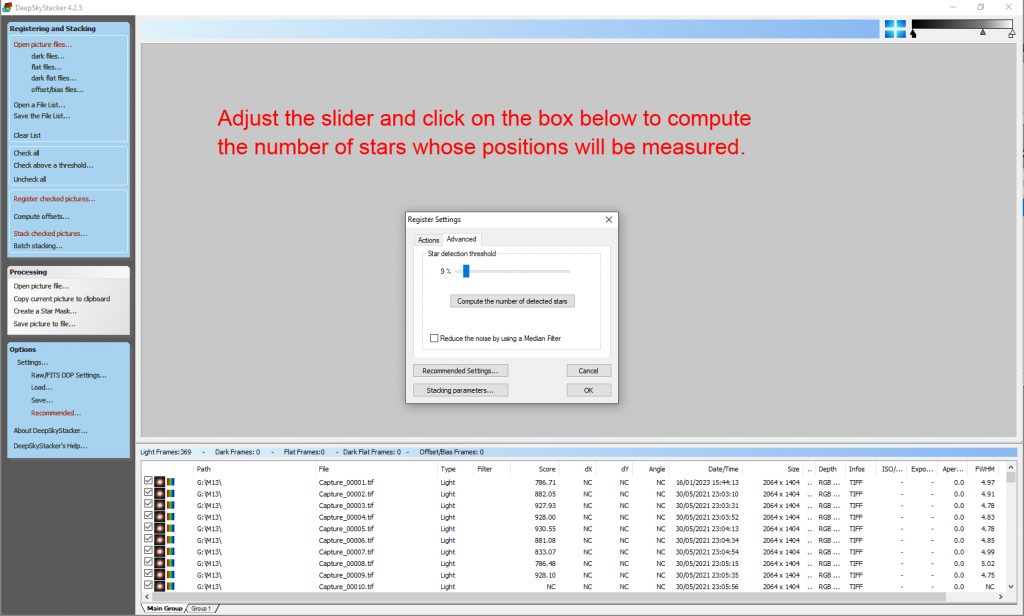
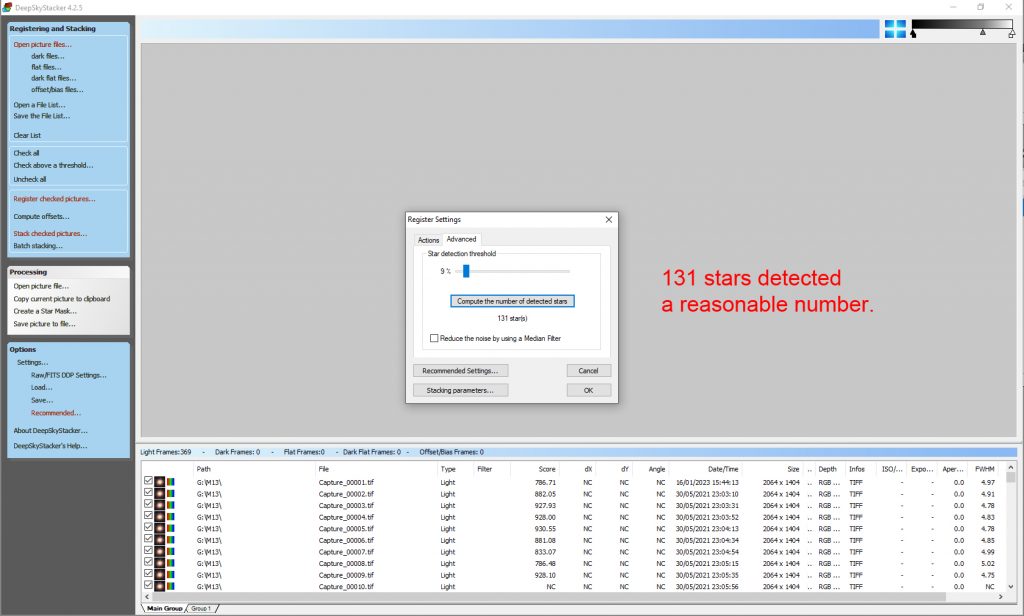
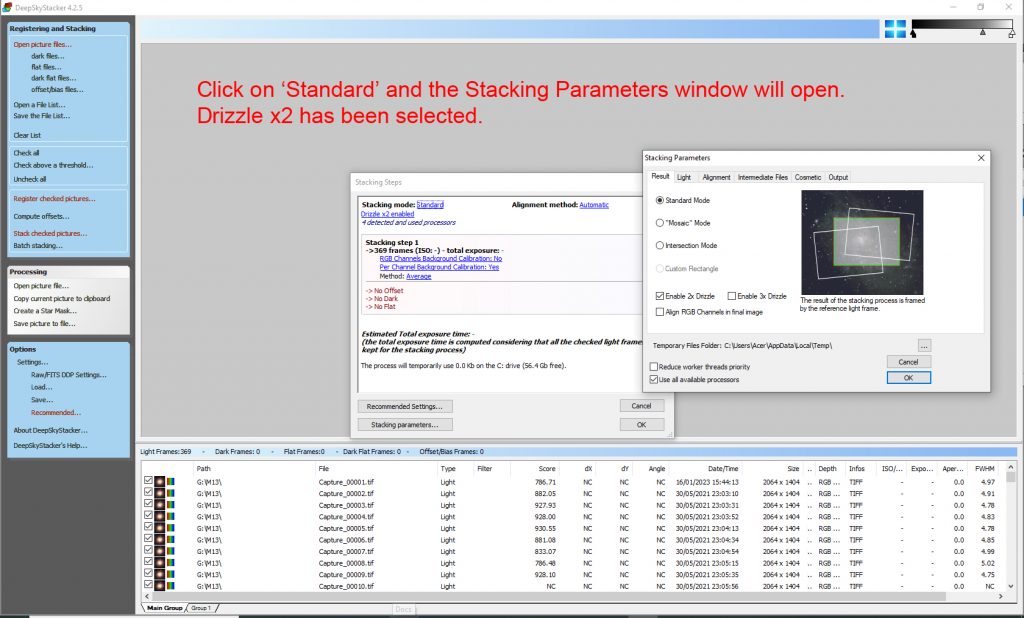
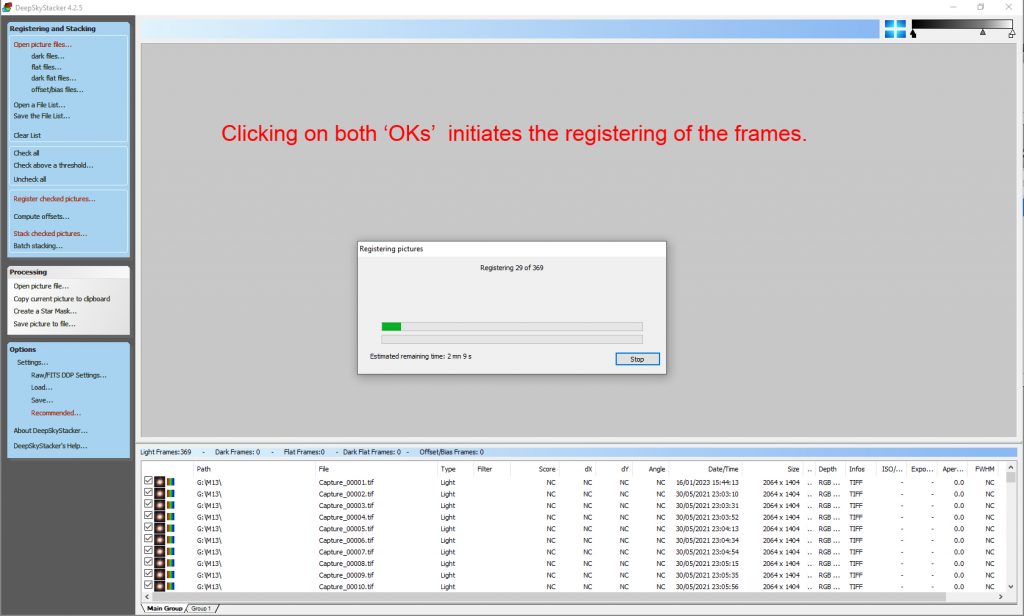
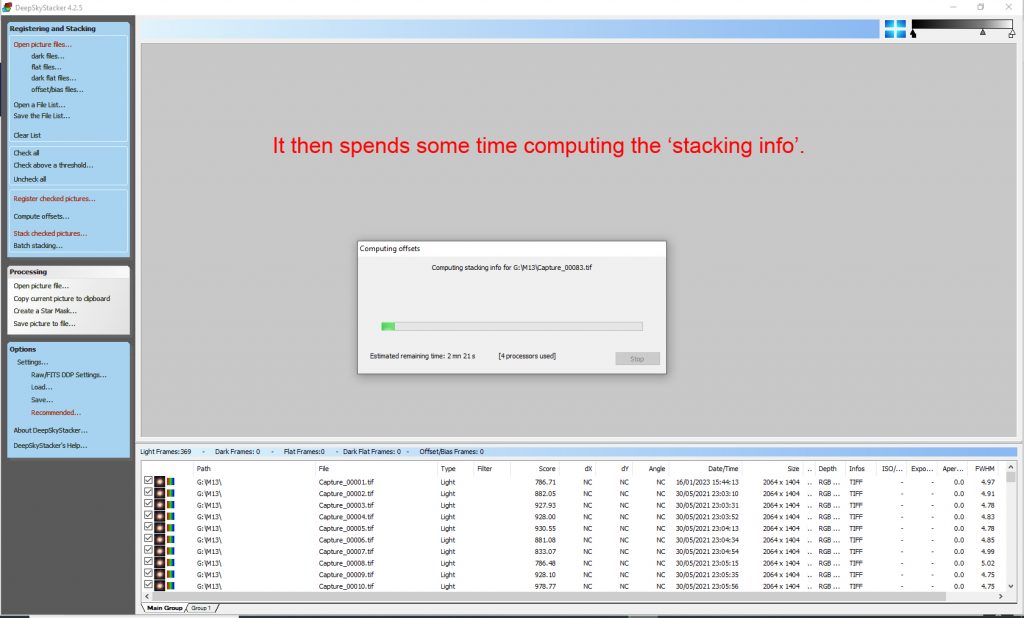
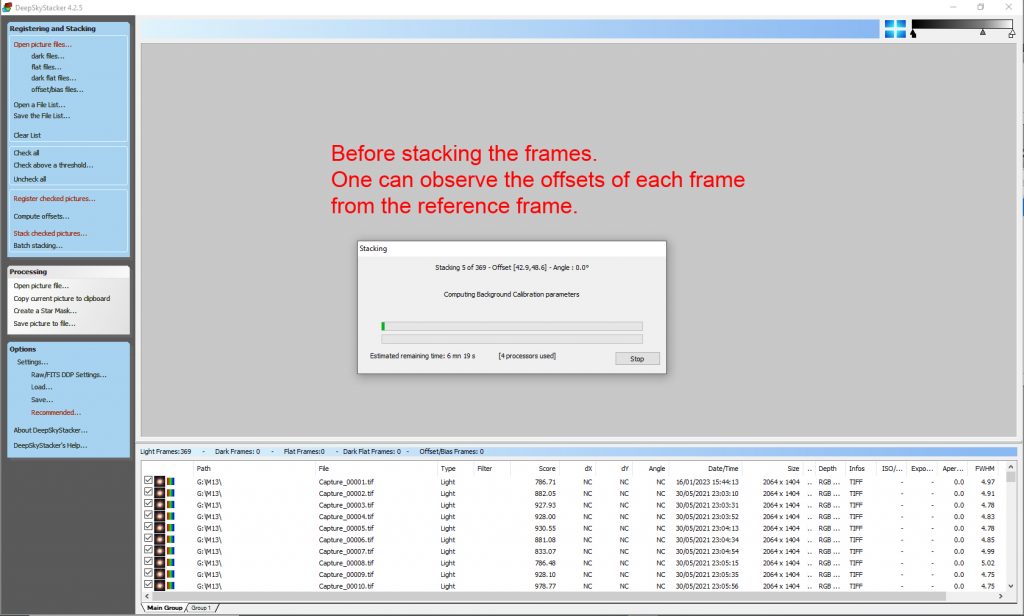
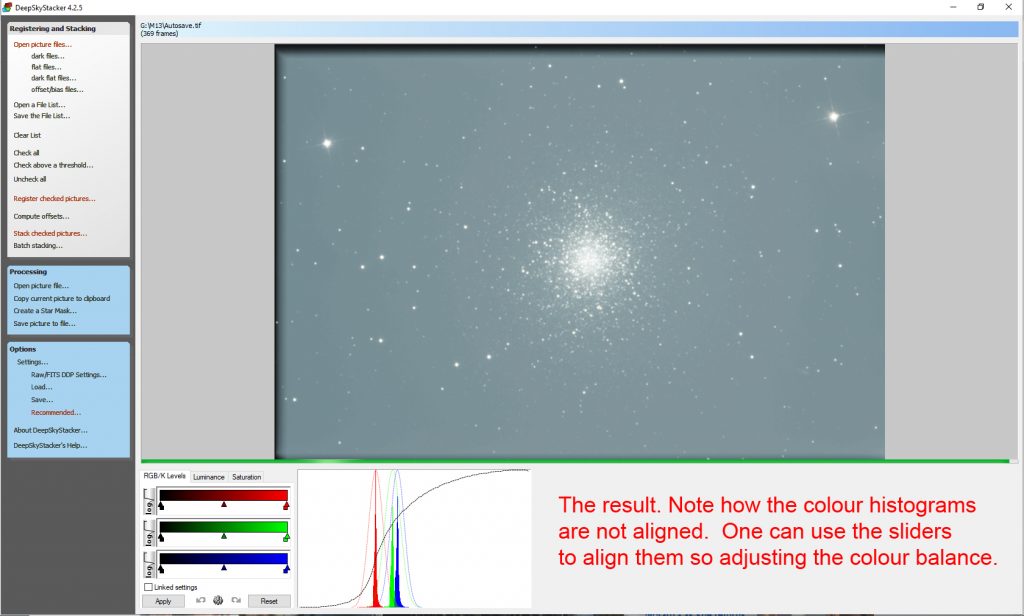
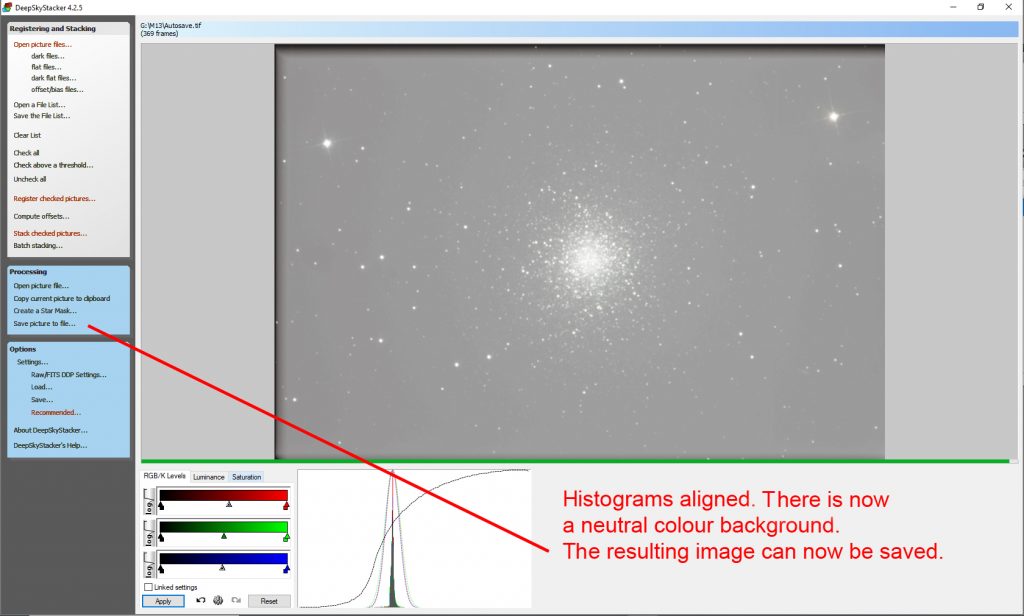
Aligning and Stacking the frames in Deep Sky Stacker
I hope the following screen shots will take you through the aligning and stacking process.