
[This is just one of many articles in the author’s Astronomy Digest.]
From this:
 Heavily light polluted image of M35 and NGC 2158 in Gemini.
To this:
 A crop of the region containing the two open clusters – M35 is the large cluster containing many blue giant stars along with two red giants. It lies at a distance of ~3,800 light years and is scattered over an area of the sky about the size of the Moon. NGC 2158, to its lower right, is around 9,000 light years further away than M35 and believed to be 2 billion years old..
For some years I have been using a technique in Adobe Photoshop to remove the Light Pollution from an astronomical image. Now that GIMP version 2.10 can handle 16-bit data it can provide a direct (free!) replacement to Photoshop. However the ‘Dust and Scratches’ filter that I have been using in Photoshop as part of this technique is not present in GIMP, but I have become aware of a downloadable set of filters that provides an alternative. This article shows how the process can be carried out in both programs.
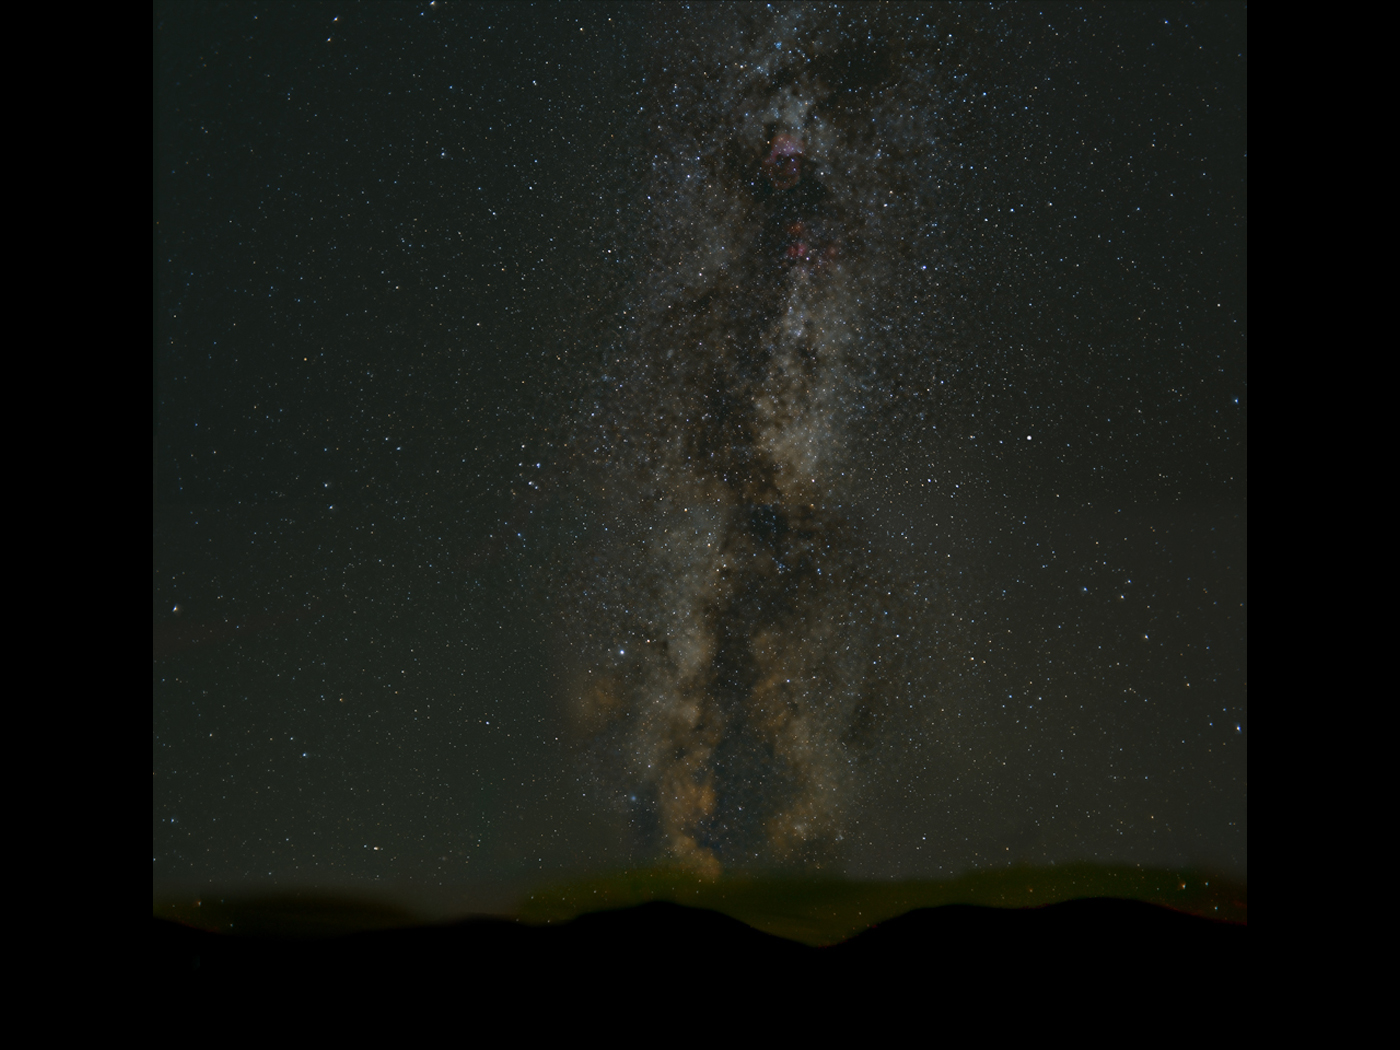
It will work under many, but not all, circumstances. If the objects in the image are star clusters, planetary nebulae or small galaxies within the field the there is no problem, but large nebulae such as the North America Nebula or galaxies such as the Andromeda Galaxy which fill an large area of the field of view are more problematic. Light pollution in wide area images of the Milky Way cannot be easily removed and imaging under dark skies without significant light pollution is really needed. It must be born in mind that any areas of brightness within the object such as, say, the outer arms of the galaxy M81, that are less bright than that of the light pollution itself cannot be imaged no matter how long the exposure or how big the telescope.
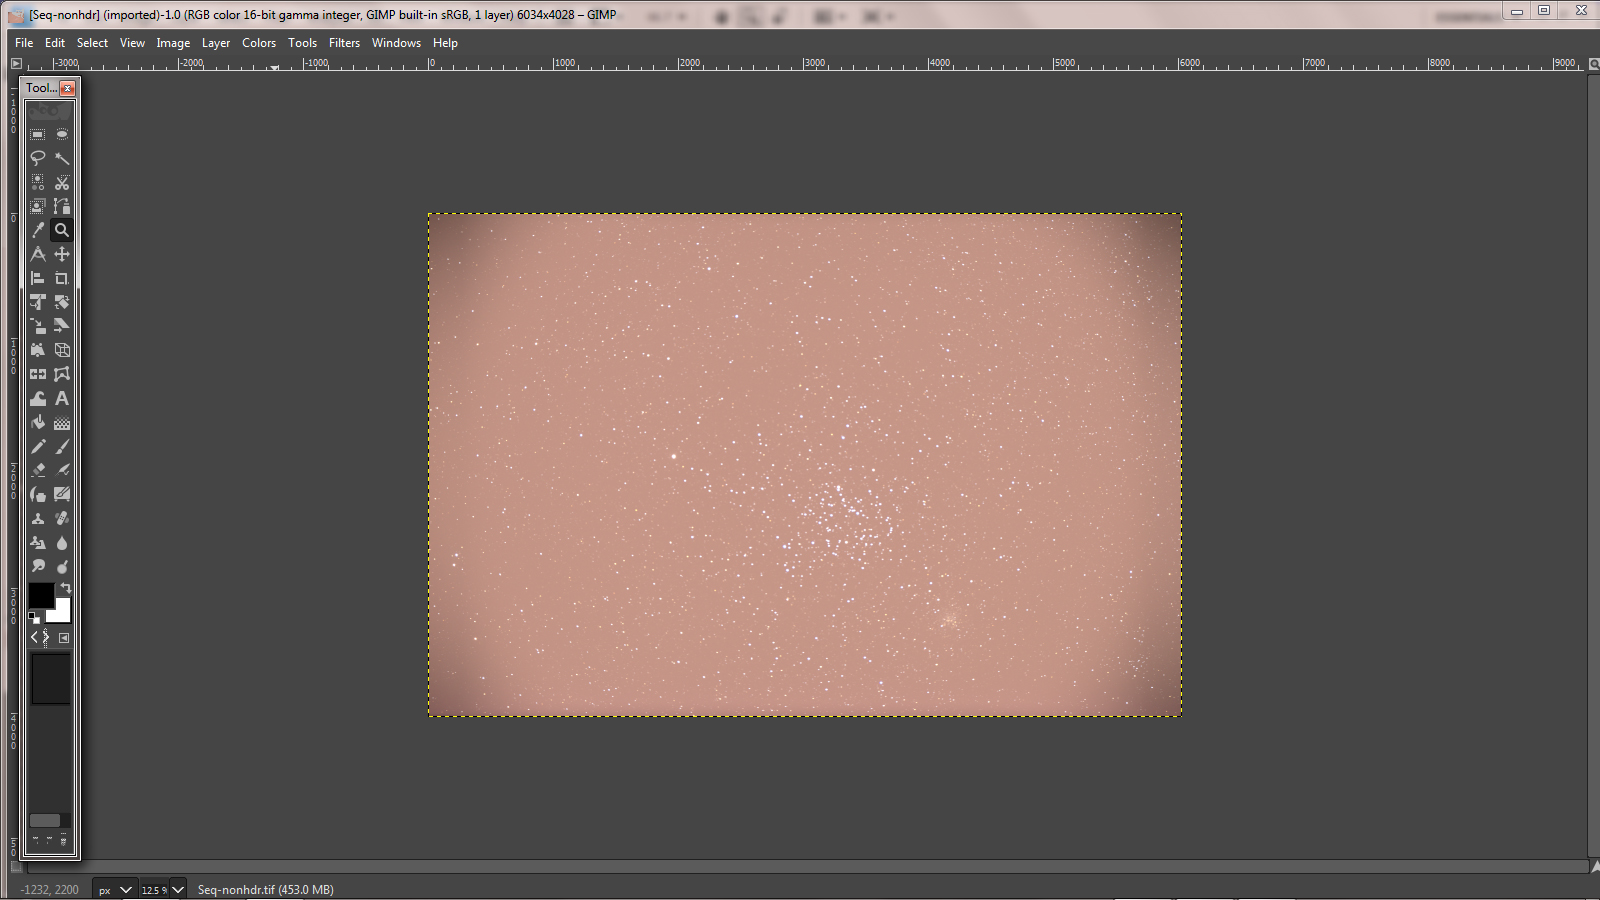
For both programs I am going to use a result of stacking 56 raw images of M35 and NGC 2158 in the Window’s free program Sequator (this is described in detail elsewhere in the digest). It shows significant and uniform reddish light pollution but with vignetting towards the corners.
Using Adobe Photoshop
The base image is loaded into Photoshop and duplicated to provide two identical layers. They can be seen in the ‘Layers’ window opened within the ‘Window’ drop down menu. Any actions take place on the top layer.
First the ‘Dust and Scratches’ filter is applied with a radius of ~30 pixels. The majority of stars disappear leaving evidence of some of the brighter stars in the two star clusters.

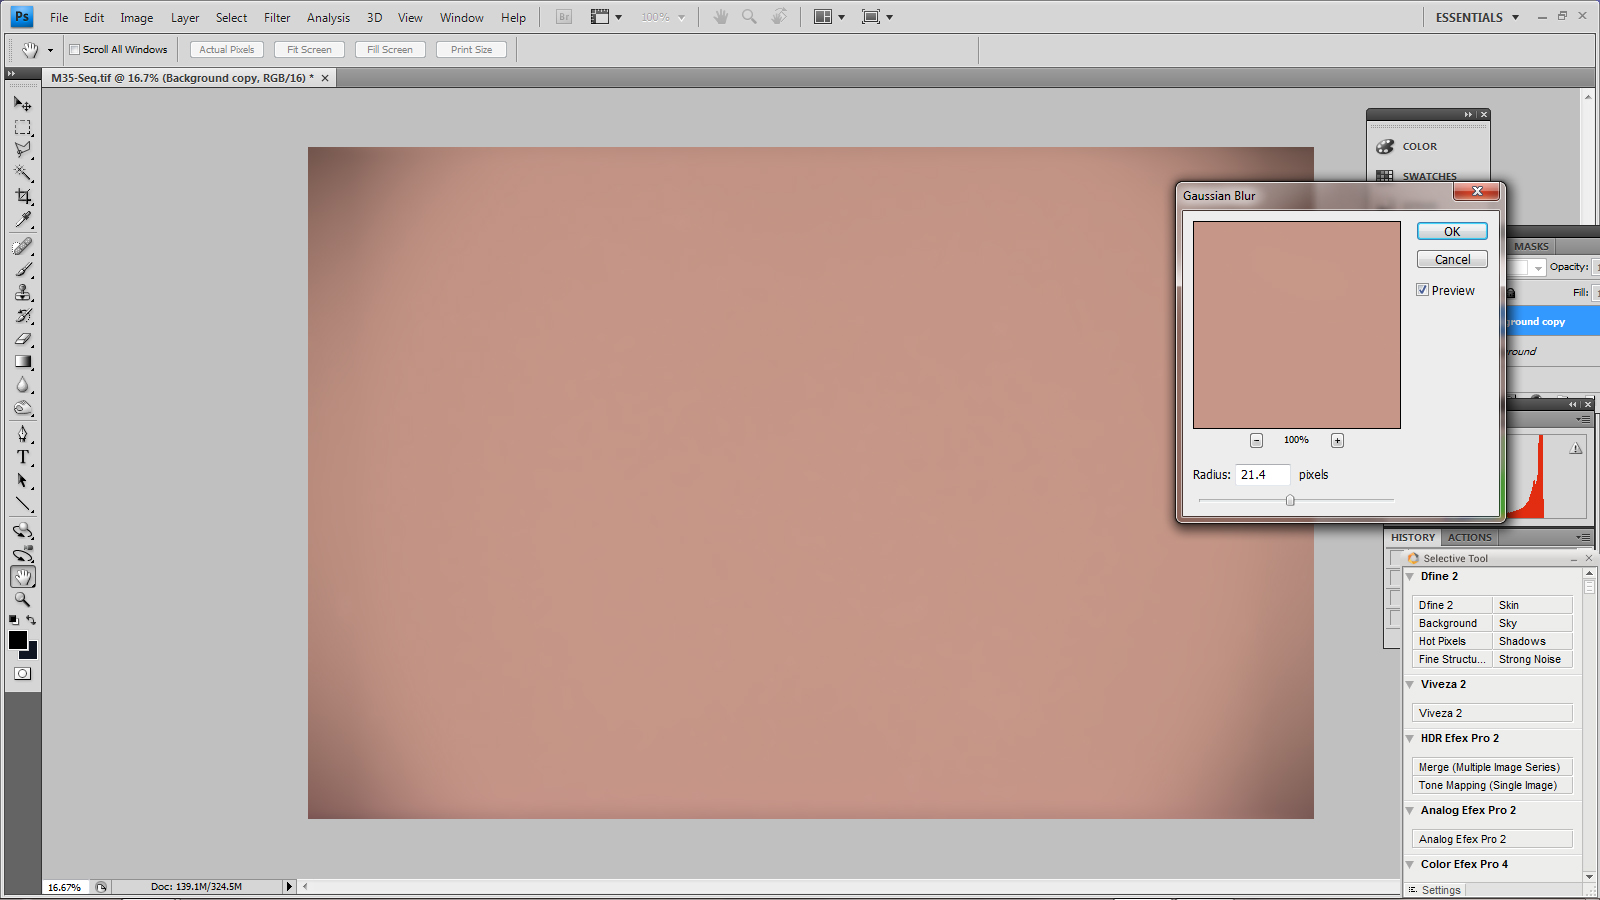
Using the clone tool, any bright regions such as, in this case, the brighter stars in the M35 and NGC 2158 clusters should be cloned out from nearby regions where the light pollution has a similar brightness. To smooth this further, a Gaussian Blur of, say, 50 pixels can be applied. There is now as good an image of the light pollution as can be made.
Finally the layer blending mode is set to ‘Difference’ and the two layers flattened. This has removed the light pollution from the image which can be stretched to bring up the fainter stars. It sometimes works best if this is done in two passes; first only removing 50% of the light pollution by setting the ‘opacity’ slider to 50% before flattening the two layers and then repeating the process with the opacity set to 100%.

Using GIMP
The first thing is to do is to download and install the set of ‘G’MIC’ filters found at ‘http://gmic.eu/gimp.shtml’. These will then appear at the bottom of the filters drop down menu.
The light polluted image should be loaded into GIMP
and the layer duplicated (‘Duplicate Layer’ within the ‘Layer’ drop down menu) to give two layers which can be seen when the Layers window is opened: in the ‘Windows’ drop down menu click on ‘Dockable Dialogs’ then click on Layers.
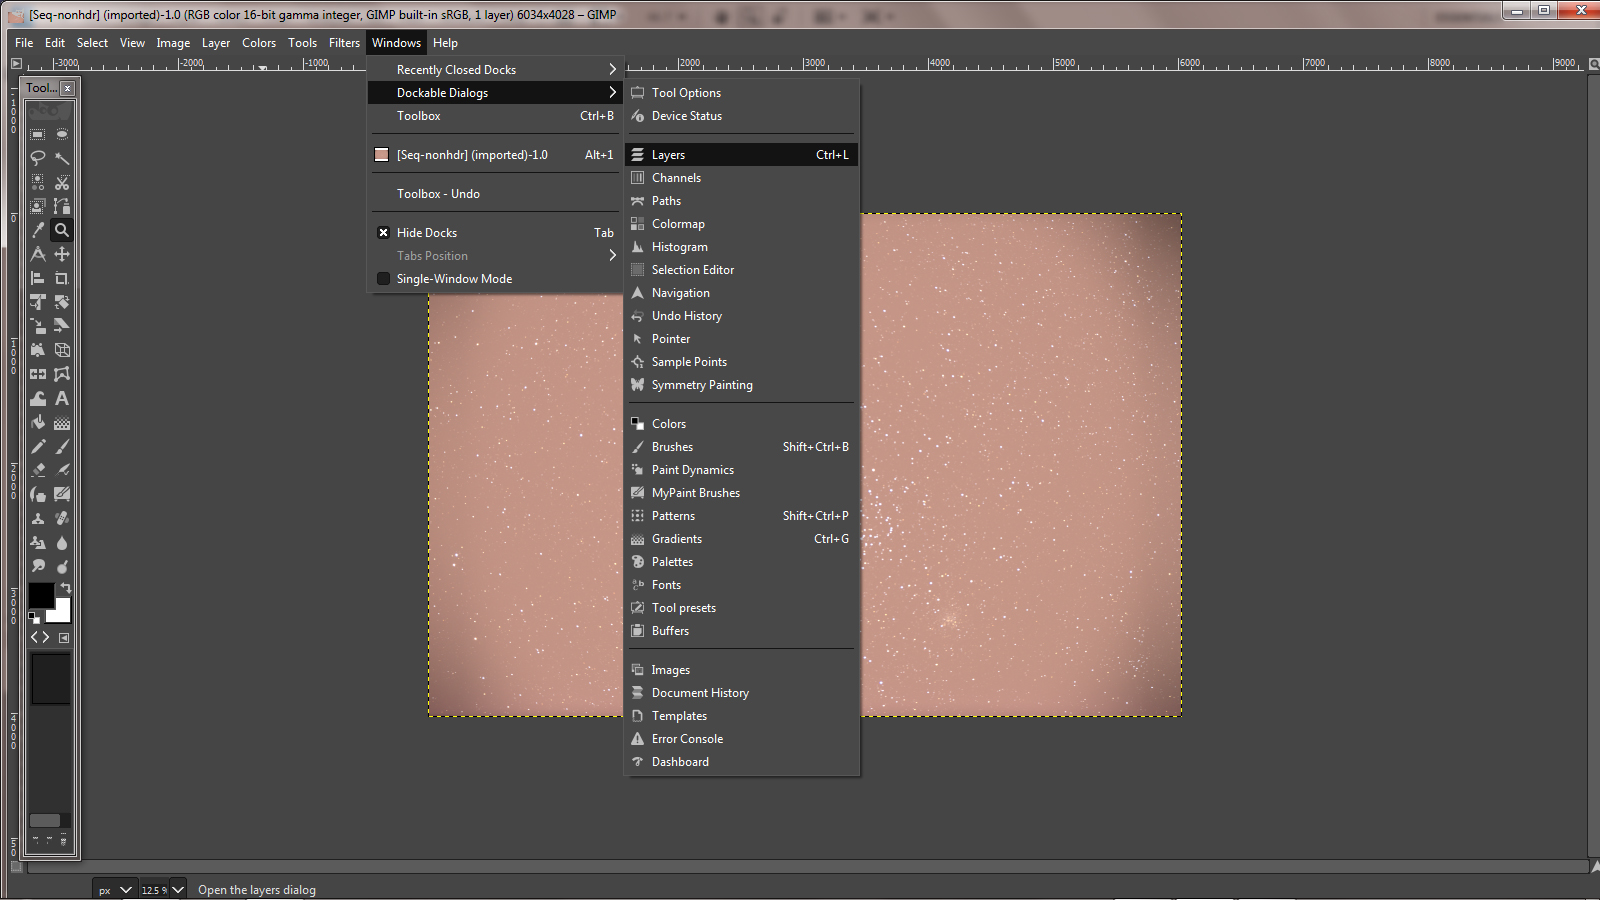 Selecting the ‘Layer’ Window.
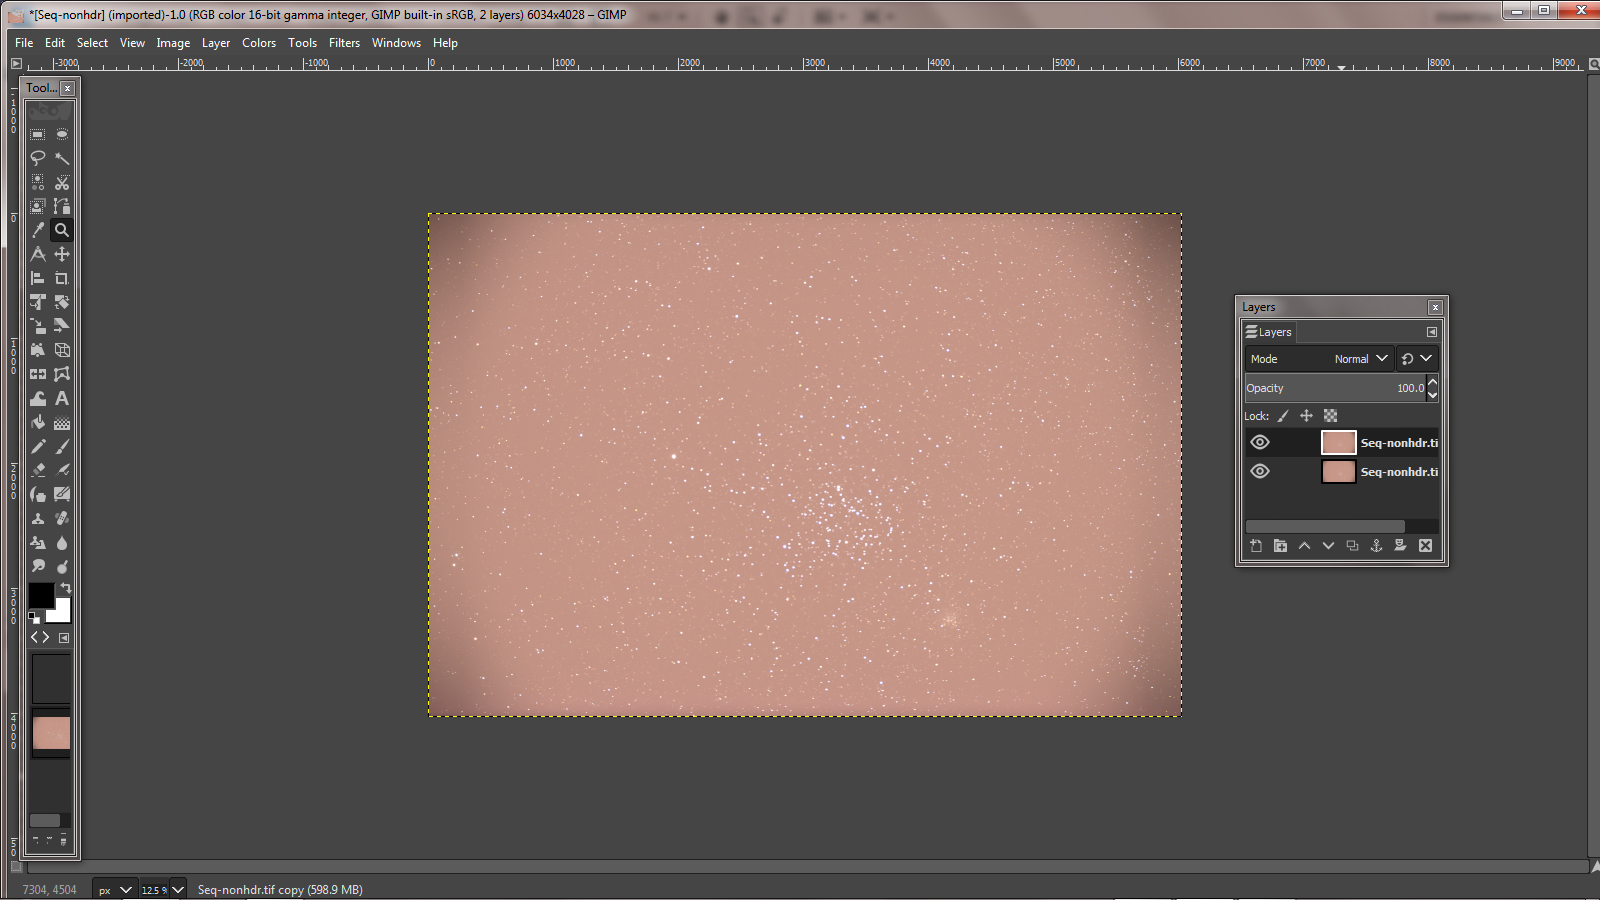 Two layers are seen.
Any actions will only apply to the top layer.
Clicking on ‘Filters’ will show the C’MIC tab at the bottom of the menu. Clicking on this will bring up its menu. Scrolling down will be seen a ‘Repair Image’ sub-menu.

Clicking on this will bring up its sub-menu. Scrolling down will be seen a ‘Repair Image’ sub-menu. Clicking on this opens up a further sub-menu. Well down, is a filter called ‘Remove Hot Pixels’. Clicking on this brings up its control window. It will be seen that the maximum mask size is 20 pixels.
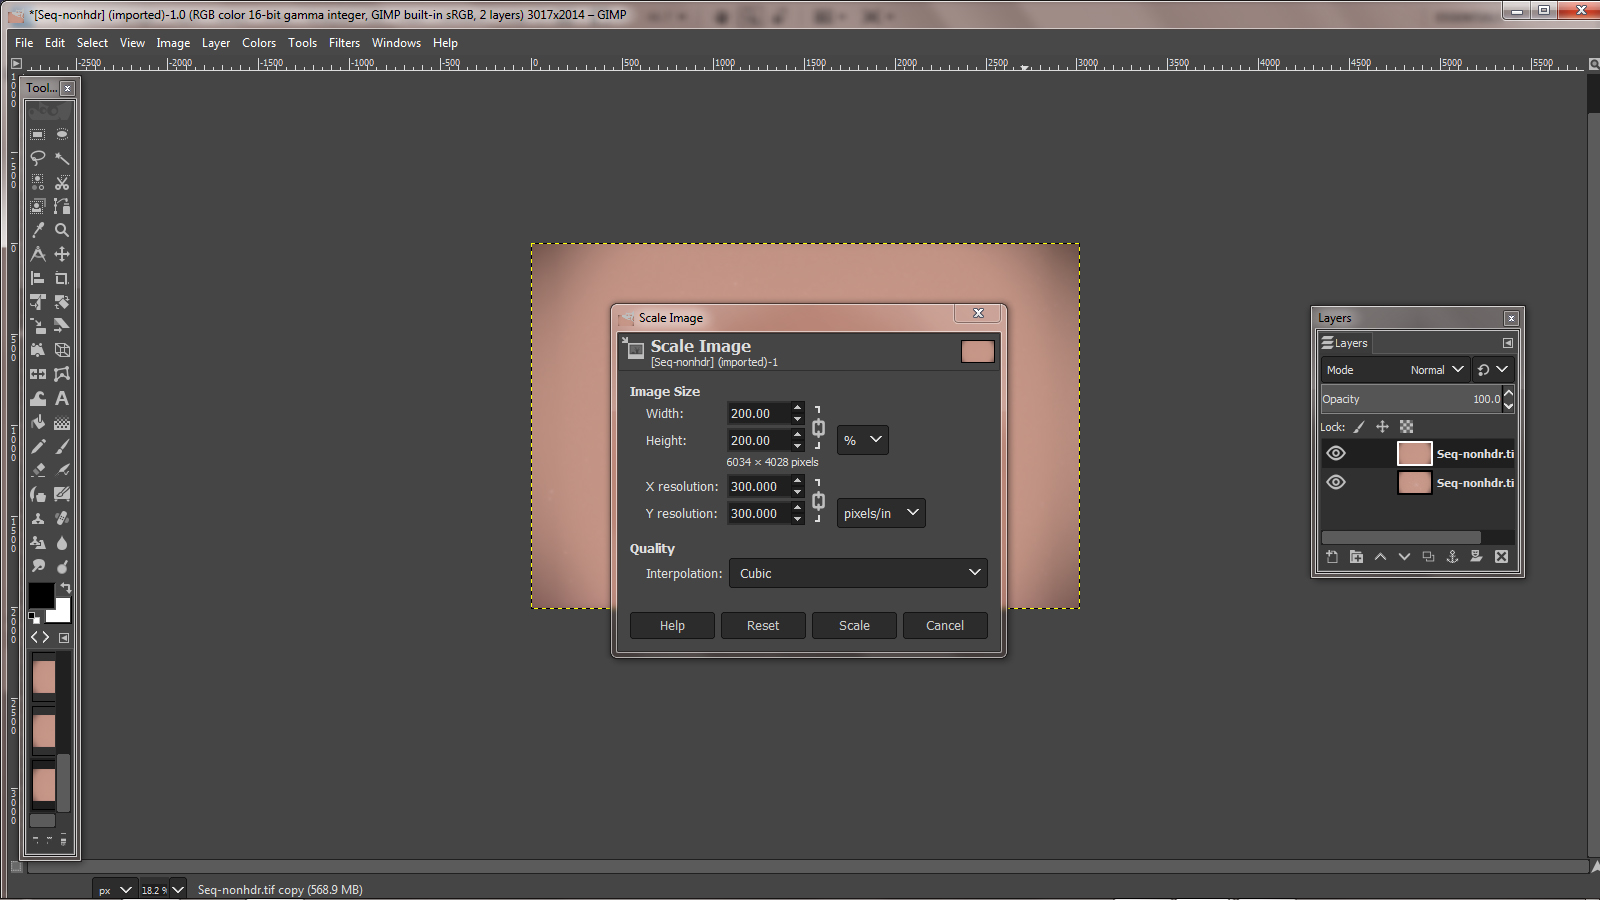
This is not really enough to remove the stars in a large image. So, before bringing up this filter the image should first be scaled by 50% (so reduced in size by one quarter) by using the ‘Scale Image’ function within the ‘Image’ drop down menu.
 The filter should then be applied with the maximum mask size of 20 pixels with a threshold of zero. It takes some time but, finally, the majority of the stars will have disappeared.
 The image should now be brought to its original size by scaling by 200%. (This process has had the effect of increasing the mask radius to 40.)
Scaling the image back to full size.
The result then looks virtually the same as when using the ‘Dust and Scratches’ filter in Photoshop.
 Most stars have been removed.
Using the clone tool, any bright regions such as, in this case, the brighter stars in the M35 and NGC 2158 clusters should be cloned out (using the clone tool) from nearby regions where the light pollution has a similar brightness. To smooth this further, a Gaussian Blur of, say, 40-50 pixels can be applied.

This is now as good an image of the light pollution as can be made. In the ‘Layers’ box the ‘Difference’ blending mode should be selected before going into the ‘Image’ menu and clicking on ‘Flatten layers’. (Why is this command not in the ‘Layers’ menu?)

The result is the original image with the light pollution removed which should be exported into the appropriate folder. It sometimes works best if this is done in two passes; first only removing 50% of the light pollution by setting the ‘opacity’ slider to 50% before flattening the two layers and then repeating the process with the opacity set to 100%.
The results from using Photoshop and GIMP were identical. In either program, the curves function could then be used to lift up the fainter stars in the image to give the final result seen in the cropped image at the head of the article.
If a nebulous region is at a high elevation then it is reasonable to assume that the light pollution might be uniform across the field. One can then blur the duplicated layer slightly and sample its colour away from any stars before painting this over the whole image. to give a uniform light pollution image.
If one can find a region where the nebula is dark such as the ‘Gulf of Mexico’ in the North America Nebula, then one can, again, blur the image of the duplicated layer somewhat and use the paint brush to sample the brightness within the Gulf region and then paint over the whole image to give a uniform light pollution field.
If, say, the Milky Way was rising out of the sea, one might hope that the light pollution (which would be greater towards the sea) might be uniform across the width of the field of view. If so, crop a full height region away from the Milky Way and then, without the ‘constrain proportions’ checked, reduce just the width to 1 pixel. (This averages the light across the crop.) Then increase the width to the full size of the image. This results in a totally smooth image of, hopefully, the light pollution which can be used to remove it from the image.
In the Kerry dark sky reserve, there was no skyglow (another name for light pollution) but green ‘airglow’ was present and this technique enabled it to be removed.
Return to Astronomy Digest home page