
[This is just one of many articles in the author’s Astronomy Digest.]
No lenses are perfect and brighter stars near the corners of the image can show a form of coma making them look like little seagulls. It is possible to make a brush tool which keeps the central part of the distorted star present, but overwrites the surrounding ‘wings’.
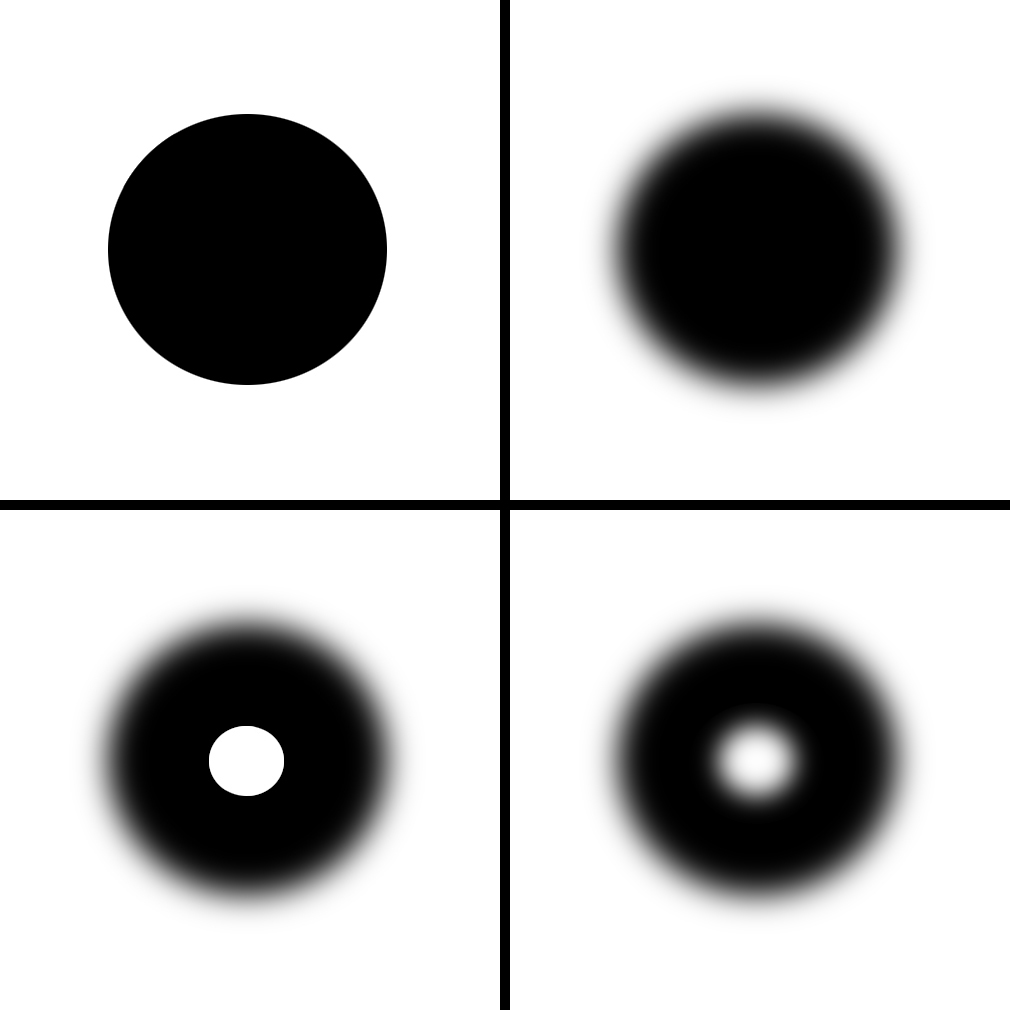
Making a star repair brush tool in Adobe Photoshop:
- Make a new blank image 500 x 500 pixels in size.
- Use the elliptical selection tool to make a circle ~300 pixels in diameter centrally within it and paint its interior black.
- Remove the selection and apply a Gaussian blur with a radius of 15 pixels to blur the black disk edges.
- At the centre of the black disk make a circular selection of ~80 pixels across and paint its interior white. Remove the selection.
- Make a circular selection surrounding this of ~150 pixels across and apply a Gaussian blur of ~12 pixels. This blurs the edges of the white disk and will define how ‘sharp’ the repaired stars will appear. If too sharp, the blur radius should be increased. Remove the selection.
- Under ‘Edit/ Define Brush Preset’ make this into a brush called ‘coma’.
If the coma brush is selected (with a double click so that the left and right square bracket ([ ]) keys can be used to control its size) one can copy from a blank region of the adjacent sky and paste over the star with an appropriate size.
Return to the digest home page: