
[This is just one of many articles in the author’s Astronomy Digest.]
These are used to carry out a first, approximate, alignment on a celestial object so that when viewing through the telescope with a low power eyepiece the chosen object will appear in the field of view. Notice that the title was not ‘Finder Scopes’ as the majority are no longer scopes! Let us have a look at the type of finder that are now available.
Red Dot Finders
These are now supplied with the majority of small telescopes. A pinhole sized red led is observed reflected by a semi-silvered mirror and appears as a red dot floating above the sky. The brightness of the dot can be adjusted to suit the viewing conditions. The brightness control usually acts as the on/off switch as well and I have often left the finder on so that next time I use the scope the battery is dead! One manufacturer sells a version that automatically switches off after a set time − this could save money in the long term! Some computerised scope will actually prompt you to switch the finder off after the initial alignment. The key aspect of these is that the position of the dot as seen on the sky does not change as the eye is moved − I have never quite understood how this works. Those that are supplied with most scope have a small circular aperture to look through. I have sometimes found that the silvering makes the sky rather too faint to make out the stars. There are also more sophisticated red dot finders that have a far greater viewing window and these are somewhat easier to use.

There are two variants of the red dot finder that are very well regarded. These are the ‘Telrad’ and ‘Rigel’ finders. In contrast to the red dot types, these ‘project’ concentric circles on to the sky and are, perhaps, easier to use. The more substantial Telrad lies along the telescope tube whilst the Rigel stands proud making it somewhat easier to place ones head behind. I have one of these mounted on my 300 mm telescope and it performs very well.
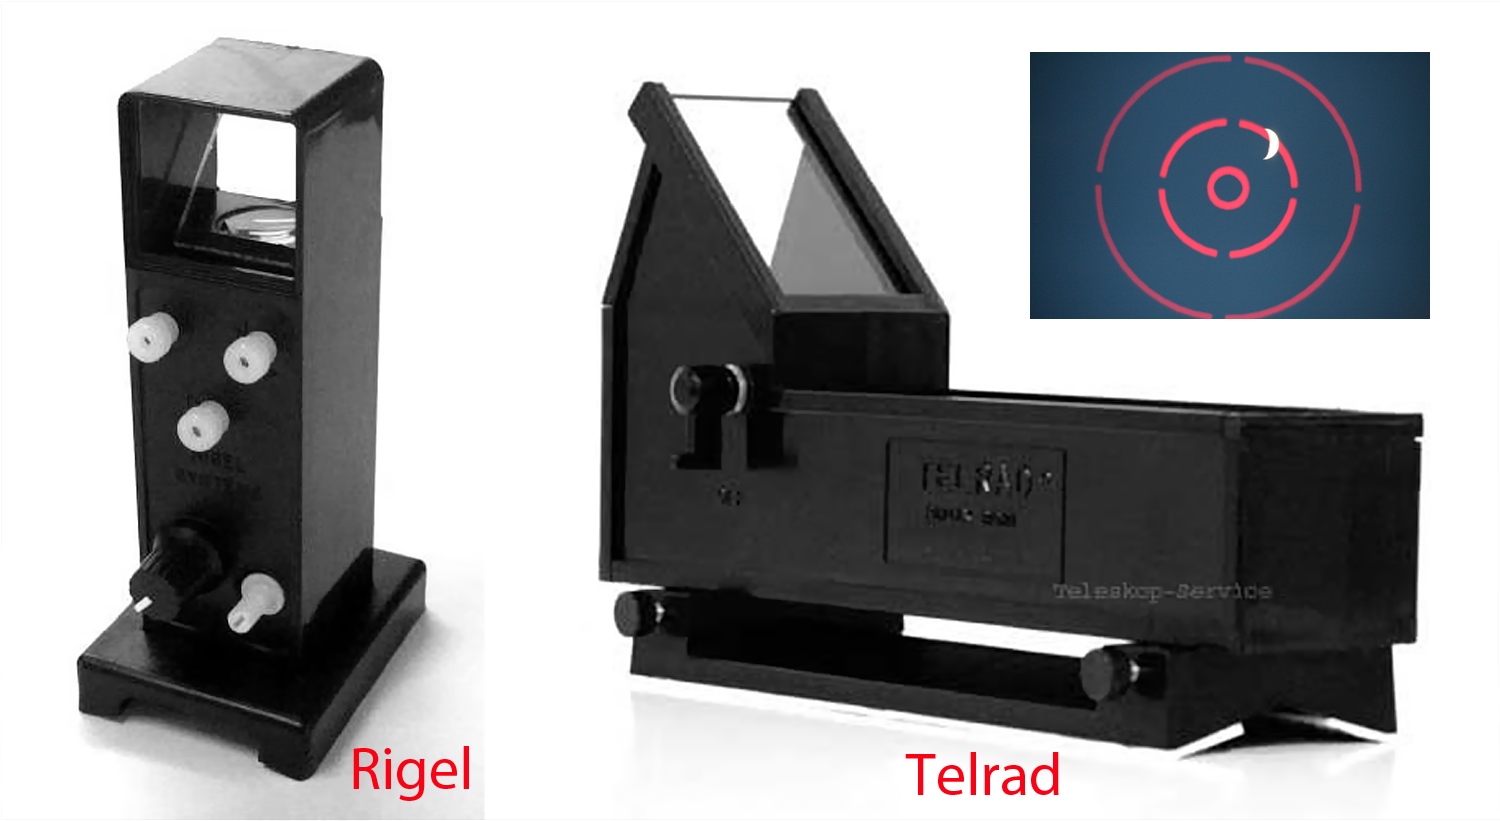
All these finders have adjustment screws to align them along the axis of the telescope. This process can often be best carried out in twilight – using a low power eyepiece with the telescope to centre the top of a distant tree, pole or church spire in the field of view. The red dot or circle can then be aligned on it. However, at night it is easy to find the Moon or, by sighting along the telescope tube, a bright star or planet.
Finder Scopes
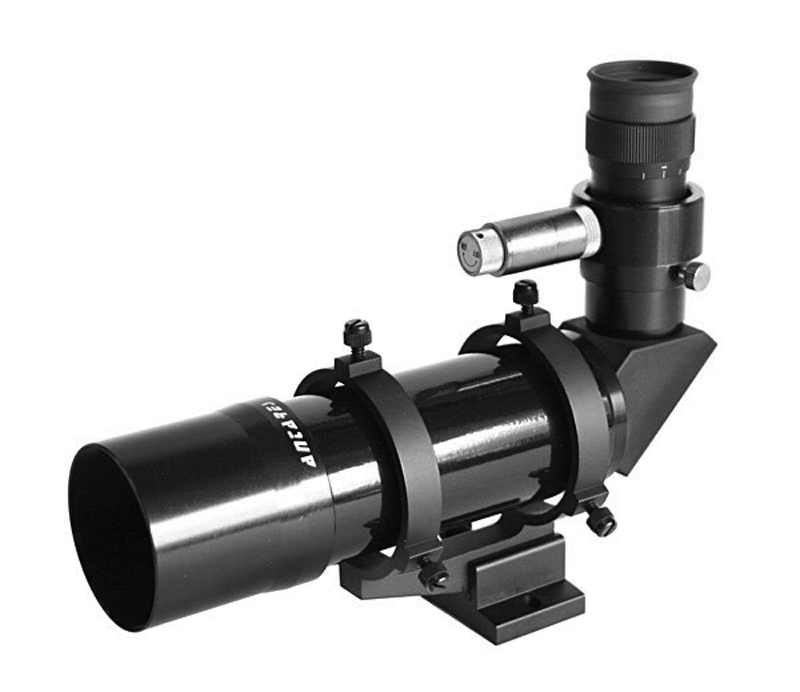
These now tend to be provided with larger and more expensive scopes and are essentially small refractors. They might be 6×30 or more commonly 8 or 9×50, so have a field of view of a few degrees, comparable to that of a pair of binoculars. They usually give an inverted image which take a little getting used to. In the image plane is mounted a glass reticule with etched cross wires which are used to align the scope. In our light polluted skies these can normally be seen, but will disappear under dark skies. One can usually centre the object in the field of view, but some have illuminated reticules which use a red led to proved just enough light to make the cross wires visible.
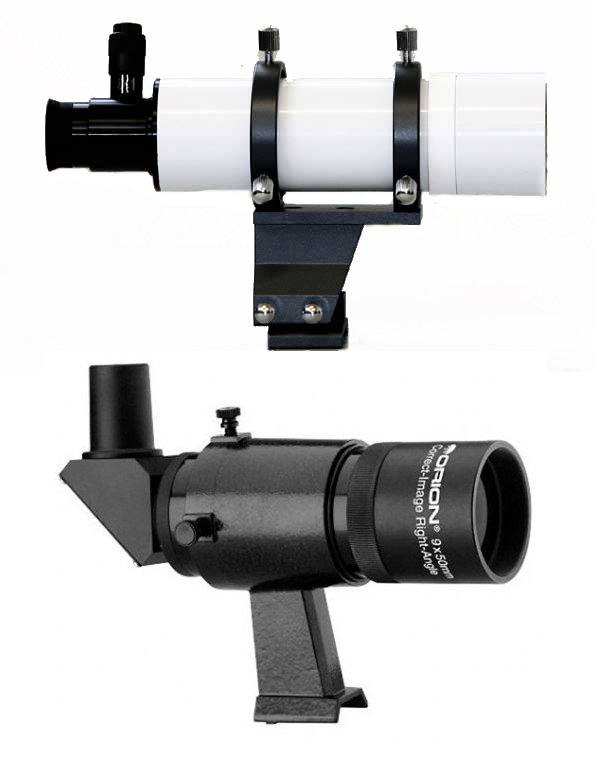
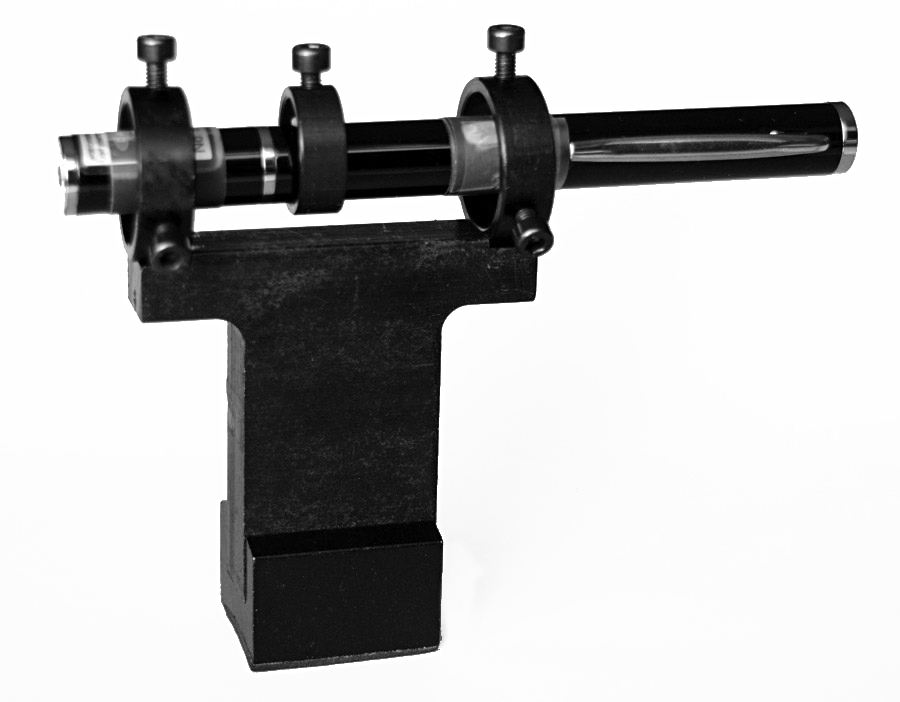
Until recently most such scopes have come mounted within two rings each with three adjustment screws to make the initial alignment (top image above) but many now come in a mount which has one spring loaded point of contact with the finder tube and two adjustment screws(bottom Image above). Some have a right angle prism so that one observes at right angles to the telescope tube rather than along it. Often this is more comfortable to use but those aligned along the tube make it easier to make an initial, approximate, telescope pointing. At somewhat over £100 pounds, one can even buy a finder scope giving an erect image and with an illuminated graticule!
Laser Pointer Finders
The most recent finder type uses a green laser pointer mounted in a pair of rings. These are very nice to use as it is not necessary to bend down and one can instantly see where the telescope is pointing. They must be used with care and are forbidden at star parties where the beam may be scattered into an astroimager’s telescope – they do not like green lines appearing in their images!
Some general comments
With the use of computerised scopes, finders are (hopefully) only needed for the initial alignment. This will use bright stars or, in the case of some Celestron scopes, even the Moon and planets. A simple red dot finder is then really all that is necessary. When using a non- computerised mount and ‘star hopping’ a 9×50 finder scope can be very useful and, when using my 4 inch refractor on an equatorial mount, I mount a red dot finder in parallel with the finder scope. The red dot finder gives a rough alignment and then, when observing a faint object, the finder scope can be used to give a more precise alignment. If one has a low power 2” eyepiece and one of the many 80 mm refractors, the field of view can be up to 4 degrees across and so the scope can act as its own finder.
I use my 80 and 102 mm refractors on an iOptron computerised Alt/Mount which can be precisely levelled. Once aligned roughly south, I can choose a bright object (say Jupiter) and simply ‘goto’ it. The elevation (altitude) should be correct and so only the azimuth will be incorrect. A quick look to see if the scope is pointing either to the right or left of the object allows me to slew in the appropriate direction and the object simply comes into view − even with a medium power eyepiece. No finder is required! (I really am beginning to like Alt/Az mounts!) When using a 127 mm refractor on my AP Mach 1 mount which I have accurately aligned on the North Celestial Pole with my QHY PoleMaster (see review elsewhere in this digest) the object will virtually always appear in the first images taken with my DSLR and CCD cameras and this too has made a finder redundant.