
[This is just one of many articles in the author’s Astronomy Digest.]
The Ritchey-Chrétien optical design is a form of Cassegrain telescope designed to eliminate coma (which is suffered by standard Schmidt-Cassegrains) and provide a relatively large field of view. To achieve this, in a RC telescope the primary and secondary mirrors are hyperbolic in shape. Since there are only two mirrors, they have no spectral dispersion or chromatic aberration and, as there are only two optical surfaces (Schmidt-Cassegrains have 4), there should be less degradation of the wavefront passing through the telescope. Using no lenses (which also scatter some light), they can cover a wider part of the visible and Infrared spectrum. Ritchey-Chrétien telescopes also give a flatter field than a SC as the secondary mirror has less curvature and thus a lower amplification factor – typically 2.7x rather than 5x. Their focal ratio is typically f/8 rather than f/10 for a Schmidt-Cassegrain.
However, to give a large un-vignetted field of view, their secondary mirror has a large, ~47%, diameter obstruction. This will reduce the “micro-contrast” of the image by taking light away from the central Airy Disk into the surrounding rings. Thus these telescopes are, perhaps, better optimised for DSO imaging rather than for visual use. A classical Cassegrain or f/6 Newtonian with their far smaller secondary mirrors will be better for visual use, especially for planetary viewing. But that is not to say that they cannot be used visually or for planetary imaging and the website: “https://tejraj.com/rc-8inch-ota-telescope.html” contains some superb planetary and lunar images that show that the Ritchey-Chrétien can be a very competent planetary imaging telescope. As it has no corrector plate and an open tube, cool down times will be less than that of a Schmidt-Cassegrain and dewing will be far less of a problem.
It is thus not surprising that many professional telescopes (including the Hubble Space Telescope) use the RC design. The first RC telescope, built in 1927, had a diameter of 24 inches and this was followed by a 40 inch instrument for the United States Naval Observatory. For many years smaller RC telescopes have been made for University Observatories and affluent amateur astronomers by RC Optical systems but these have been beyond the reach of most amateurs.
However, Ritchey-Chrétien telescopes can now be bought for reasonable sums made by a Taiwanese Company, Guan Sheng Optical (GSO). These are sold under a wide variety of brand names. The 6 and 8 inch telescopes are mounted in solid tubes which can be either made of steel or carbon fibre. Some have 96% and some 99% reflectivity mirror coatings so variants can be bought at a range of prices starting at around £450 for the 6 inch model and £950 for the 8 inch model.
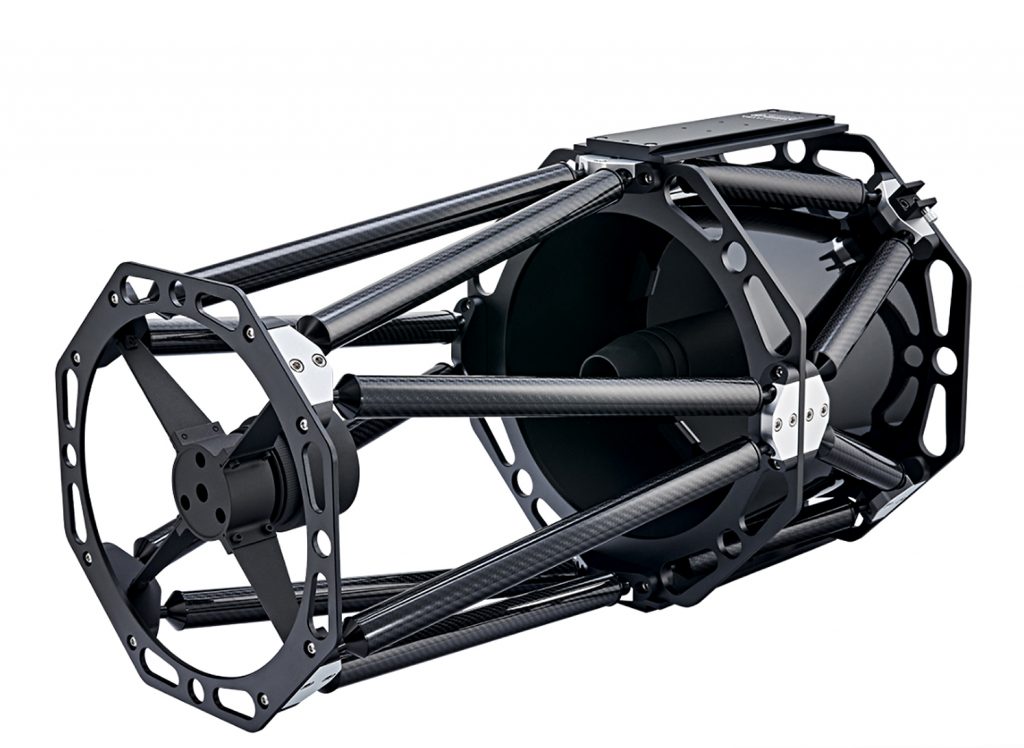
The 10 inch models can be obtained with either a solid steel or open truss tube construction at around £2,500 or £2,800 respectively. A 12 inch steel tube model is available for around £3,000 with an open truss model for £3,800. A colleague has the Stellar Lyra 10 inch truss tube RC which looks very professional. It gave superb views of the heart of the Orion Nebula at a star party in April 2022.
Baffle Tube Problem
It is now well known that the baffle tubes in the earlier GSO RC telescopes are too short and can let in stray light. Happily there is now a simple solution. First Light Optics now sell baffle extension tubes for all GSO telescopes costing from £25. The latest versions have a tapered extension tube added to remove the problem so one will not be needed. In mine, the tapered extension screws into the initial section.
My RC-8
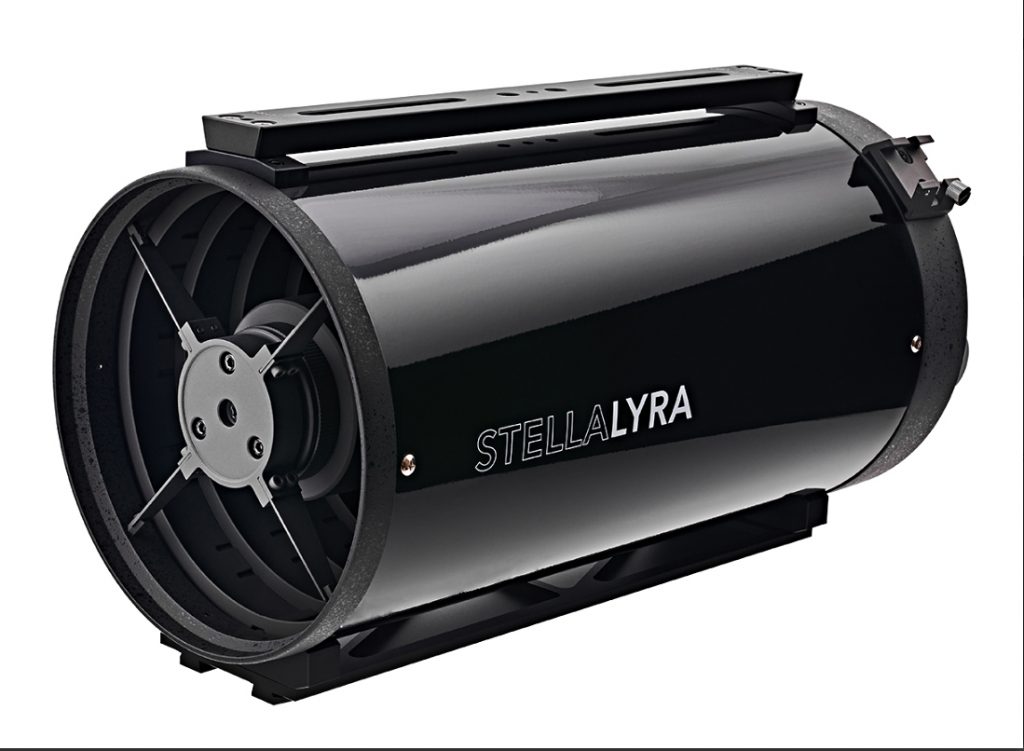
In September 2021 I was able to acquire a Stellar Lyra 8 inch RC (sold by First Light Optics) having a steel tube and 96% reflectivity mirrors. Pleasingly, it came with both an Astro Essentials x0.75 focal reducer and also a tilt adjuster to ensure that the camera sensor can be accurately aligned on the image plane. The focal plane is well away (around 25 cm) from the rear of the telescope tube and so a set of three extenders are supplied to be placed in front of the focuser and so enable it to be mounted as far to the rear as possible to help reduce any droop and minimise the use of any further extenders beyond the focuser. This large back focus gives plenty of room for a filter wheel if a monochrome camera were to be used along with off axis guiders etc., but it does produce a real problem. It is virtually impossible to balance the scope if an astro camera is to be used without a star diagonal (as it should be). I have had to place a 1kg weight at the front of the optical tube to enable the telescope to be balanced. First Light Optics sell a Baader ‘Dovetail Bar Levelling Counterweight’ with two types to fit on either a Vixen or Losmandy rail. A single 1 kg weight included and a further weight can be purchased if required.
The focuser is a “Steel Track” design which can support a greater camera load than a conventional Crayford focuser. The focal length of the telescope is 1,600 mm at f/8 and when using the x0.75 focal reducer this reduces to 1,137 mm at f/5.6 – quite useful for imaging. The interior is painted a matt black and is well baffled to maximise the “overall contrast” of the telescope. Two full-length dovetail plates are mounted on opposite sides of the telescope tube; one Vixen style and the other Losmandy style – a nice feature.
The first task having acquired a Ritchey-Chrétien is to check and perhaps adjust its collimation. By all accounts, this is a rather tricky process. One reason why it is more difficult than for a Schmidt-Cassegrain is that a Schmidt-Cassegrain uses a spherical main mirror so it does not need to be precisely parallel to the secondary whereas using an RC with two hyperbolic mirrors this is really important. Looking on the WEB, there are many ways to carry this out using a variety of collimation tools. I have outlined my experiences with this scope in an article in the digest ‘Experiences with collimating a Ritchey-Chrétien Telescope” and have managed to achieve excellent collimation using just a Cheshire Eyepiece.
The next task, which can be largely carried out in daylight is to find the optimum focus position for the camera using the provided extenders. I had to use all three of the extension tubes and the accessory sensor tilt adjuster before the focuser. The balance point of the telescope and camera is then close to the rear of the tube assembly which means that rear of the camera is some 12 inches below the attachment point.
Performance testing
Articles about the Ritchey-Chrétien Telescope say that it is vitally important that the spacing between the two hyperbolic mirrors is correct – adjusting the secondary mirror central holding screw can affect this. This separation will affect the telescope’s focal length so giving a method to test for its accuracy. For my 8 inch Ritchey-Chrétien, the specified focal length is 1,625 mm. The Micro 4/3 camera that I am using has a sensor size of 19.1 x 13 mm so that the long dimension should subtend 40.4 arc minutes given this focal length. [The angle subtended is ((19.1/1,625) x 57.3) arc minutes.] As seen in the Astrometry.net output screen below, this is exactly what is found, so the focal length is correct.
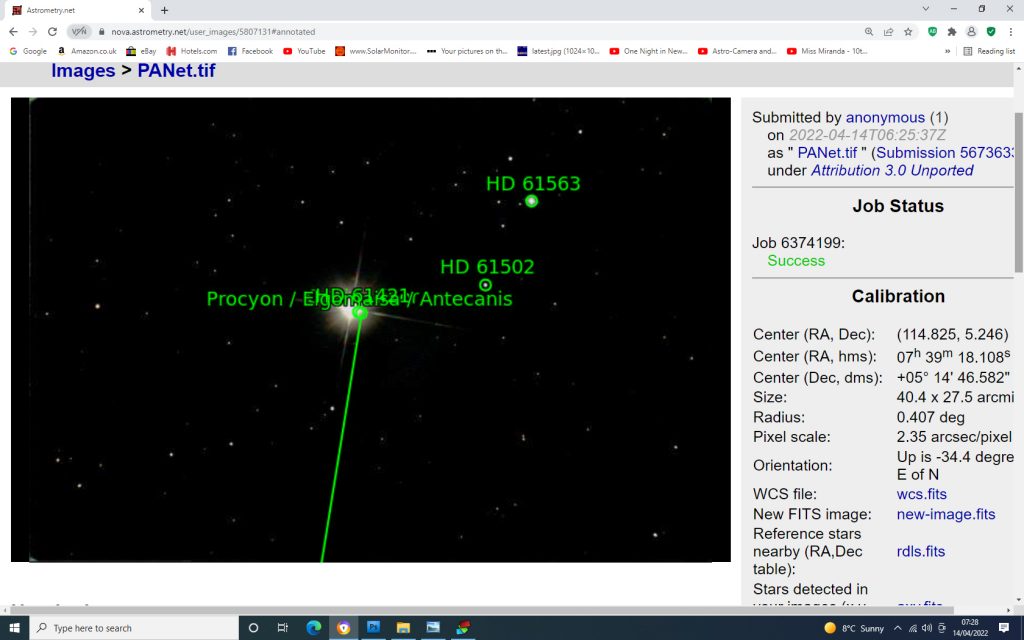
Below is a test image under a low transparency sky of the star field around Procyon in Canis Minor as it was setting towards the west. I was using a Micro 4/3, Altair Astro 294c Pro, cooled camera. (The image shows fewer stars than that taken using the focal reducer seen below as, due to a mount tracking problem, I was only able to stack 32 frames that had been converted to monochrome.) The stellar images are excellent implying that I had been able to accurately collimate the telescope.
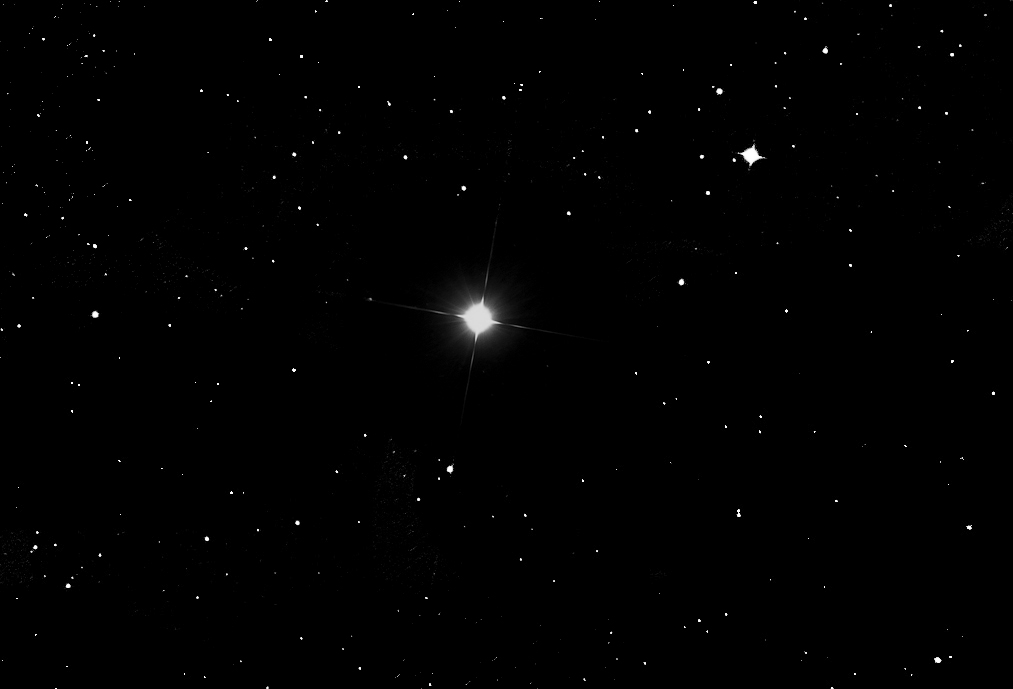
My 8 inch Ritchey-Chrétien Telescope came with an AstroEssentials RC 0.75x focal reducer (£99). When used, only the two 25 mm extenders along with the sensor tilt adapter were required to bring the camera to focus. I made some further tests imaging the star field around Procyon. There was no coma of any sort visible across the frame so I believe that the focal reducer is very well matched to the telescope optics. I think that this will be my favoured imaging setup. [I have had to limit the “stretching” around Procyon to prevent it “blowing out”.]
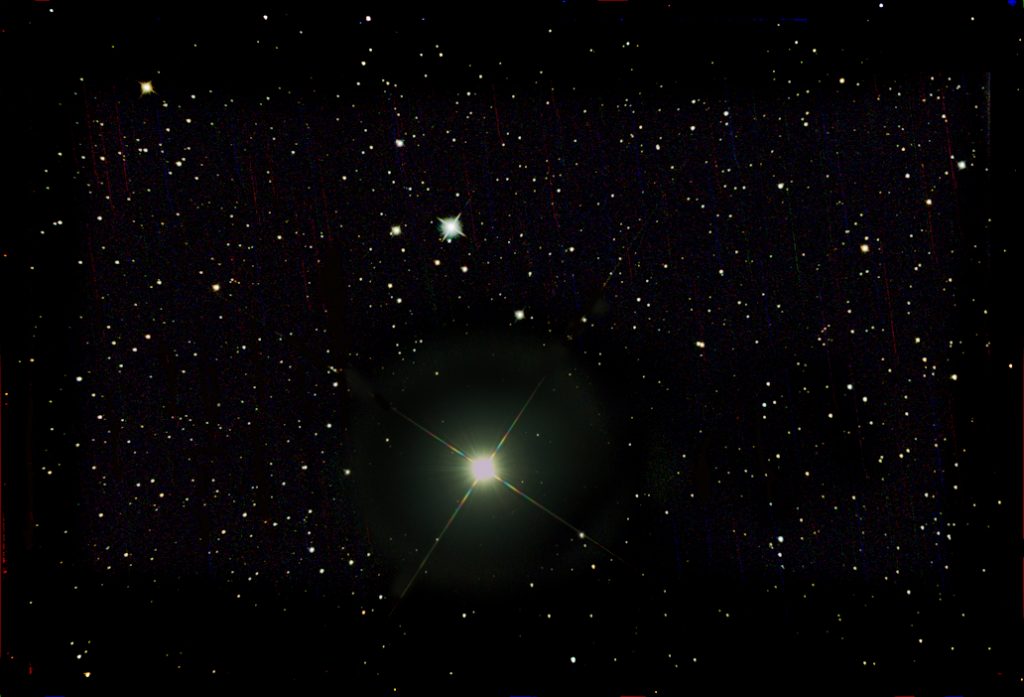
Astrometry.net gave the image size as 52.1 x 35.4 arc minutes and a comparison of the two fields showed that the reducer had a reduction ratio of 0.77 (nominally 0.75). This does, of course, mean that there are two lens elements in the optical train – which could allow a little chromatic aberration to be visible.
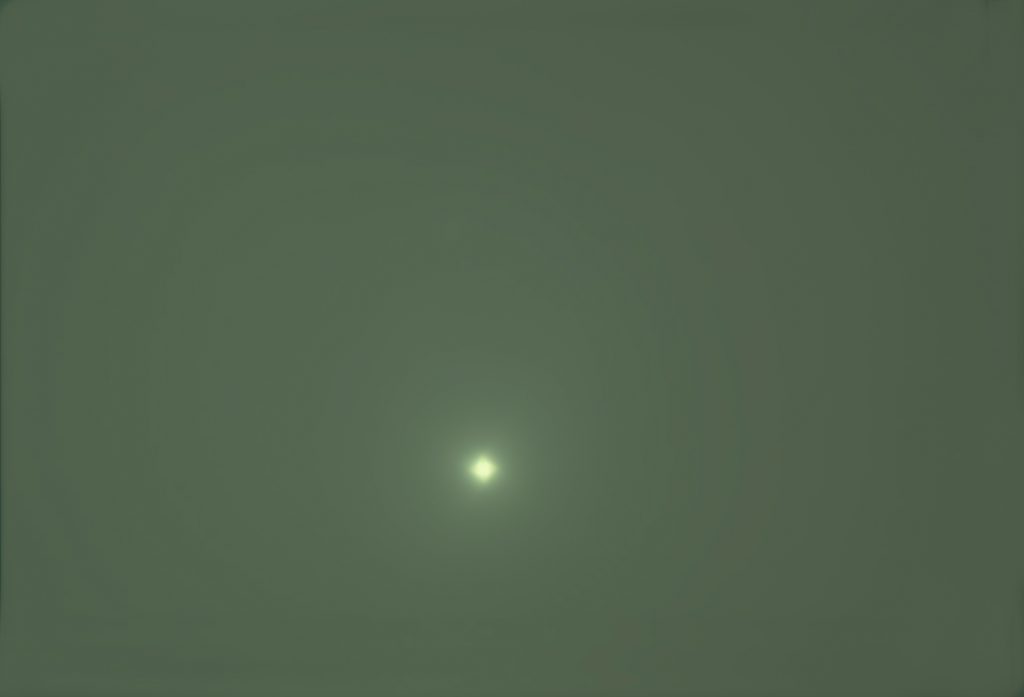
The stellar images were excellent across the frame and even ‘tighter’ than in the non focal reduced image. ( I may have achieved a better focus.) Using the light pollution to make a flat frame, the brightness in the green channel was ~104 at the centre and that in the corners ~94 so implying just a 10% reduction in brightness – which I found really impressive and can be ignored. (Scattered light from Procyon may have actually increased the central brightness so the vignetting could actually be even less.) Flat frames would only be necessary if ‘dust bunnies’ had to be removed.
In both images, the stars across the field were round and well defined giving credence to the accuracy of the collimation.
Vignetting
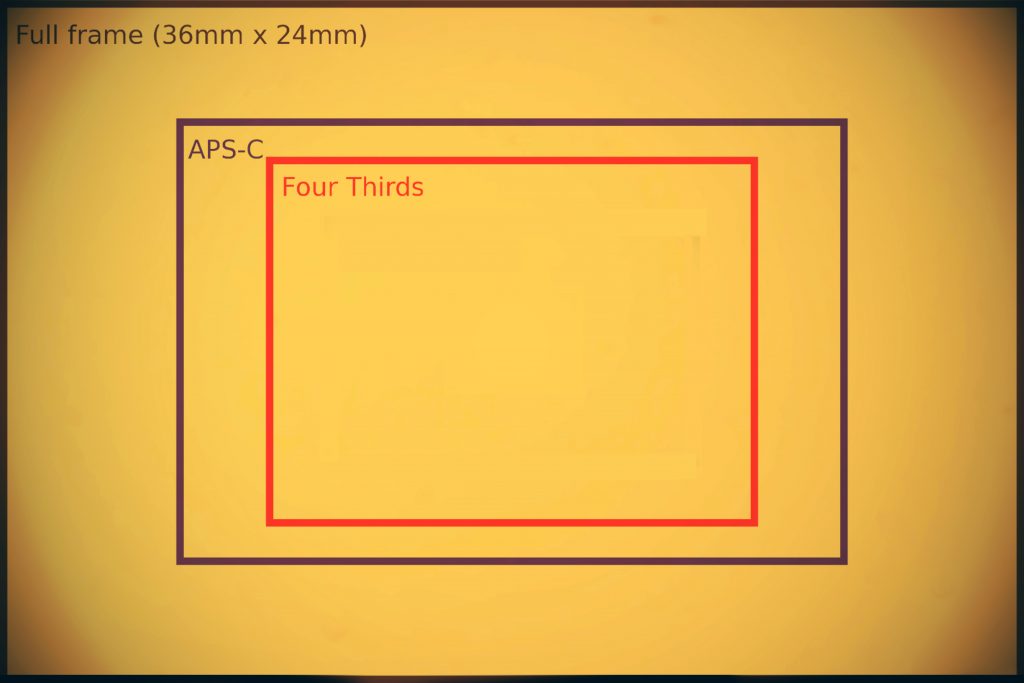
I was impressed with the very mild vignetting using a Micro 4/3 sensor – at most 10% in the extreme corners, as described above, which can be ignored. [If there is significant light pollution – as there was – and one removes the stars using a ‘Dust and Scratches filter’ one is actually left with a flat frame as described in another digest article.] Surprisingly, when using the focal reducer it was no worse. The image below shows a flat frame taken with a full frame sensor (Sony A7 II). One can see that there is rapid fall off in the extreme corners of the frame. However if one was imaging an object such a globular cluster or planetary nebula centred in the frame, this would not really be a problem and flat frames would enable the majority of a full frame sensor to be used. I do, however, suspect that a field flattener would be required. The vignetting on an APS-C sensor will be very mild and easily corrected using flat frames. One would not need to use flat frames with a Micro 4/3 sensor given a clean sensor.
A lunar image
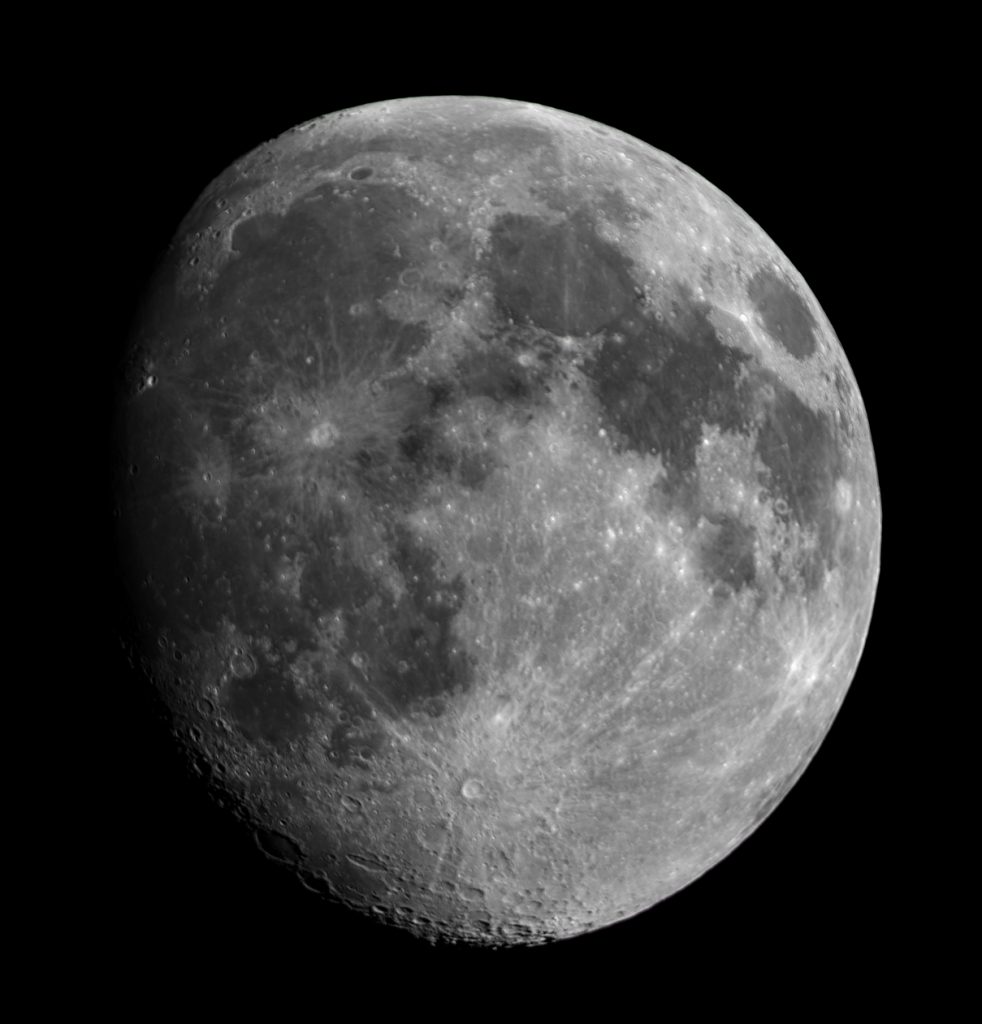
The same evening, the Moon was 11.7 days old and I took this image using the Altair Astro 294 Pro camera as a webcam. Two videos of 100 frames were stacked and aligned in Autostakkert. Without using the focal reducer only two panes were required to cover the Moon’ surface which were then manually composited.
Leo Triplet
This image is a composite made from three exposures: two, 30 minute exposures, and a single, 1 hour, exposure taken under non transparent skies. These were taken using the focal reducer and, pleasingly, no chromatic aberration was seen. This is not really enough exposure time but, at least, some structure can be seen in the galaxies.

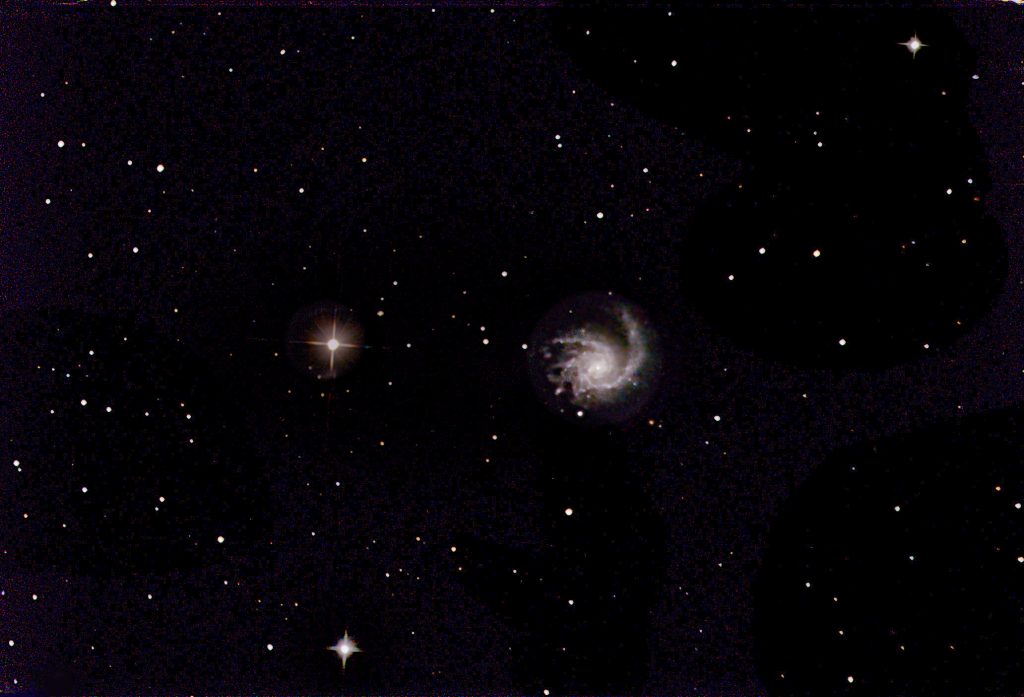
M99 – the Pinwheel Galaxy
Imaged with Micro 4/3 sensor with no field flattener at 1,625mm focal length. A total of 82 minutes integration time.
Some thoughts
Apart from the 8 inch Ritchey-Chrétien, there are three other similar telescopes that can reasonably claim to the astrographs – having an aberration free, wide, flat field.
Stellar Lyra Ritchey-Chrétien £ 895 Focal reducer for £99 (Steel tube 96% reflectivity mirrors)
Celestron Edge HD £1,895 Focal reducer for £399
Vixen VC200L £1,538 Focal reducer for £241
Meade ACF Euros 1,600 from Teleskop-Express
Focal reducer Optec Lepus 0.62x Telecompressor for £223 from First Light Optics
The Vixen and RC have open tubes so will cool down faster and will not be so prone to dewing up. They have focusers at rear so will not suffer from image shift when focusing
This looks as though the Ritchey-Chrétien is, by far, the best buy but they appear not to be that popular.
There are some good reviews on the web but in the forums some criticisms can be found.
One is that the focuser is poor. It may be the the earlier ones had a straightforward Crayford Style focuser which has, I believe, been replaced with the ‘Steel Track’ version that is in my scope. This may however still be a weak point and some are replacing it with higher quality focusers. I have not yet had sufficient use of mine to judge if this is necessary.
A criticism made is that the mechanics are poor. There is some truth in this in that the focuser and extenders are attached to the primary mirror back plate. (Not the case of the Truss Tube versions.) This make is harder to collimate as, if one has to adjust the primary mirror, this will affect any adjustments that have already been made to the secondary – see below. Apart from this weak design point, the actual construction is fine.
A criticism is that collimating these scopes (particularly the tube versions) is difficult as compared, say, with the Edge HD. This is not a fault. As a Schmidt Cassegrain has a spherical mirror, the primary has no axis and so its orientation with respect to the secondary does not matter. Therefore it does not have to be adjusted. However, with a primary which has an optical axis, as does the Ritchey-Chrétien, the primary and secondary mirror have to be perfectly aligned with each other so, if the primary is out of alignment, collimation is bound to be more difficult.
I found a problem in that there are many YouTube videos showing how to collimate an RC. These use different techniques and some require use of the expensive Howie Glatter laser collimator. I have to say that I got very confused and my initial attempts – with a scope which was very out of collimation – were not able to collimate the scope. I finally found a text and YouTube set of instructions showing how to achieve collimation using just a ‘Cheshire Eyepiece’. Due to the back plate attachment of the focuser to the primary mirror cell, this may have to be an iterative approach – but it can be done relatively easily. I have described the technique with links to the web descriptions in the digest article ‘Experiences with collimating a Ritchey-Chrétien Telescope‘.
I initiated a ‘Cloudy Nights’ forum post:
https://www.cloudynights.com/topic/820280-8-inch-telescope-for-astroimaging/#entry11841360
to try to get some other views on the use of an Ritchey-Chrétien compared to the Celestron Edge HD. This has proved quite illuminating, and the image of the Whirlpool Galaxy taken with an 8 inch Ritchey-Chrétien is quite stunning.
I had no need to acquire the Ritchey-Chrétien as I already have a Vixen VC200L which has been an excellent telescope with which, for example, to image globular clusters and planetary nebulae. However, I thought that it would be an interesting purchase as, second hand, it was relatively low cost. It will provide, with its focal reducer, a ~1,200 mm f/6 telescope for astroimaging.
Apart from my initial collimation problems, I am very pleased with my purchase – but I would never recommend it to a beginner!