
This is one of ~60 illustrated articles to be found in the author’s Astronomy Digest.
This essay provides further examples of Solar imaging to complement those in the two CUP books and points out a very useful website showing near real-time H-alpha images from observatories across the world.
The Sun is on its way down towards Solar Minimum but can still be active at times! If there are prospects of a sunny day and you have a solar imaging system, be it in white light or H-alpha, then it is worth looking at the SOHO satellite website to see a current solar continuum image or that of the GONG-NSO website (search for GONG H-Alpha Network) to see near real-time whole disk H-alpha images taken from observatories across the globe. [GONG-NSO :- Global Oscillation Network Group − National Solar Observatory]
It was clear on the morning of the 8th July so I did look at the SOHO site and saw that there was a nice sunspot group visible. Other wavelength images indicated that there might be some activity nearby at the Sun’s limb. I thus mounted my Lunt 60 mm pressure tuned H-alpha telescope together with an 80 mm refractor equipped with a Baader Herschel Wedge onto my equatorial mount. Details of the telescopes and accessories that were used are given in both CUP amateur astronomy books.
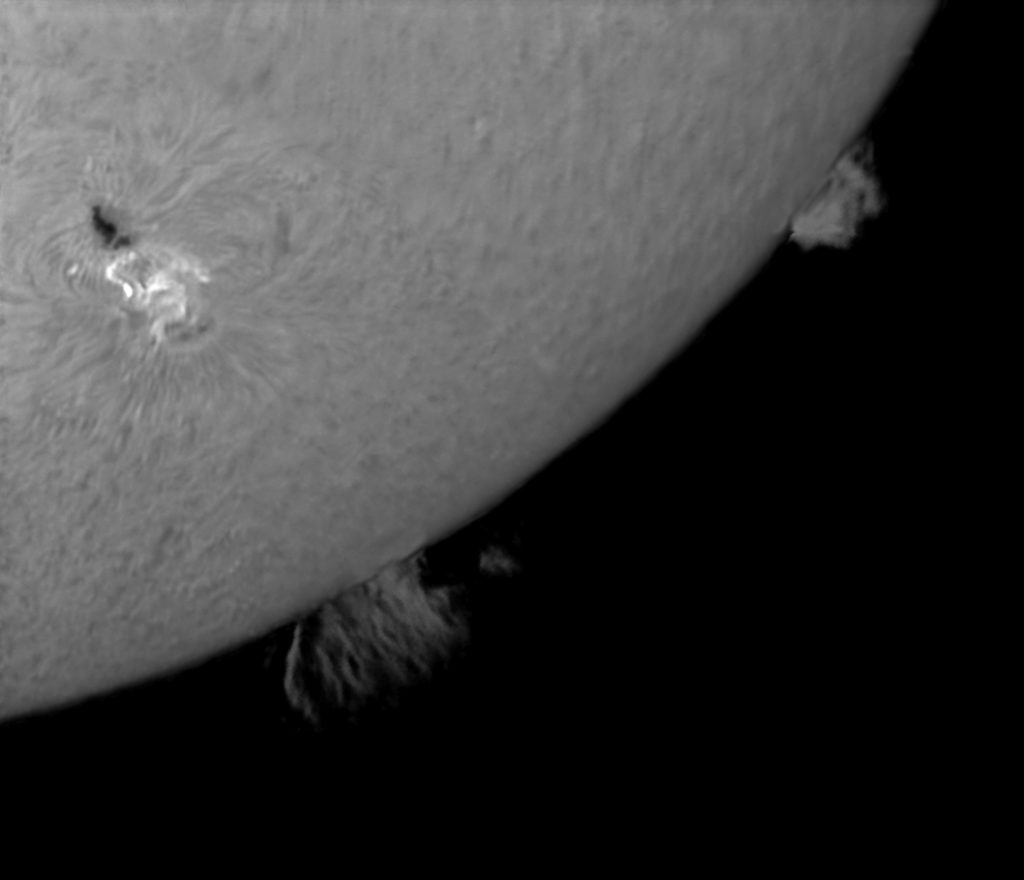
As soon as the Sun cleared the ridge of my house, clouds built up and I had a somewhat frustrating time over the next three hours observing and attempting to image through breaks in the cloud. I was pretty amazed with what I saw in H-alpha − the largest prominence I had ever seen along with a brighter but smaller one nearby both close to the one sunspot group that had alerted me to the day’s imaging prospects.
White Light Imaging
I first set about imaging using the white light system. The Baader Wedge incorporates a narrowband filter − they call it a Solar Continuum Filter − in the body of the unit along with two neutral density filters to reduce the light to safe levels. This gives a lime green image and the system is said, with some justification, to give the highest contrast ‘white light’ images of the Sun that can be obtained.
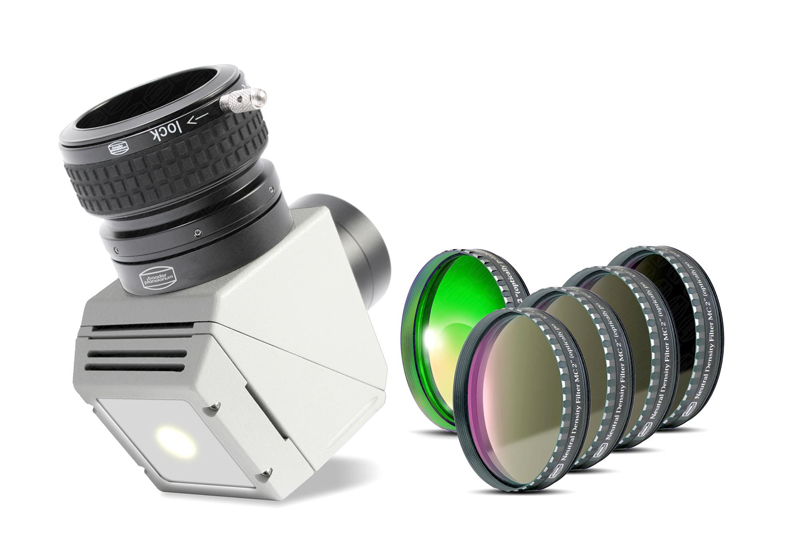
Baader Herschel Wedge
The translucent ceramic tile at the rear of the wedge also acts as projection screen showing an unfocused image of the Sun and so acting as a solar finder. [Note: as full intensity sunlight is passing down the telescope tube reflecting telescopes should not be used as the heat might destroy the secondary mirror. Refractors should not exceed ~130 mm aperture otherwise the rear heat trap can become uncomfortably hot and those with Petzval doublets near the eyepiece are also not suitable for its use.]
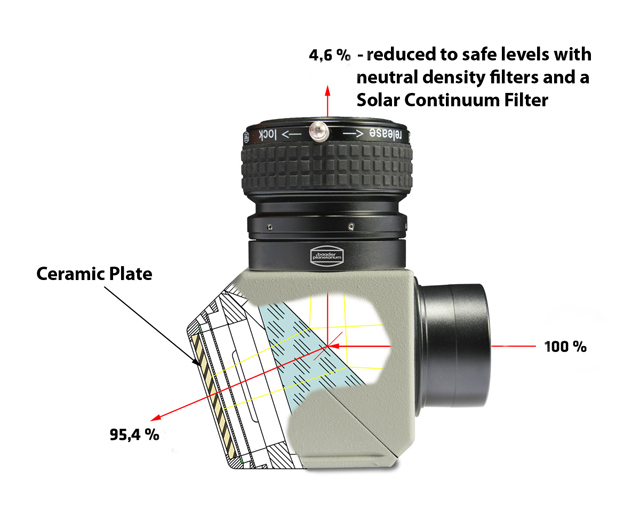
Herschel Wedge in cross section
A 2x Barlow lens was incorporated to increase the image scale and a video sequence was captured using a monochrome Imaging Source webcam. The raw .avi file was loaded into Registax 6 and the frames aligned. The best 60% were then stacked and the ‘wavelets’ sharpening tool used with all sliders set to 20. The resultant TIFF image was imported into Adobe Photoshop and the local contrast increased using the ‘Unsharp Mask’ tool with a radius of 100 pixels and an amount of 12%. Finally a little sharpening was applied using the ‘Smart Sharpen’ filter. As the image was allowed to move very slightly across the sensor during the taking of each .avi file (The reasoning behind this is discussed in the essay on ‘Planetary Imaging’) the final image required a small crop. This was also true when taking the H-alpha images.

White light image of the sunspot group
H-alpha Imaging
I bought the Lunt H-alpha telescope as it uses a theoretically perfect method of tuning the etalon which forms the first step in the selection of the H-alpha emission line at 656.28 nm in the deep red. The etalon is a pair of very closely spaced glass plates. The interference of light reflecting back and forth between them produces a comb of ~0.07 nm wide pass-bands spaced regularly across the visible spectrum. Prior to the eyepiece is a ‘blocking filter’ which is an H-alpha filter having a broader bandwidth which is used to select out the specific H-alpha band in the comb produced by the etalon. Changes in atmospheric pressure will affect the tuning of the etalon as the effective spacing of the two glass plates is determined by the refractive index of the air between them and so it is necessary for the separation between the glass plates of the etalon to be adjusted. Due to Doppler effects, the tuning may also need to be adjusted slightly to highlight prominences at the edge of the solar disk rather than the surface features. To adjust the effective spacing of the two glass plates that form the etalon a common method is to alter the angle of the etalon to the incident light. The light then has to travel at a varying angle across the etalon which alters the effective separation − just as crossing a road at an angle requires one to walk further. Instead, the Lunt pressure tuned H-alpha telescope adjusts the air pressure within the etalon: increasing the pressure increases the refractive index of the air within so increases the effective path length across the etalon. The pair of glass plates forming the etalon is thus always at right angles to the light − as is theoretically best.
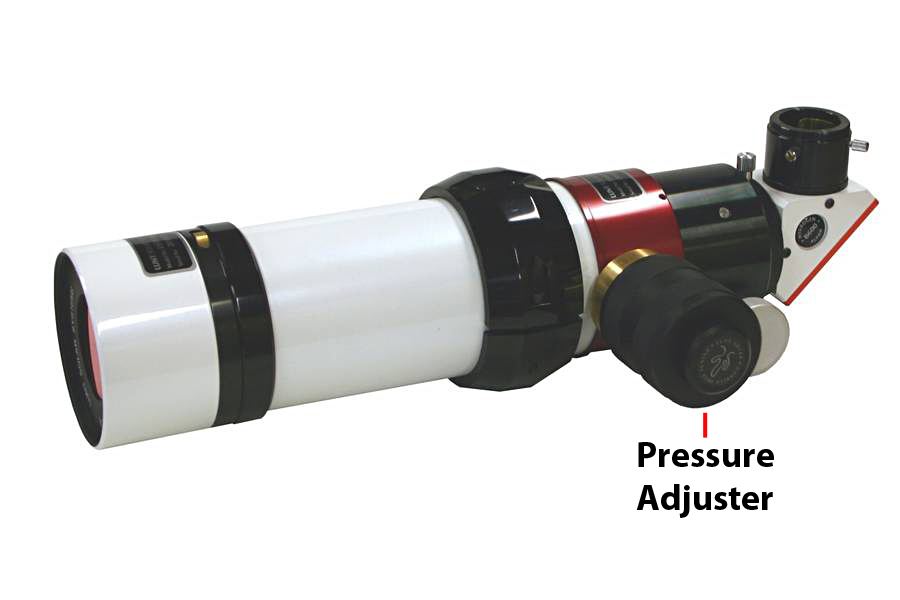
Lunt 60 mm, pressure tuned, H-alpha telescope
A 2x Barlow lens was used to increase the image scale and, in this case, a Point Grey Chameleon 1.2 megapixel monochrome webcam was used. As both the sensor size and number of pixels are greater than those in the Imaging Source webcam, more data has to be downloaded and stored onto hard disk. Initially, using the Intel i5 laptop that I employ for image capture, I found that though its data could be downloaded and saved in RAM in real time, it was taking twice as long to write this data to either the internal hard disk or an external USB3 drive − so halving my possible imaging time. The problem was solved by replacing the internal hard drive with a Solid State Drive (SSD) and acquiring an external USB3 SSD drive.
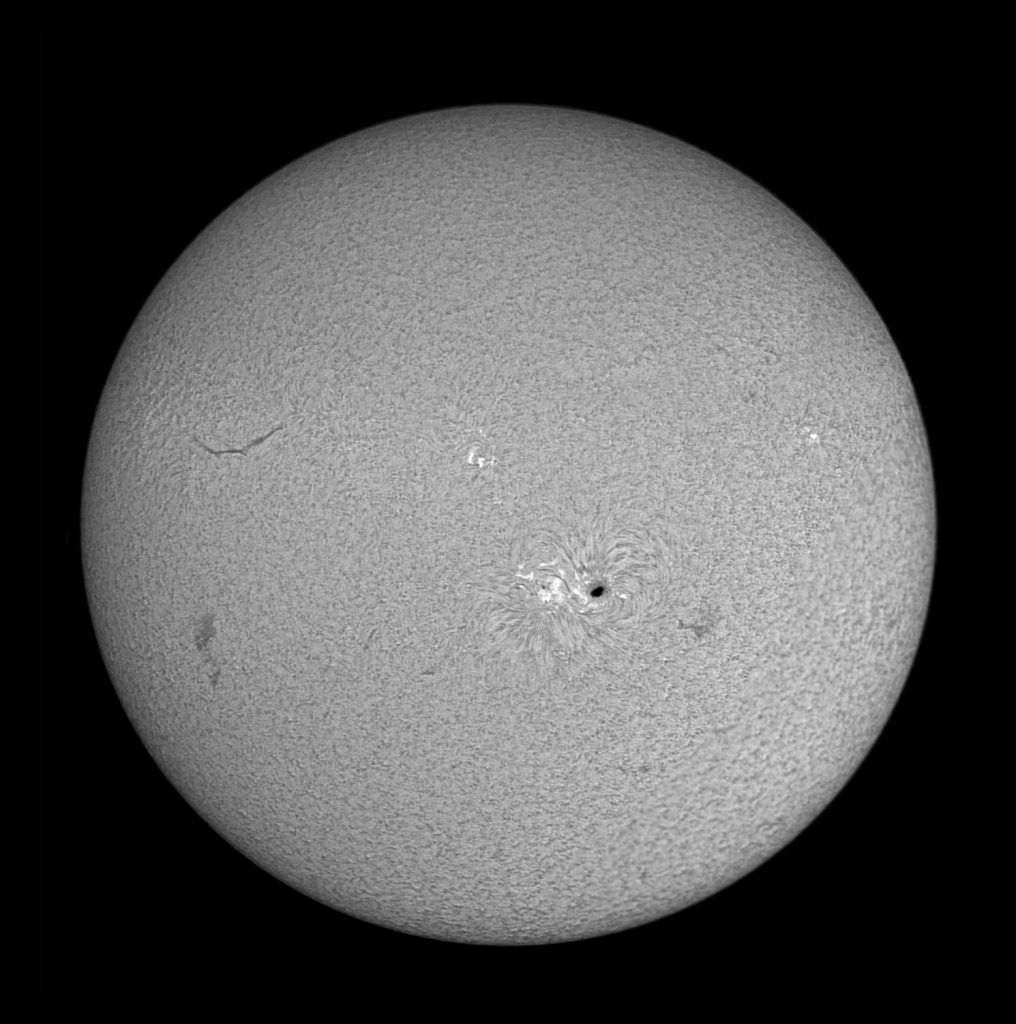
The raw .avi file was again processed in Registax 6 and enhanced in the same way as for the white light image, using wavelets and the ‘Unsharp Mask’ and ‘Smart Sharpen’ filters in Photoshop to give the result shown below.
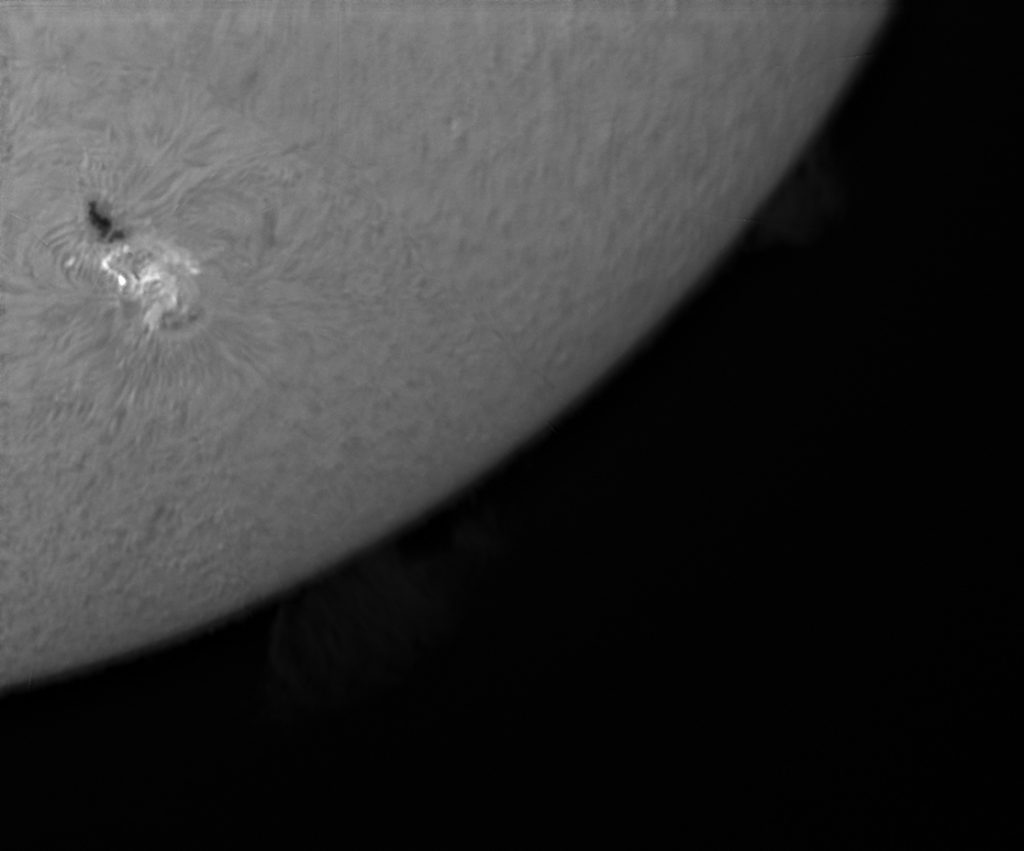
Image exposed for the solar disk
Prominences tend to be considerably fainter than the Sun’s surface. A simple solution is to expose correctly for the solar surface and then use the ‘Levels’ tool in Adobe Photoshop (or other image processing software such as GIMP) to selectively brighten the prominences. The image below shows the result of selectively brightening the prominence regions − but they are not too well defined and very noisy.
The prominences have been brightened
An alternative which requires somewhat more effort but can produce a far better end result is to increase the exposure for the prominences and take a further image before combining the two exposures into one image. In this case the smaller prominence was brighter than the larger one so two further exposures were taken − one correctly exposed for each. The prominence images are shown below.
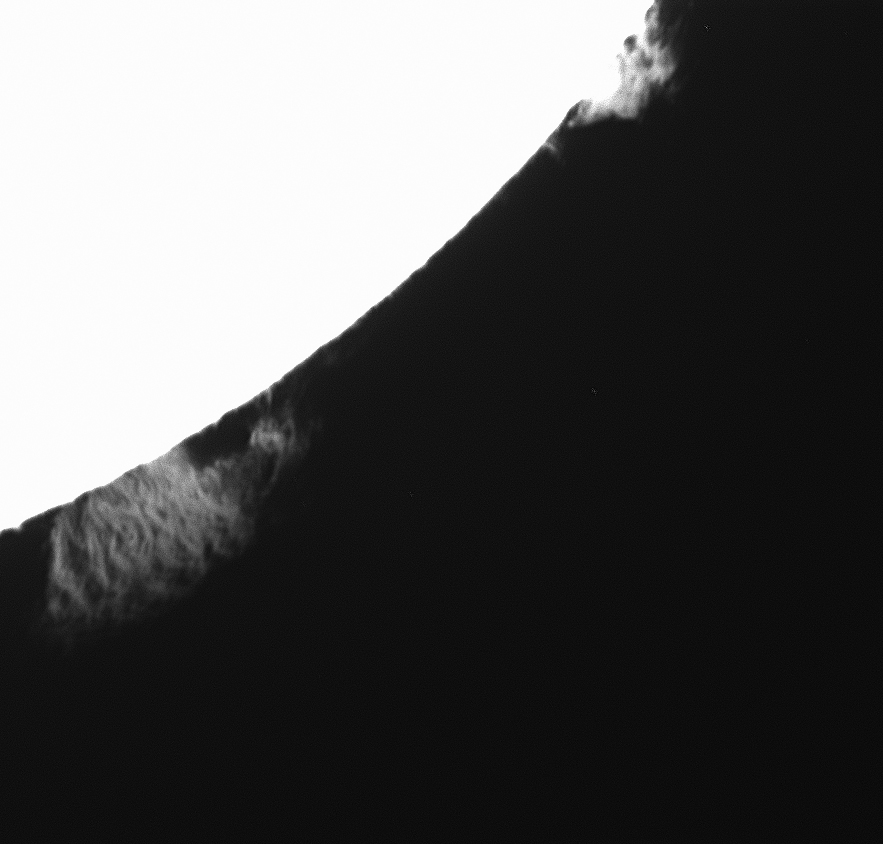
Larger prominence
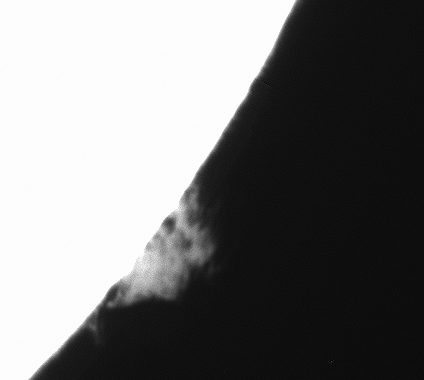
Smaller, but brighter, prominence
By selectively lightening the outer parts of two prominences in the disk image using the polygonal selection tool, their position becomes obvious − one needs to keep the brightening away from the solar disk. This produced the following image.
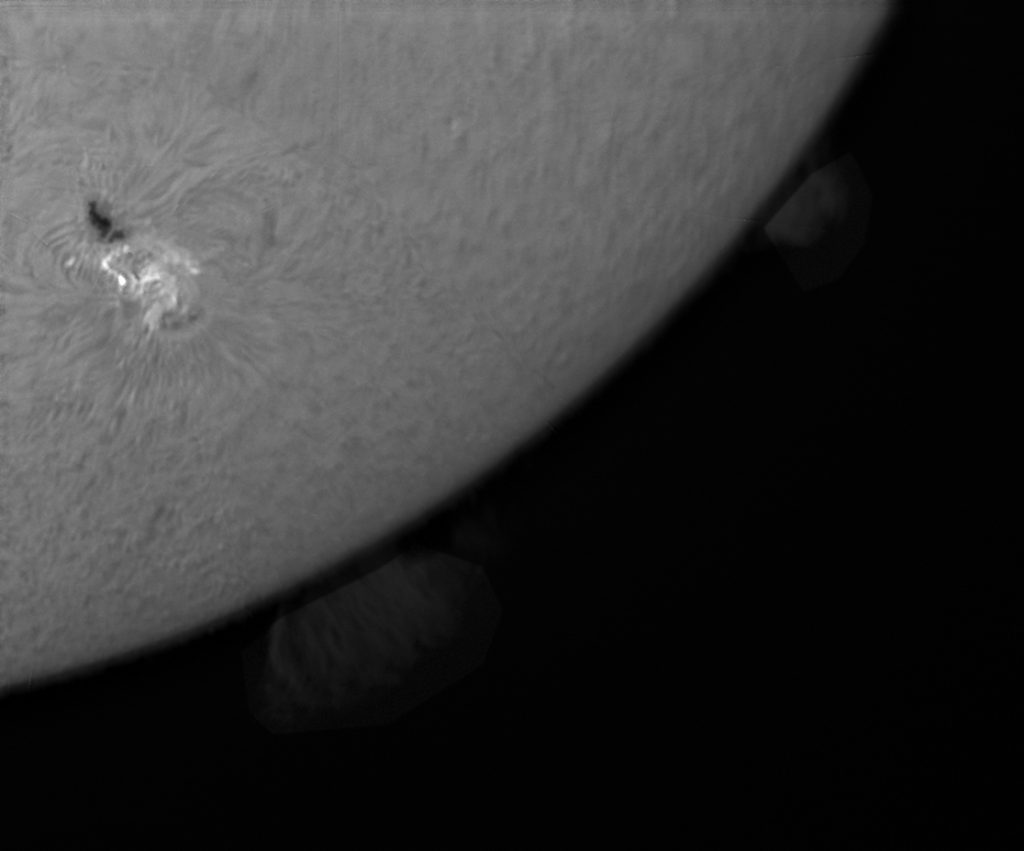
Solar disk image with the outer parts of the prominences brightened to show locations
It is then possible to clone the correctly exposed prominence images into their correct locations so producing the final result. (Selecting from the prominence images and pasting onto the disk image.) The orientation of the images remained the same during the taking of the three .avi sequences so this was not a too difficult task.

The final H-alpha image in monochrome
It is possible to give the image an ‘H-alpha’ colour by duplicating the image to give a second layer and painting this layer with a suitable red colour such as R=186, G=8 and B=10. One can then flatten the two layers using the ‘Color’ (American spelling) blending mode with a ~70% opacity to give the result below.

An ‘H-alpha’ coloured image
As mentioned above, the USA’s National Solar Observatory whose telescopes form part of the Global Oscillation Network Group has an excellent website which shows near real time H-alpha images of the Sun taken from a number of observatories around the world.
I append the full solar disk image taken some time later that morning at the Cerro Tololo Observatory and also a crop roughly similar to my result. The match is very pleasing.
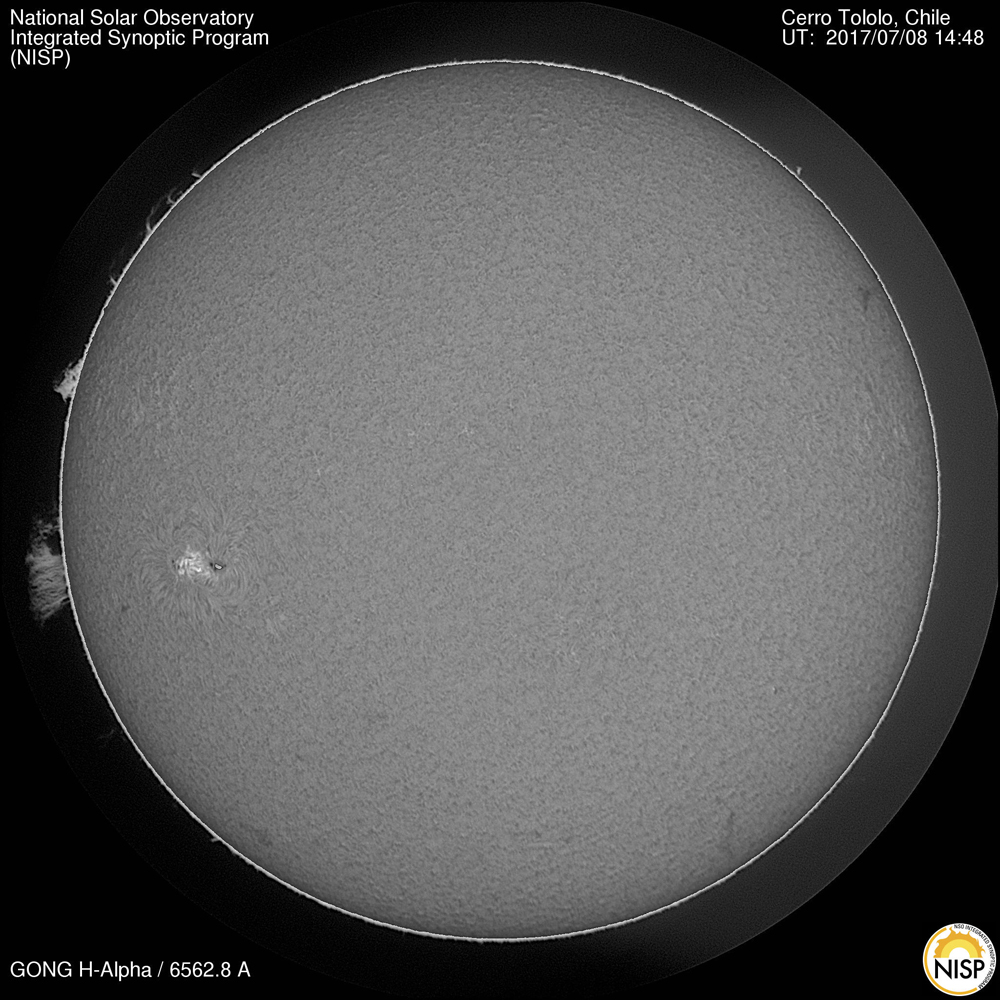
Full disk H-alpha image
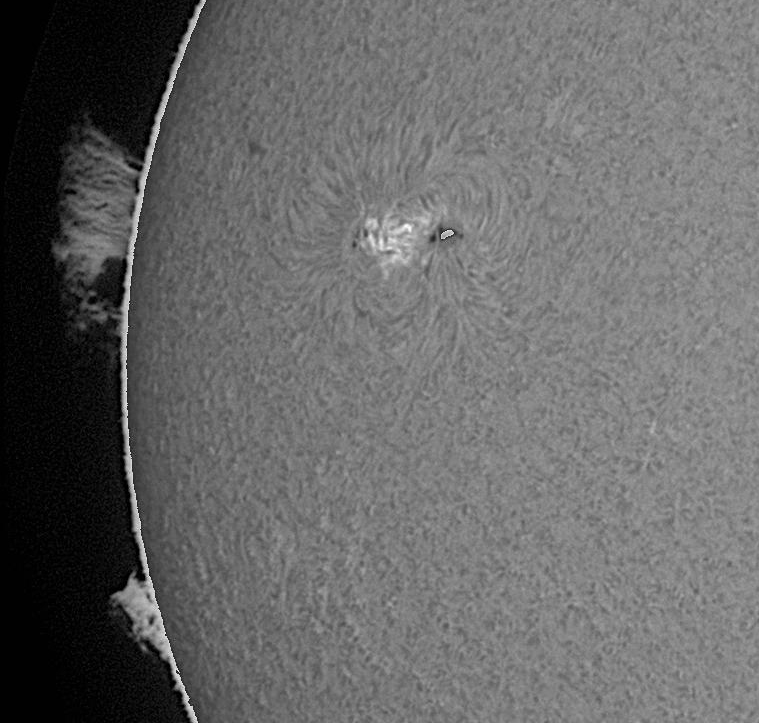
Crop showing the region that I had imaged
Postscript 1: The Sun on the 12th of July
It was clear a few days later and I was able to image the sunspot in white light using the Herschel Wedge and Takahashi 102 mm refractor with the Point Grey Chameleon camera.

This camera can just encompass the width of the Sun’s disk but only two/thirds its height when used with the Lunt 60 mm H-alpha telescope. The full disk image is thus a composite of two frames.
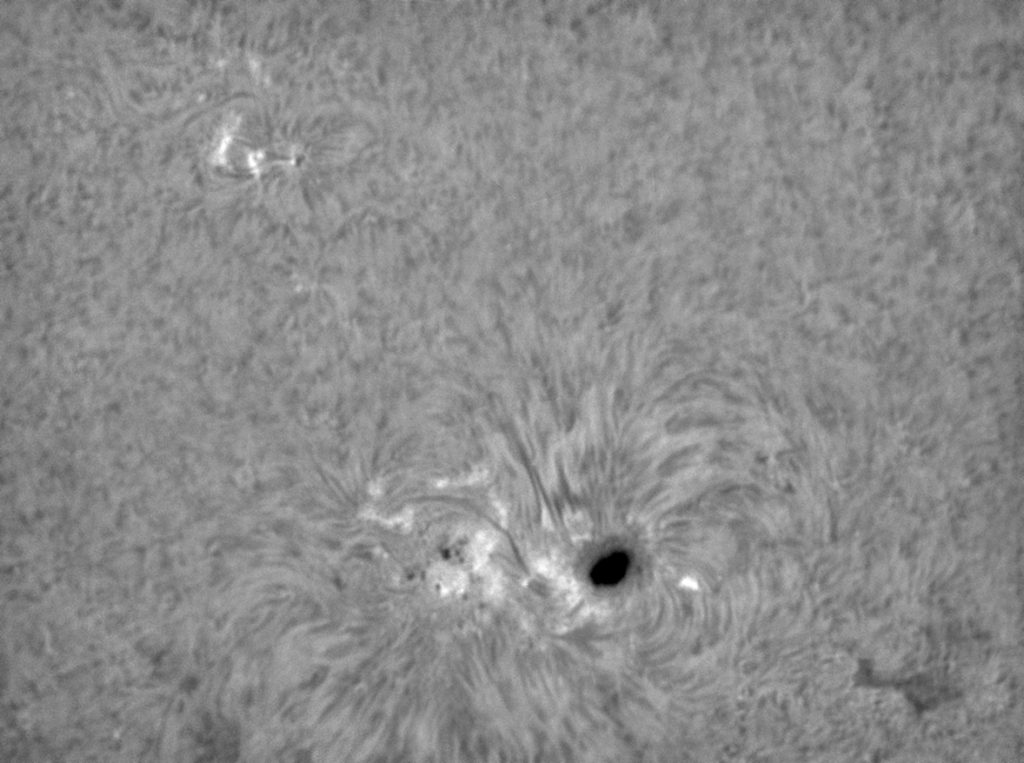
Adding a x2.5 TeleVue Powermate enabled a larger scale image of the sunspot region to be taken.
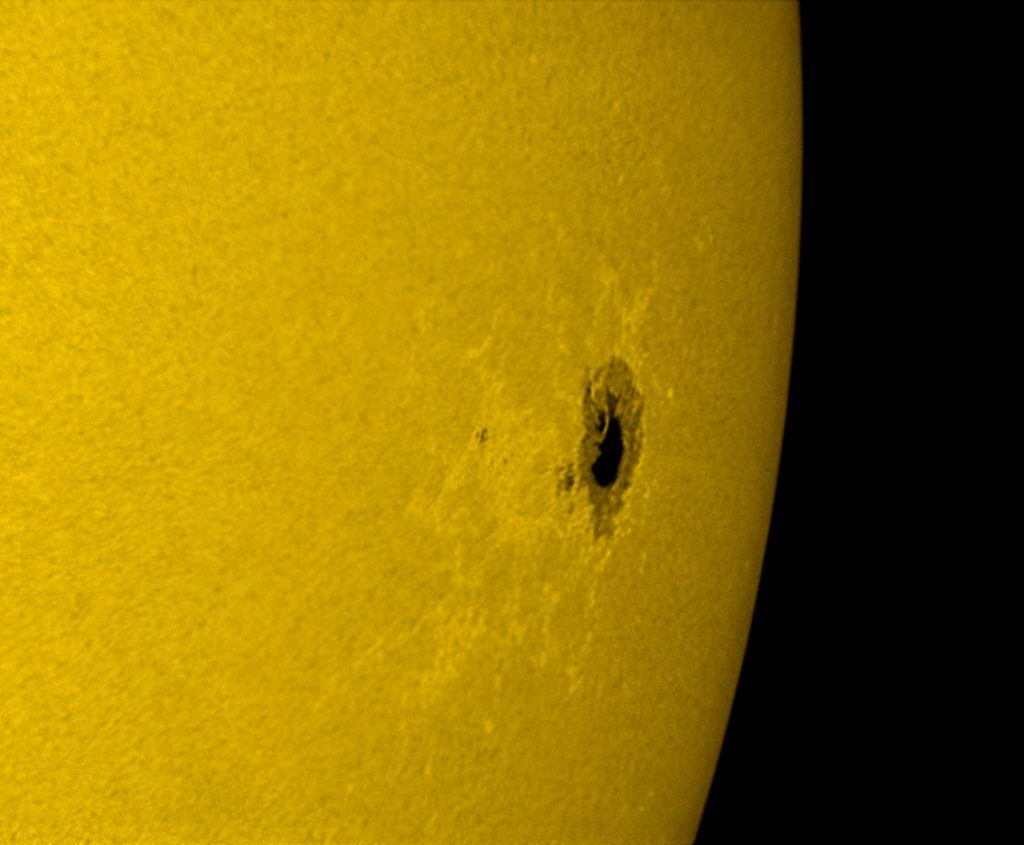
Postscript 2: The Sun on the 16th of July
The sunspot group that I had first imaged on the 8th July had by now crossed much of the face of the Sun and was moving towards the edge of the solar disk. I Imaged the sunspot group (AR2665) one last time on the 16th using a 127 mm refractor, 2.5x TeleVue Powermate and Point Grey Chameleon video webcam. The image was coloured by duplicating the image to give two layers, painting the upper layer with a suitable yellow colour (R = 214, G = 170 and B = 0) and flattening the two layers using the color (American spelling) blending mode with an opacity of 70%.
Return to Astronomy Digest home page