
Many of you will be aware of the Batinov mask which is an excellent aid for focusing a telescope but may not be aware of a newer version called a Tri-Batinov mask. This produces a more complex pattern as seen below.
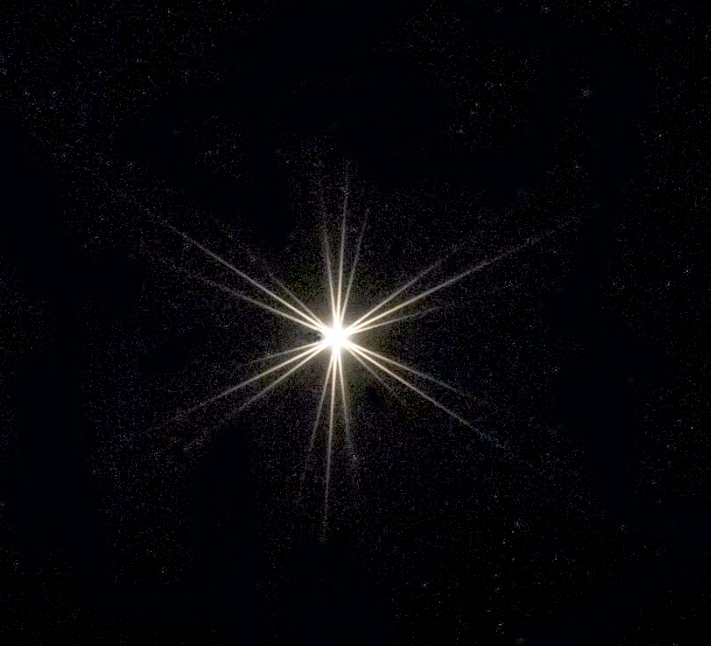
In this image the telescope was perfectly collimated and one can see that the three central ‘lines’ are symmetrical within their bounding lines. Should the secondary mirror be out of collimation, one or more of these will be offset and, by adjusting the appropriate secondary adjusting secondary screws, can be brought into the centre – making it quite easy to collimate the secondary.
Its use to help collimate an 8 inch Ritchey-Chrétien
I wondered if one would assist in the collimation of my 8-inch Ritchey-Chrétien telescope.
A wide variety of Tri-Batinov Masks are sold by Rother Valley Optics. However, they do not have one for the 8-inch Ritchey-Chrétien and I was intrigued to see how one might use one to confirm its collimation state and perhaps help make some final adjustments. The ‘Lazy Geek’ has made a YouTube video:
which includes some instructions as to how to use software to design a mask and produce a file that can be sent to be 3D printed. This I did with the design shown below.
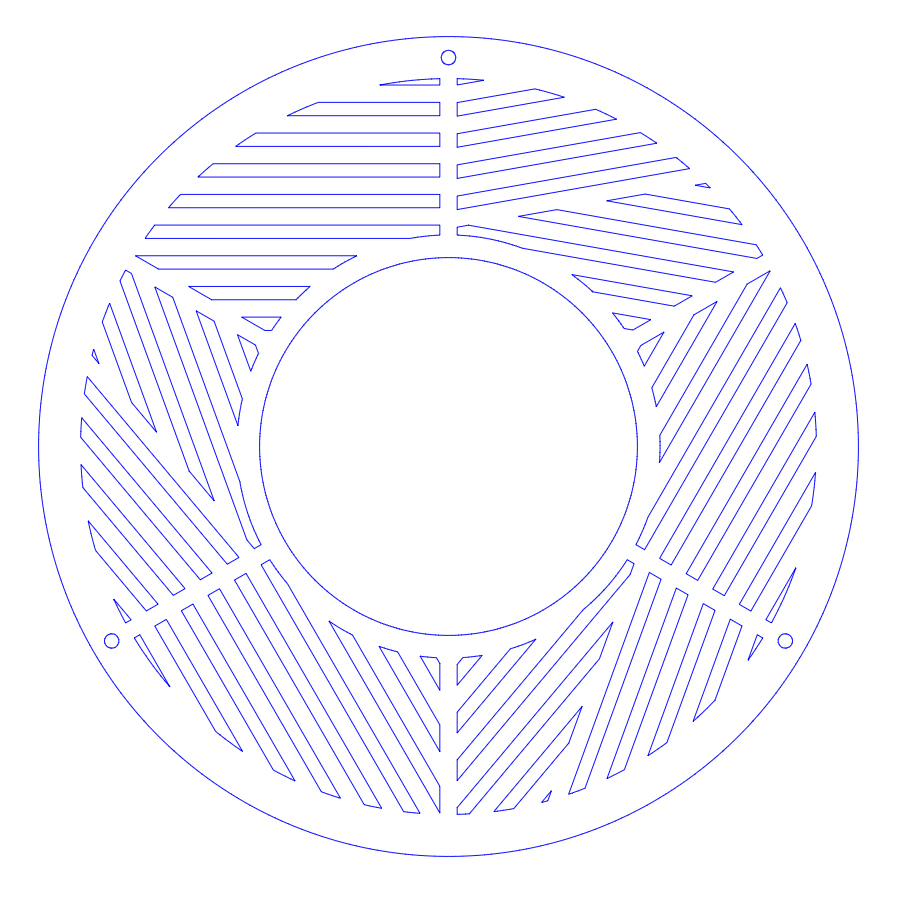
The resultant mask is 5 mm thick.

Help in the collimation an 8 inch Richey-Chrétien
I have written two previous article to describe my efforts:
https://www.ianmorison.com/experiences-with-collimating-a-ritchey-chretien-telescope/
https://www.ianmorison.com/a-webcam-based-collimation-tool/
In the second of these articles I had shown how an astronomy webcam (ZWO ASI 178 monochrome camera having a 3096 x 2080 pixel sensor) coupled with an 12.5 mm eyepiece can be used to carry out the initial collimation of a telescope and mentioned that some standard webcams could be used instead. So I added a 1.25 inch barrel to a Microsoft VX5000 webcam to see if it could be a suitable alternative. It only has a 640 x 480 pixel sensor so the resolution would not be as good as with the astronomy webcam, but it proved suitable. (Later Microsoft webcams have higher resolution sensors.) Using Windows 10, the free program SharpCap recognises the Microsoft webcams and this was used to view the telescope interior and carry out the initial collimation as described in the previous article so providing a low cost camera solution. Below is the image of the interior of my 8 inch RC telescope using my ZWO webcam with none of the extension units added. It shows the spider leg supports which are not quite symmetric but quite close. This, I think, indicates that the primary mirror is not perfectly aligned along the optical tube axis.
The Microsoft VX5000 Webcam

(The resolution of the Microsoft webcam image below is just sufficient to show the spider leg supports.)

Final Collimation using an artificial star.
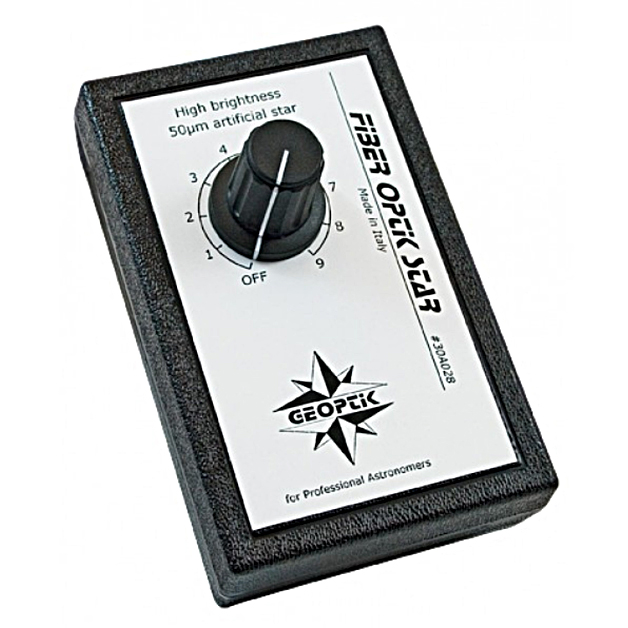
Further collimation adjustments were made with the help of the Geopic Variable Artificial Star available from Rother Valley Optics for ~£100 but a non variable version is available for £52, and instructions can be found on the web to make one very cheaply. (A tiny hole punched into some aluminium foil placed in front of a torch for example.) Its ‘aperture’ was 50 microns made using a fibre optic cable. Placed at ~30 metres from the telescope, its angular size was ~0.4 of an arc second so making a very reasonable ‘test star’.
First Collimation session
Two methods:
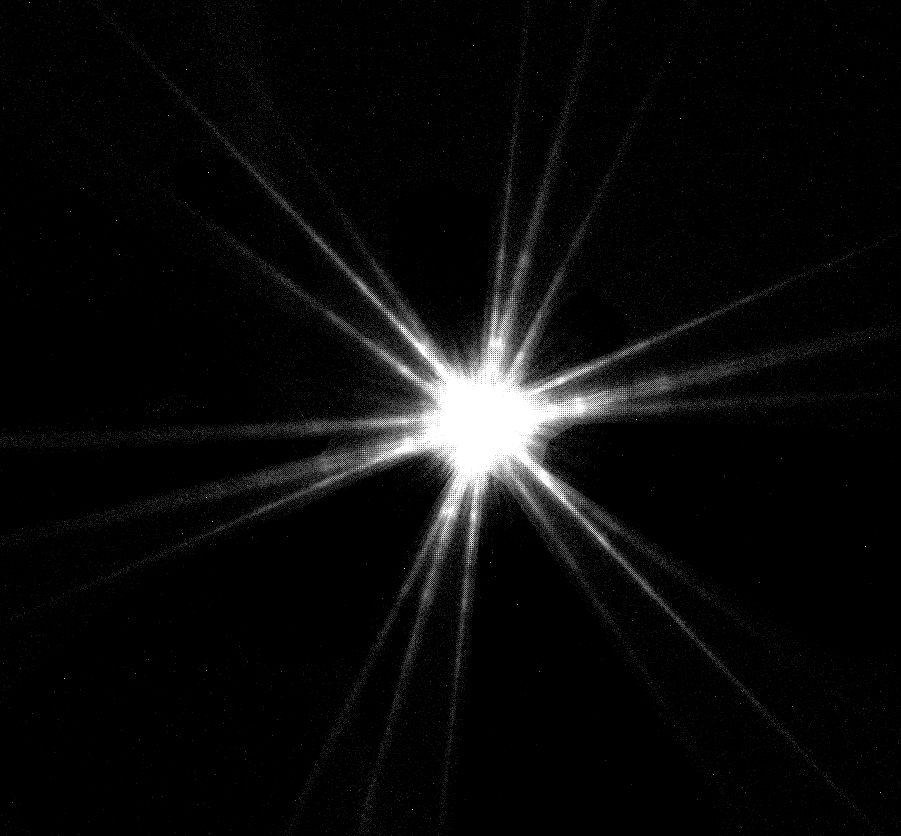
1) Using the Tri Batinov Mask
This was placed at the front of the telescope and the ‘Star’ image focussed to provide the image seen below using my AA 294, Micro 4/3, colour camera. It is obvious that the collimation is not perfect as none of the central lines bisect their accompanying pair.
The three allan key slots controlling the axis of the secondary mirror were then finely adjusted to give the result shown below – a big improvement but not perfect.

2) Using Al’s Collimation Aid
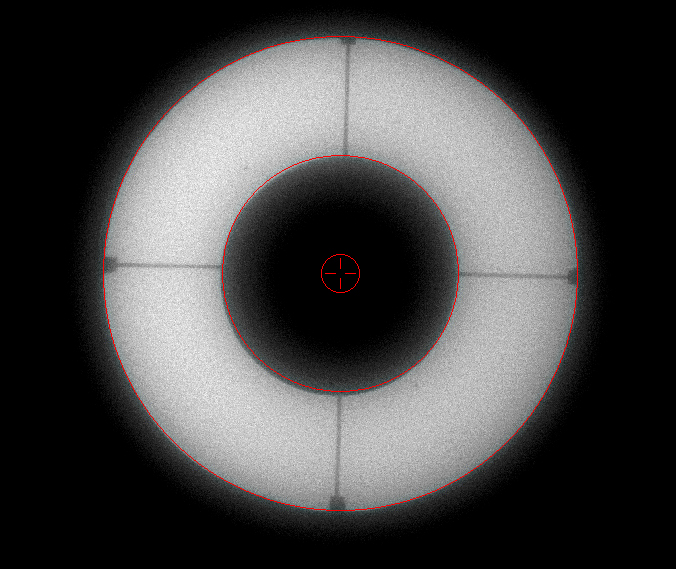
Al’s Collimation Aid is a resizable transparent window with:
a small cross hair at the centre of the window
3 adjustable concentric circles
variable opacity of the circles and cross hairs
The concept is that the ‘inner’ circle is adjusted to match the diameter of the central obstruction, and the ‘outer’ circle is adjusted to the diameter of visible disk. As the circles are concentric, any collimation error should be readily apparent.
The download link is given at the very bottom of this URL:
http://sweiller.free.fr/collimation.html
My AA 294, Micro 4/3, colour astro camera was used to image the out of focus star image and ‘Al’s Collimation Aid’ opened and placed over the image with the inner and outer circles adjusted in size as seen in the image below. This showed that the collimation was close but still not quite perfect. (The image is the result of processing a video sequence giving a far better image.)

A further collimation session will be required!