
In October 2021, I spent a week in the Isles of Scilly to take part in the COSMOS ‘Scilly Dark Skies Week’. The islands must have one of the darkest skies in the UK and we did have some clear, transparent, moonless nights with the northern Milky Way from Perseus to Lyra stretching overhead towards midnight.
I had taken my Sony A5000 camera (see article in Digest) along with a superb Zeiss 45mm, f/2, legacy lens used with an adapter. Importantly, this lens is totally rectilinear and does not suffer from distortion – very important if a set of untracked images are to be taken. As the A5000 had an APS-C sensor with a 1.5 crop factor, the effective focal length was 67.5 mm. The focal length is significant as I did not have a tracking mount with me and so was taking untracked exposures. This limits the exposure time allowed for the taking of a single frame if star trailing is to be avoided. The formula often used is to divide the effective focal length into 500. However, the trailing is greatest near the Celestial Equator and is least as one approached the North Celestial Pole. So it is possible to include a ‘Cos Dec’ term to reduce the effective lens focal length. The regions of the Milky Way that I was aiming to image were around Dec 45 degrees. The Cos Dec term is ~0.7, so reducing the effective lens focal length to 47.25 mm and thus 10 second exposures would be appropriate. With the latest high resolution sensors it is suggested that 300 should be used rather than 500 and, in the resulting images a touch of star trailing could be seen when viewed at 100%. As described below, this is easy to remove.
In untracked images, as the sky rotates against the sky some of the outer parts of the image will not receive the full illumination that the total exposure would provide. It may then be necessary to crop the image down somewhat. The use of untracked imaging may well not work so well using very wide angle lenses if they are not totally rectilinear – as most are not – and blurring of the outer parts of the frame may result so some severe cropping could well be required.
It is difficult to take a separate set of dark frames with a DSLR or mirrorless camera as the sensor temperature changes as the images are taken. When exposures longer than a few seconds are taken, these cameras will usually follow a light frame with a dark frame. In most cameras the taking of these dark frames can be disabled so spending more time imaging the sky but then ‘hot pixels’ may be visible which the dark frames would have removed. However, for these images, the taking of the dark frames was enabled.
The general advice when astroimaging is to save raw images, but the use of JPEGs will greatly reduce the data storage required. A single raw frame will have a greater bit depth than JPEGs but, if many frames are stacked (as one will do when using many short exposures to image an object), then the effective bit depth is increased and there may be little difference. (In fact, as the internal production of JPEGs within the camera may involve some stretching and in some circumstances the result may actually be better.) In this case JPEGs were saved.
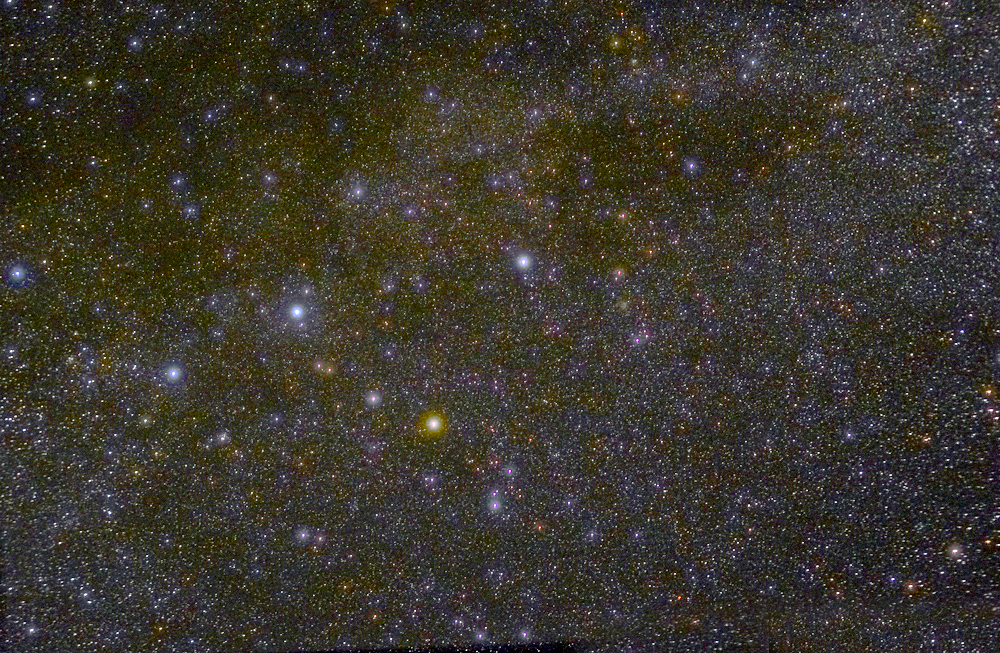
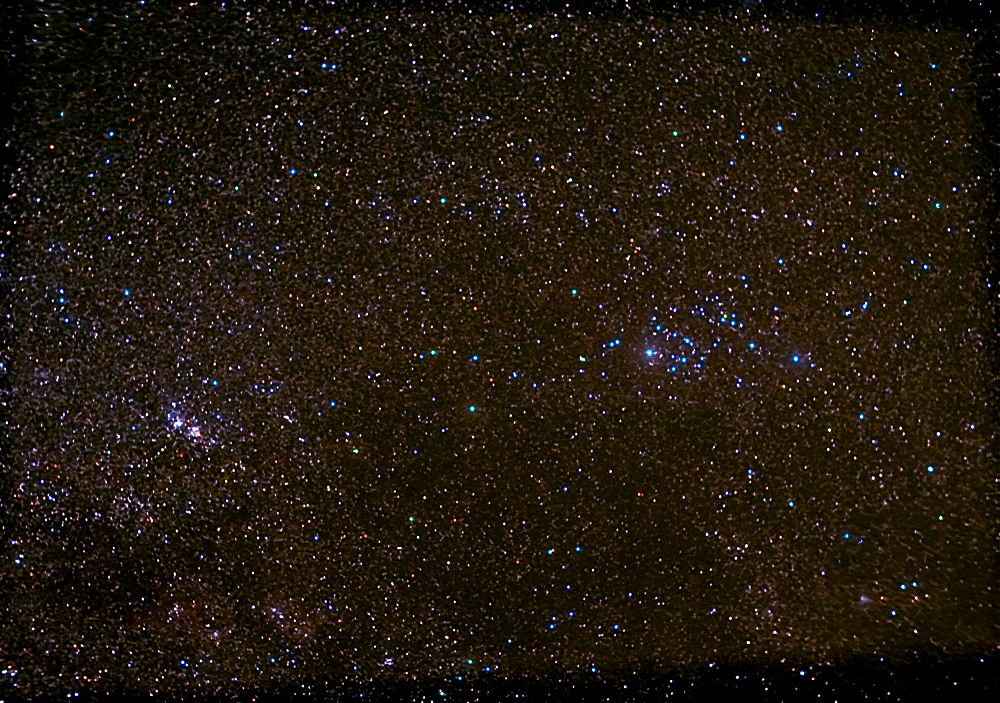
I imaged two areas of the Milky Way; one including the constellation Cassiopeia and the other Perseus. In both, the star colours showed up nicely. The sky background is not uniform showing the varying dust regions in the Milky Way. ‘Background Extraction’ would have removed these variations and was not used – the site had virtually no light pollution and is rated as Bortle Class 1.
For the Cassiopeia image I was able to stack 56 frames. There may have been some water vapour in the atmosphere when I took these as the brightest stars had become somewhat diffuse – nicely making them more apparent in the image. For this image, nothing was done except to stretch the image and remove the hint of star trailing.
For the Perseus image I was able to stack 65 frames. The double cluster shows up well as does the large open cluster NGC 1348 that surrounds Mirfak, Alpha Persei. Again, for this image, nothing was done except to stretch the image and remove the hint of star trailing.
Removing the hint of star trailing in the two images
In Adobe Photoshop or Affinity Photo, the image is duplicated and the blending mode set to ‘Darken’. Using the ‘Move’ tool, the upper layer is moved, pixel by pixel over the base layer and the stars will be seen to become circular. For precision, it may be worth first doubling the size of the image before in order to make finer adjustments.
There is one proviso. If the image contains nebula regions, this process may cause artefacts and it is then best to separate the nebula and stars using StarNett++ and only apply the technique to the stars image before combining them.