
One of over 100 articles in the author’s Astronomy Digest: http://www.ianmorison.com
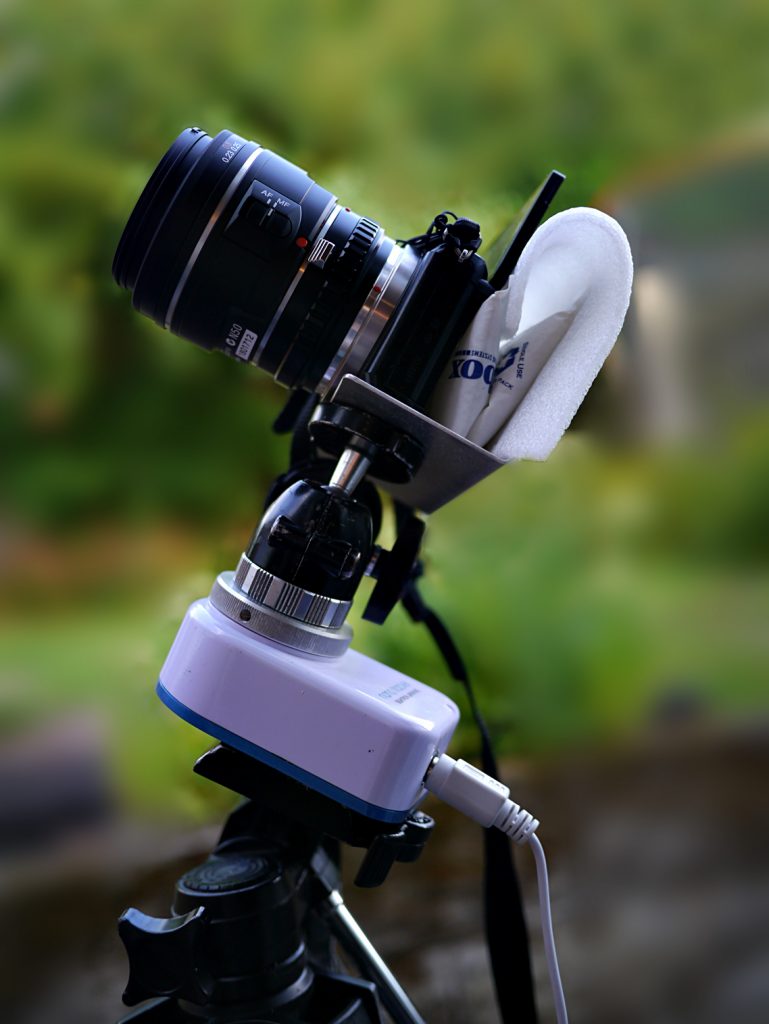
Astroimagers will often purchase a specialised astro-camera when imaging with a telescope, but there is no reason why a normal digital camera cannot be used instead. Indeed, the sensors used in specialised cameras are often the same as those used in DSLR and mirrorless cameras – for example the APS-C sized CCD sensor in my cooled QHY8L camera was that once used in the Nikon D50. Specialised cameras do, of course, have their advantages: the lower cost examples may well include a cooling fan to help reduce the rise in temperature of the sensor as a sequence of images are taken whilst the more expensive include Peltier cooling systems to lower the sensor temperature down to, perhaps, -20 Celsius and so reduce the noise levels in the captured frames. However, the latest CMOS camera sensors have inherently low noise so this is not so much of a problem as it once was. If the camera has a tilting screen, it should be opened out to reduce the heat path between the back of the camera and the surrounding air and one can sometimes, as for my Sony A5000, arrange to hold a small ice pack against the camera back, as seen in the image below, to keep the sensor temperature as low as possible.
Coupling to the telescope
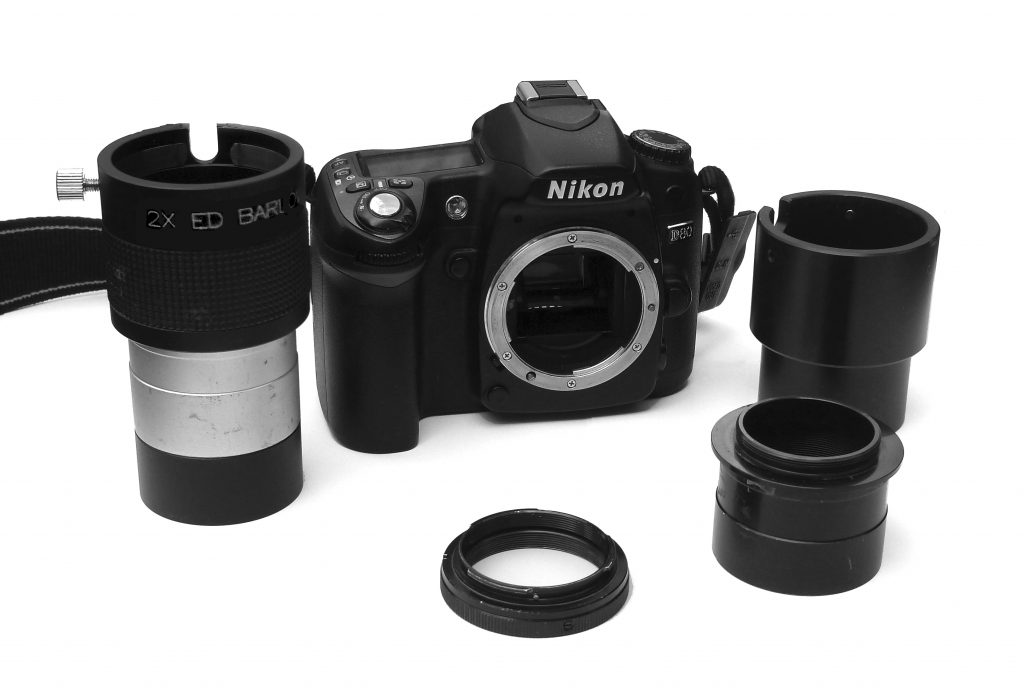
In order to couple a camera to a telescope one needs to purchase a T-mount adapter. This is made up of two parts; a 2 inch barrel to fit into the focuser and a bayonet which is specific to the camera and which fits into the camera’s lens coupling flange. These can be bought, for example, from Harrison Cameras in the UK. When used with refractors, I have never been able to acquire focus and it is likely that to achieve focus a 2 inch barrel extender will be required. If one were imaging the Moon with a short focal length refractor, the image is likely to be too small on the sensor to be adequately sampled and so the result will have a lower resolution than the telescope is capable of. In this case, a Barlow lens can be added to increase the image size by, typically, 2x. It may be that the result of adding a Barlow lens makes the lunar image too large. In this case one can either take images of two or more segments of the lunar surface and then ‘composite’ them into a single image using, for example, the free program Microsoft ICE (Image Composite Editor). There can sometimes be an alternative – I have found that the Barlow lens element of my 2x Barlow can be unscrewed and will screw directly into the front of the T-mount barrel. This reduces the distance of the Barlow lens to the sensor and reduces the magnification to ~1.5x.
The problem of balance
There is a problem when adding a camera to a small refractor particularly if it is a DSLR or full frame mirrorless camera. Its position, usually at the end of a barrel extender or field flattener/reducer produces quite a turning moment and so, even if the telescope is attached to the mount as close to the focuser as possible (using rings and a typical 6 inch ‘Vixen’ style dovetail bar) the combination will be back heavy and it will not be possible to balance the telescope around the declination axis. The best solution would be to purchase a longer mounting bar such as the Geoptik 250mm Vixen Style Universal Dovetail Bar (available from Rother Valley Optics at a cost of £40) so that the bar extends back towards the camera and balance can be achieved. A workable, but far less elegant method would be to add weight to the front of the refractor, perhaps by using a small camera ‘bean bag’ strapped to the telescope tube.

Curvature of Field
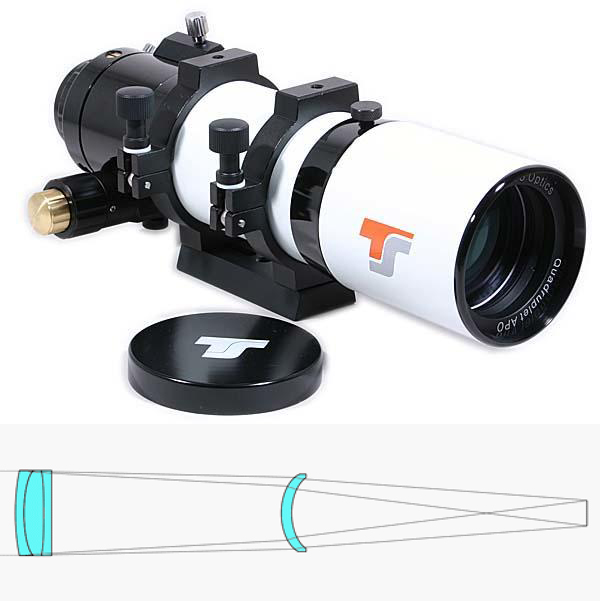
There is, however, a fundamental problem when using a standard telescope with a full frame (36×24 mm sensor) camera – curvature of field. This may also become apparent when a very short focal length refractor is used with an APS-C sensor camera. Whereas camera lenses are designed to give a flat field so that all parts of the sensor will capture a sharp image, standard telescopes are not. The image plane is actually the curved surface of a sphere whose centre in the case of a refractor is the ‘nodal point’ of the objective lens. As a result, in order to correctly focus the outer parts of a flat sensor, it will need to be slightly closer to the lens or mirror. The shorter the focal length of the telescope the greater the problem as the curvature will be greater. Telescopes that aim to provide a flat field are called ‘astrographs’ and will very likely contain one or more additional elements as in the Teleskop Service 66 mm Quad astrograph which uses a triplet objective coupled with a singlet lens part way down the telescope tube to flatten the field.
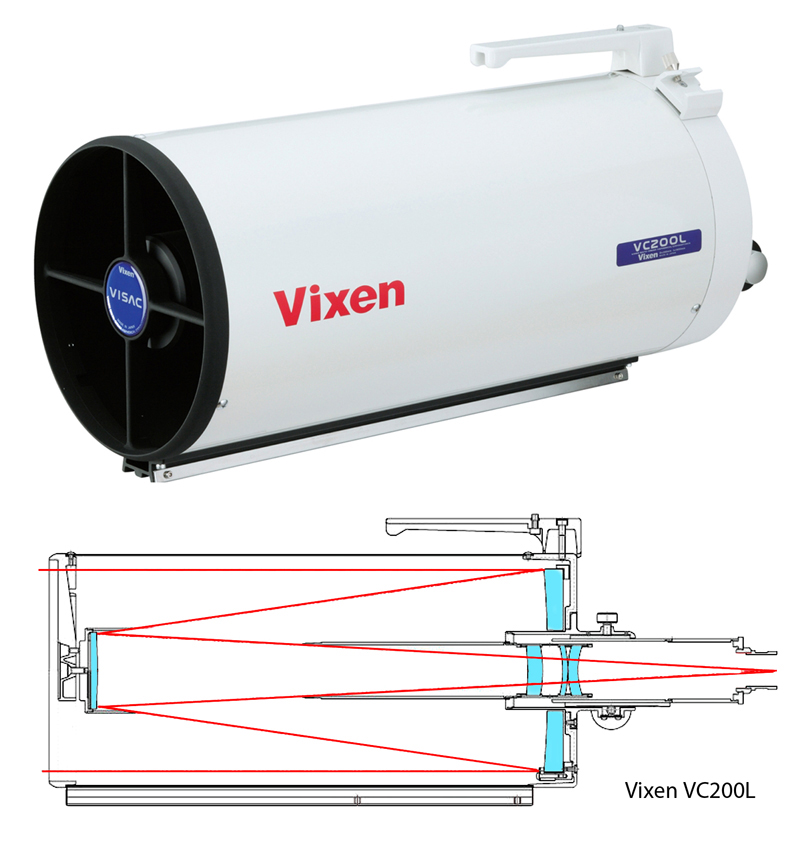
The Vixen VC200L and the Celestron ‘EdgeHD’ catadioptric telescopes employ additional lens elements mounted within the rear baffle tube to, again, provide a flat field with ‘clean’ stellar images out to the edge of the frame.
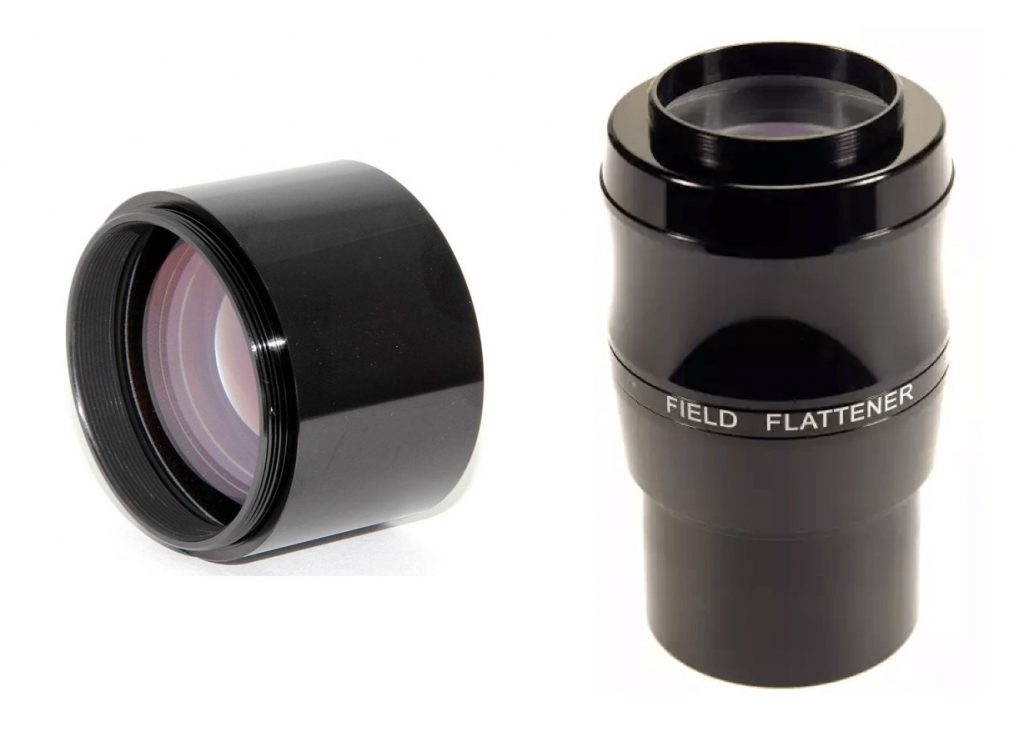
Field Flatteners and Reducer/Flatteners
Curvature of field and the effects of lens aberrations distorting the stellar images towards the edge of the field can be compensated for by the use of either ‘Field Flatteners’ or ‘Reducer/Flatteners’ (called reducers from now on). The former will leave the focal length of the telescope essentially unchanged whilst the latter will reduce the effective focal length by, usually 0.8x, 0.7x or 0.6x, as well as flattening the field – these will both widen the field of view and reduce the focal ratio so shorter total exposures will be required. Many manufacturers will provide these designed specifically for a given telescope but there are some that will work with a range of focal length telescopes. For example, the ‘Teleskop Service 2 inch flattener’ will work with a very wide range of refractors with the distance from the flattener to the sensor adjusted to suit the focal length of the telescope. The required distance varies from ~100 to 130 mm as the telescope focal length increases from 450 to 800 mm. It does work superbly well. Another, low cost, example is the Altair Astro Lightwave 1.0x Field Flattener which can be used with f/5.5 to f/6.25 refractors. I have used the TS flattener with an 80 mm f6.25 refractor with very good results when used with a full frame sensor.
An example of a reducer is the TeleVue TRF 2008 which will work well with refractors with focal lengths in the range 400 to 600 mm reducing the focal length by 0.8x. Though having a focal length of 355 mm – less that the nominal range of the reducer – I have coupled it to a Takahashi 60mm, f/5.9, refractor to provide an effective 284 mm, f/4.7 telescope. This works amazingly well covering all of a full frame sensor with some easily correctable vignetting and would, of course, be perfect across the whole of an APS-C frame sensor. [Takahashi do provide a dedicated field flattener for this refractor as well as a, somewhat expensive, 0.72x reducer.]
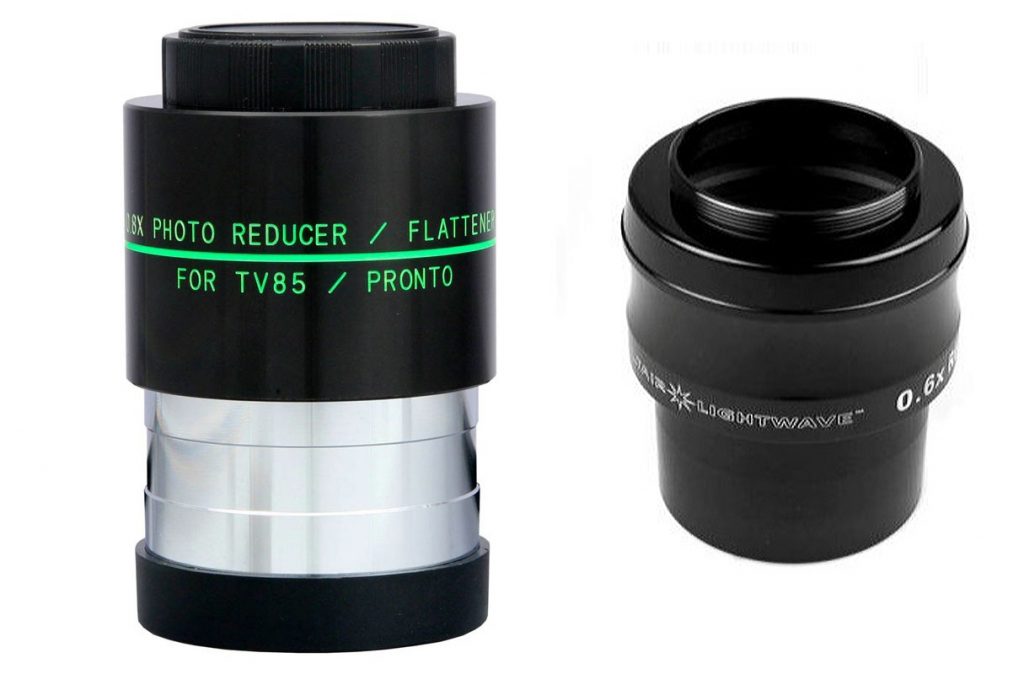
I have also used the Atair-Astro 0.6x reducer with an 80mm aperture, f/ 6.25, FPL-53 (close in performance to Flourite) doublet objective. The combination, gives an effective 300 mm focal length, f/3.75, telescope. It cannot cover a full frame sensor but will cover around 77% of it – a far larger area than if an APS-C sensor were used. When used with an APS-C camera this telescope produces near perfect images across the whole sensor, either with the reducer or without. So, if using an APS-C sensor camera, it may well be that a field flattener is not required – particularly for focal ratios of f/7 and above.
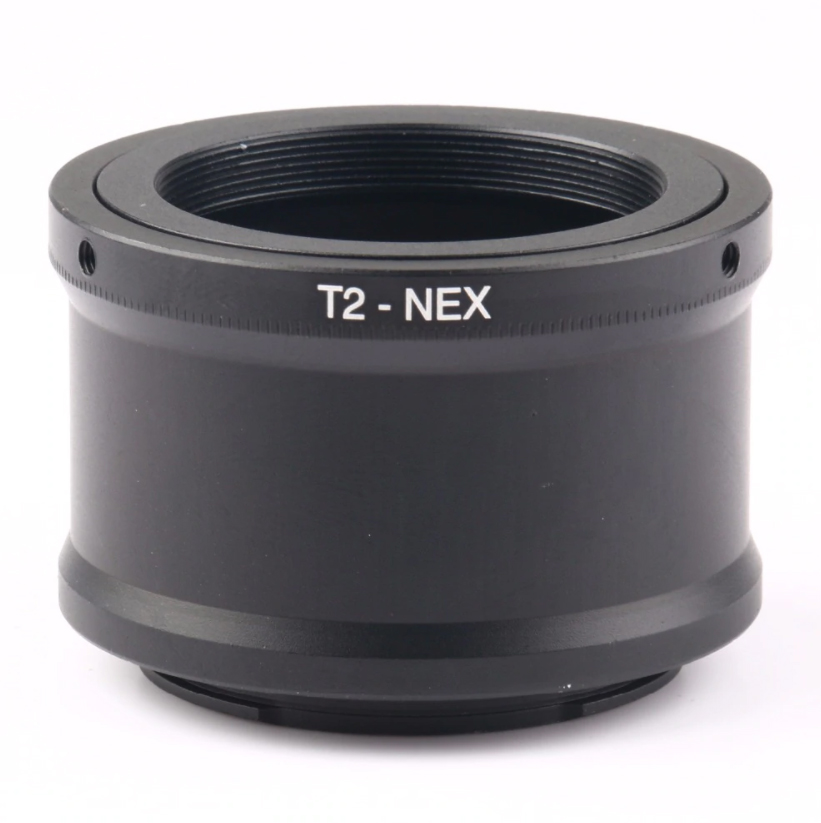
The reducers will usually screw directly into the bayonet part of a T-mount so, if used, the barrel part is not required and one may not need to use a focuser barrel extender to reach focus. Typically, they require a distance from the rear of the flattener to the sensor of ~5.5 mm. The thickness of the T-mount bayonet coupled with the camera flange to sensor distance will correctly achieve this when using a DSLR but, as the flange to sensor distance is less for a mirrorless camera, one needs to apply some extra separation. In the case of the Sony mirrorless cameras, Harrison Telescopes can supply a Sony e-Mount T2 adapter ring costing ~£15 which has additional length to provide the correct spacing.
The use of APS-C or Full Frame cameras
When using a refractor with a flattener or reducer it is very unlikely that the full area of a full frame sensor can be covered. There will almost certainly be some vignetting at the corners of the frame and the image quality will fall off with stars exhibiting ‘coma’ – so called as the stars appear like comets – whilst in other cases they take the form of a ‘seagull’. The image across an APS-C sensor should be fine, but can it be worth using a full frame sensor camera? I think that the answer is yes providing the resulting image is cropped and possibly some ‘star restoration’ is applied to the outer parts of the frame. As a ‘lens’ example, the excellent Samyang fisheye lens looses a large part of its image circle when used, as designed, for an APS-C sensor, but when used with a full frame sensor the majority of its full field of view will be captured. Again, and rather surprisingly, the Nikkor 35mm f/1.8 APS-C lens has been found to be usable with a full frame sensor camera providing some cropping is used.
Let’s assume that a telescope flattener or reducer can perfectly cover an APS-C sensor. Its horizontal length (Nikon/Sony) is 23.5 mm and the vertical, 15.6 mm. This gives an area of 366 sq mm – less than half that of a full frame sensor (36x24mm) of 864 sq mm. The image circle to just cover an APS-C sensor is ~28 mm. This image circle can perfectly cover a 20 mm diameter square area giving an area of 400 sq mm so a small advantage if used with a full frame camera. But often the image circle is greater than this, and if we allowed for an image circle of 34 mm rather than 28 mm, the area that could be covered on the full frame sensor will be 576 sq mm – a very worthwhile gain. An even larger area may be usable if one is happy to do some star restoration in the extreme corners and perhaps use some light frames to correct for vignetting. (Vignetting can also be corrected in Photoshop or Affinity Photo.) The Digest contains an article ‘Repairing Coma in Star Images’ to correct for ‘seagull’ or ‘comet’ type coma. However, if the coma is in the form of stars elongated radially away from the centre of the frame then there is a simple solution. The affected corner areas are individually selected and the layer duplicated. The blending mode is set to ‘darken’ and, with the move tool selected the mouse clicked on the upper (visible) layer – important. The arrow keys can then be used to shift the upper layer over the lower one and you will see how the distortion is removed before flattening the two layers. [This method will also correct for minor ‘star trailing’ when applied to the whole of an image.]