JUNE 2019
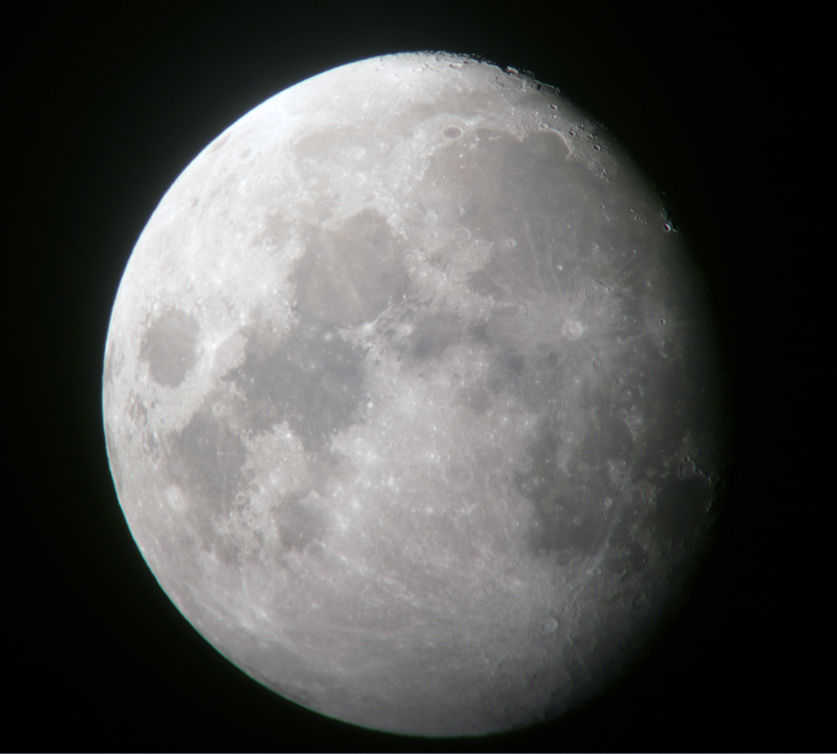
A Colourfull Moon using ‘Super-resolution’
An article in the author’s Astronomy Digest – https://www.ianmorison.com
The lunar image seen below was produced using a technique called ‘super-resolution’. Also known as ‘drizzle’, it was developed by the Hubble Space telescope Institute to process the first HST images when it had a rather low resolution camera. Although the technique is mainly used to increase the effective resolution of a camera, it also reduces the noise in the image as several images are averaged. Stacking 4 frames should reduce the noise in the image by half, 8 frames to about a third of that in a single frame. It is this aspect of the process that has allowed this image to be made as it was produced by increasing the colour saturation of the lunar image. Unless the image is virtually noise free, this process ‘blows up’ and produces a disastrous, pixilated, image. The technique can also be used to increase the effective resolution of, say, landscape images and an example will be shown at the end of the article. The process can be activated in several DSLR cameras and is also used by some smartphone cameras to improve their image quality.
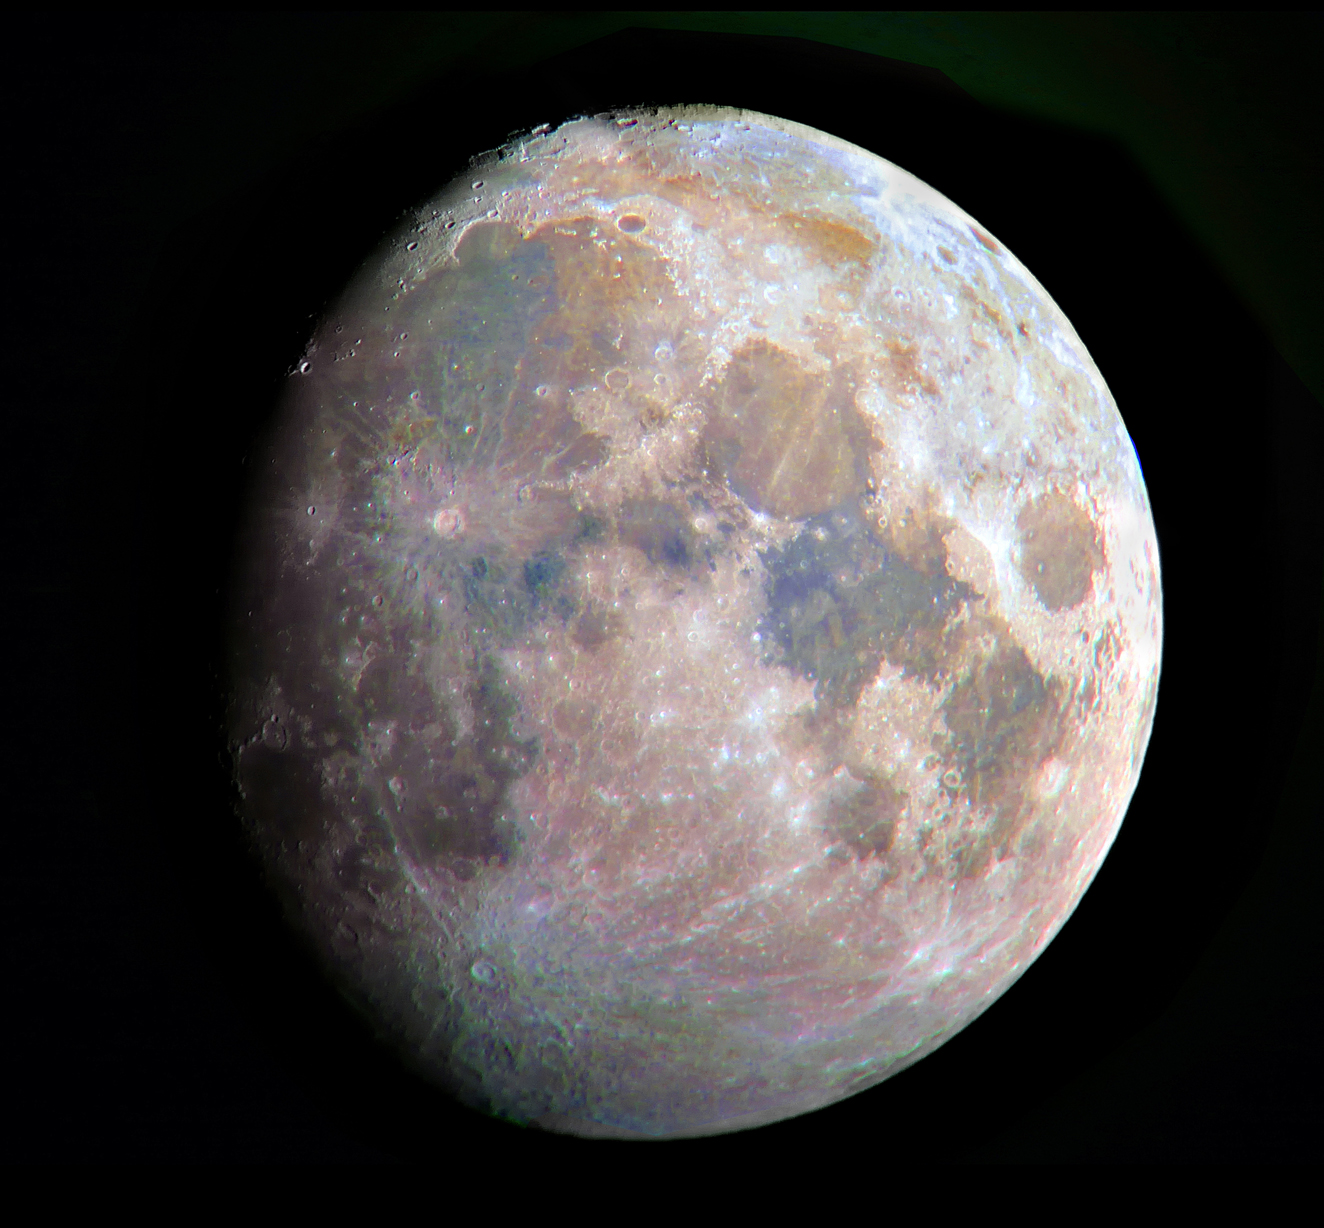
The image actually tells us a little about the Moon’s surface geology, as the bluish colour of Mare Tranqillitatis indicates that the basalt lava contains more titanium (TiO2) than Mare Serenatatis up to its left which contains relatively more iron (FeO) giving it a redder colour. The southern portion of Mare Tranquillitatis contains the highest proportion of Titanium on the lunar surface at 4.4%.
Super resolution
In essence the idea is this. Imagine that the image produced by the camera sensor can be perfectly projected onto a ‘sensor array’ that has four times as many pixels. Capturing a single frame would have no real effect on either the resolution or the noise in the image. But if the larger ‘sensor’ collected (and so averaged) the light from a number of images (which have been perfectly aligned onto it [*]) and if the initial image has fallen on slightly different parts of the camera’s sensor so that the images will be subtlety different then something almost magical occurs. Not only will the noise in the image be reduced (as might well be expected) but the resolution given by the large sensor will actually be greater than that of the initial camera sensor. Usually the larger ‘sensor’ will be twice the dimensions that the camera sensor implying twice the resolution but, in reality, one might hope for an increase in resolution of 30 to 50%. One should point out that if the camera sensor has sufficiently small pixels to well sample the image falling on it from the telescope or camera lens then the process cannot improve the resolution but will give a smoother image. Ideally to fully sample the image falling on the sensor, the pixel size should be a half or less than that of the airy disk of a point source (such as a star) projected onto the sensor. With the latest very high resolution sensors one would not expect the resolution to increase as much as with sensors having fewer pixels.
[ (*) Each added image will have been shifted both vertically and horizontally and may also have been rotated to achieve precise alignment.]
The process
Taking the frames
Let’s say our camera is to take 8 frames. Even if a tracking telescope has been used, then it is almost certain that the image of each frame will have shifted by a pixel or so. Using a camera to take a landscape image one can either hand hold the camera whilst a burst of images are taken (when it is surprising how much the individual images will have shifted) or, if mounted on a tripod, slight taps on the tripod between each taken frame will have the same effect. I hope that it is obvious that there cannot be any movement in the scene being imaged otherwise that part of the image will be blurred in the final result. It is suggested that the frames are captured in raw rather than Jpg, but these can be used and the process will tend to remove the Jpeg artefacts.
Employing ‘super resolution’ in practice using Adobe Photoshop.
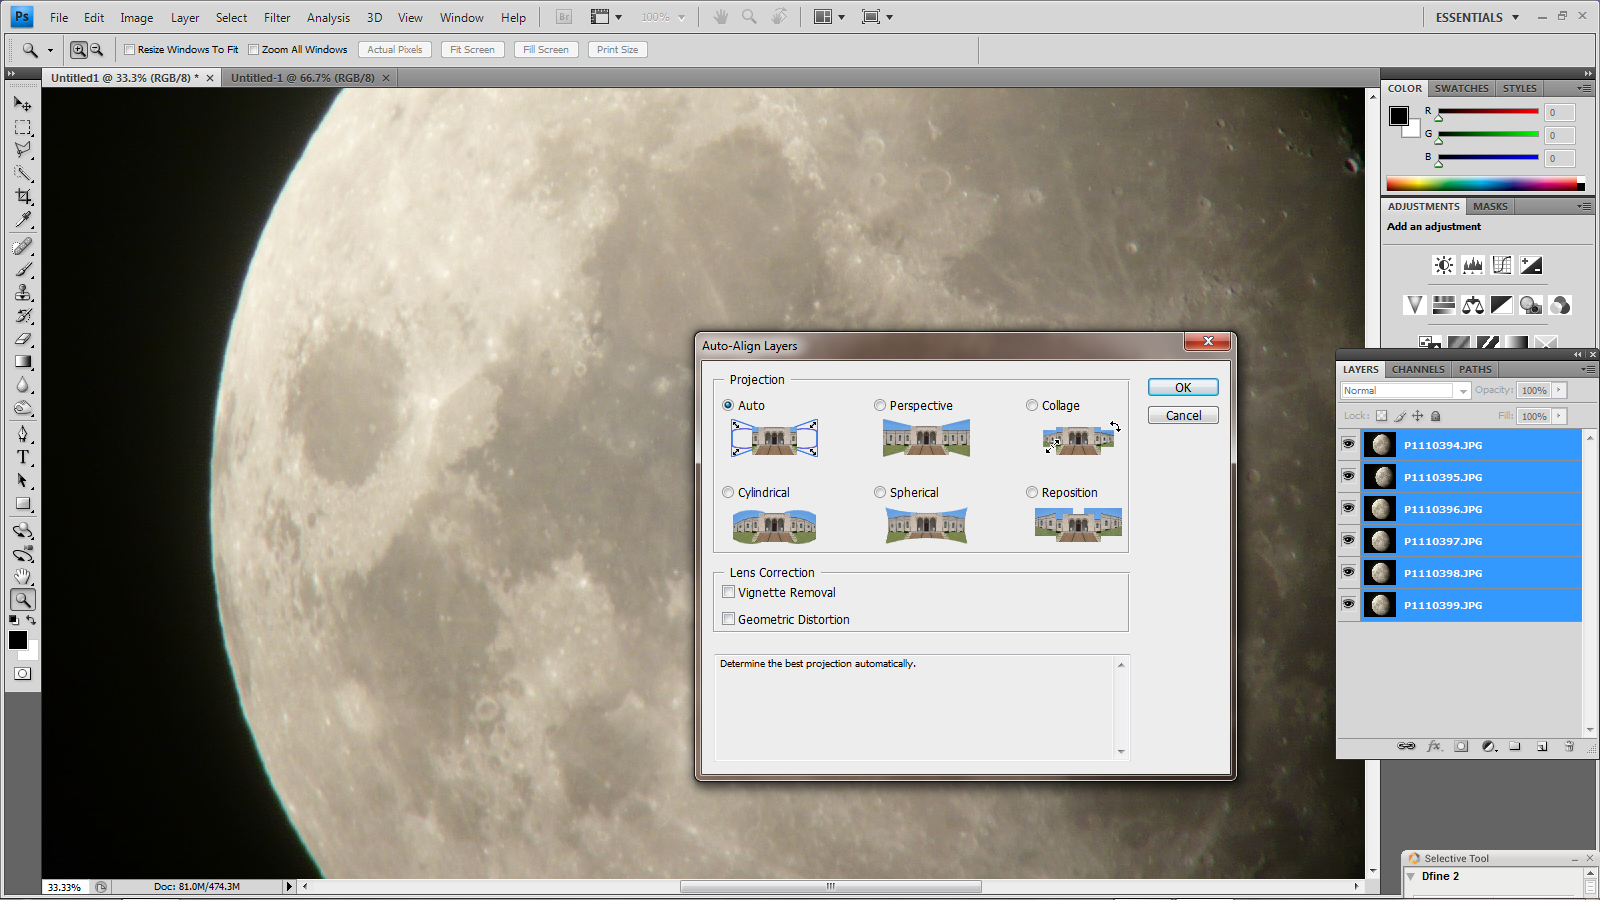
The 8 (or some other number) of frames are loaded into a set of layers using File > Scripts > Load Files into Stack.
Select all by clicking on the top layer and then shift clicking on the bottom layer – all layers will turn blue.
Click on the top layer and use Image > Image Size >Percent 200. All layers will be increased in size by 2 in each dimension.

Align the images: Edit> Auto Align Layers. Select ‘Auto’ and leave the two lens correction boxes unchecked (this is the default setting). It will then take a little time to align the layers.
Averaging the layers
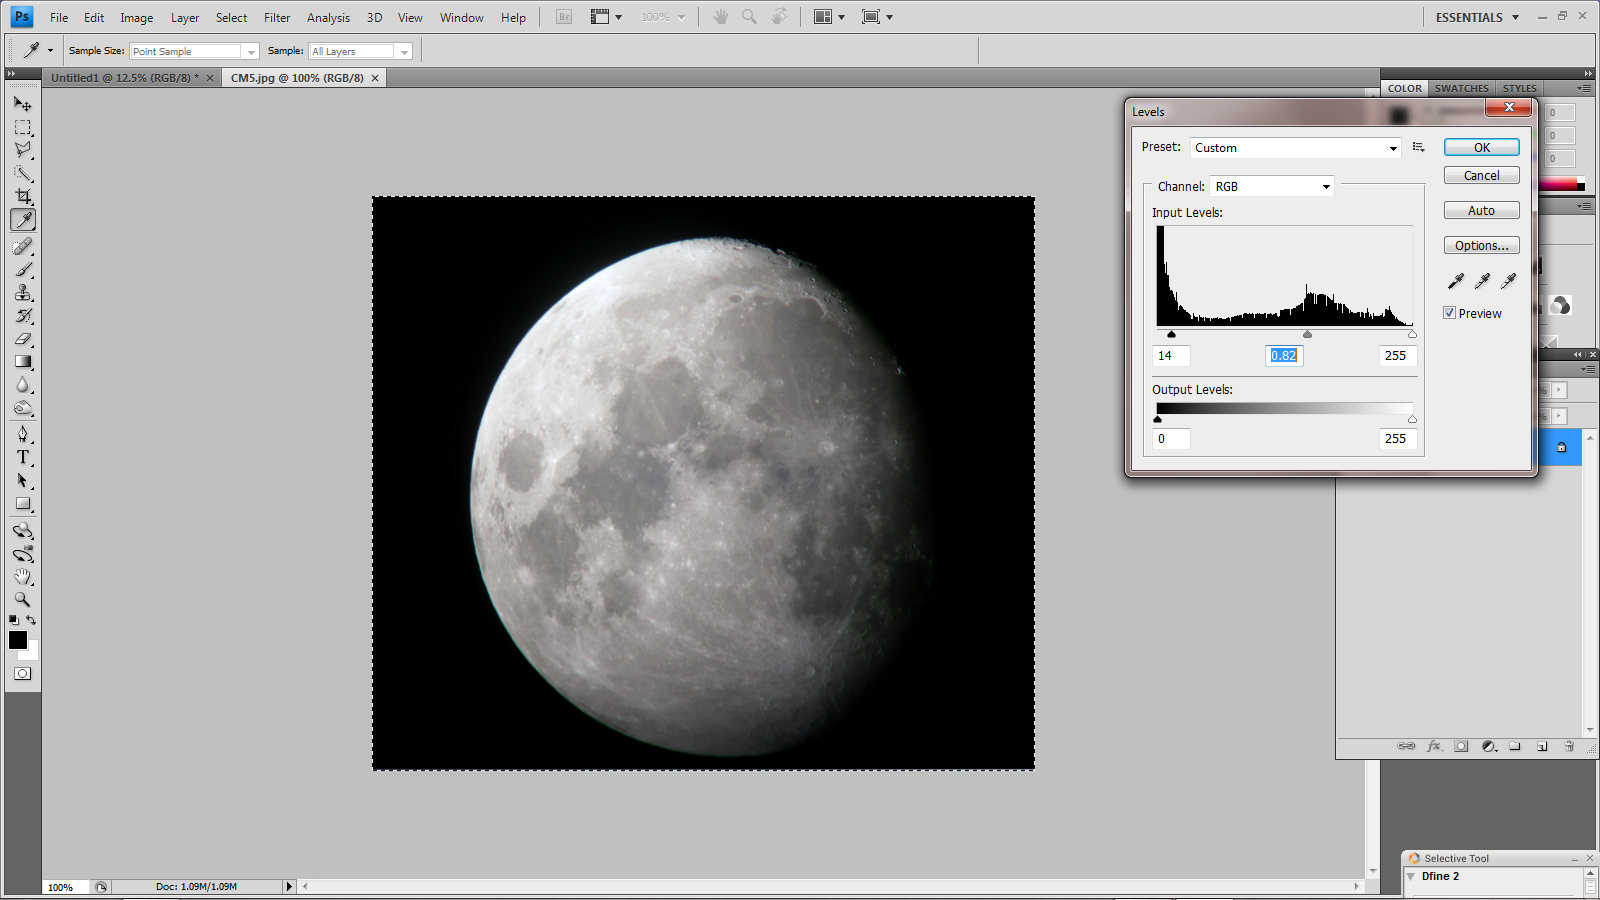
Click on each layer in turn (it will then be the only one in blue) starting at the second from bottom. In this case use the opacity slider to set to 50%. Moving to the next one above set to 33%, the next one to 25%, the next to 20%, the next to 17%, the next to 14% and the next to 12%. This percentage is simply 100/n where the bottom layer is 1 (so 100%) and does not need to be changed.
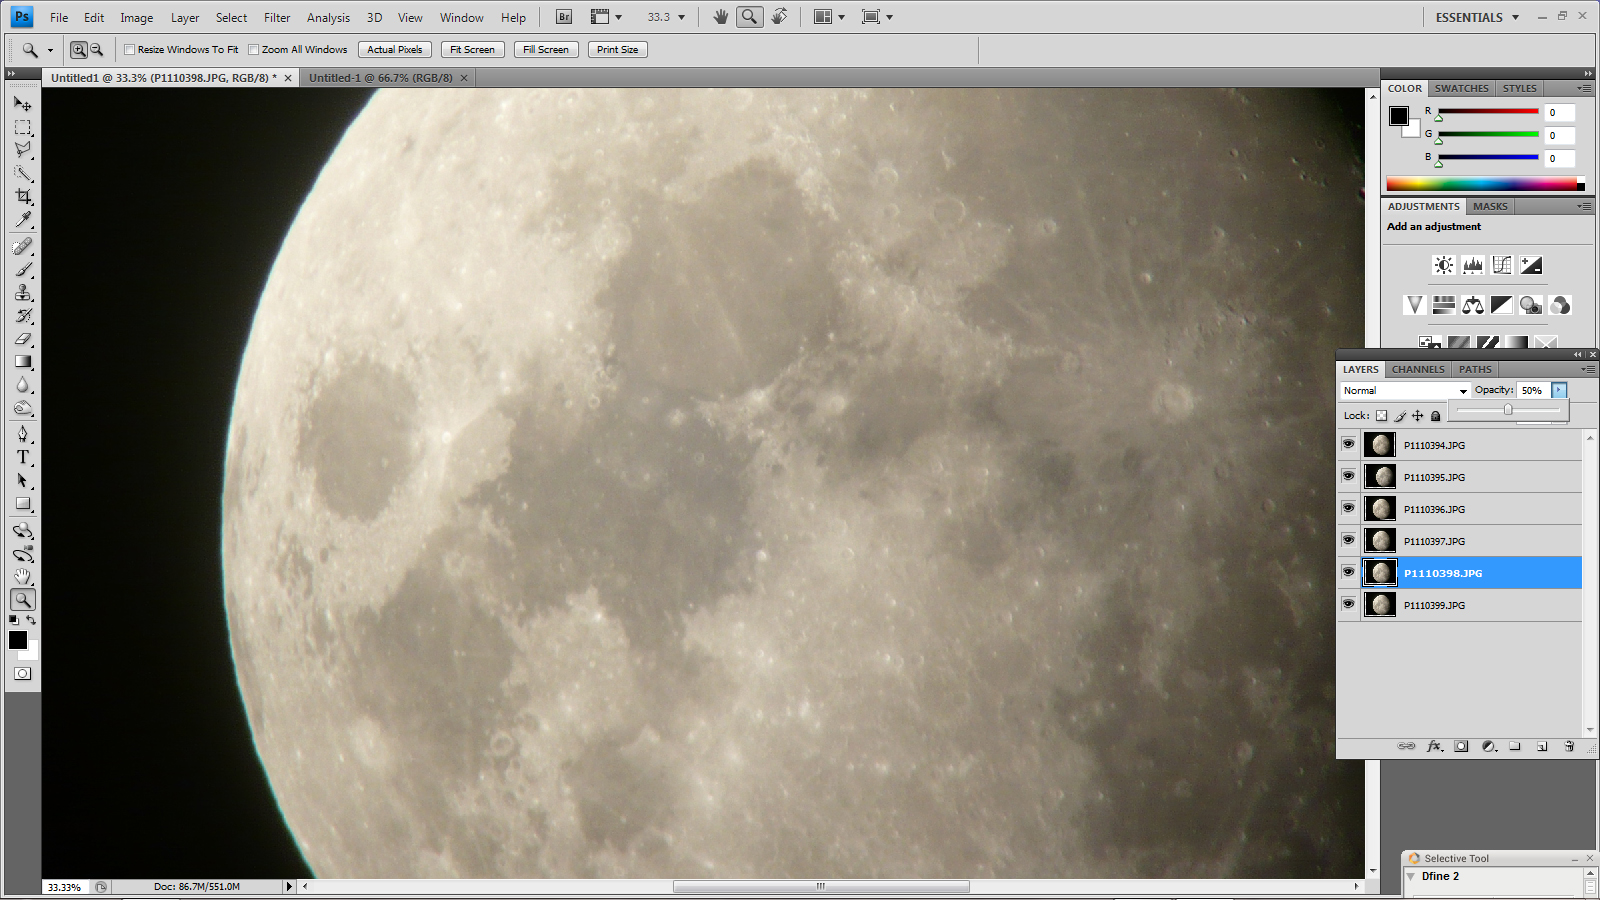
Setting the second layer to 50%
Then flatten the layers so Layer > Flatten Image.
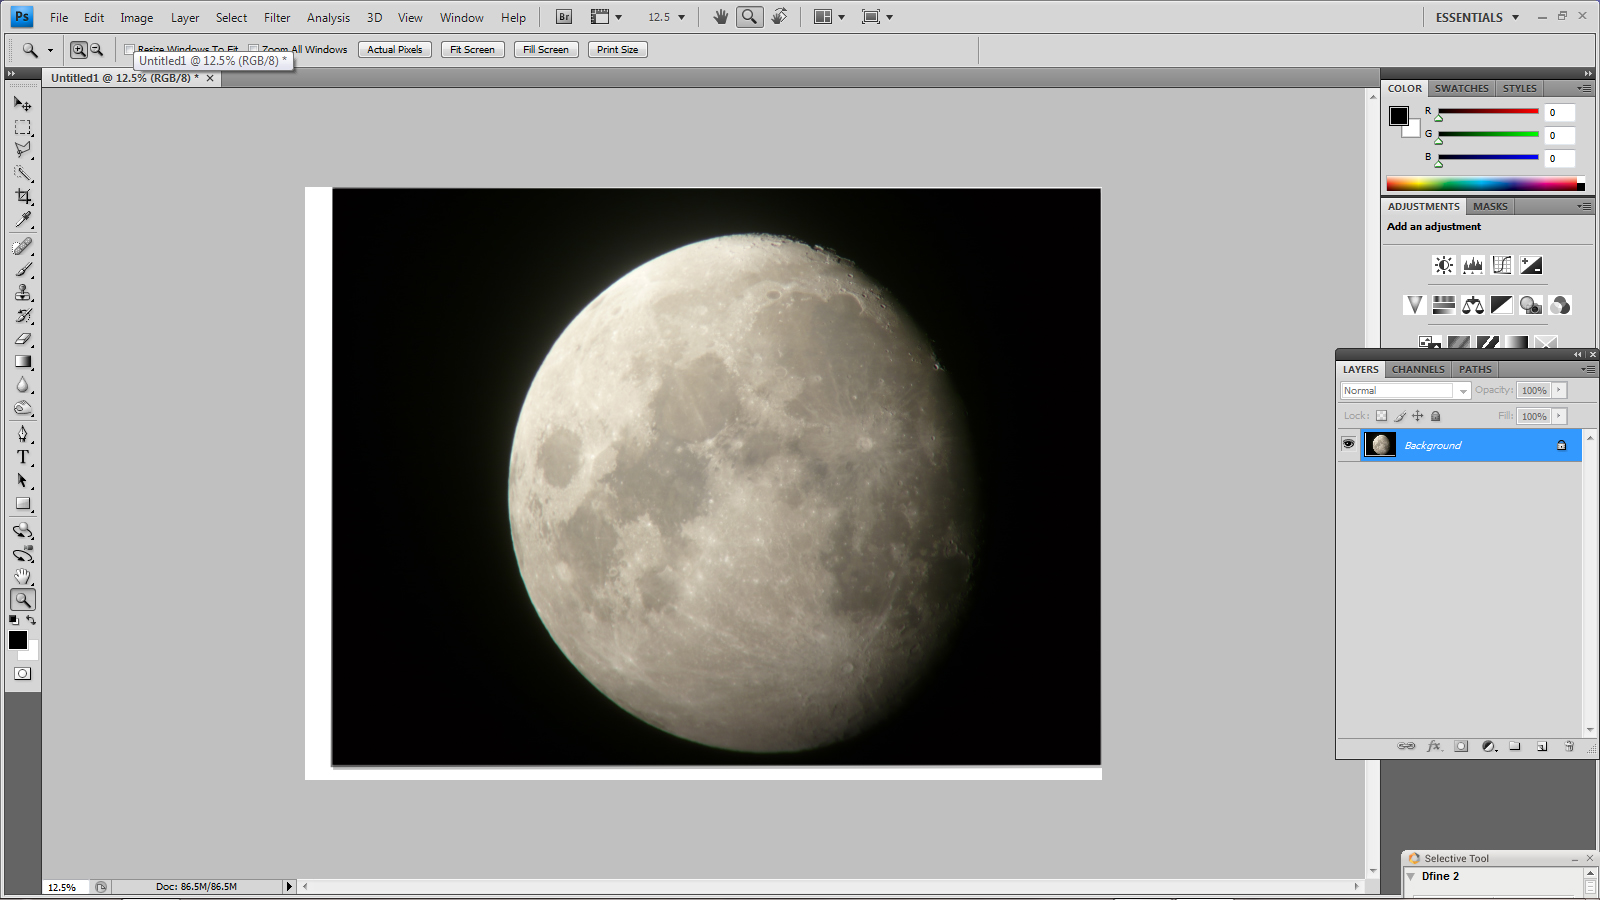
The result showed a brown colour cast. The white parts of the result show how much the images had shifted during the taking of the individual frames.
Removing the overall colour cast
The ‘Auto Color’ (Image>Auto Color) tool was clicked upon to remove the colour cast.
Adjusting the levels and sharpening the result.
First, in Levels (Image > Adjustments> Levels) the left slider (to adjust the ‘black point’) and mid point sliders were adjusted to produce a better image.
Then some ‘local contrast enhancement’ was applied using the ‘Unsharp Mask’ Filter (Filter> Sharpen>Usharp Mask) with a very large radius and small amount. This increased the contrast between the mare and highlands.
As the image now has very low noise, the ‘Smart Sharpen’ filter (Filter> Sharpen> Smart Sharpen) was used sparingly to produce the enhanced lunar image.
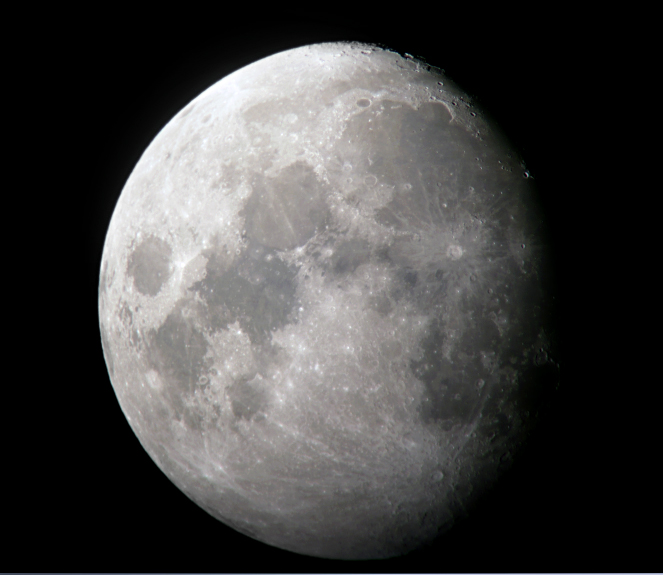
Bringing out the colour
Some hints of the colour differences can be seen in this image and can be made more prominent by increasing the colour saturation in the image. This can either by done using the Hue/Saturation tool (Image>Adjustments>Hue/Saturation) with the result shown at the start of the article or, perhaps more subtly, using ‘Match Color Tool’ (Image> Adjustments>Match Color) as shown below.

Colour enhancement using ‘Match Color’
Lunar Map drawn and coloured by Lucien Rudaux and printed in the Larrouse Encyclopedia of Astronomy, 1967.
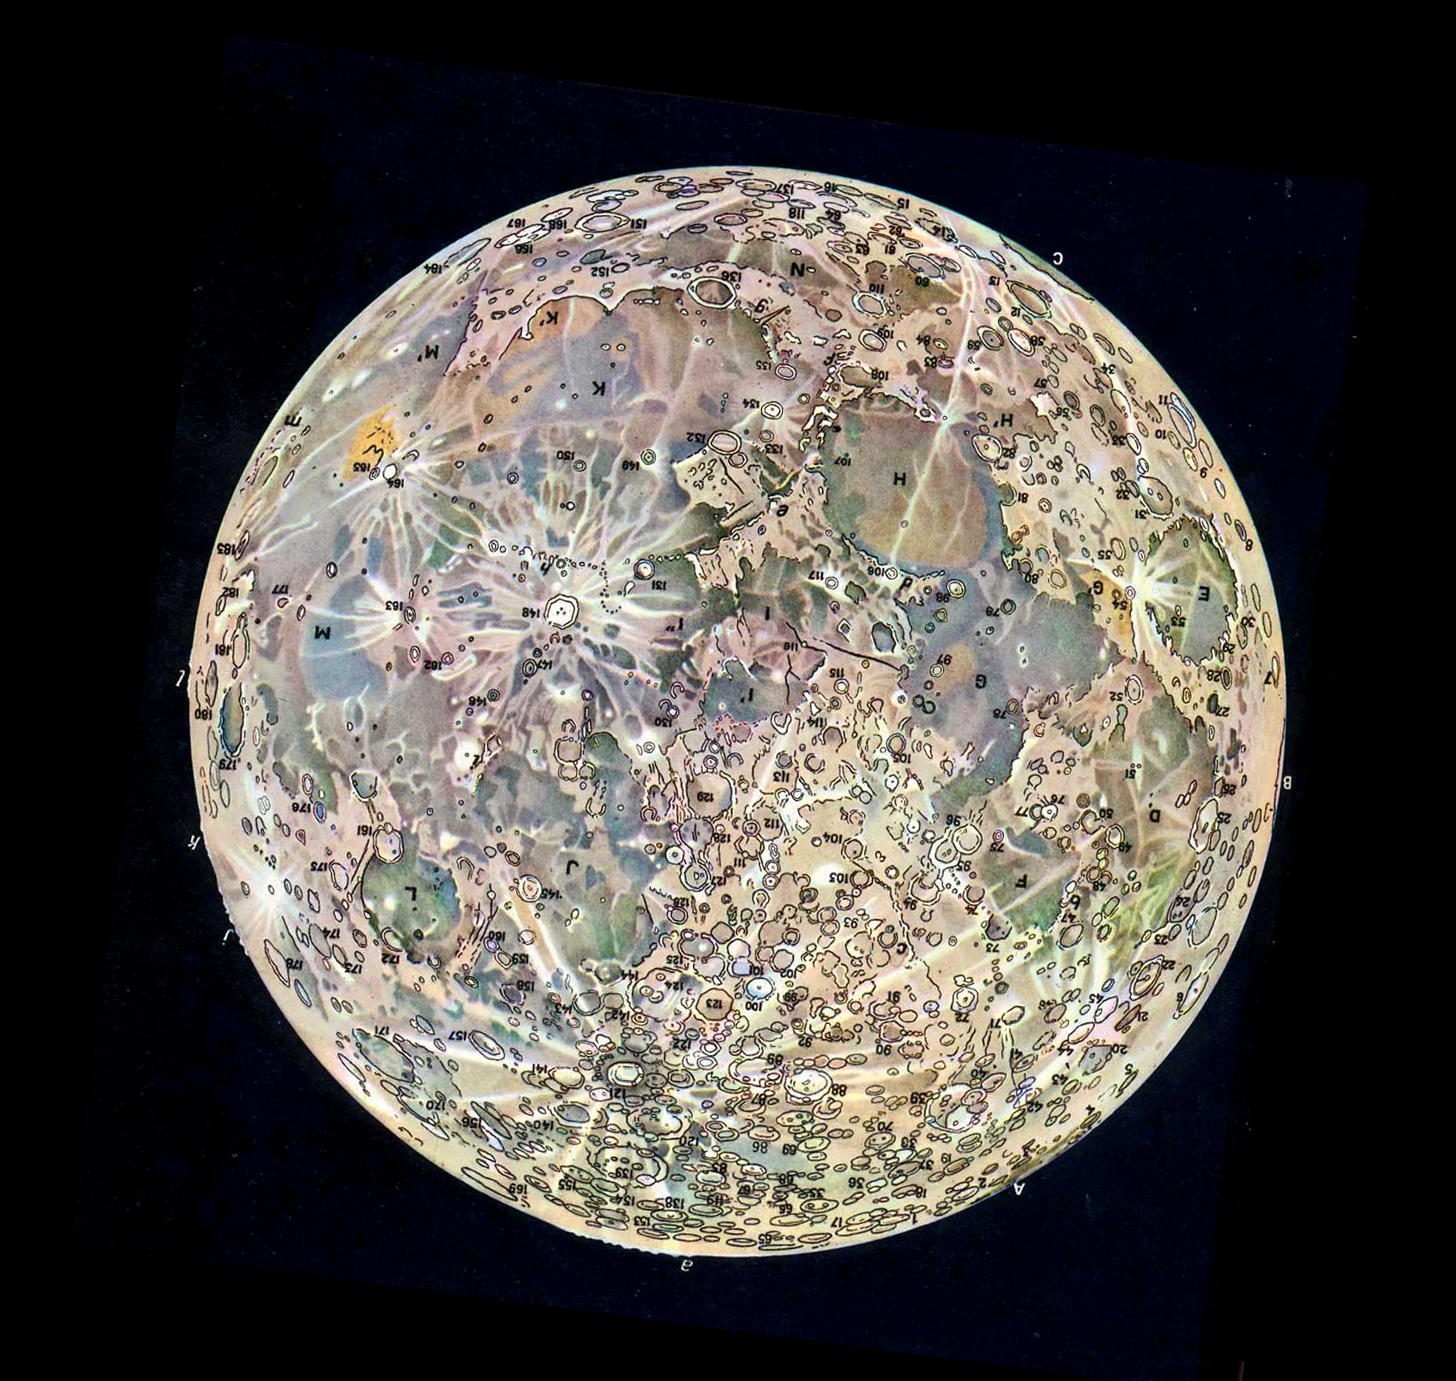
I find this image amazing. Rudaux must have had wonderful colour discrimination to be able to produce this map made purely by visual observations. The agreement from Mare Tranquilitatis up and across to the the crater Plato and the Sinus Iridum is very close indeed.
Use with normal photography
As mentioned at the start of the article, this technique can now be employed when using a number of cameras such as the Pentax K1 – but which then takes ~30 seconds to process the burst of images it has taken. However, if using any camera, a set of images taken in ‘continuous’ mode are taken, then the Photoshop processes described above will work.
Two examples
- The Sony A5000
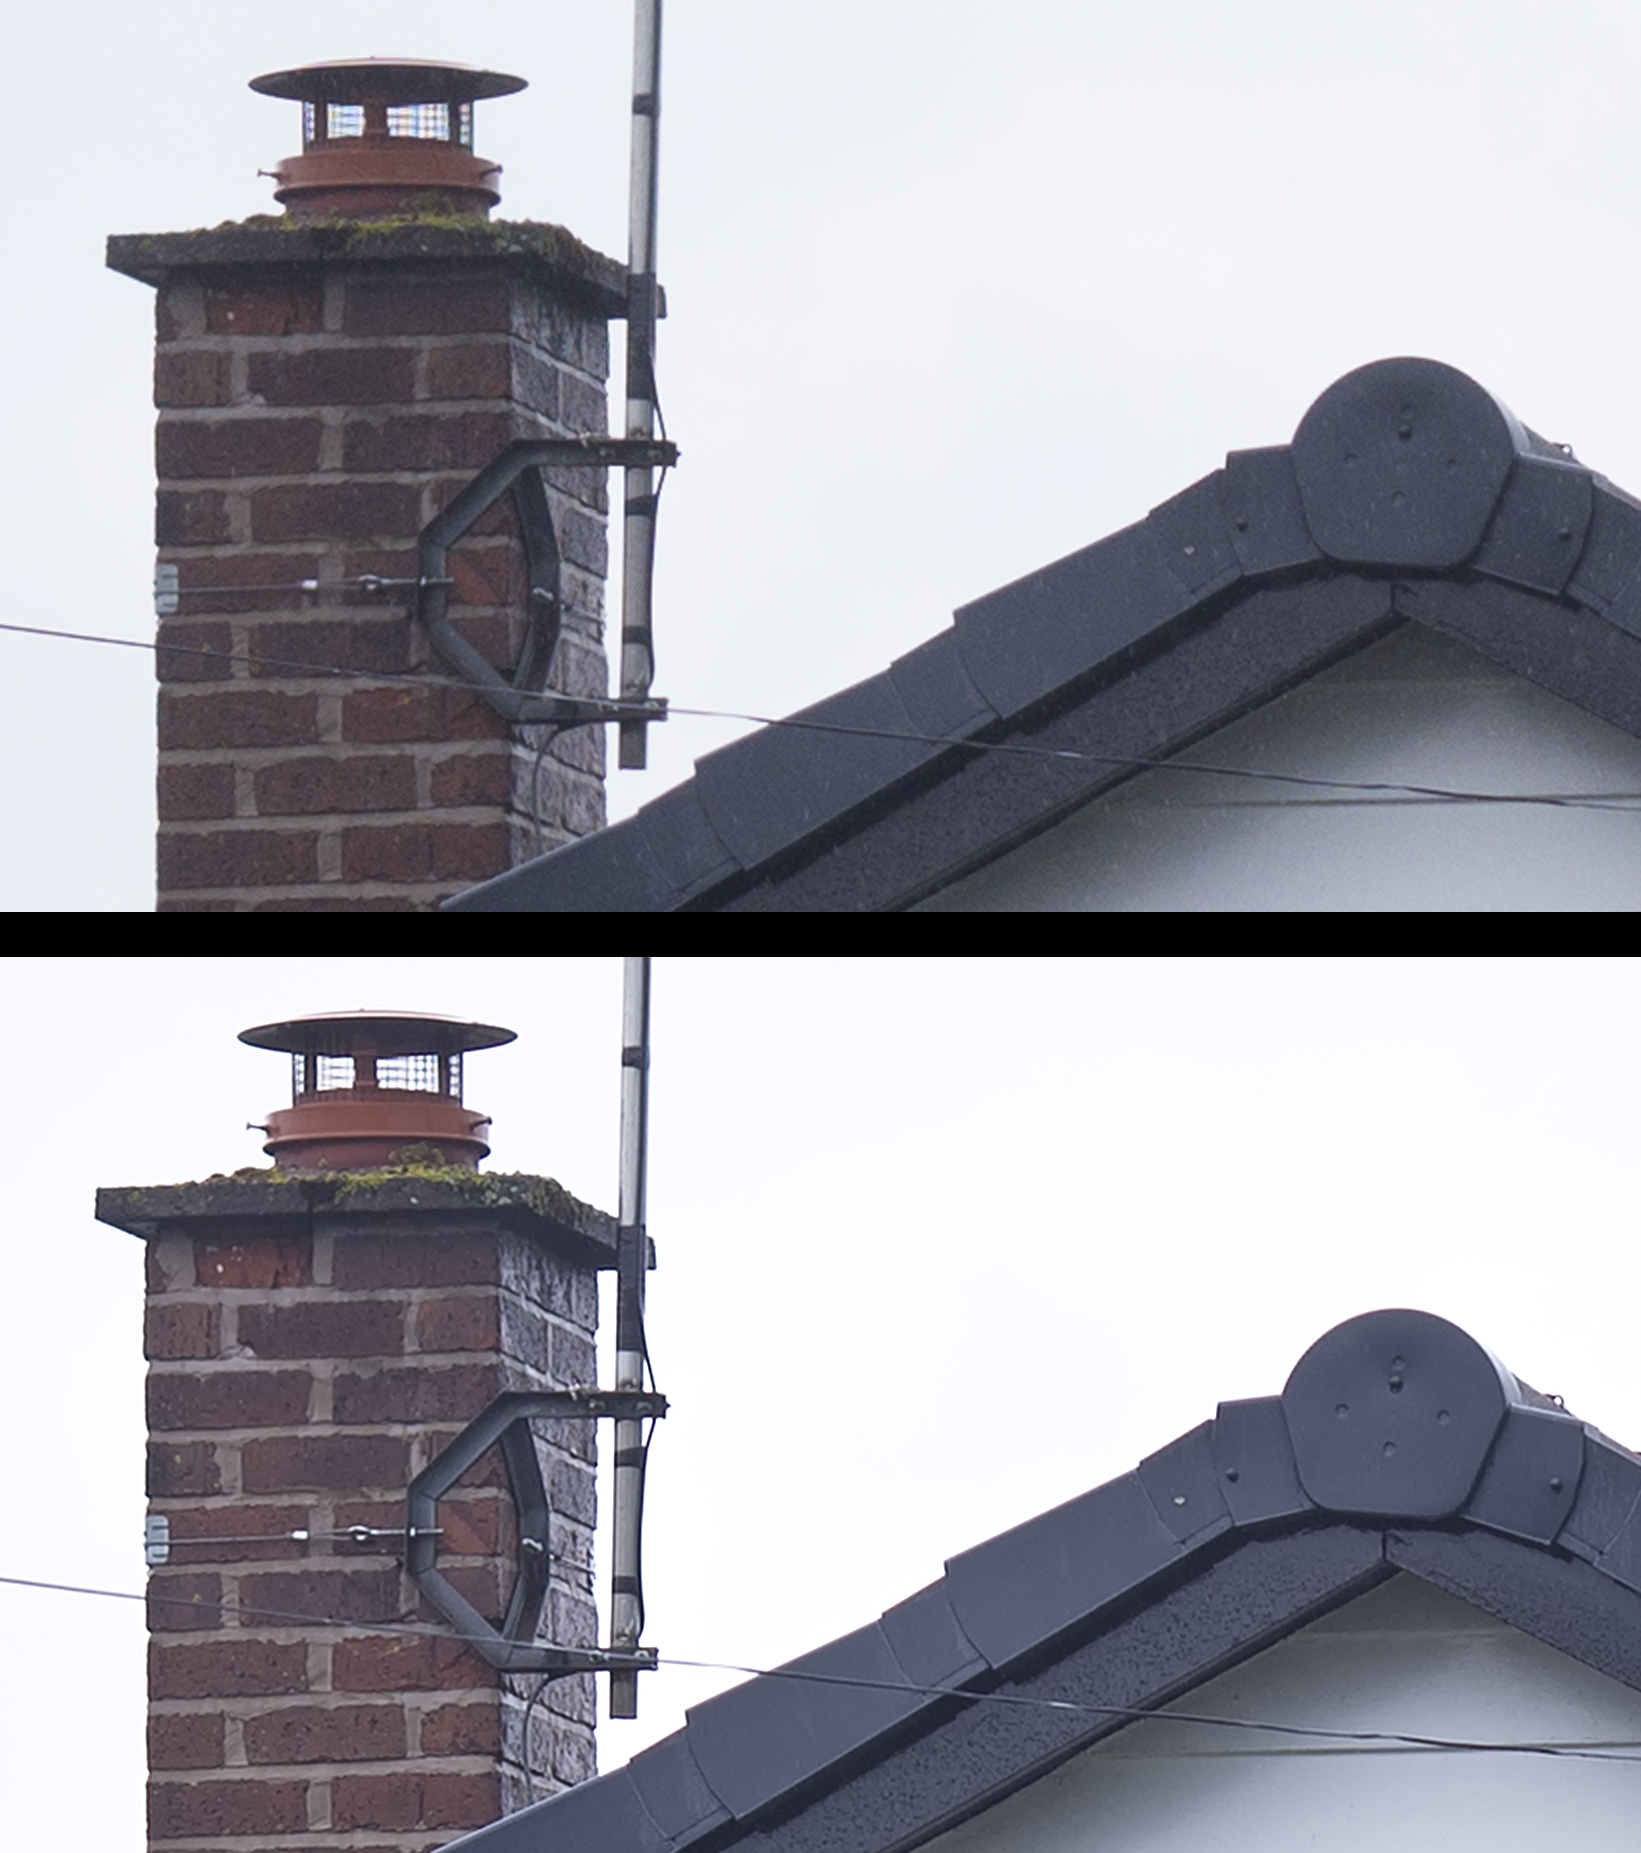
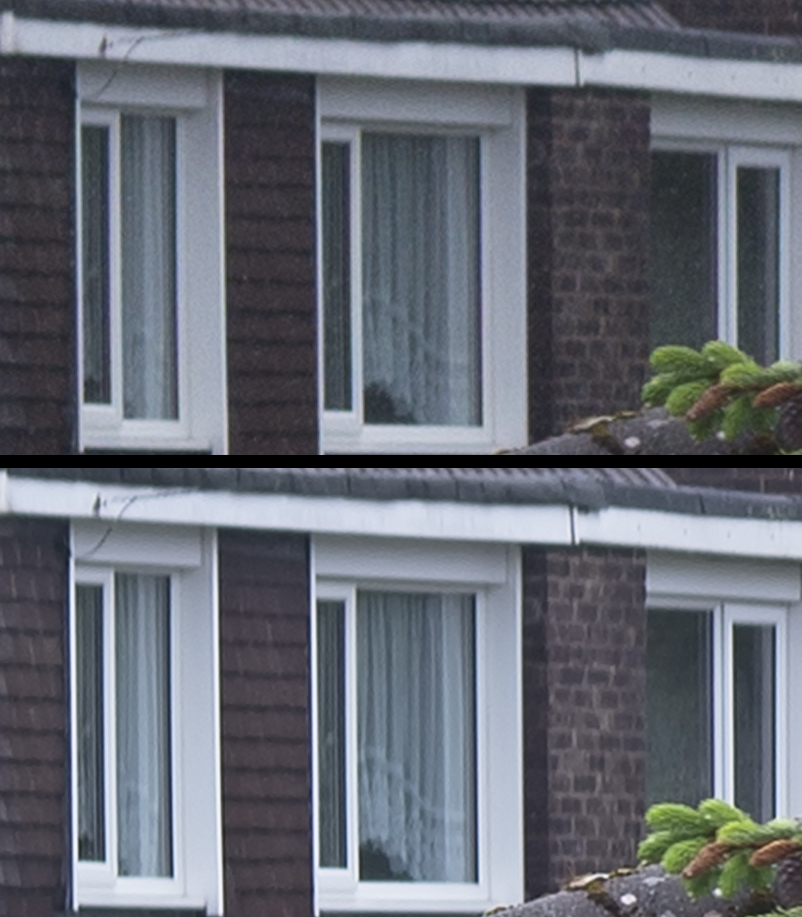
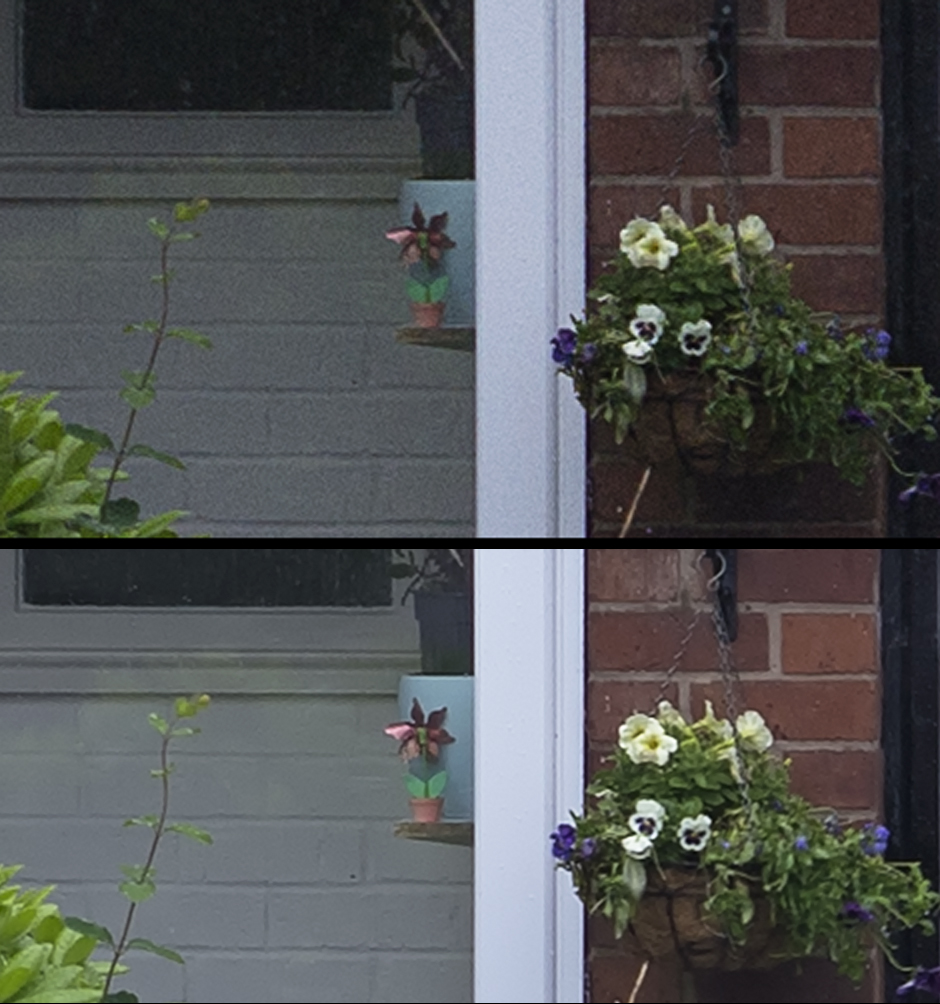
A continuous, hand held, burst of 9 raw images (this filled the buffer) was taken with the 21 megapixel Sony A5000 using on a dull day using a very sharp Zeiss 45mm lens stopped down to f/5.6. It was hoped that its resolution might exceed that of the Sony sensor so it would be worth using the technique to increase the resolution but also, of course, the noise in the image would be reduced without reducing the inherent resolution of the lens which might result if a noise reduction program were used. So, even if the resolution was not increased, a better image might well result in any case. The 9 frames were converted to Tiffs in Adobe Lightroom and processed just as described above.
No difference would be expected to be seen in full sized images reduced to include in this article, so I have produced comparison images of three areas in the image shown at 100%.
- The Sigma DP2 Merrill
This a 16 megapixel camera but using a Fovean sensor where each pixel records all three colours – in contrast to the normal Bayer sensor where, for a 16 megapixel sensor, 8 would be green, 4 would be red and 4 blue. So to produce its 16 megapixel image the Bayer camera has to interpolate between the pixels so the actual resolution is not quite what it might seem. Normally an anti-aliasing filter precedes the sensor to prevent moiré fringing and this also reduces the resolution a small amount. The Fovean sensor does not need one so punches well above its weight. The camera is slow to use and eats batteries but can produce beautiful images with exceptional ‘micro contrast’. In the set of three images below, the top shows the straight output from the sensor and one can see how each pixel is quite independent of its neighbours. The second shows this image having been interpolated to twice its original size giving a smoother image. The third is the result of the ‘super-resolution process which due to the averaging of a number of frames gives a cleaner image.
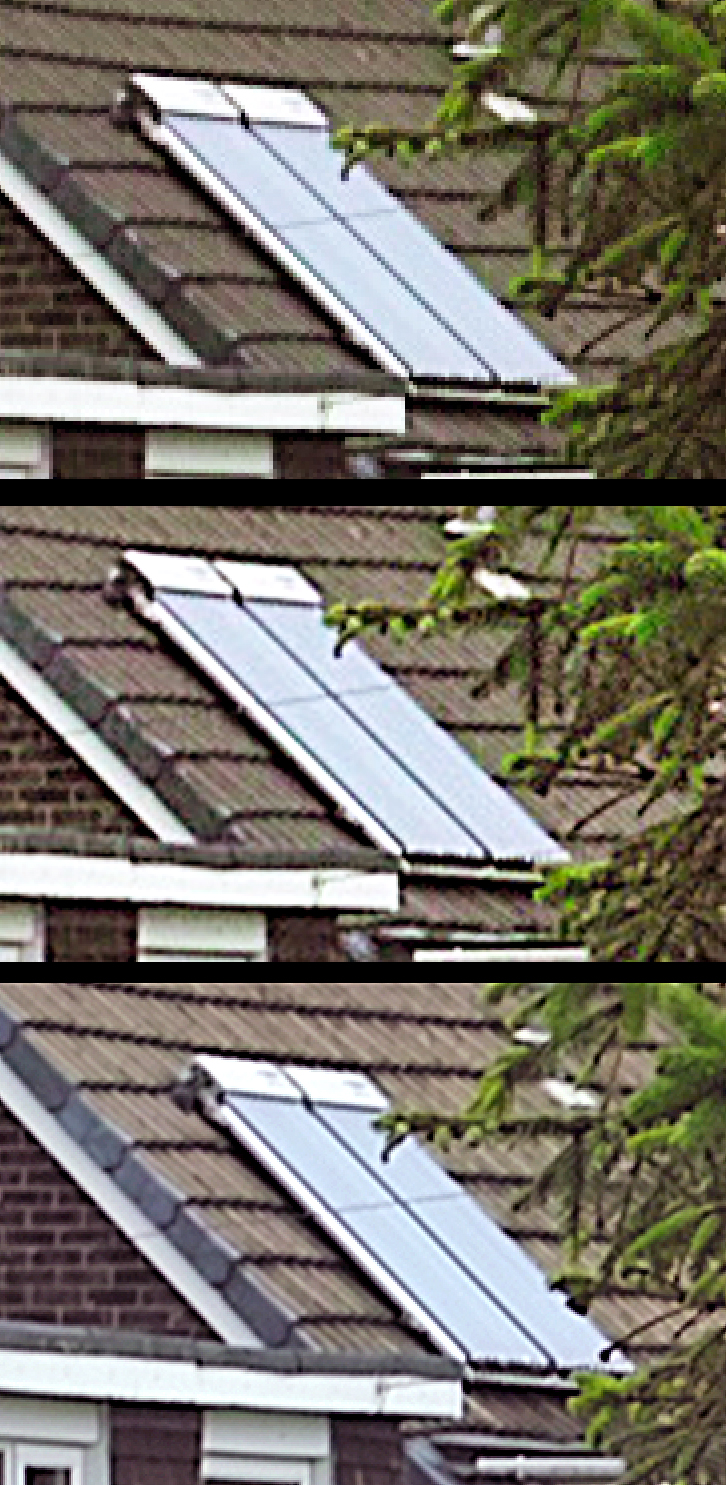
I think that it fair to say that in both cases there has been a small increase in resolution but, more importantly, a ‘far cleaner’ image has resulted. I also found that the result from using my Nikon D610, 24 megapixel, camera and the, 16 megapixel, DP2 Merrill were essentially identical in resolution – giving some credence to the statements that the DP2 Fovean sensor is roughly equivalent to a 26-28 megapixel Bayer sensor.
This is not a technique that I would use regularly, but on occasion when a particularly good scene presents itself, why not?