AUGUST 2023
A user built EAA astrophotography telescope
The basic idea of EAA astrophotography is for a telescope to take many very short exposures which are ‘Live Stacked’. As an increasing number of frames are aligned and stacked, the image will show faint objects gradually appearing out of the noise. This is quite magical and great for use at outreach events. There are now quite a number of dedicated EAA scopes ranging in aperture from 50 mm up to 114 mm. These are controlled by a smartphone or tablet on which the captured image appears (the Unistellar EVScope 2 does, however, have an ‘electronic eyepiece’ through which one can view the gradually improving result).
These are very easy to set up and use but only have small imaging sensors so that the field of view is somewhat limited. There are many YouTube videos about them.
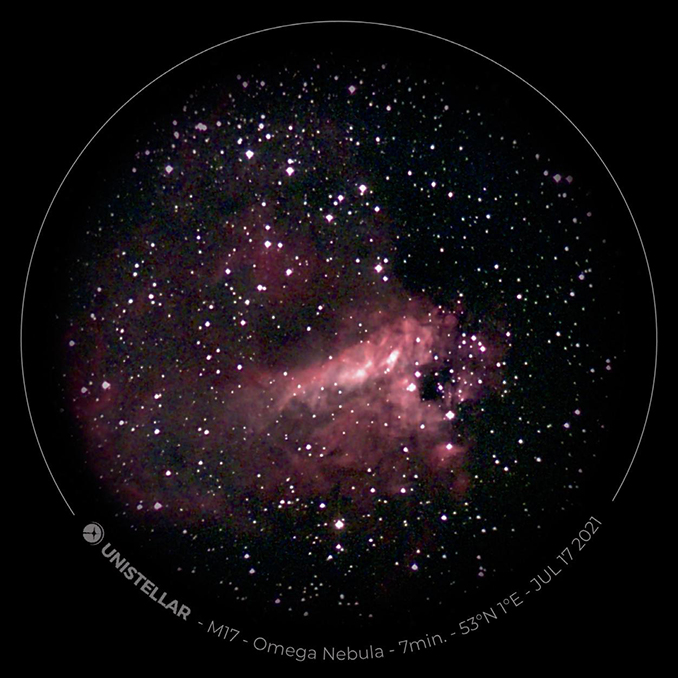
It has to be said that they can take quite impressive images as this one of the Swan or Omega Nebula taken by the Unistellar EVScope 2.
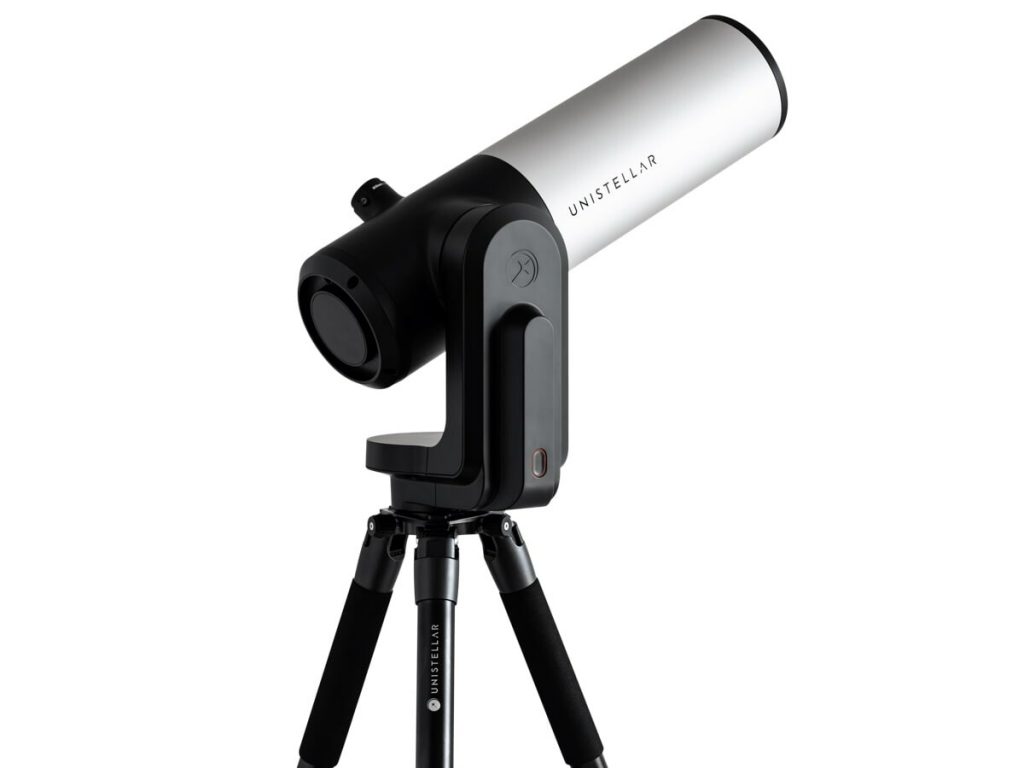
This can be achieved by those who are not particularly into astronomy so, for some, they can be a worthwhile purchase. The Unistellar EVScope 2 has perhaps the highest specification of EAA specific telescopes, so this is the telescope I wished to emulate.
This article describes a mount/scope/camera configuration that will give even better results than the best of these at lower cost – although it does take a little effort. Many astronomers will already have some of the required items to put one together. One great advantage is that eyepieces rather than a camera could be used with the telescope to visually observe the Moon and planets at higher magnifications.
A low cost mount/combination to use for EAA
Looking through the lists of affordable ‘goto’ telescope/mount combinations, one stood out to me. This the Celestron NexStar 130 SLT. This employs a 130 mm parabolic mirror in a Newtonian configuration having a focal length of 650 mm (so with a focal ratio of f/5) mounted on a single arm computerised Alt/Az mount. As it happens, I own one of the very first to come into the UK when I reviewed it for Astronomy Now many years ago.
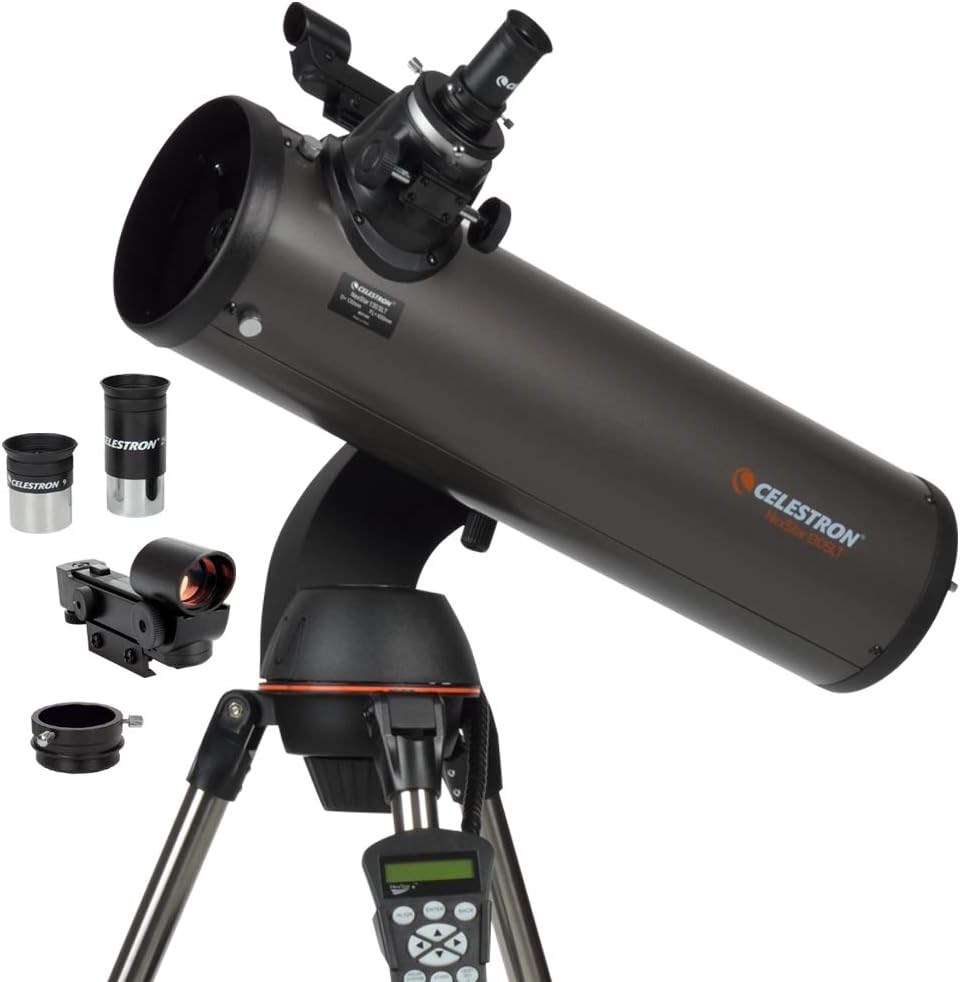
It employs a wonderful 3 star alignment system called SkyAlign where one simply finds and centres any 3 bright stars spread across the sky. It current cost is ~£500 and I thus thought that this would make an excellent basis to compete with the Unistellar EVScope 2 which employs a 114 mm Newtonian telescope having a focal length of 450 mm giving a focal ratio of f/4. In terms of light capture the 14% increase in aperture of the 130 SLT should partly compensate for the lesser focal ratio of the EVScope 2. So I suspect that these would be very comparable in imaging performance. Where the 130 SLT system could outperform the EVscope2 is the fact that a larger sensor camera could be employed giving a correspondingly larger field of view.
The EAA specific scopes have rather small sensors solimiting their field of view. That in the Unistellar EVScope 2 gives a field of view of 45.2 x 33.9 arc minutes – andthus can just encompass a full Moon.
The Unistellar EVScope 2 camera
The pixel size of its 7.7 megapixel sensor is just 2.4 microns. Each pixel will subtend 1.1 arcseconds on the sky. The nominal resolution of a 114 mm aperture telescope is ~1.2 arc seconds so, under typical seeing conditions (the atmosphere limits the resolution to 2-3 arc seconds), the sensor will nicely sample the image produced by the telescope. I have included these details to help define a suitable astro camera to be used in the system.
[Note: I have found it very difficult to get correct information about the sensor and have used plate solving of its images to help deduce the actual specification.]
The proposed camerafor use with the Celestron 130 SLT
There is one obvious choice - the Altair Hypercam Fan-cooled 183C PRO Colour Astronomy Imaging Camera at ~£500. This 20 megapixel camera (5440 x 3648 pixels) has 2.4 micron pixels which subtend 0.76 arc seconds on the sky ((pixel size in microns / focal length) *206.3). As the nominal resolution of the 130 SLT is ~1 arc second, the sensor, under perfect conditions, would under-sample the image produced by the telescope. But, under typical seeing conditions, it would nicely sample the image. It has a sensor size of 13 x 9 mm having a diagonal of 15.86 mm rather than the 8.6 mm of that in the EVScope 2. Coupled to the 130 SLT this gives a field of view of 69 x 46 arc minutes, substantially larger than that of the EVScope 2. The increase in the field of view is not quite as much as the increase in sensor size would have one believe as the EVScope 2 has a shorter focal length than the 130 SLT. The image below gives an accurate representation of the relative fields of view.

A cooled version is available for £749.
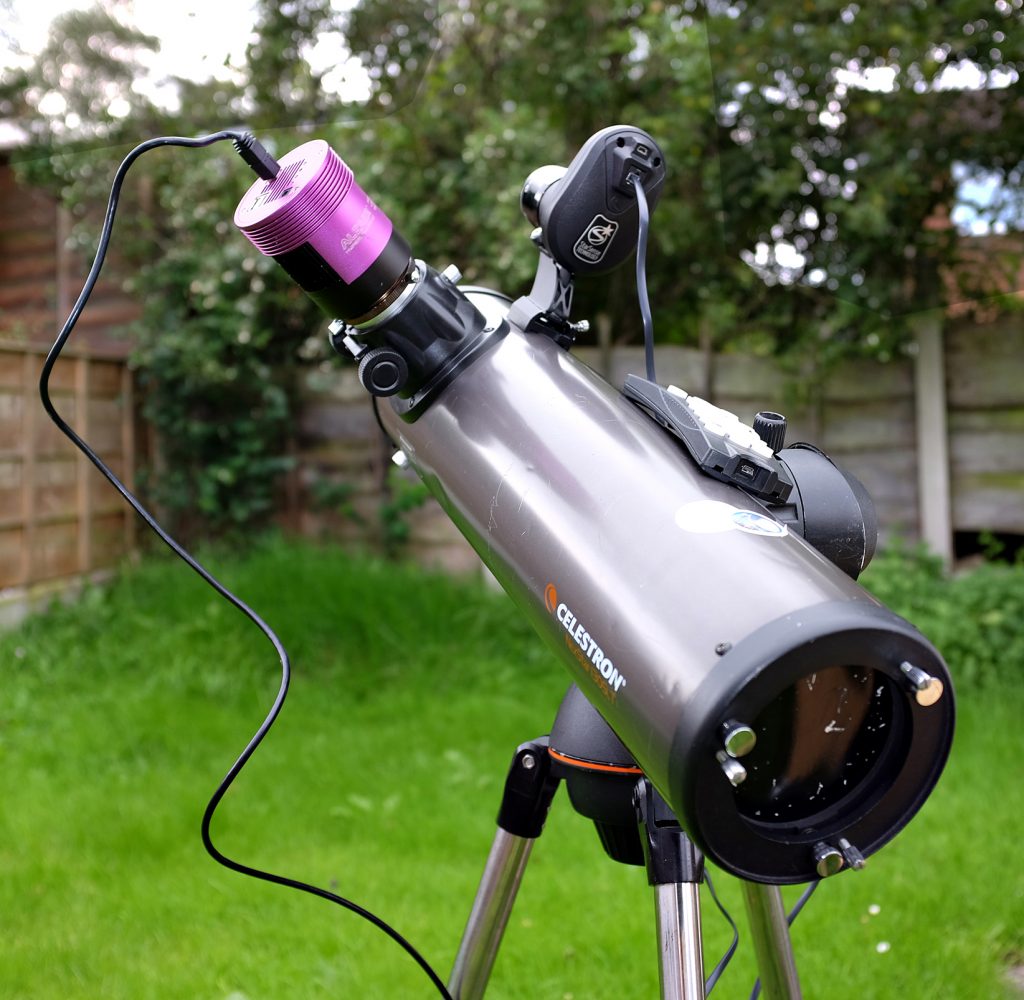
Attaching the camera to the 130 SLT
My 130 SLT has an interesting eyepiece attachment system. A 1.25 inch barrel tube (to accept a 1.25 inch eyepiece) is attached to the wide barrel of the rack and pinion focuser (it may well be that later models sport a 2 inch barrel tube - most images on the web show a 1.25 inch eyepiece adapter but one shows a 2 inch adapter). In either case a suitable t-mount adapter could be used to attach the camera to the focuser but I found that I was not then able to achieve infinity focus with my dedicated astro camera - as may well be the case with other dedicated cameras such as the 183C PRO. However, the 1.25 inch (or 2 inch) eyepiece tube adapter actually uncouples from the focuser leaving behind a M42 threaded barrel onto witch the camera can screw directly - so no adapter is required saving some money and plenty of inward travel is available to reach infinity focus. Problem solved.
Two pleasing results
Firstly, the system did not give rise to any significant vignetting and there was no evidence of coma towards the corners of the field of view - this is where a smaller sensor camera helps.
The Imaging Software
The software package that I and many imagers use is SharpCap