FEBRUARY 2021
Affinity Photo Imaging Tutorial (2)
An article in the author’s Astronomy Digest – https://www.ianmorison.com
This is a step by step work through of processing a fairlytricky data set of the Orion and Running Man Nebulae imaged by acolleague. The subframes were takenusing a Sony A5000 camera and Televue 4 inch, f/5, telescope. Thirty, 15 second exposures at an ISO of 1,600had been aligned and stacked in Deep Sky Stacker using the 2x dither mode and savedas a 32 bit Tiff file. (Over 700 Mbytes in size!) The short exposures ensured that the central,very bright, part of the Orion nebula surrounding the Trapezium stars was notover exposed.
[The updated version of Affinity Photo can also align and stack subframes and produces excellent results as covered in the ‘Aligning and Stacking …’ article in the digest and described in Imaging Tutorial (1)]
An introduction tothe workspace
This section for newcomers to the program and describesthose features of Affinity Photo that are used in the tutorial.
The tools palate is a vertical bar on the left hand side ofthe image space. The required toolsymbol is simply clicked upon to activate. Those used in this tutorial are the ‘crop tool’, the ‘selection brush’that lies below it and the ‘paint brush’ below the colour disk.
Across the top of the workspace lie some drop down menus:
In the ‘File’ submenu, one can open and export (rather thansave) a file, in the ‘Edit’ drop down menu one can ‘undo’ or ‘redo’ adjustmentsthat have been made to the image. One can also access the ‘Inpaint’ tool.
In the ‘Document’ drop down menu one can convert the formatto, say, reduce size or change the bit-depth of an image.
In the ‘Layer’ drop down menu one can ‘Duplicate’ a layer or‘Merge Down’ two or more layers.
In the ‘Filters’ drop down menu one can go into the ‘Blur’and ‘Sharpen’ drop down menus to apply the desired effect.
At the top right one can select the colour of the paint brush. Below are a set of adjustment tools. Clicking on the levels symbol, for example, three options are brought up such as, in this case, ‘Default’, ‘Darken’ and ‘Lighten’. The default modes are used in this tutorial and, when clicked upon, bring up the adjustment window. After adjustment, to immediately apply its effect as will be done in this tutorial, one clicks upon the ‘merge’ tab.
The use of layers
When a tool, such as ‘Levels’ is used to alter an image, AP produces an ‘Adjustment Layer’ thatsits above the preceding layer and these will build up as more tools are usedunless they are ‘merged’ after each tool is applied. Advanced users will keep multiple layersactive – which has the advantage that any single adjustment layer can bealtered later if desired without affecting any of the other adjustmentsmade. This is quite hard to describe ina tutorial and so I will use the approach where each adjustment layer is mergedimmediately after its application so only one layer remains active. If necessary, within the ‘Edit’ drop downmenu one can backtrack as many steps as one wishes to get back to anintermediate step that one is happy with. At certain points within the editing process I will ‘export’ the currentversion of the image so that, should I need to leave the program or shouldit crash, I will be able to continue on fromthat point. I have found that,occasionally, AP has crashed when, asa novice, I have made some mistakes in using it. On a couple of these occasions, this requireda hard reset of the computer. Theprogram also crashed when it somehow ‘disapproved’ of two out of 45 tiff filesthat I had been attempting to stack. [Ihad to find them by trial an error.]
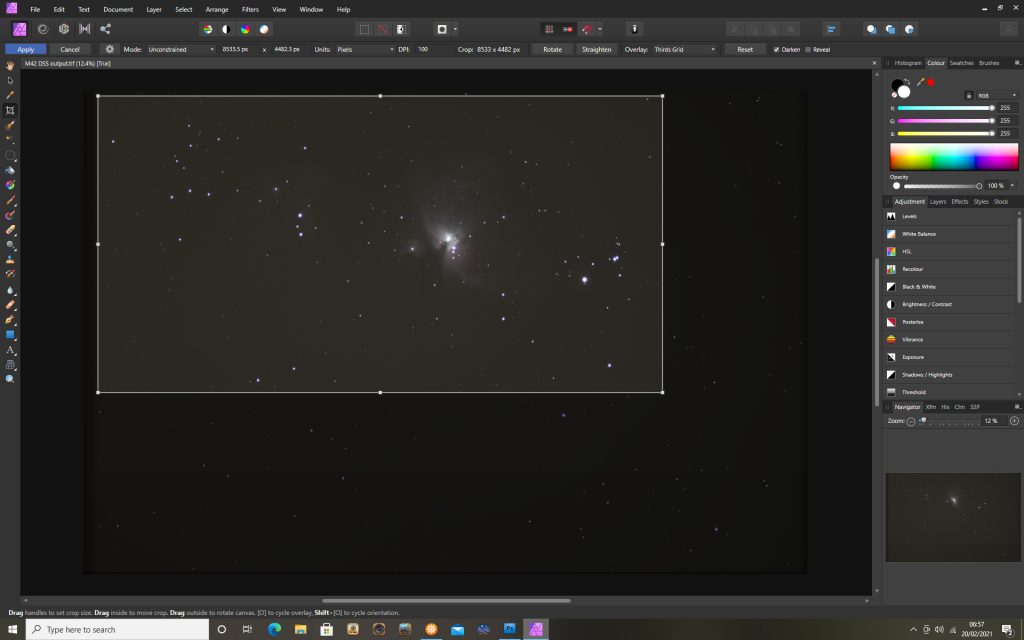
Importing andcropping the file.
To reduce the processing time, the image was cropped to onlycover the part of the image covering the two nebulae. The crop tool was used to select the desiredregion and the blue ‘Apply’ tab at top left clicked upon to make the crop.
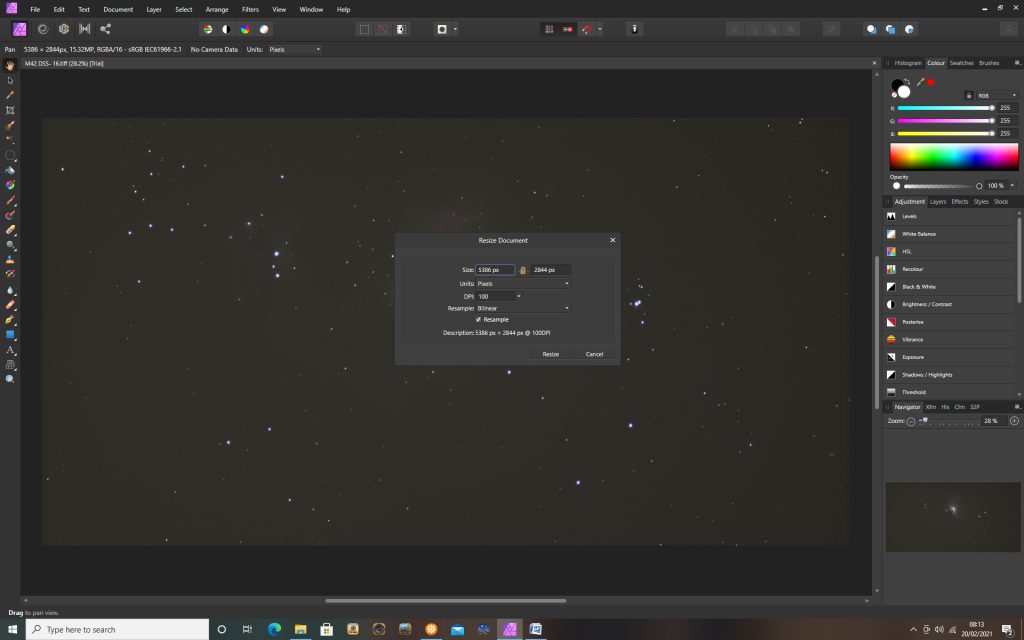
Reducing in size
In the ‘Document’ drop down menu, the ‘Resize Document’command was used to halve the resolution – making it equivalent to the originalresolution of the camera.
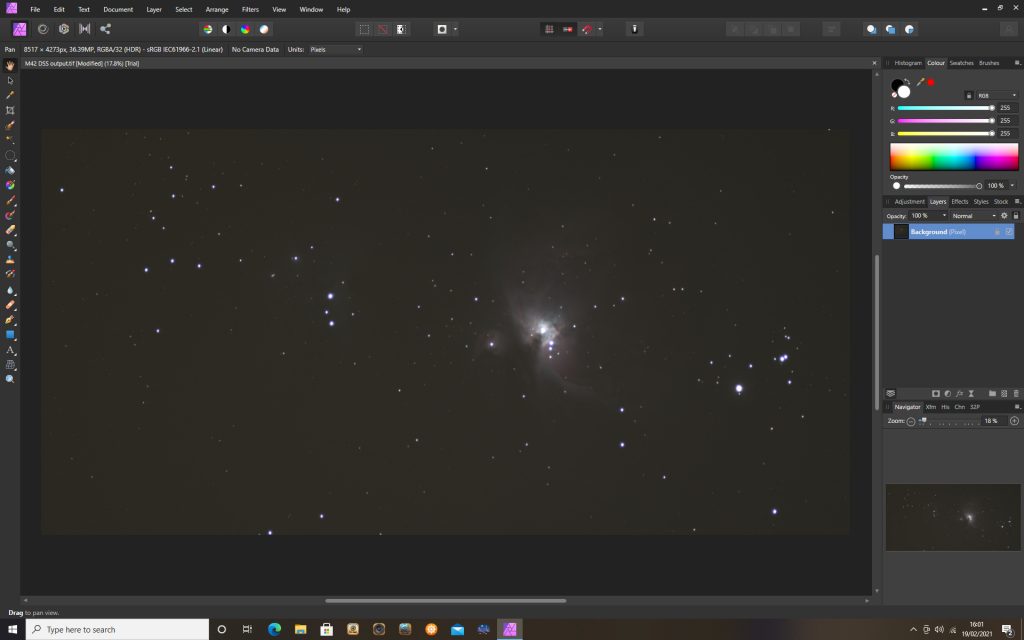
First stretching of theimage
The use of 32 bit data allows one to extract the very faintdetail in the image – but it does increase the processing time and two usefulfunctions (‘Inpaint’ and ‘Median Blur’)cannot work on 32 bits. If one firststretches the data to lift up the fainter parts of the image one can thenreduce the bit depth to 16 bits without losing any information contained withinthe image. [In some cases, it may beworth working in 32 bit mode throughout and the ‘work-around’ for the Inpaintand Median Blur functions that cannot be used in 32 bit mode is describedbelow.]
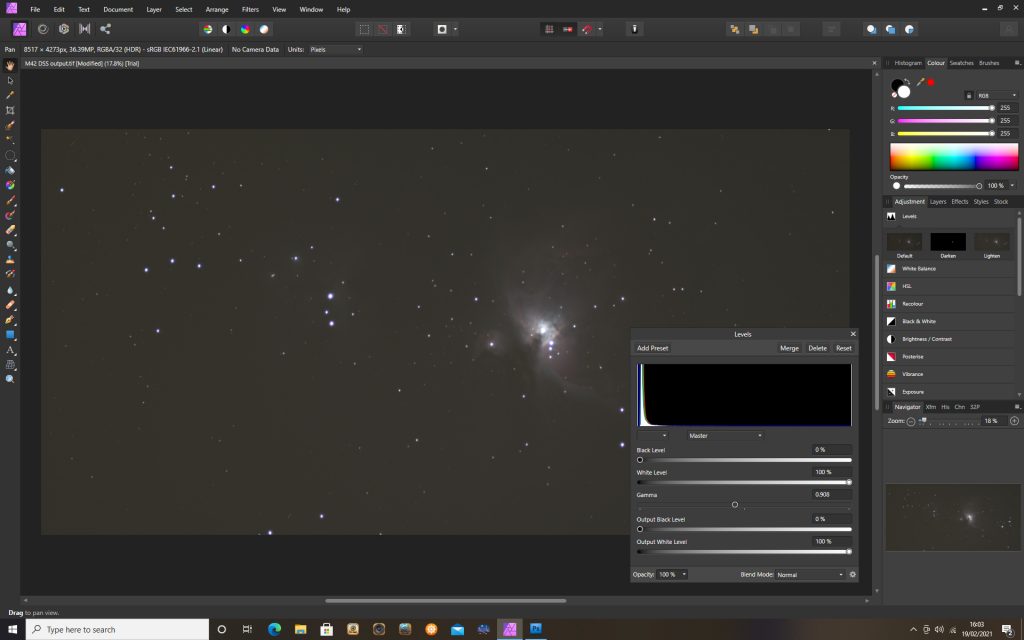
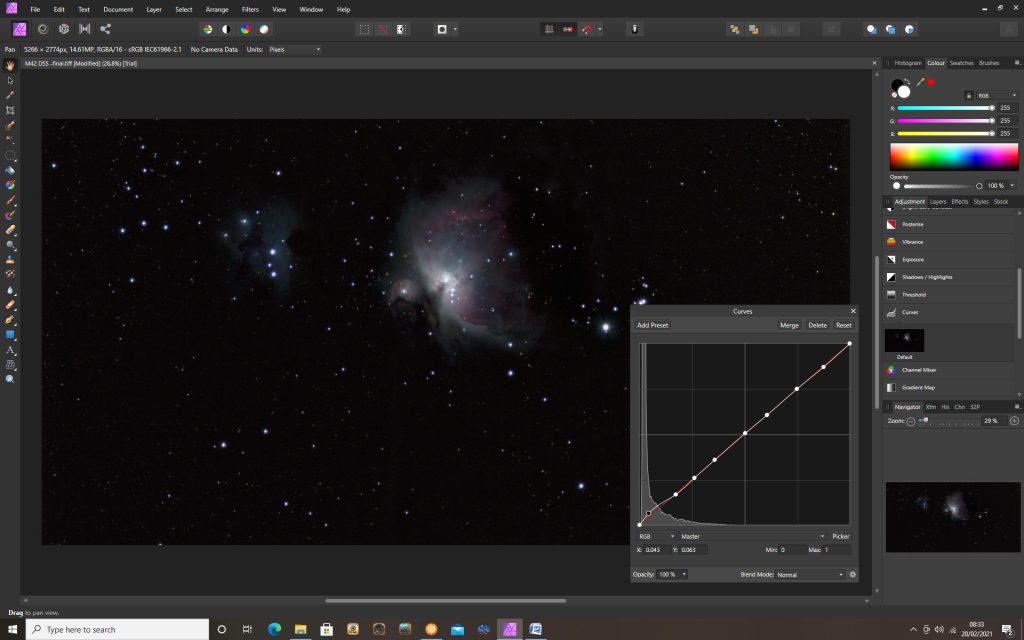
There are several ways of stretching the image one caneither use the curves function or, as in this case, the levels/gamma methodwhich works well with this data set.
The image is opened and the ‘Default’ levels adjustment toolis opened. Within its window, the gammaslider is moved to give a value of, say, 0.8. One will see that the fainter parts of the image increase in brightnessmore that the brighter parts – thus producing some image stretching. Two applications allowed the sky backgroundlevel to become obvious.
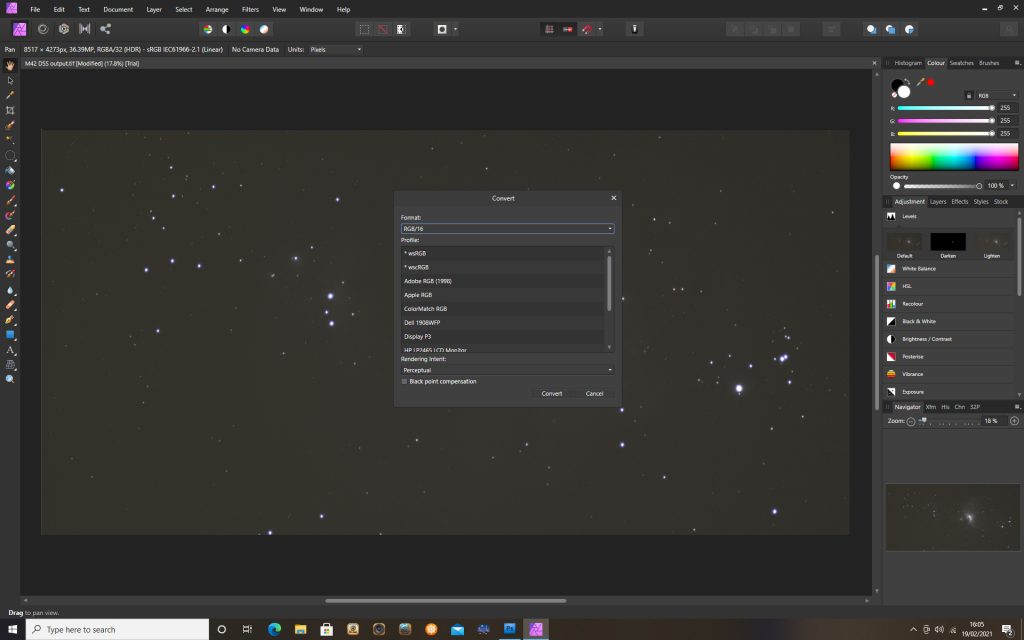
Reducing the bitdepth.
In the ‘Document’ drop down menu, the ‘Convert Format..’function was used to reduce the bit depth from 32 to 16 bits.
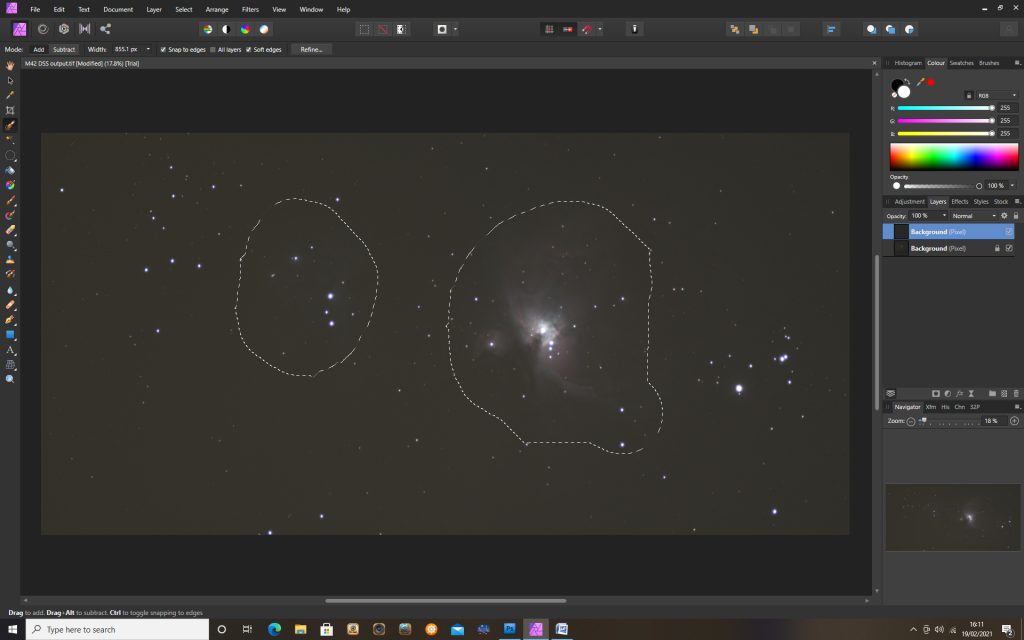
Removing the skybackground
The best way to do this is to make a new layer containing justthe sky background and then subtract this from the original image. Affinity Photo has a magic way of doing this! The image is duplicated and the screen showsthe upper layer. Using the selectionbrush tool, the areas containing the two nebulae are selected.
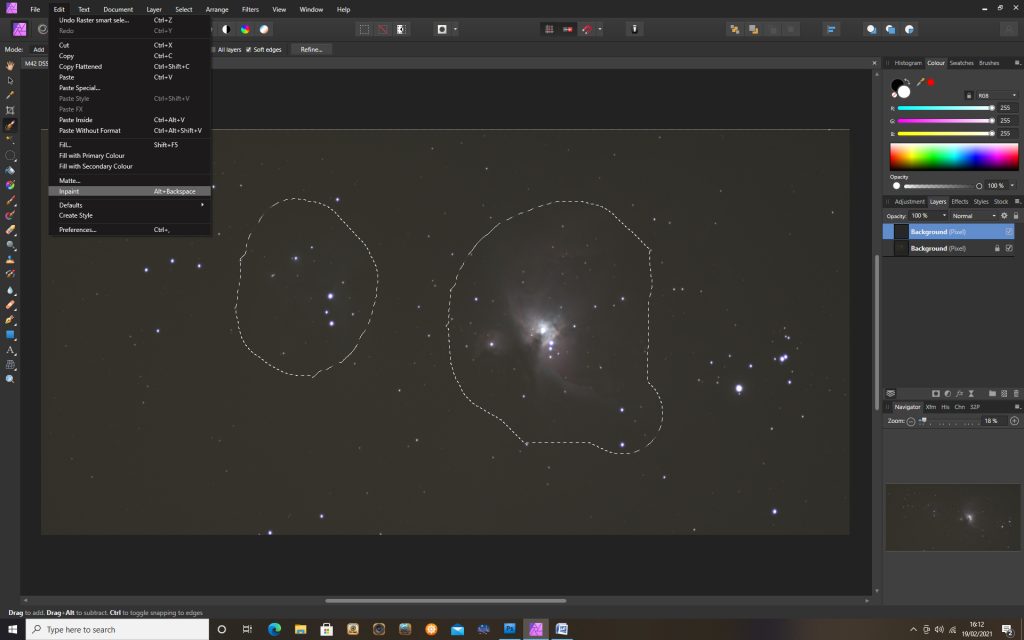
In the ‘Edit’ drop down menu, the ‘Inpaint’ function isclicked upon when, amazingly, they disappear.
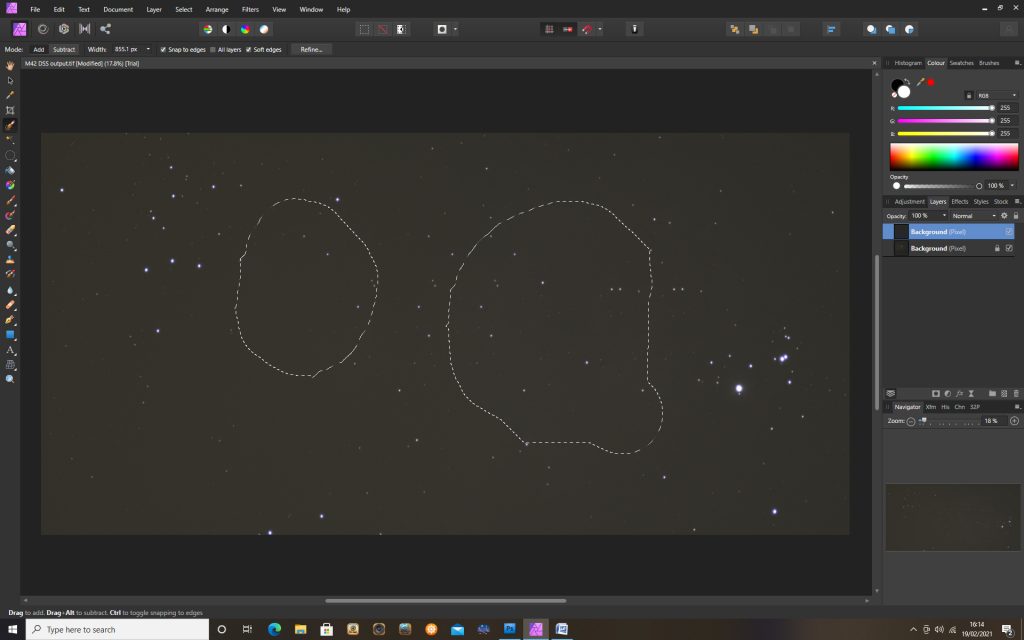
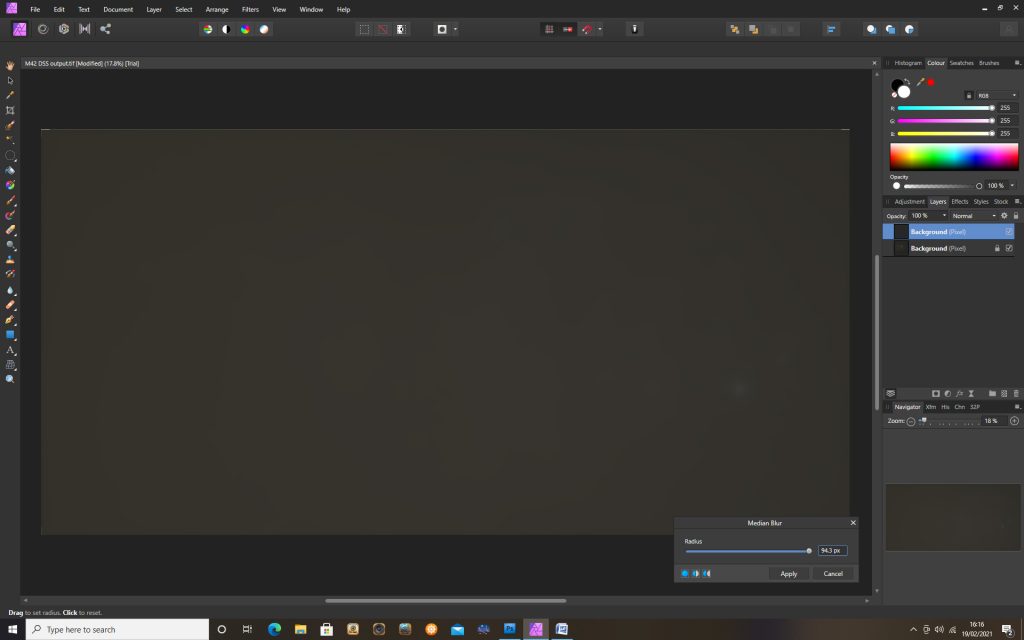
The selection is removed by pressing ‘Esc’. Now in the ‘Filter’ drop down menu, ‘Blur’ is clicked upon and, in its dropdown menu, the ‘Median’ filter is selected.
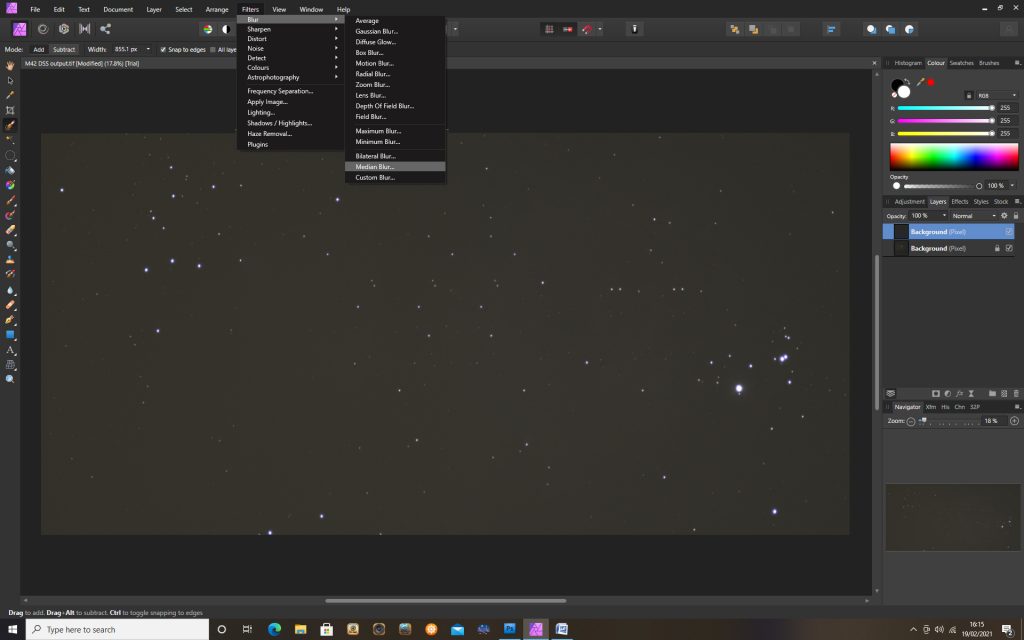
This is applied with the maximum radius of 100 pixels and the stars disappear giving a smooth image of the sky background.
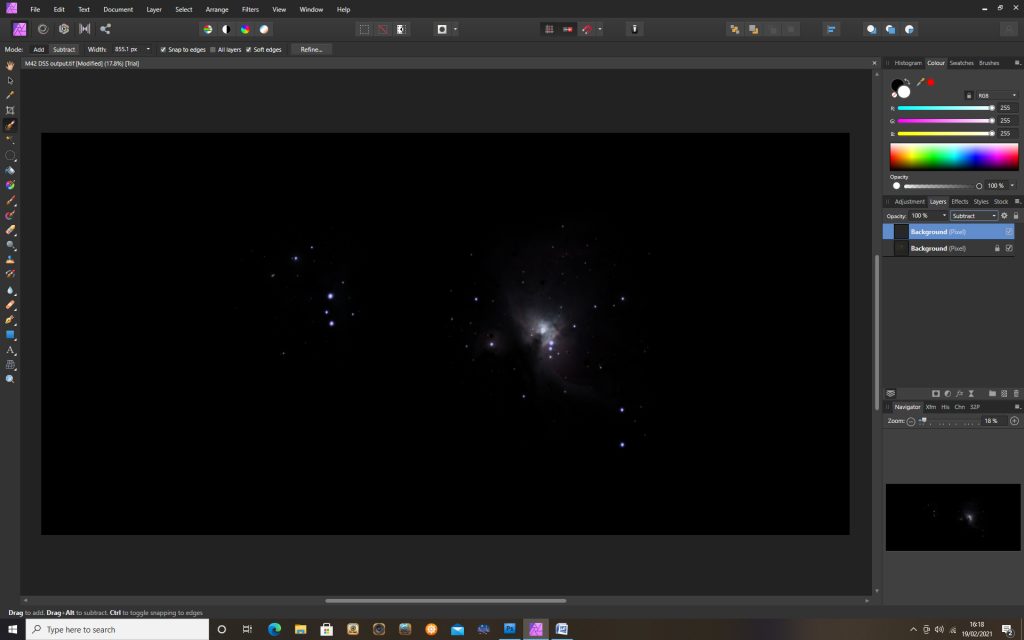
In the Layers blend mode drop down menu (at right beside the ‘Adjustment’ drop down menu), ‘Subtract’ is selected with an opacity of 100% and then clicking on ‘Merge Down’ in the Layers drop down menu produces an image with a totally black sky background. [Many astophotographers do not like a totally black sky background, so at the end of the imaging process, this can be addressed.]
Note: Removing the sky background in 32 bit mode
The Inpaint function and Median filter can only work in 16 bit mode so, before their use, the upper layer is changed to 16 bit depth, the inpainting and median filter applied before the layer is changed back to 32 bit depth and subtracted the from the image layer below.
Further Stretching of the Image
The same ‘levels’ procedure is applied again to bring out the fainter parts of the nebulae.
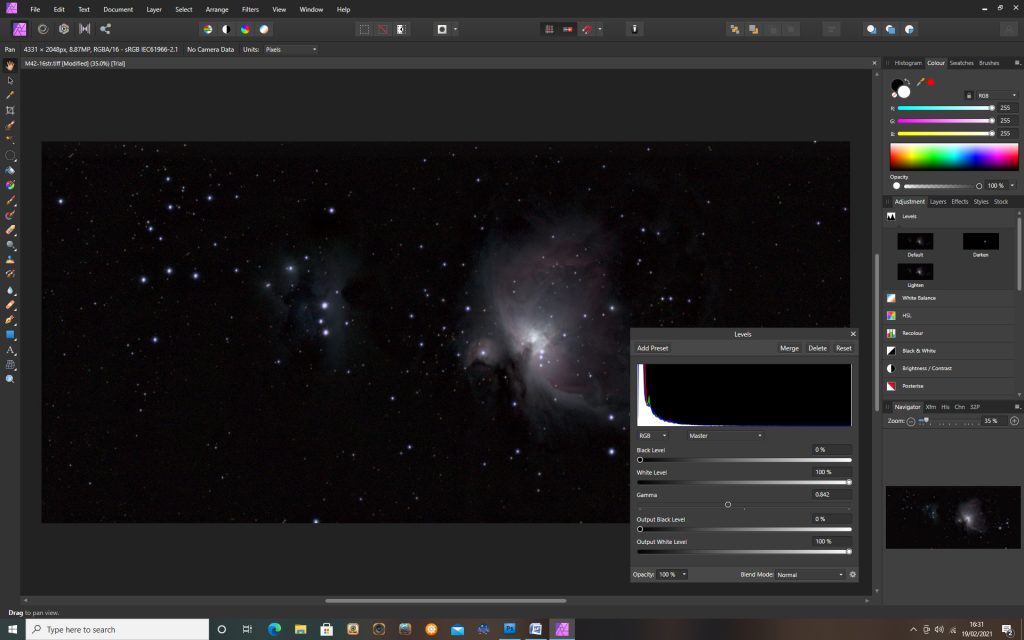
In this case there can be a problem in that the very bright central part of the Orion Nebulae surrounding the Trapezium stars can get blown out. If this is seen to happen one could use an alternative stretching method employing the ‘Curves’ function. If the greater part of the curve is locked to initial straight line curve and only some lifting done to the darkest end of the curve this can be avoided.
Alternatively, using the selection brush, one can make a selection of the central part of the Orion Nebula and, within the ‘Refine’ window, increase the feathering to, say, 90 pixels. If the pixel selection is now inverted (Select> Invert Pixel Selection), the application of the levels function will not apply to the originally selected region but, due to the feathering, there will not be an obvious boundary between the selected and de-selected regions.
This additional stretching may bring up the background leveland use of the ‘black point’ slider in the levels command can reduce this ifnecessary.
Enhancing the Image
The ‘local contrast’ within the two nebulae can be increasedby selecting them with the selection brush and using the ‘Clarity’ (Filters>Sharpen> Clarity) tool. The result isquite significant and greatly improves the image.
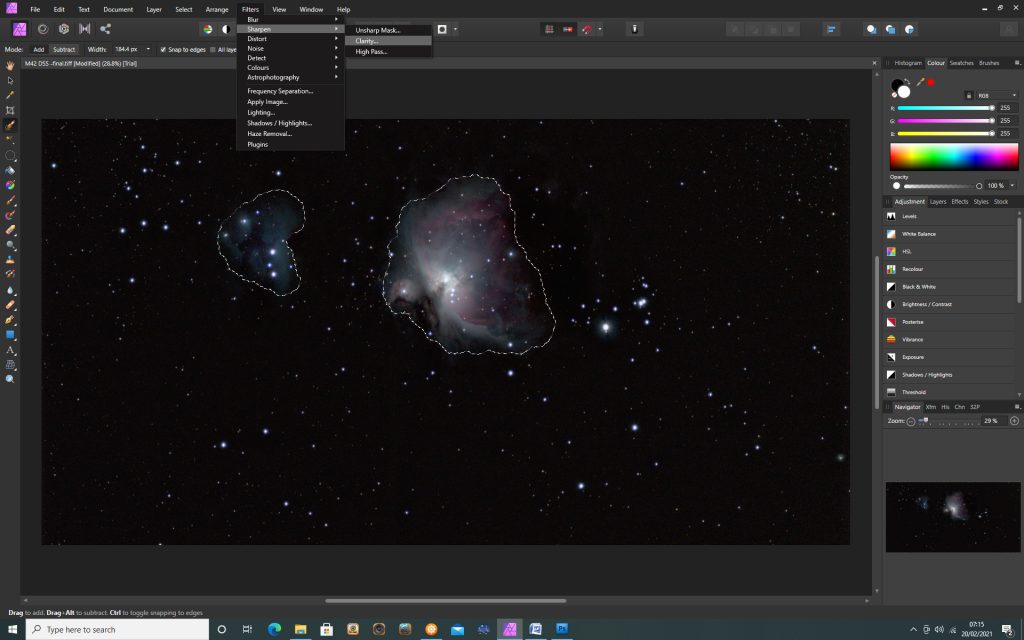
It could also be worth applying the ‘Vibrance’ filter(Filters> Sharpen> Vibrance) to the nebula regions.
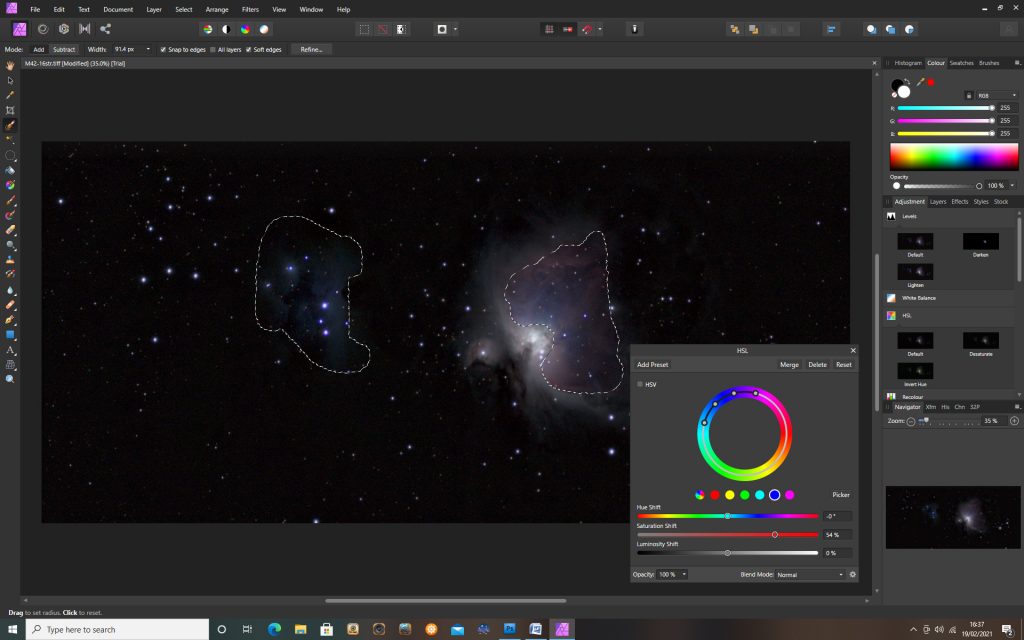
One might also consider increasing the saturation within thetwo nebulae. This can be achieved byusing the ‘HSL’ tab in the studio pane. The regions of the two nebulae are selected using the selection brush tooland the saturation can then be gently enhanced with adjustment made only to theselected areas.
Adding somebackground brightness
I desired, one can uniformly increase the sky background tothat the sky is not totally black. Theimage is duplicated and the upper layer is painted a dark grey.
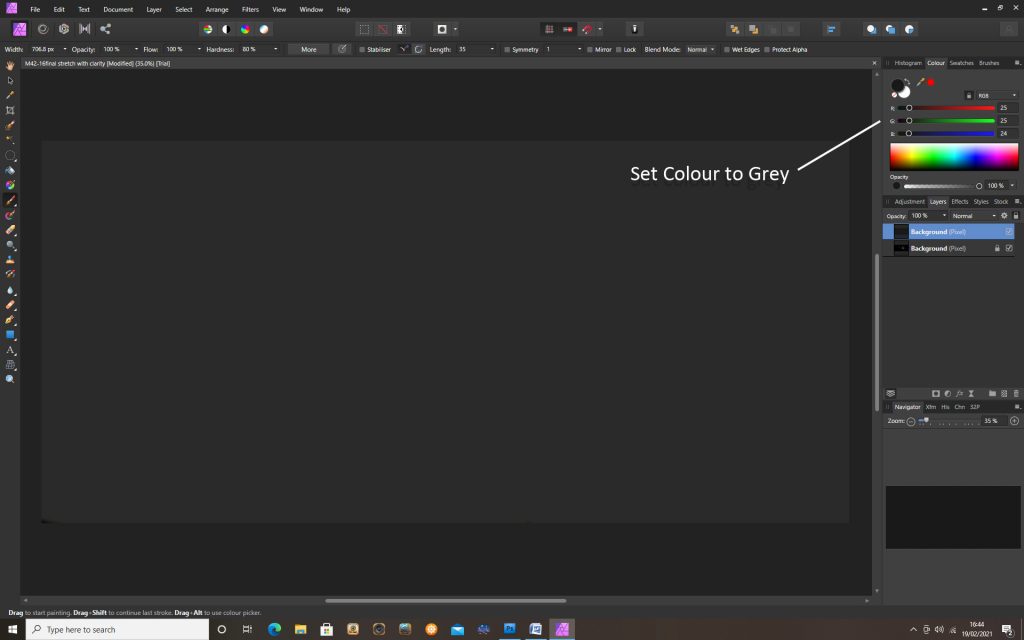
If the Layers blending mode is set to ‘Add’, the opacity of the upper layer can be adjusted to a low amount to brighten the sky background and give the final result.
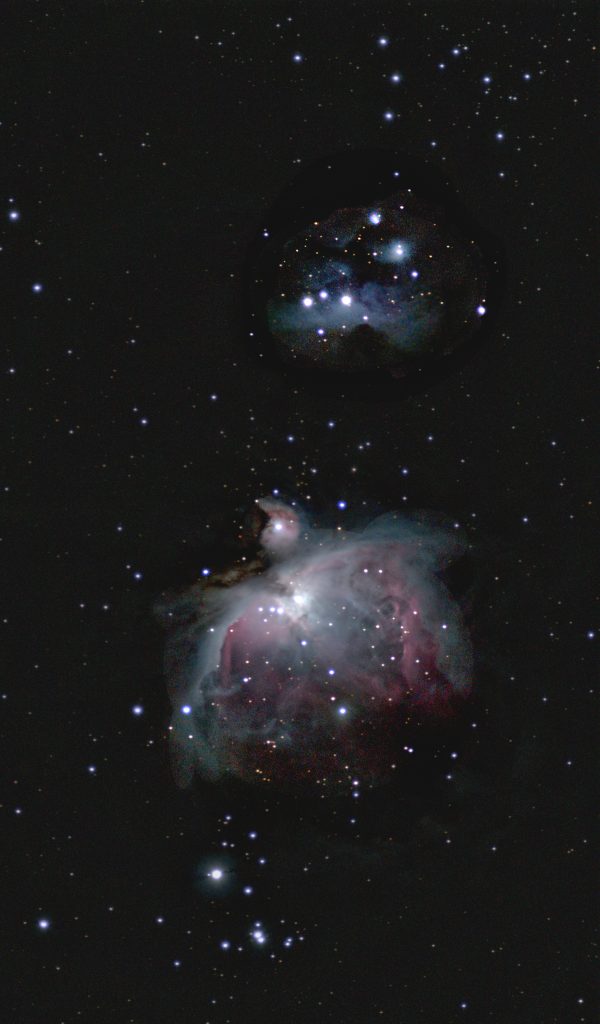
As only 30 exposures were able to be stacked as wind shake had affected a further 30 subframes, the outer, very faint, parts of the Orion Nebula were barely visible, but otherwise this was an excellent image of the two nebulae – showing up the Running Man Nebula particularly well.