AUGUST 2022
An in-depth processing tutorial imaging the Veil Nebula
An article in the author’s Astronomy Digest – https://www.ianmorison.com
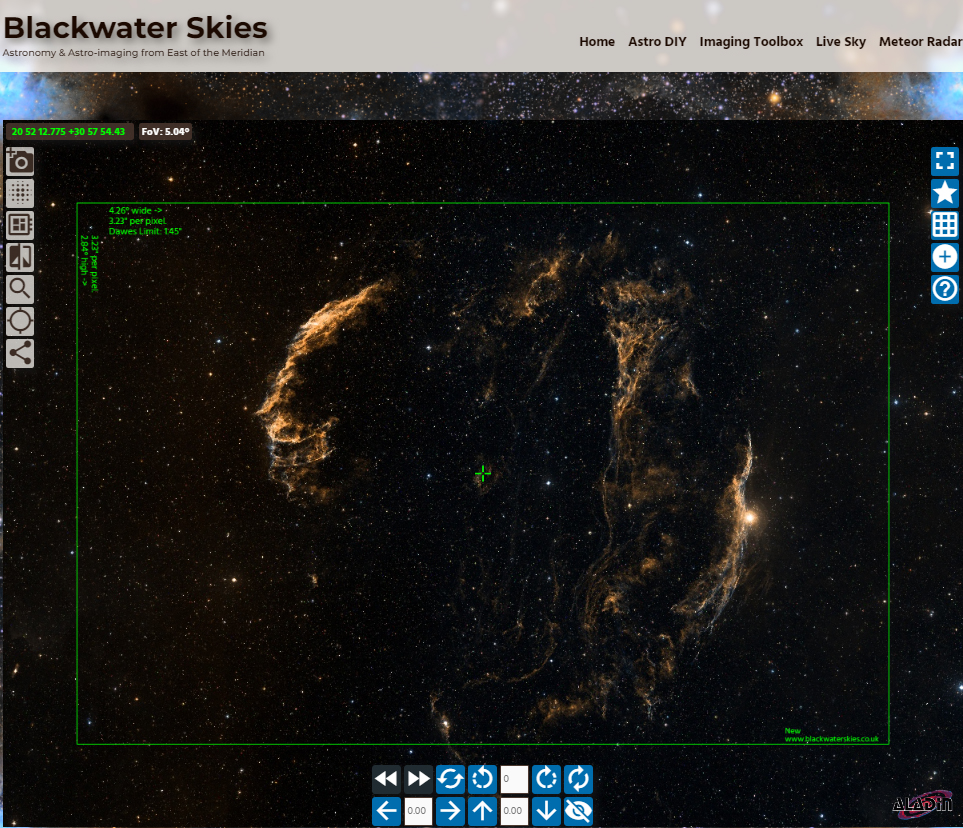
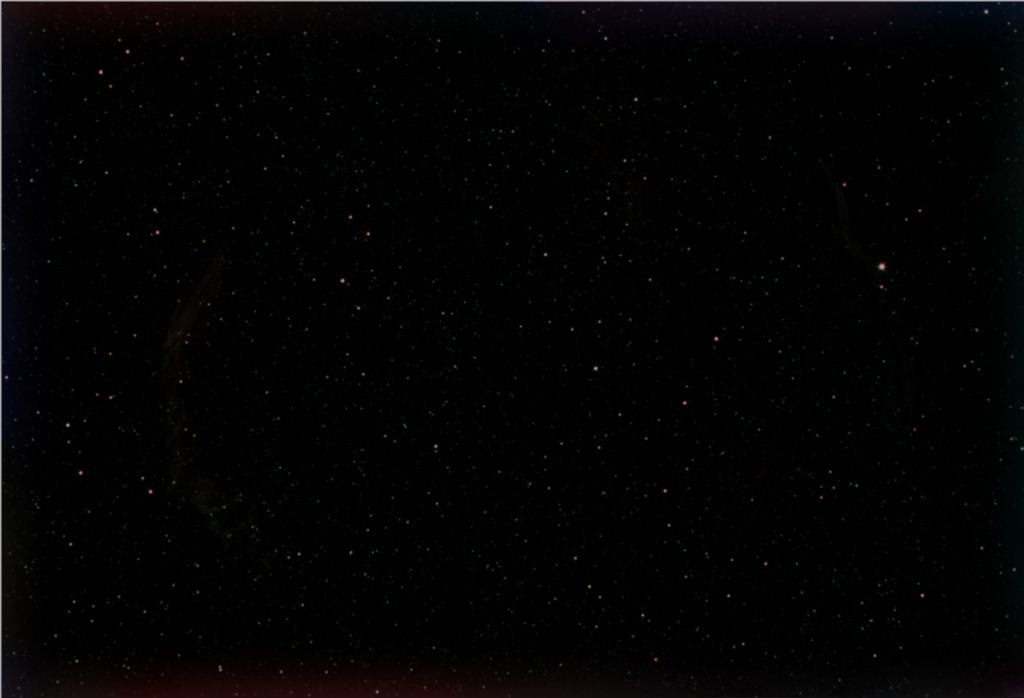
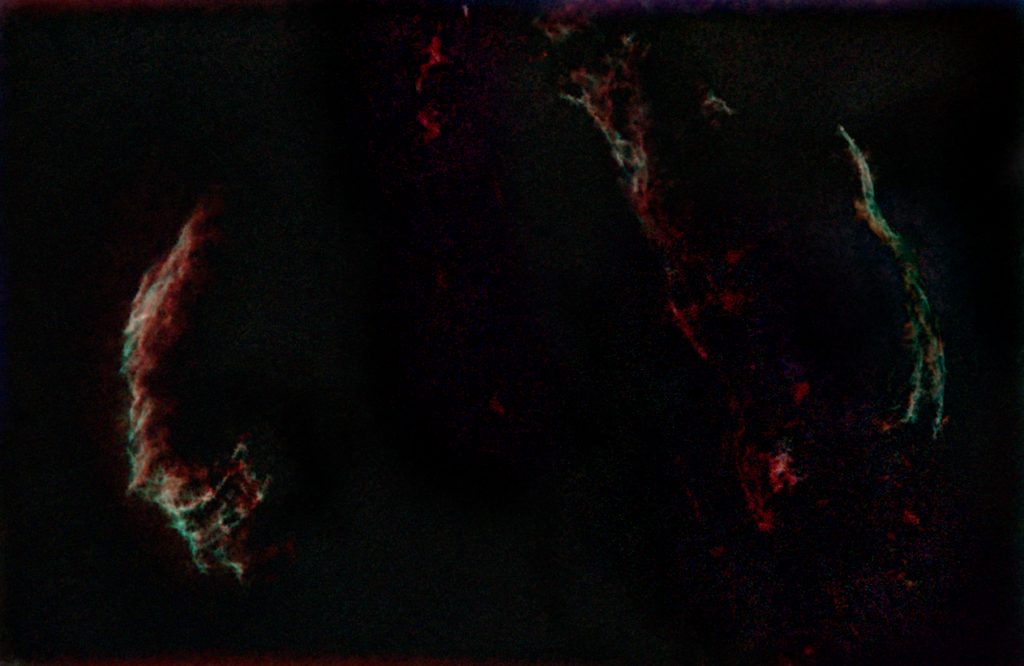
The Veil Nebula constitutes the visible portions of theCygnus Loop, the supernova remnant of a star 20 times more massive than the Sunwhich exploded between 10,000 and 20,000 years ago. It lies at a distance of 2,400 light-years and its remnants have sinceexpanded to cover an area of the sky roughly 3 degrees across. To image it in full I first needed to choosethe appropriate lens or telescope to couple to my Micro 4/3 sensor Altair Astro294 cooled colour one shot camera. Asseen in the Blackwater Skies Imaging Toolbox (see article: Field of ViewCalculator using Blackwater Skies Imaging Toolbox) a focal length of ~300 mm issuitable.
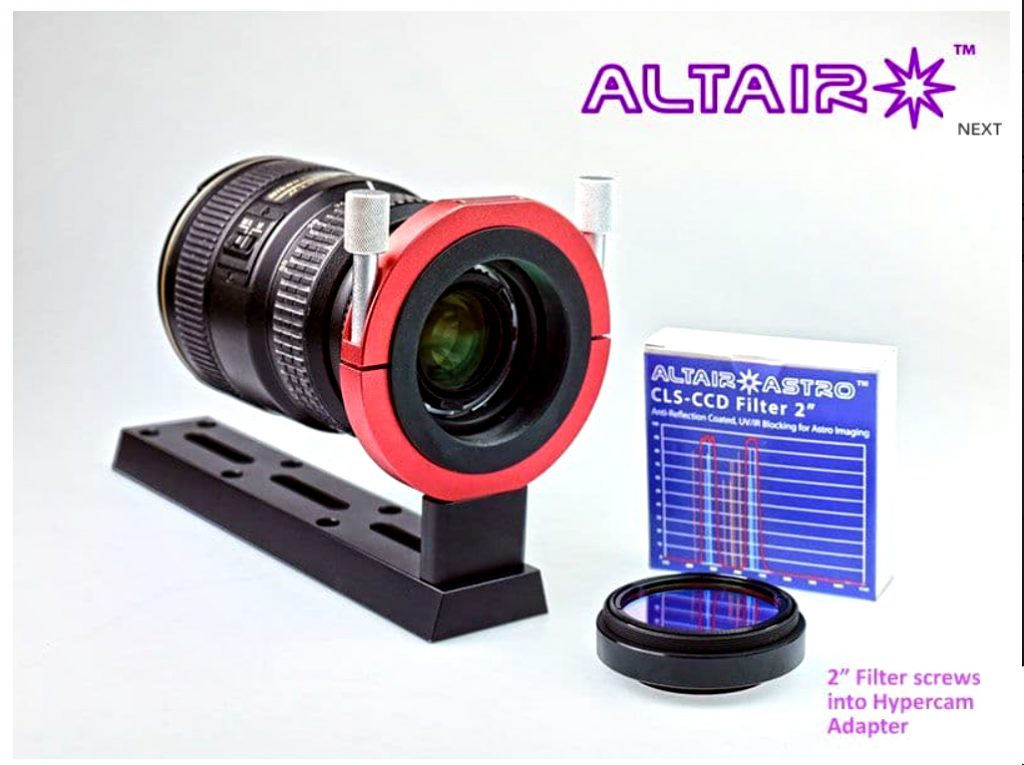
Happily, I have a 300 mm Nikkor prime lens which can be usedin the Altair Astro lens mounting system for Nikkor lenses. The mount, as seen below, allows theplacement of a 2 inch filter within and I inserted the Alair Astro TribandFilter which only passes the H-alpha (red), OIII (green) and H-beta (bluegreen) spectral lines and so greatly reduces the problem of light pollutionfrom my urban location. The f/4.5aperture lens was stopped down to f5.6 to improve its image quality.
One hundred, 30 second, unguided exposures were taken.
Aligning and Stacking the capturedframes
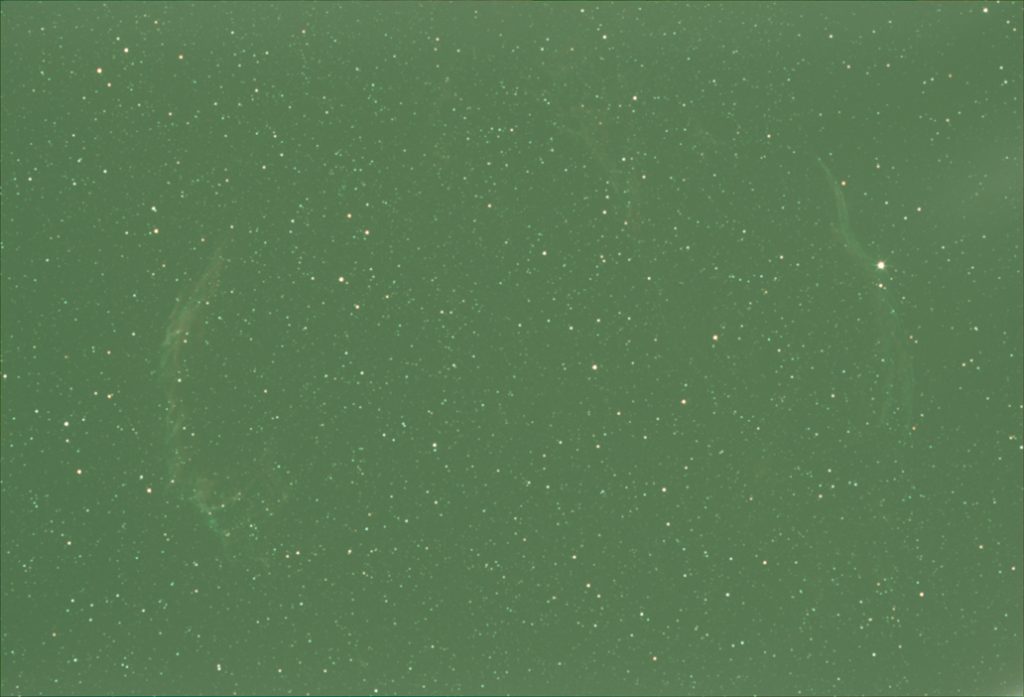
This was done in the free program ‘Deep Sky Stacker’ butalternatives are ‘Sequator’ and Affinity Photo. There is a description of using Deep Sky Stacker in the digest article ‘Anexample of using Deep Sky Stacker and IRIS to produce a wide field image’. The overall image hasa green cast due to the fact that astro cameras do not compensate for the factthat there are 2 green pixels for each red and blue. This is essentially due to the sky glow –mostly light pollution. Deep Sky Stackerallows the green excess to be compensated to some extent by adjusting therelative amounts of red, green and blue to align their histograms. However, the result as seen below still has agreen cast.
Processing the stacked data
This was one of the most complex processing tasks of any that I have undertaken requiring several steps:
1) Removingthe sky glow.
2)Stretching the image to bring out the nebula – which over accentuates thestars.
3)Separating the image into ‘Nebula’ and‘Stars’ images.
4) Enhancingthe Nebula image.
5) Removingthe green colour cast of the stars.
6) Reducingtheir size so that they will not dominate the nebula.
7) Combiningthe resulting Nebula and Stars image.
Processing Software
To completethe processing as I have done, one will need one of ‘Adobe Photoshop’, ‘Affinity Photo’ – which is a superb low costalternative to Photoshop sometimesavailable for just £30 – or the free program ‘Glimpse – a development of GIMP. Also of great use is Siril, a freeastronomical image processing package that includes some excellent features, inparticular its ‘Background Extraction’ tool and comprehensive ‘stretching’algorithms. I am now doing much of my image processing using it. The free program ‘Starnett++’ which was usedto separate the nebula regions from the stars was the key to being able toproduce a good final image with the free program ‘Images Plus’ used to improvethe star images. I will give processingdetails using Photoshop first and then show the differences, where applicable,using Affinity Photo, Siril and Glimpse.
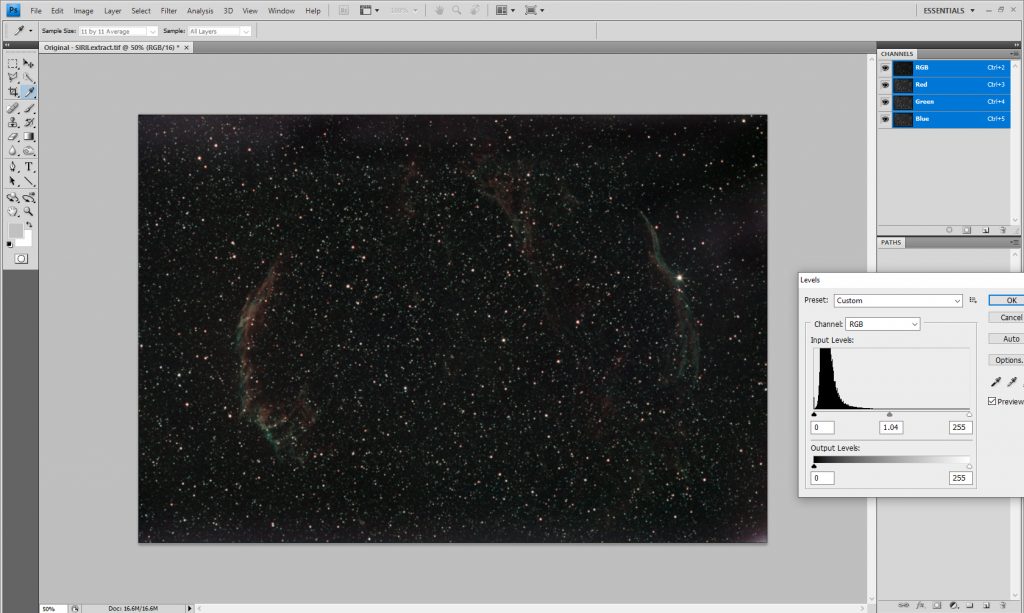
Removing thebackground sky glow and stretching the image in Photoshop
The image is duplicated. One now attempts to produce an image of the sky glow alone. There are a couple of techniques. In the first, the areas of the nebulae in the upper layer were cloned over from surrounding areas so the image was just of stars.
To this the ‘Dust and Scratches’ is applied with a radius of 50 pixels to remove them leaving just the background sky glow with a further smoothing using a Gaussian Blur with the same radius.

In the second, one assumes that the sky glow will be uniformacross the field of view. The duplicate layer is blurred by, say 30 pixels, andthe colour selected from a location away from a nebula region as near to thecentre as possible. [Some of the nebularegions were easily visible in the image but some were barely visible. One help would be to download an image of theVeil Nebula from the web – which will show where the nebulosity lies.]
This is the most difficult part of the whole process and Imade several attempts to get a good result. As described below, Siril has an alternative approach which works well.
The two levels are then merged using the ‘Difference’blending mode and the result saved.
Removing thebackground sky glow in Affinity Photo orGlimpse
The exact same techniques can be applied to the image aswith Photoshop but, in Affinity Photo, one could also select the nebula regionsusing the ‘Selection Brush’ and in the ‘Edit’ menu select ‘Inpaint’ to removethe nebula before using the ‘Dust and Scratches’ filter.
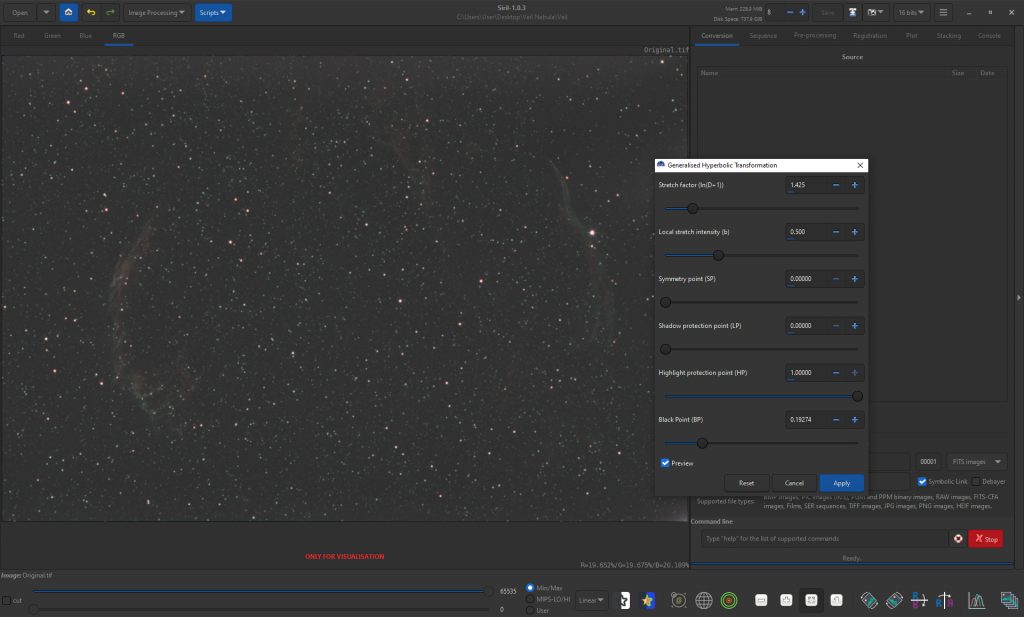
Removing thebackground sky glow and stretching the image in Siril
Here on can use the ‘Background Extraction’ tool. A sparse grid of points is placed over the field.
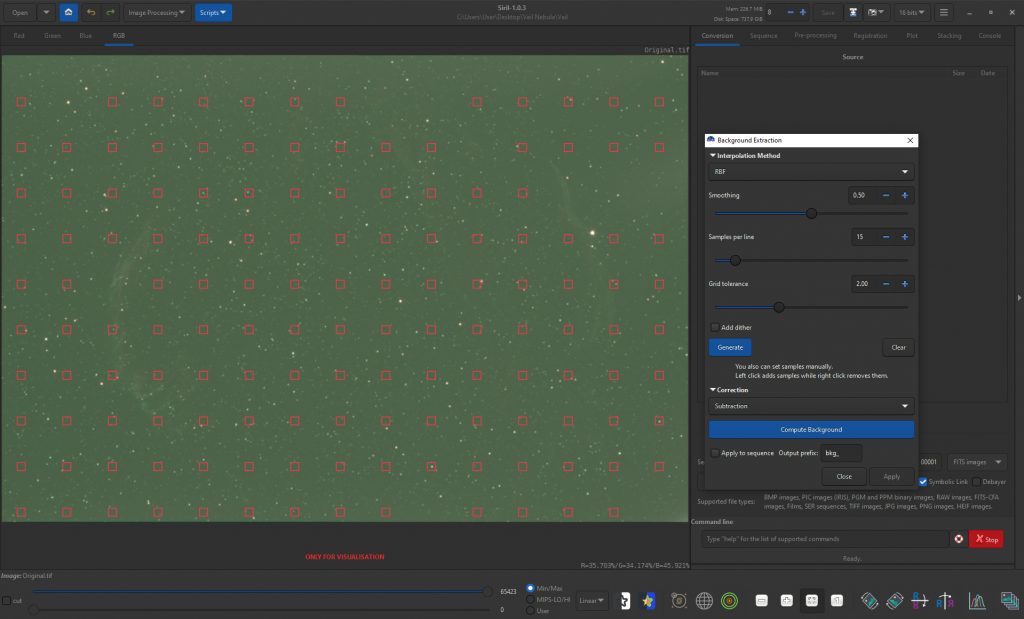
Those that lie over nebula regions are removed by right clicking on them (in a colour channel display).
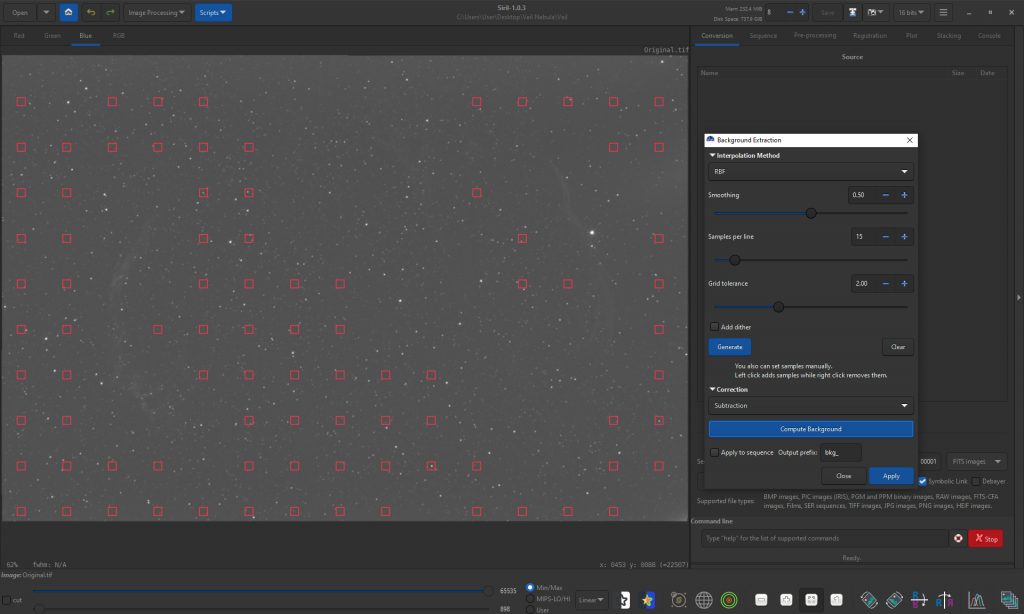
Applying the tool then removes the sky glow.
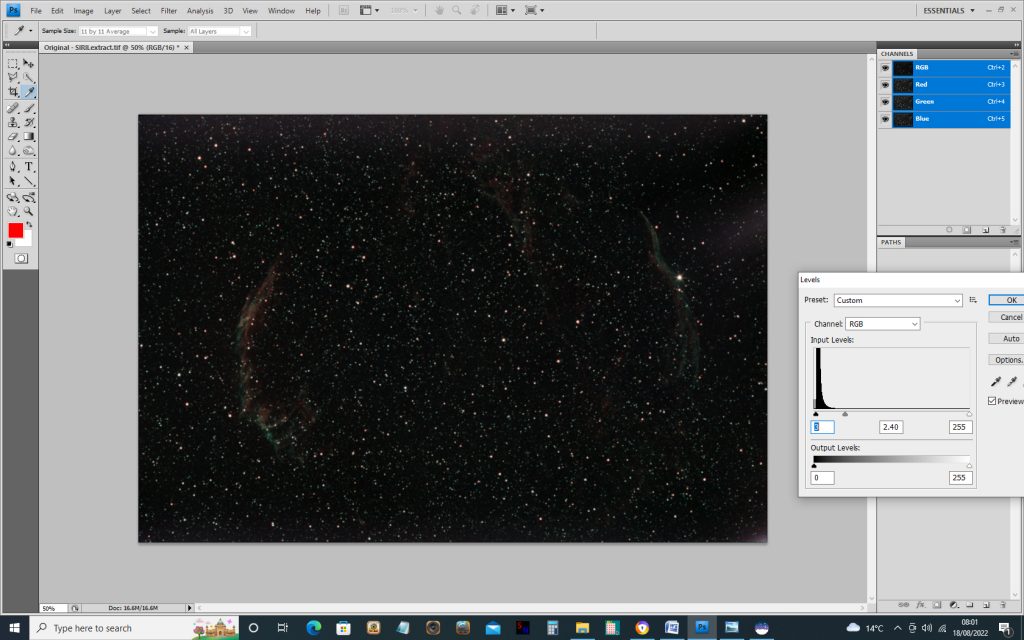
Stretching the image
In Photoshop, Affinity Photo or Glimpse, the image can be stretched in using either levels or curves to bring out the nebula. I used the levels tool, moving the central slider to the left and then adjusting the left slider which controls the black point. Two applications were made as seen below.
In Siril, the image can be stretched using the Histogramtool – essentially acting as a levels tool. However, I have found that the ‘Asinh’tool in Siril is quite good and, even better, the newly provided ‘GeneralisedHyperbolic Transformation…’ tool.
In all cases one now has a stretched image with the sky backgroundhaving been removed. Two further programare then used to produce a far better image.
Using Starnett++ toseparate the Nebula and Stars.
This free program removes the stars from the image leavingjust the nebula regions. Differencingthis with the original image gives an image containing just the stars. The latest version of the program now has aGUI – Graphical User Interface – and one simply specifies the stretched imageto be processed and then alters the name (initially the same) of the required outputfile. I have sometimes found that theprogram gives an error message and aborts the process. To avoid this, I first place the input fileinto the Starnet++ folder and select it from there, saving the result in thesame folder.
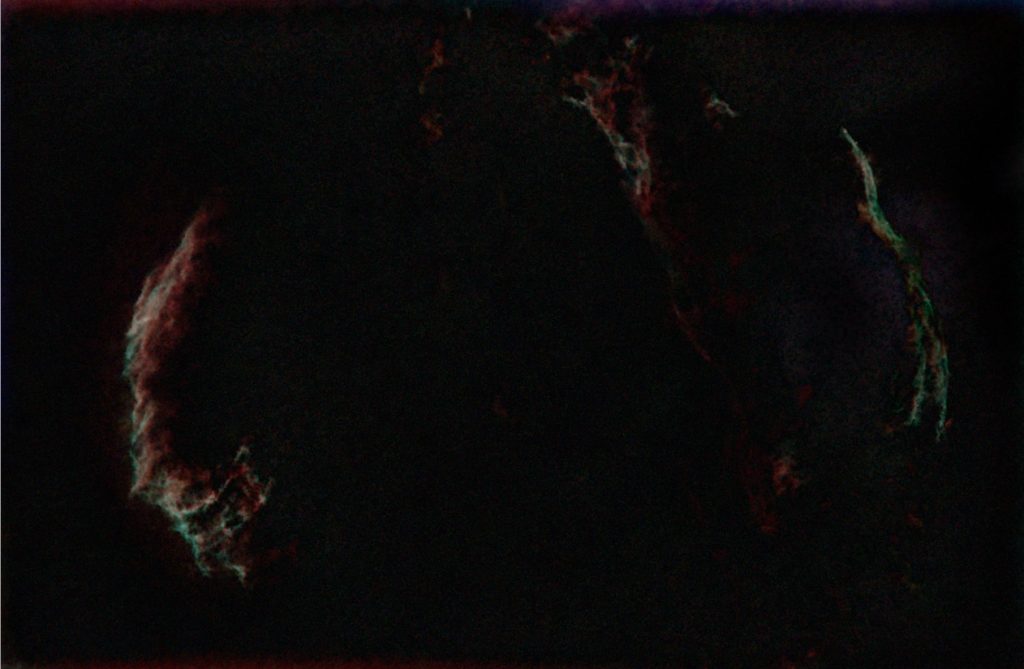
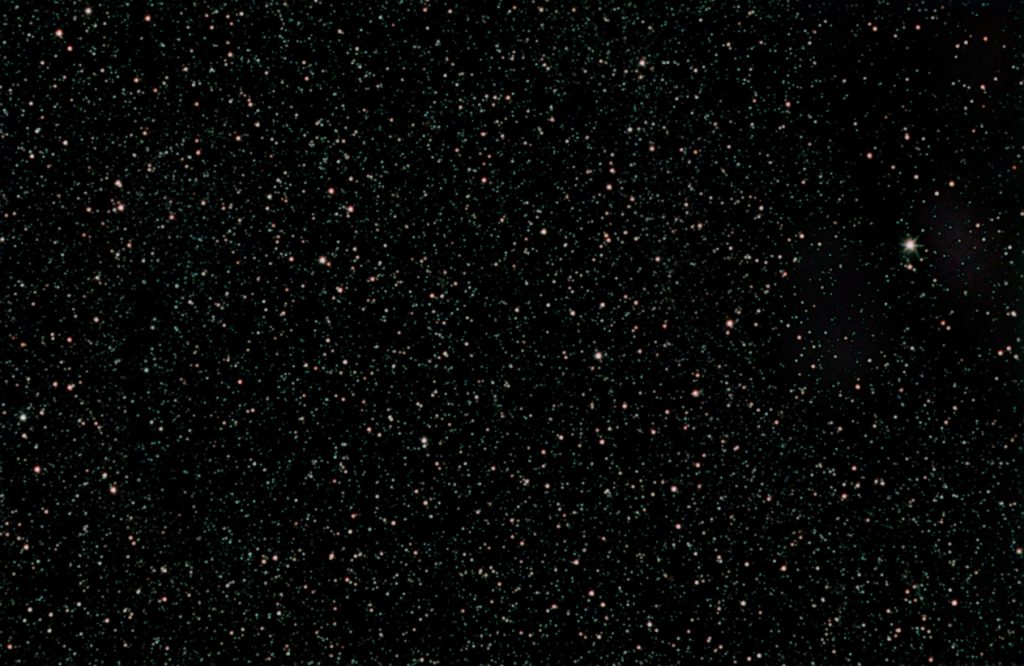
If the nebula image output from Starnet++ is differencedwith the original image, an image of just the stars results. (Nebula+Stars –Nebula = Stars.) These can then beindividually processed to enhance the nebula regions and ‘clean up’ the starsimage.
Enhancing the Nebulaimage
In Adobe Photoshop, Affinity Photo or Glimpse, one canincrease the ‘local contrast’ of the image by using the ‘Unsharp Mask’ filterwith a maximum radius and then choosing the amount to suit. I liked the result of using Glimpse a littlemore than the other two.

Removing the greencast from the stars
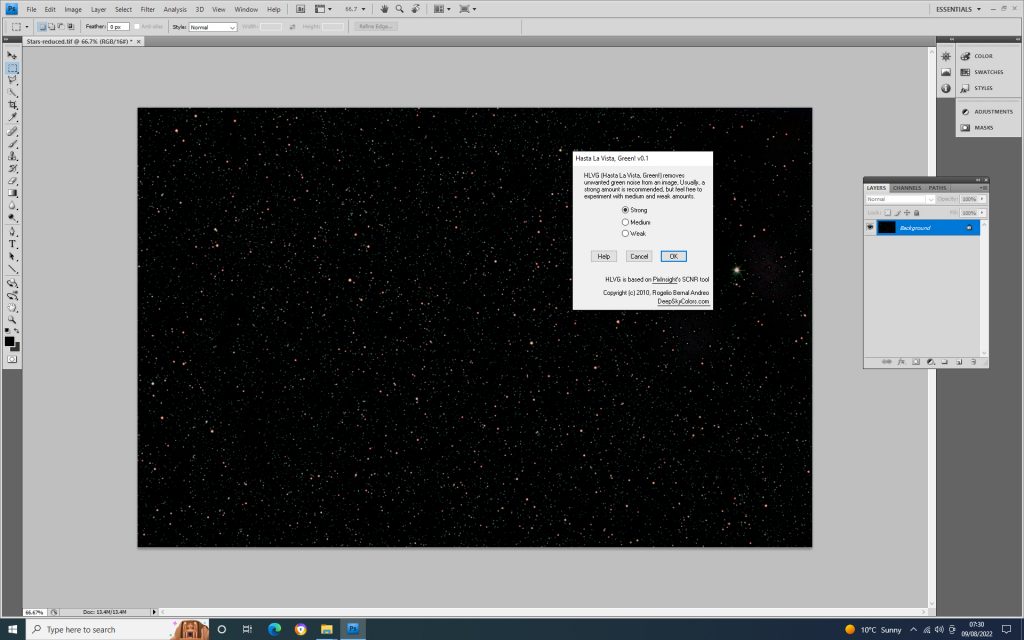
The stars in the stars image had a green cast (quite common) and for both Photoshop and Affinity Photo one can download a free filter called ‘Hasta La Vista, Green!’ from the ‘deepskycol.com/tools.html. [It may also be possible to download this for use in Glimpse.]
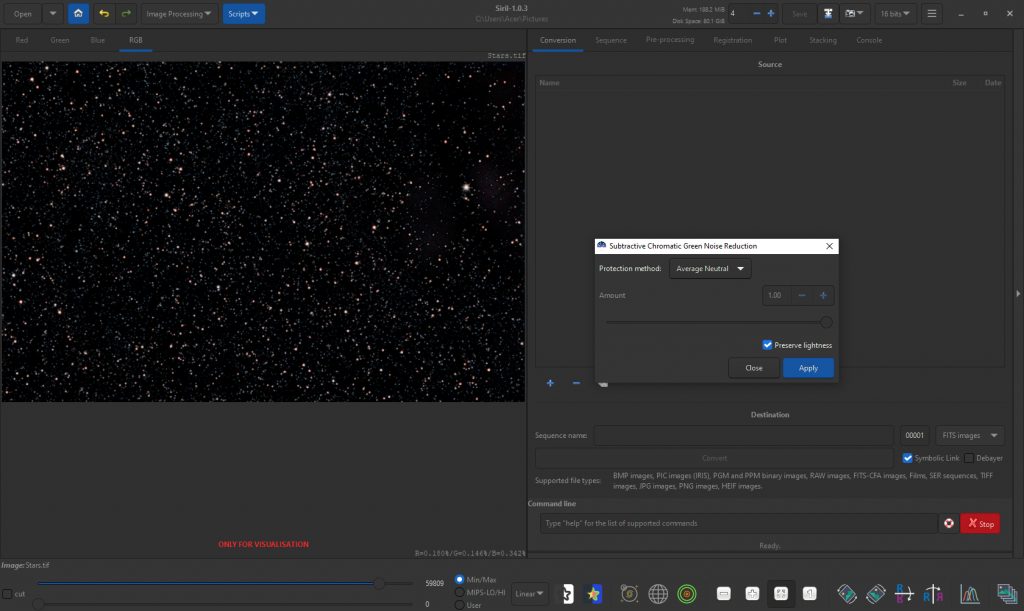
Siril has a ‘Remove Green Noise’ Tool which could also be used.
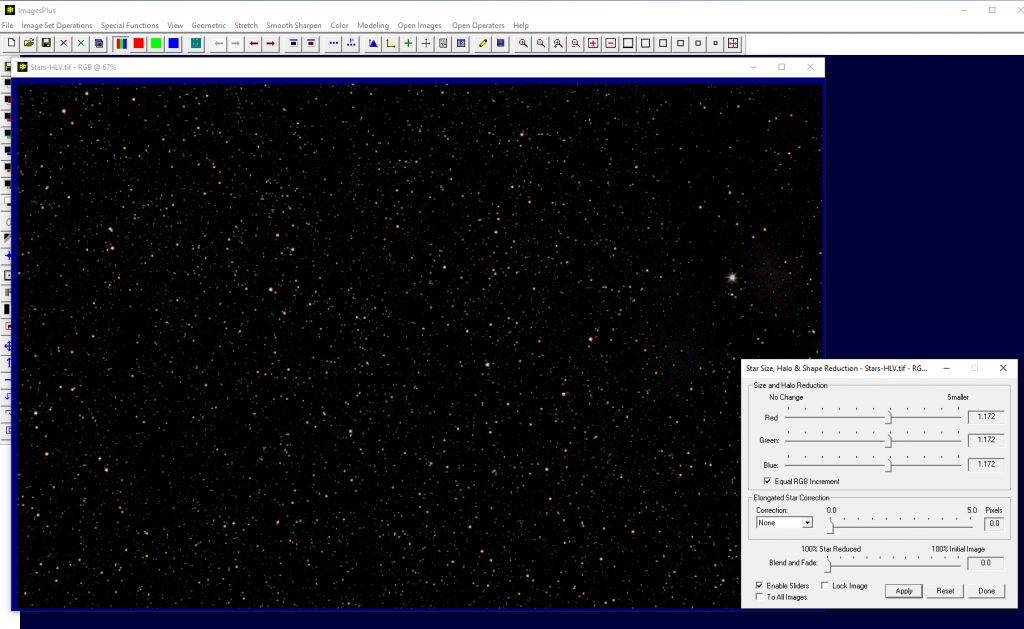
Using ‘Images Plus’to reduce the star sizes.
This, now free, program has within its ‘Special Functions’ astar reduction tool which, as it says, reduces their star sizes so reducingtheir impact on the nebulae – which is what one is trying to showcase.
Combining theEnhanced Nebula and ‘Reduced Stars’ image.
The two are then combined by copying and pasting the ‘ReducedStars’ image over the ‘Enhanced Nebula’ image and the two layers flattened or mergedusing the ‘Screen’ blending mode in Photoshop, Affinity Photo or Glimpse. [Setting up the two layers is a littledifferent in Glimpse.] The brightness ofthe stars in the image can be controlled if desired by using the ‘Intensity’slider to reduce their impact further.
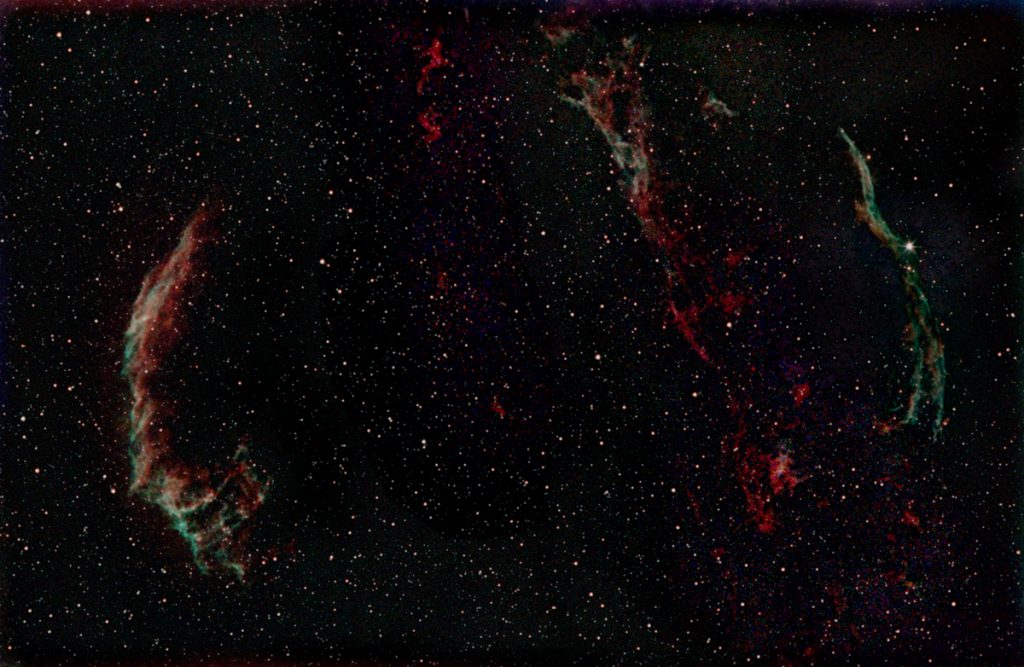
Considering that the final image is based on only 50 minutes total exposure and taken from a light polluted location, the result is not at all bad. I hope that some of the techniques that I have described may be of use to you. Note that the two emission colours are red – from H-alpha emission – and teal – a combination of the O III emission towards the blue end of the green part of the spectrum and the H-beta emission in the blue-green. The image produced from a colour camera is correct but one sees quite a number of Veil Nebula images where the OIII and H-beta emission is shown as blue – which is not correct.