JULY 2023
Background Extraction
Astrophotographs taken from light polluted skies will showlight pollution as an overall background to the image – which may well changeacross the frame particularly at low elevations. The process of background extraction aims toremove this light, termed ‘Sky Glow’, from the image.
In the background extraction tools, two of which aredescribed below, a number of point samples are placed across the image and atwo dimensional model is made of the sky background. It is vital that samples are not placed overnebula regions as their light will be regarded as background and removed!
A Simple method usingan image processing program
A simple, but quite effective, method can be implemented inAdobe Photoshop, Affinity Photo or the free program Glimpse. To see the pollution better in the stackedimage, it might well need to be first brightened but this must be done linearlyusing, for example, the ‘Brightness/Contrast’ tool. The image is duplicated. Any nebula regions must be cloned over fromneighbouring regions of the image to give an image only showing stars. A ‘Median’ or ‘Dust and Scratches’ filter is thenapplied to the upper layer with a radius of, say, 50 pixels. By magic, the stars disappear giving just animage of the sky background. The twolayers are then flattened using the ‘Difference’ blending mode leaving an imagewith the sky background removed. Simples. I have found that thismethod can sometimes give better results close to the edges of an image thanthe background extraction tools, so it can be worth using. If nebulosity covers much of the image, suchas an image of NGC 7000, the North America Nebula there is obviously aproblem. In this case, the object was ata high elevation so one could reasonably assume that the sky background wasuniform across the frame. So, in theduplicate image, a Gaussian Blur wasapplied with a radius of ~5 pixels (to average out the sky background a little)and a sample was taken of the dark region in the ‘Gulf of Mexico’. The whole duplicate frame was then paintedwith this colour before ‘differencing the two layers. A similar process could be used when imagingthe Andromeda Galaxy at high elevation.
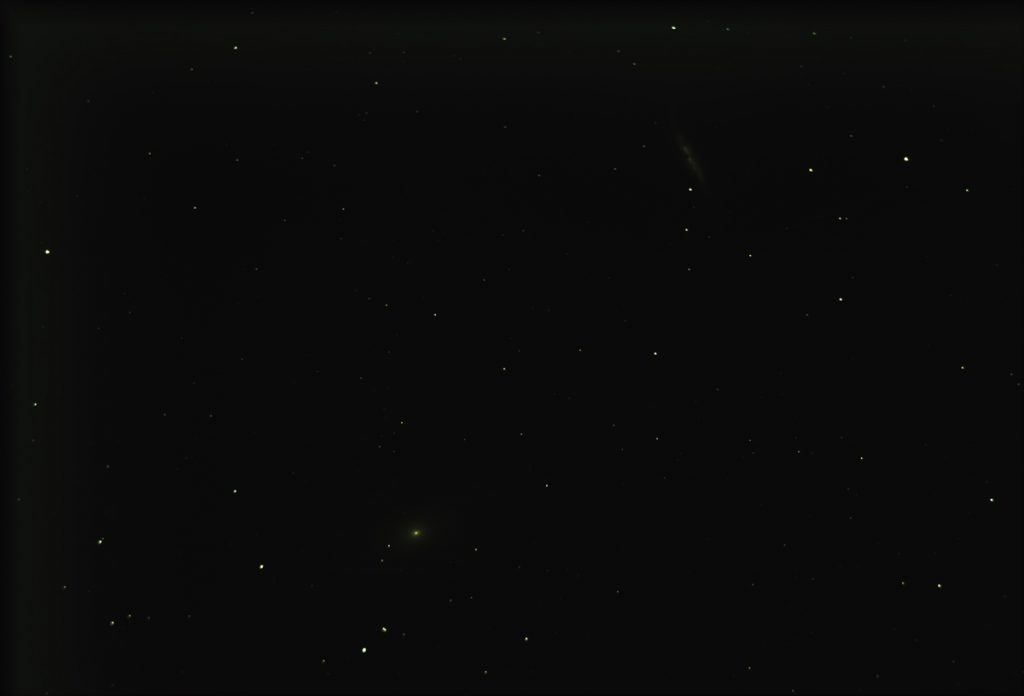
An example – M81 and M82
The stacked image is shown below.
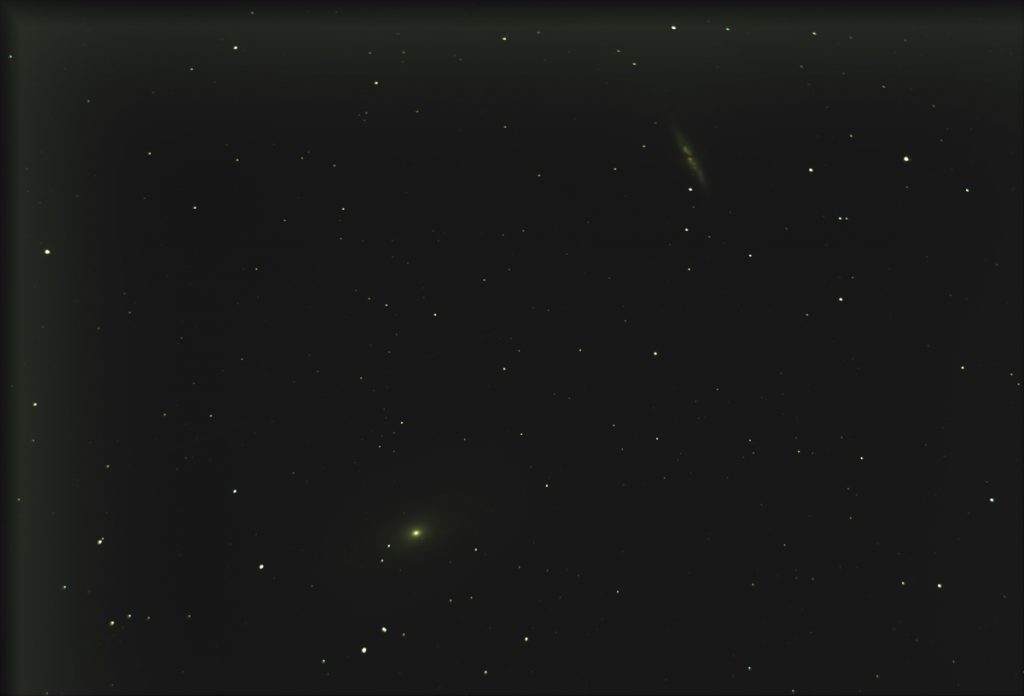
To see where the two galaxies are, the image is linearly brightened using the ‘Brightness/Contrast’ tool.
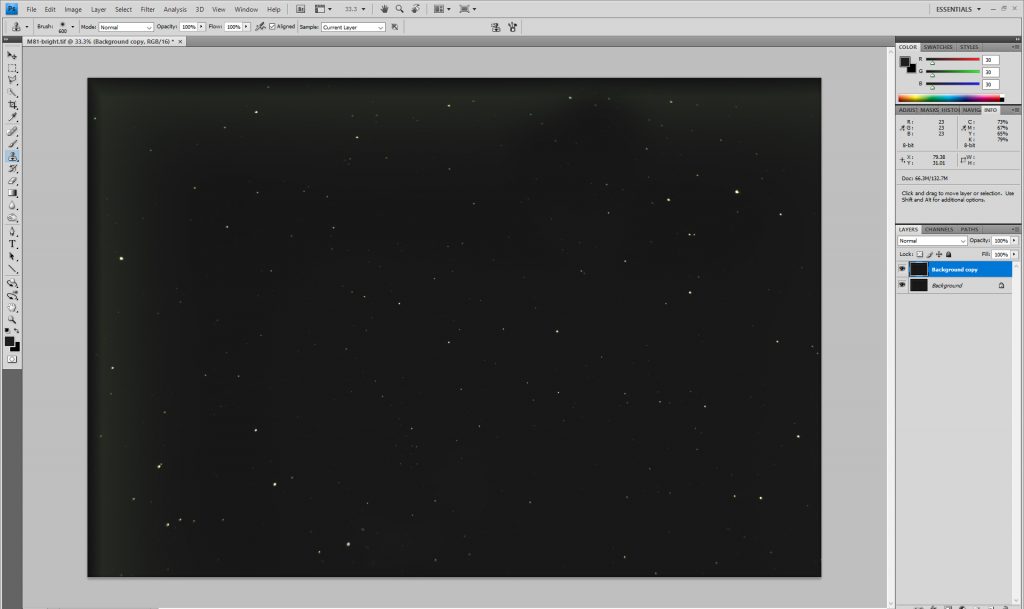
The brightened image is duplicated and the galaxies in the upper layer cloned out from close-by regions of the frame.
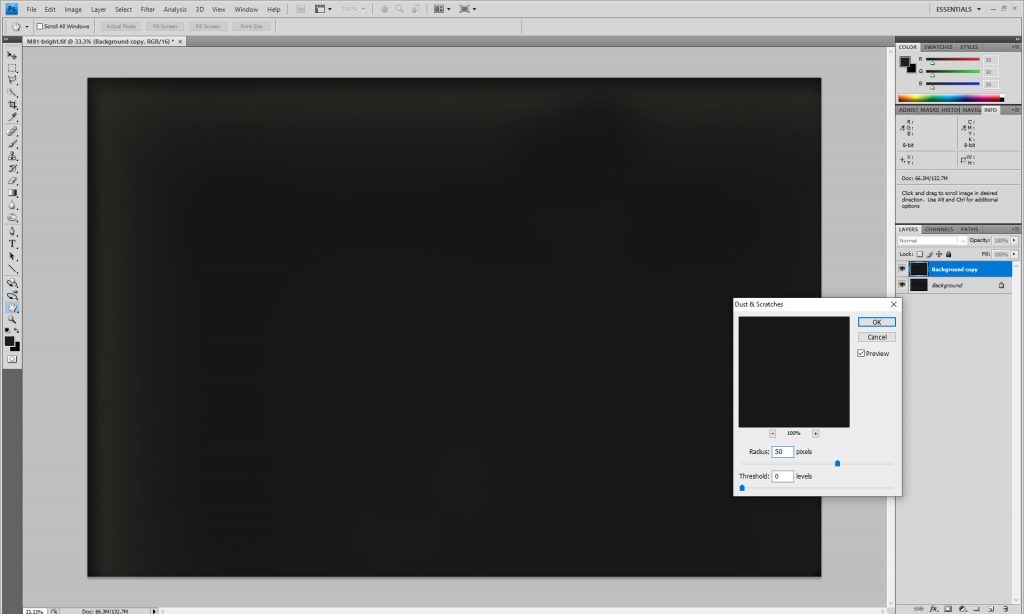
The ‘Dust and Scratches’ or Median filter is applied with a radius of, say, 50 pixels. The stars disappear leaving just an image of the sky background.
The two layers are flattened using the ‘Difference’ blendingmode to remove the sky background.

Background Extractionin Siril
I am using the free program Siril (for Windows, MacOS and Linux) to process my stacked images so its Background Extraction Tool is the one that I normally use. It is very simple in use and the placed grid across the frame attempts to avoid nebula regions. Any sample points left over or too close to nebula regions can be removed by right clicking on them. I have explained its use in the digest article: https://www.ianmorison.com/a-guide-to-stacking-background-extraction-and-stretching/
When the Background Extraction tool is opened, Siril puts a grid of sample points across the frame. It attempts to avoid Nebula and has avoided M81 but not M82.

The sample points close to M82 are removed by right clicking on them. The area around M81 was cleared as well.
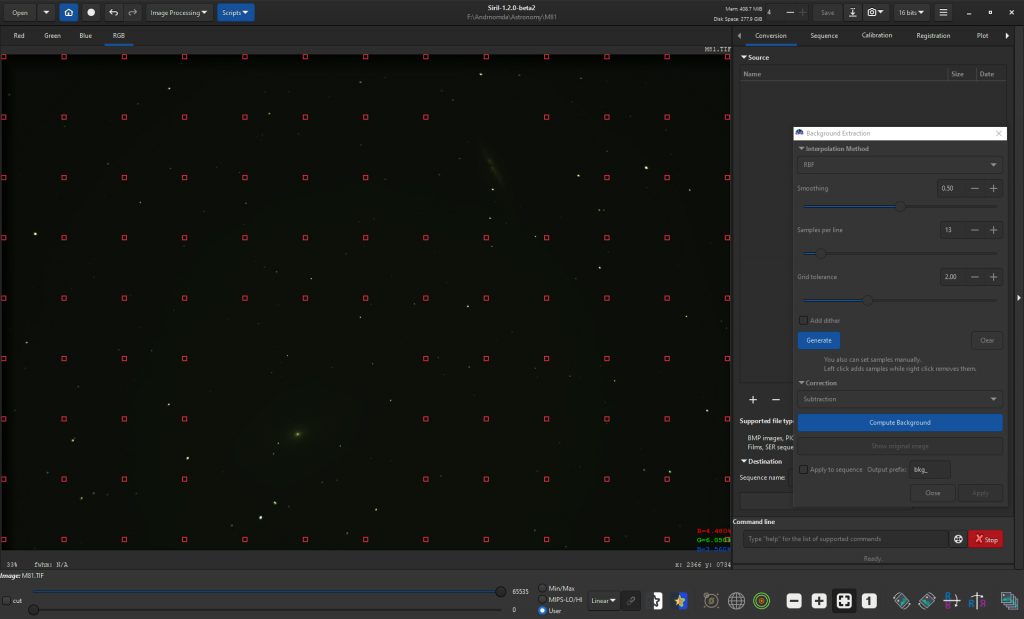
On clicking on ‘Compute Background’ and, when blue, ‘Apply’, the background is removed.

GraXpert Backgroundextraction
This free program works in a very similar way to that in Siril but gives more options to refine the process. With versions for Windows, MacOS and Linux, it can be downloaded from: https://www.graxpert.com/
When opened the stacked image is loaded – again that of M81 and M82. Like Siril, a grid is placed over the frame
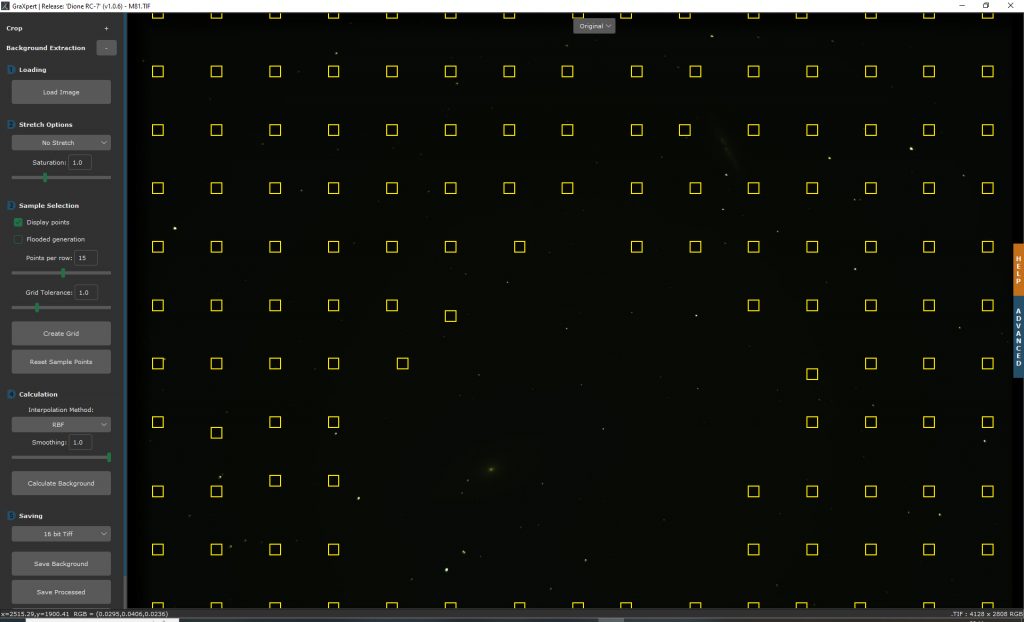
The result is a little odd – a very large area around M81 is avoided, but not as one might expect around M82 so sample points were added (left click) or removed (right click) to give the grid shown below.
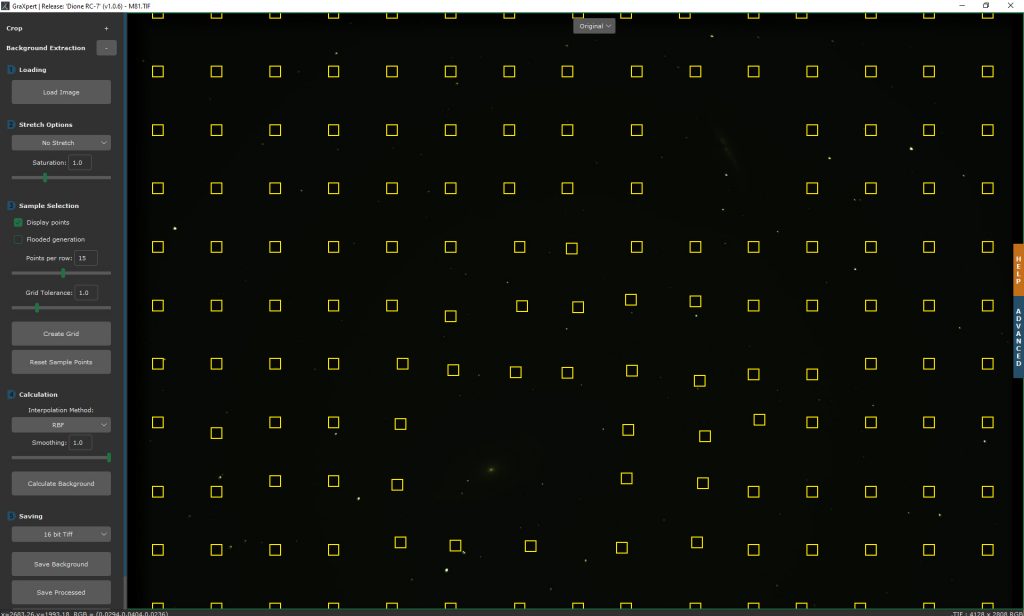
GraXpert has three possible interpolation methods – RBF is the standard one and will be used by default. On clicking ‘Calculate Background, the sky background is removed. GraXpert can then show the result, the original image or an image of the sky background which it has removed. The result can now be exported as a 32 bit Fits file to import into Siril for further processing or a Tiff file if so desired.
There are three YouTube videos which go into great detail: