FEBRUARY 2022
Binning, Dithering and Drizzling
[This is just one of many articles in the author’s Astronomy Digest.]
Binning
When using a dedicated astro camera it is possible tocombine the individual pixel data into groups of 4, 9 or 16 pixels defined as2x, 3x or 4x binning.
This will have two effects: it will increase the sensitivity but reduce the resolution.
2x binning will halvethe resolution but increase the signal by a factor of 4 so a decrease of sqrt(4) = 2 in noise level. A shorter total exposure will be needed for agiven signal to noise ratio. There willalso be smaller files to store and process. You may not need the full resolution that your sensor gives so I usuallyuse 2x binning when imaging.
Whilst I am using SharpCap to platesolve the captured images and home in onto the targetobject, I use 4x binning and also use a high gain as noise will not really be aproblem. This will minimise the exposuretime to capture sufficient stars so that frames can be plate solved or enableone to quickly adjust the mount manually to centre an object in the frame.
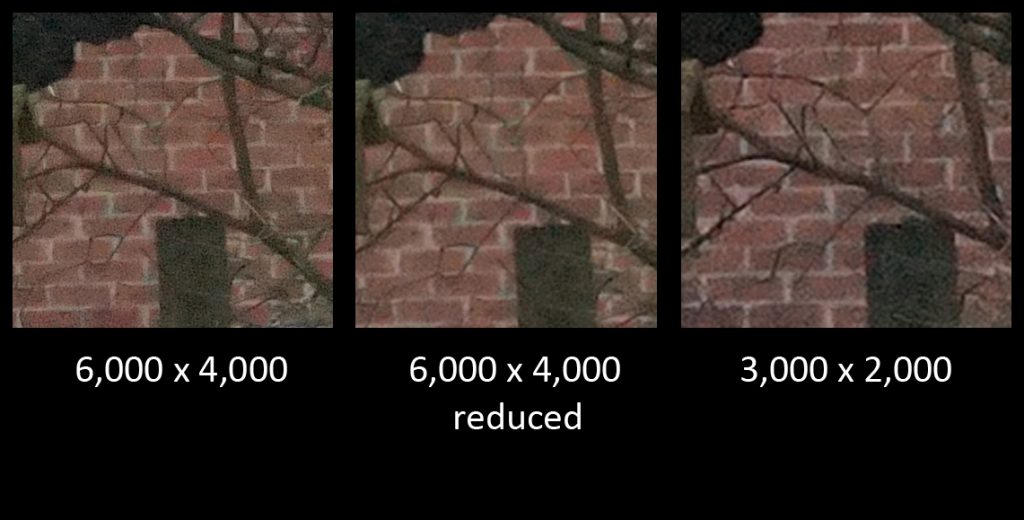
When using a DSLR, reducing the captured image size does notappear to bin the pixels. In a postprocessing program such as Photoshop reducing the image size will bin thepixels so reducing the noise in the image as seen in the set of imagesbelow. The full size image (left) whenreduced to half size (middle) does have a reduced noise level, but the halfsize image produced by the camera has the same noise level as the full frameimage.
Dithering
The sensitivity of pixels across the field of view is not uniform as the sensitivity of the green, red and blue pixels varies on scale sizes of ~20 – 40 pixels. This means that if one imaged a totally blank sky without light pollution with the sensor staying perfectly aligned, the image would not be a uniform grey but suffer from what is called “colour mottling” – slight variations in colour across the frame.
The way to avoid this to allow the image to move across thesensor during the imaging period and so average out the colour variations. There are two ways to eliminate the colourmottling.
The first is not to auto guide, but to let the image slowly drift across the sensor so thatthe stars are not trailed. This meansthat short exposures are necessary which is not such a problem with CMOS sensorsin DSLRs or astro cameras. ( I typically use exposures from 30 to 60 seconds.)
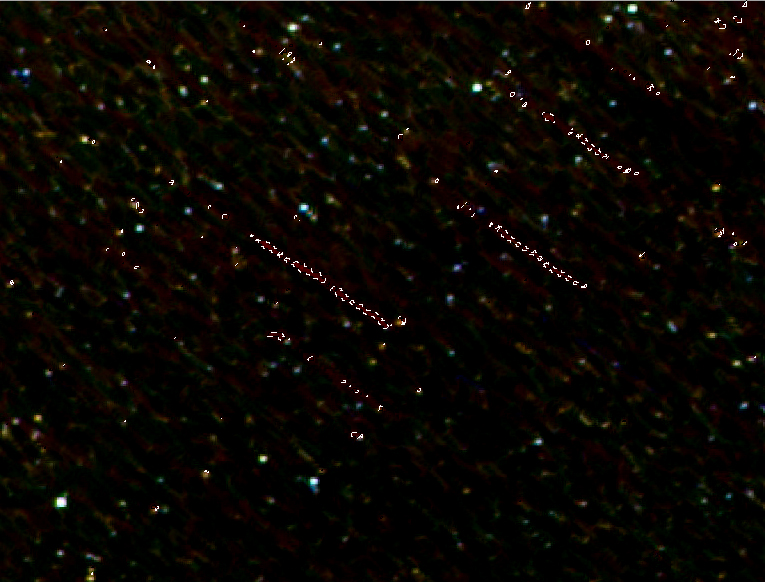
Movement across the sensor will happen automatically if themount is not perfectly polar aligned. This is the approach that I take. However it can give rise to “walking noise” which is veryobvious in an image.
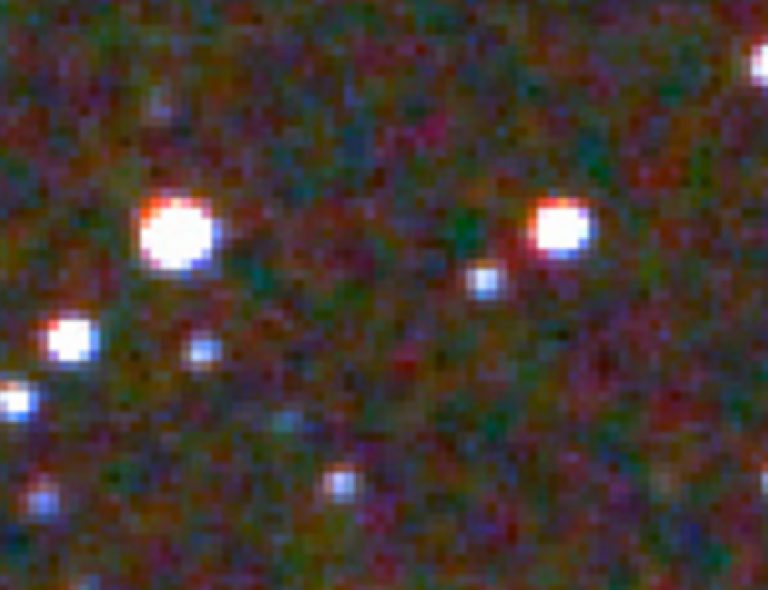
Zooming into the image one can see the effects of hot pixelsstreaking across the frame.
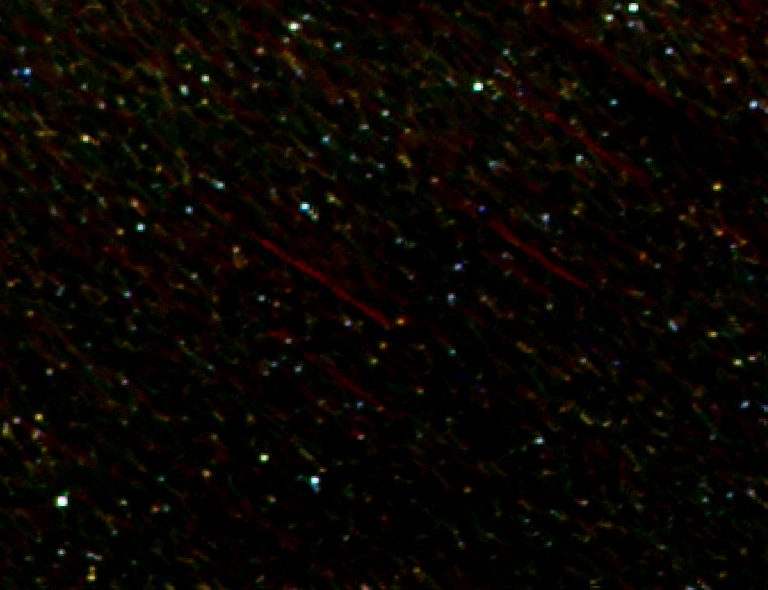
This was a particular bad example taken with a DSLR (so un-cooled) on a warm summer night. There is one effect that helps reduce their visibility. Stacking the frames will integrate up the stars, but not the hot pixels so their relative brightness will get less and one might simply be able to increase the black level and loose them in the background noise. However, as seen below the most obvious hot pixel trails may still be seen.
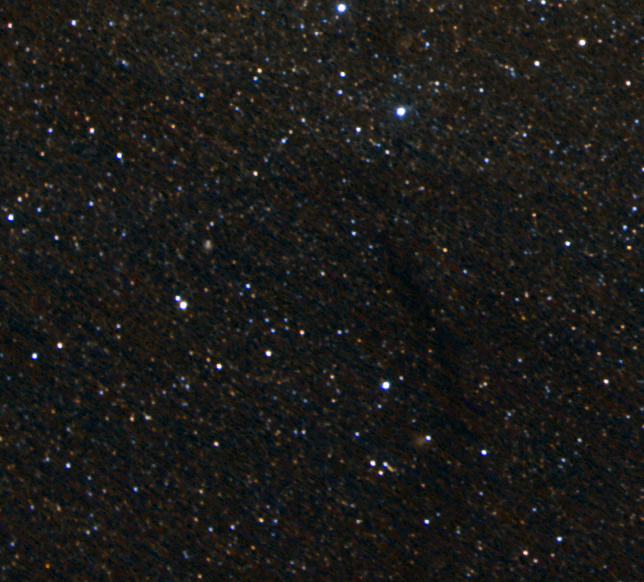
These are not too difficult to remove in Adobe Photoshop or Affinity Photo. [Affinity Photo is a superb low cost program that can do virtually all that is required for use by astrophotographers.]
Use the “Select colour range” tool to select thehot pixel colour (red in this case).
Expand the selection by 2 pixels.
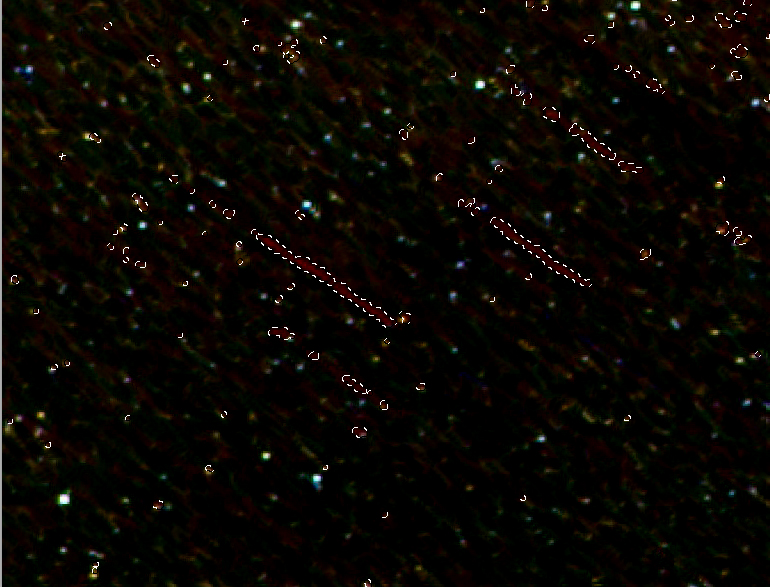
Paint the whole image (using a big brush) with thebackground colour (usually black).
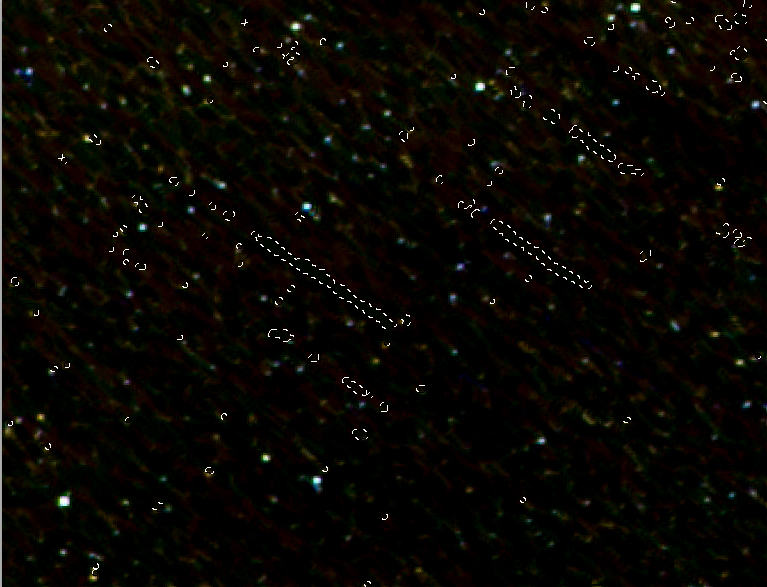
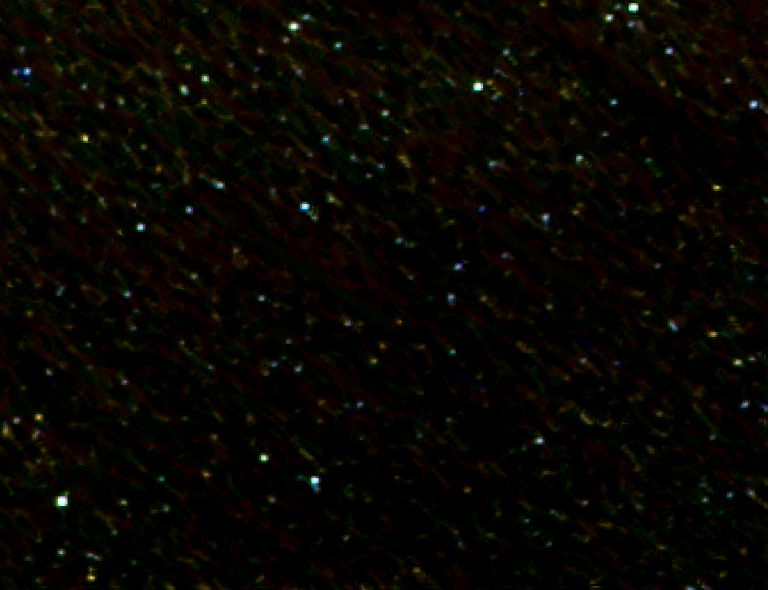
Repeat for any green or blue pixel trails. One may then need to increase the blacklevel to produce a passable image having removed the walking noise.
When Autoguiding
If autoguiding, allow the guiding program to make randommovements in the telescope pointing between every few images. Programs such as PHD guiding can carry thisout.
Drizzling
This wasoriginally developed for use with the Hubble Space Telescope and its first camera– “Wide Field & Planetary Camera 1” (WFPC1).
To fully sample an image (which is 2D) the Nyquist Sampling Theorum states that the sensor pixels must subtend an angular size that is one third the hoped for resolution. The Hubble Space Telescope has a nominal resolution of 1/20th of an arc second = 0.05 arc seconds. However, the pixels of the Wide Field & Planetary Camera 1 (WFPC1) had pixels which subtended 0.043 arc seconds. So the images produced by the 2 m aperture telescope were well under-sampled.
By taking many images which are slightly shifted on thesensor, upsizing them by some factor (1.5, 2 or 3) and then aligning andstacking them, the resulting image will, perhaps surprisingly, overcome thesampling limitation and give a higher resolution image with, perhaps, an up toa 50% improvement.
Many smartphones can now use this technique as do somecameras which use sensor based image stabilisation such as the PanasonicG9:
“By using sensor-shift stabilization technology the 20Megapixel Panasonic G9 camera can use a High Resolution Mode to capture andcompile eight separate images to create a single 80MP raw file. This systemcreates a more highly detailed and colour accurate image than a single shotalone can produce and can create an image with a 10,368 x 7,776 resolution.”
The noise level is also reduced as the result is the averageof 8 images. The scene must be stationaryand wind can be a problem.
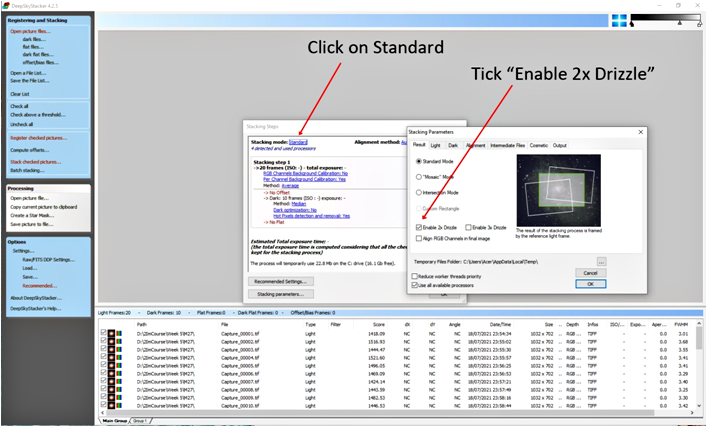
If our deep sky images are dithered, Deep SkyStacker can employ drizzling.
As can “Autostakkert!” when used to process lunar or planetary images.
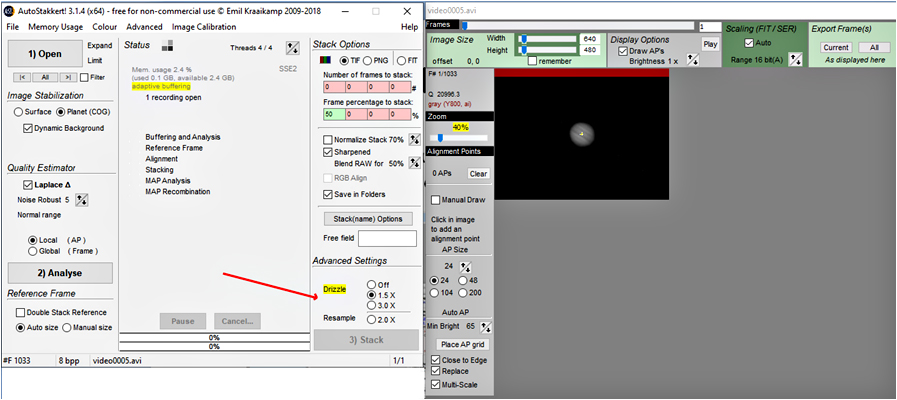
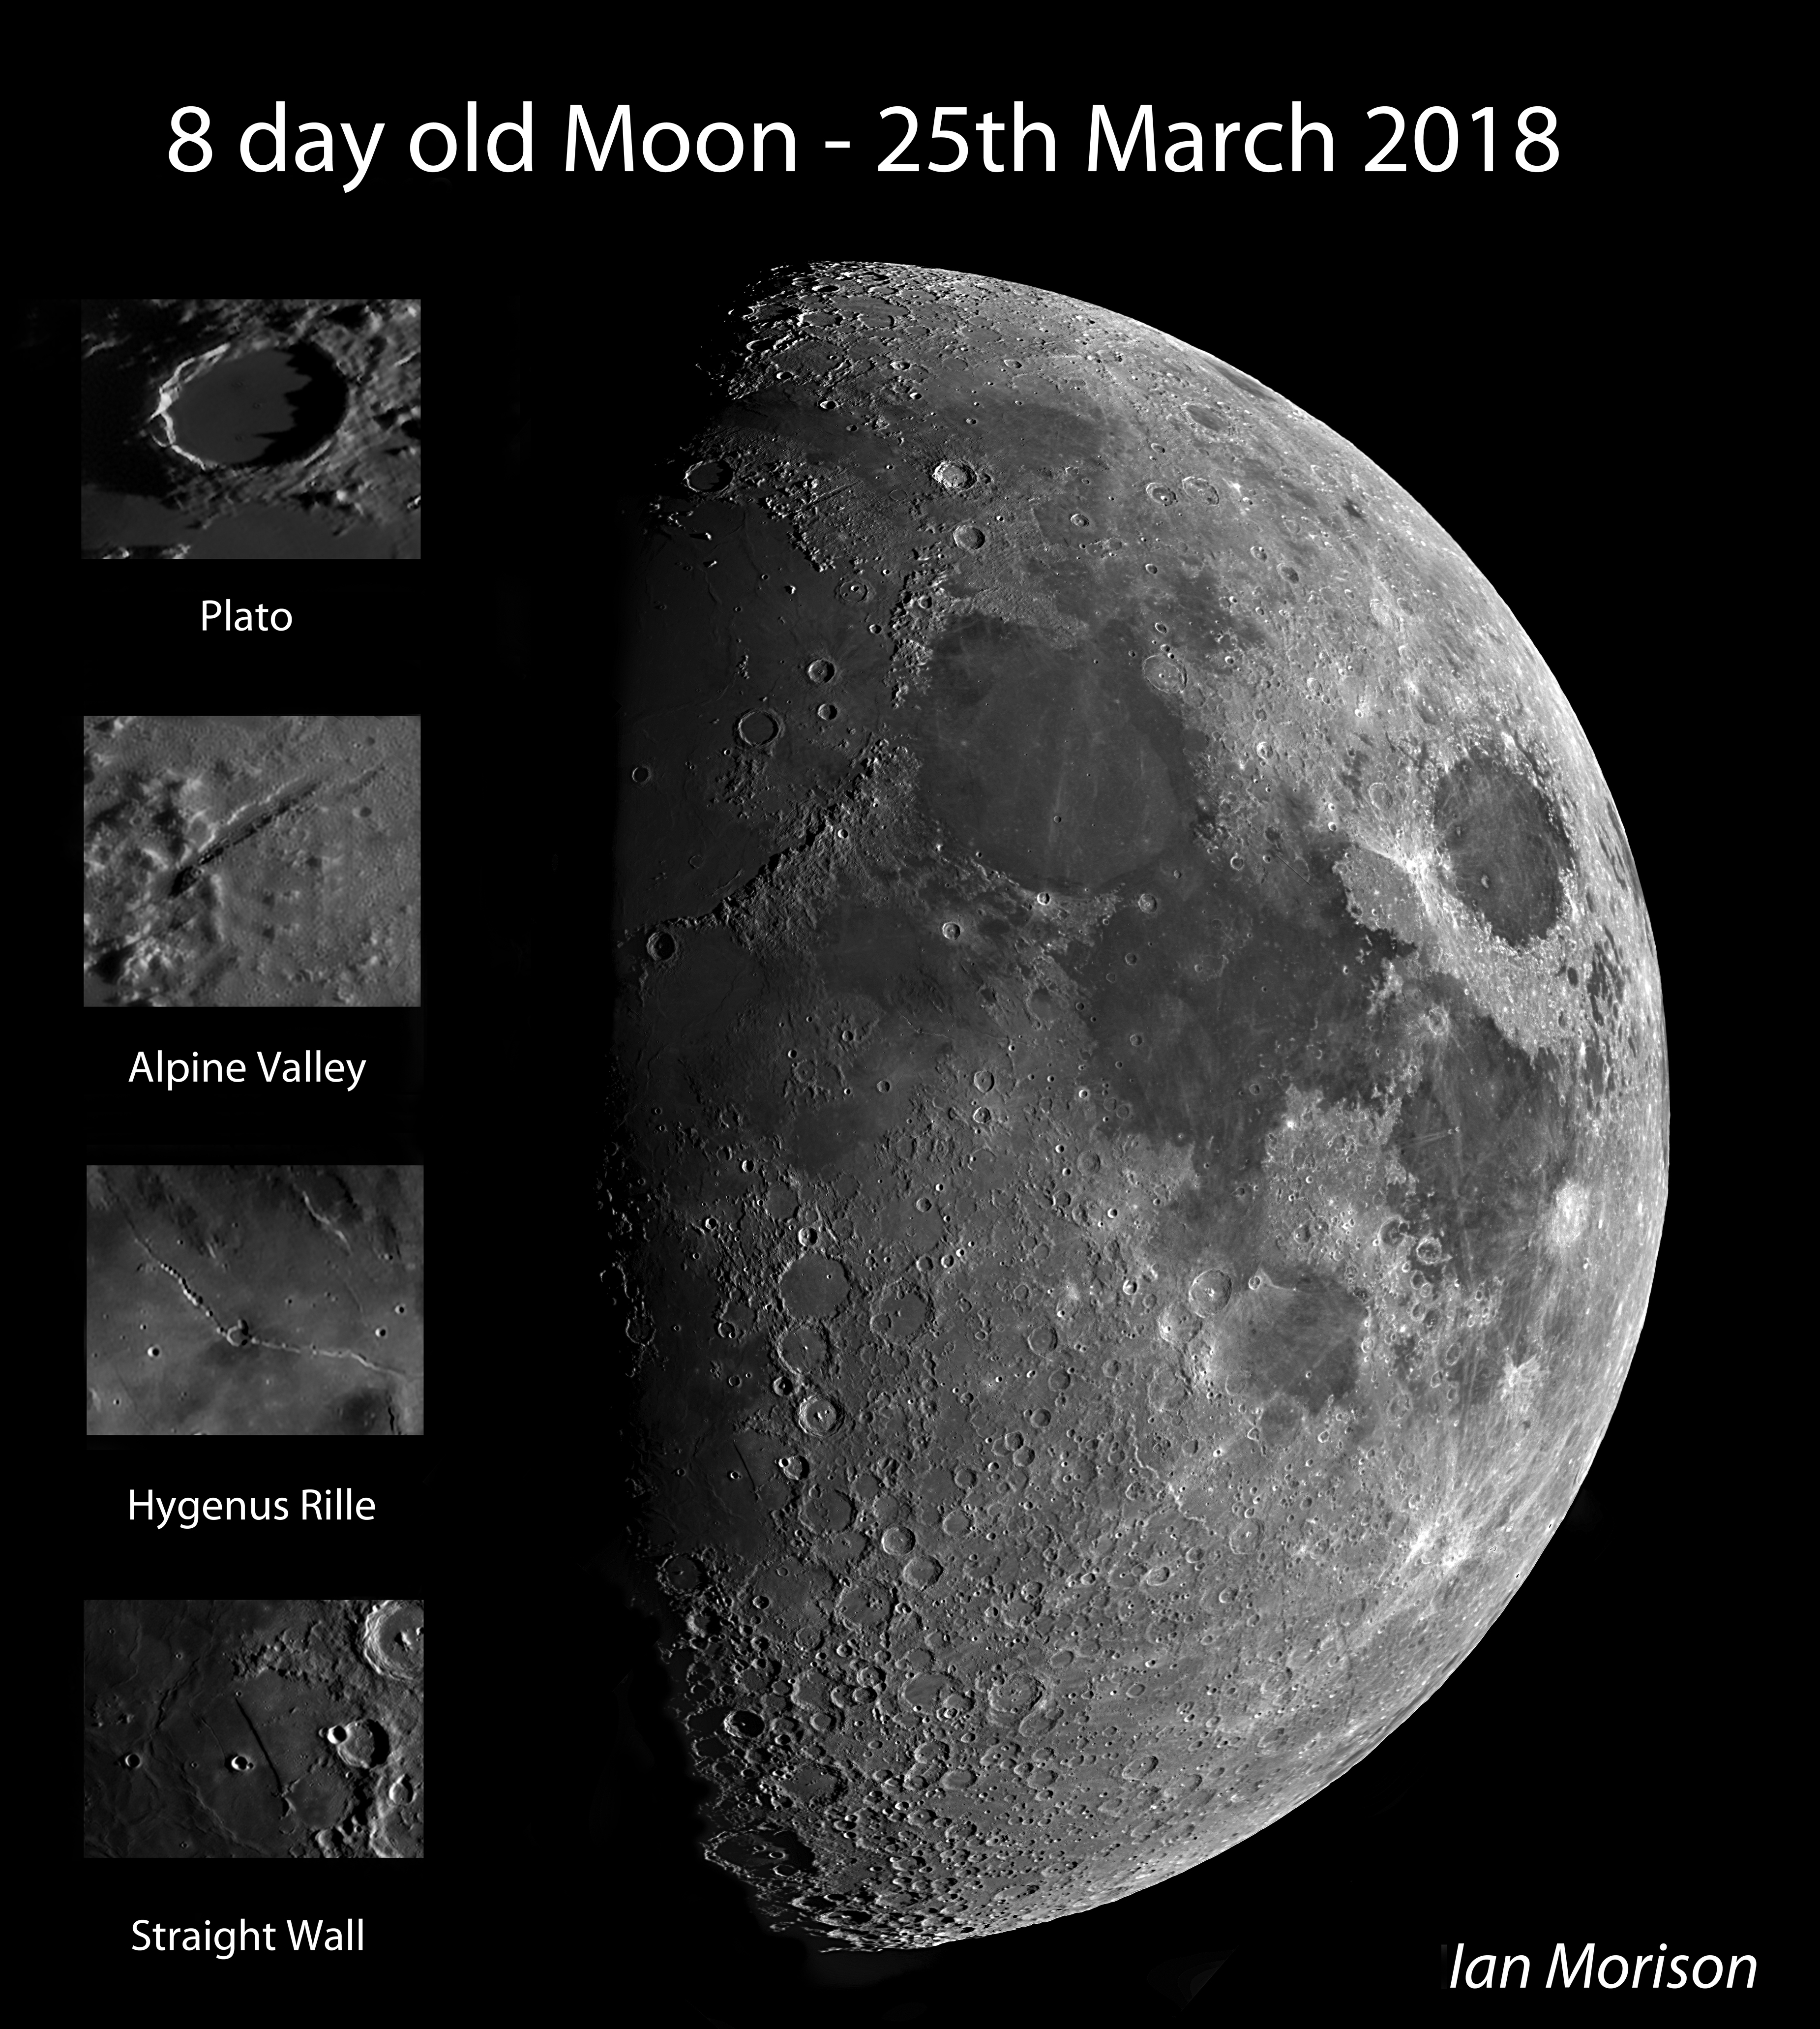
I have used 1.5x Drizzle in Autostakkert! with some success in taking high resolution images ofthe Moon using “lucky imaging”.

A near full sized version of this image having a resolution of ~0.7 arc seconds can be found here.