MARCH 2018
Deep Sky Stacker: could it be worth first converting raw files into Tiffs? A case study imaging M35 and NGC 2158.
[This is just one of many articles in the author’s Astronomy Digest.]
When writing a further essay for the digest, I became interested in how Deep Sky Stacker (DSS) was dealing with the raw data that I had captured imaging the clusters M35 and NGC 2158. Raw frames were taken using a full frame Nikon D610 attached to a CFF telescope’s 127 mm apochromat refractor employing an aspherical oil-spaced triplet objective. The D610 was controlled over a USB cable from an Android tablet using the program qDslrDashboard and was set to take 56, 20 second, exposures at an ISO of 800. No darks or flats were taken. The telescope has a 3-inch focuser but, having a 2-inch barrel, could not be expected to cover the full frame sensor. As a result, the field was significantly vignetted, but the two clusters were well covered. I was not using a field flattener, but the stellar images were perfect across the unvignetted field of view.
The D610 has a very low noise sensor and the night was cold. With the sensor temperature changing and unknown it would not have been sensible to take dark frames and there was no evidence that these would have improved the final image. It would have been possible to use the ‘In Camera Noise Reduction’ imaging mode which follows each ‘light’ frame with an identical exposure ‘dark’ frame and differences the two. This would remove any hot pixels, but Deep Sky Stacker can remove these whilst aligning and stacking the frames and the process actually adds noise to the image. However, then the time spent imaging the sky would have been halved. In my digest article ‘The use of Dark Frames when using a DSLR’, I suggest that, if the night is cold, one should not use the ‘In Camera Noise Reduction’ and simply gather as many photons from the sky as possible. I think that this imaging study bears this out.
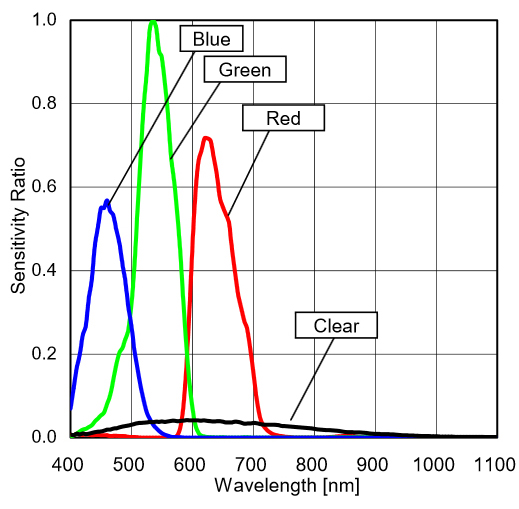
I initially used DSS to process the raw image. Two things became immediately apparent. Firstly, the star threshold for detecting stars in the raw files had to be quite low. Secondly, in the Tiff file produced by DSS from the .NEF raw files, I was somewhat surprised in that the image had a green cast rather than red cast that I would have expected (due to light pollution) having a green peak to the right of the histogram. It took me some while to realise what was happening. The fundamental reason is that camera sensors are more sensitive to green light so that, unless compensated for, the green values will be greater.
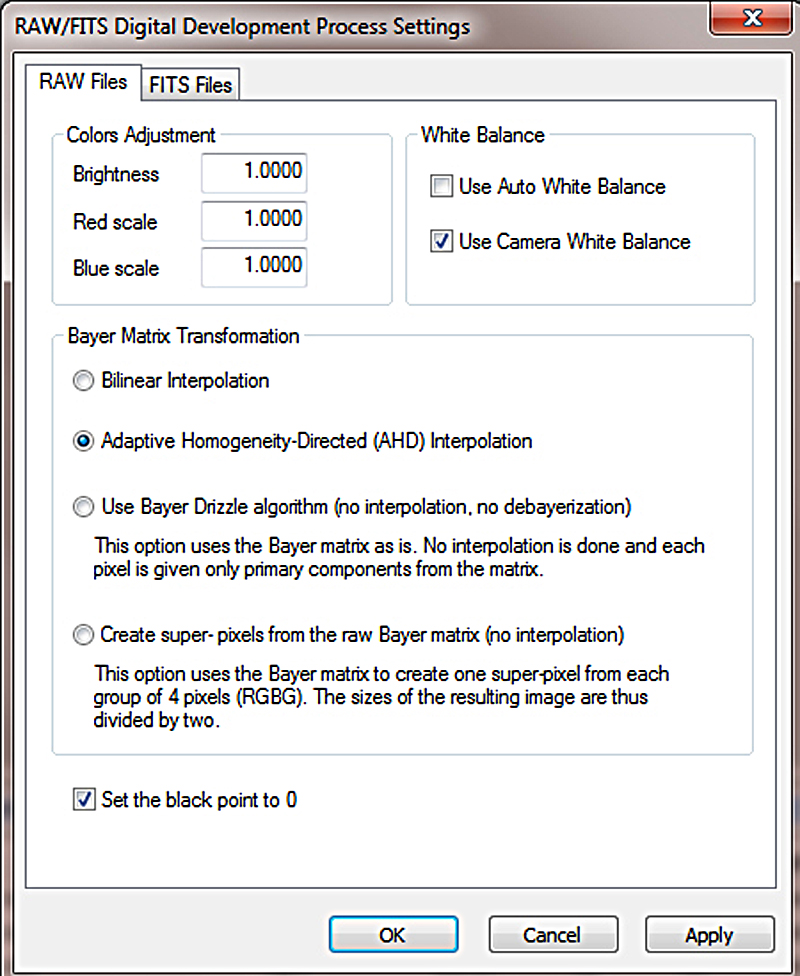
This is the case for the .NEF raw files produced by my Nikon camera. In the past, I have always converted these first to Adobe .dng files and this process must produce a raw file having equalised the red, green and blue levels by, presumably, increasing the levels of the red and blue. So, if stacking .NEF files in DSS, one must click on the ‘Camera White Balance’ box in the RAW settings box. Having done so, the DSS output Tiff file histogram was just as I had expected with a red peak to the right due to the local light pollution.
Before I had realised how to fix this problem I thought that it might be worth converting the .NEF files either into .dng files (as I had done previously) or to Tiff files using a raw converter and then aligning and stacking them in DSS. This turned out to be interesting, hence this article.
There were four possibilities at my disposal:
- Convert the .NEF files into .dng files using the (free) Adobe DNG Converter.
- Convert the .NEF files into .Tiff files using Adobe Light Room.
- Convert the .NEF files into .Tiff files using the (free) Nikon View NX-i image processing software.
- Convert the .NEF files into .Tiff files using the (free) RawTherapee image processing software.
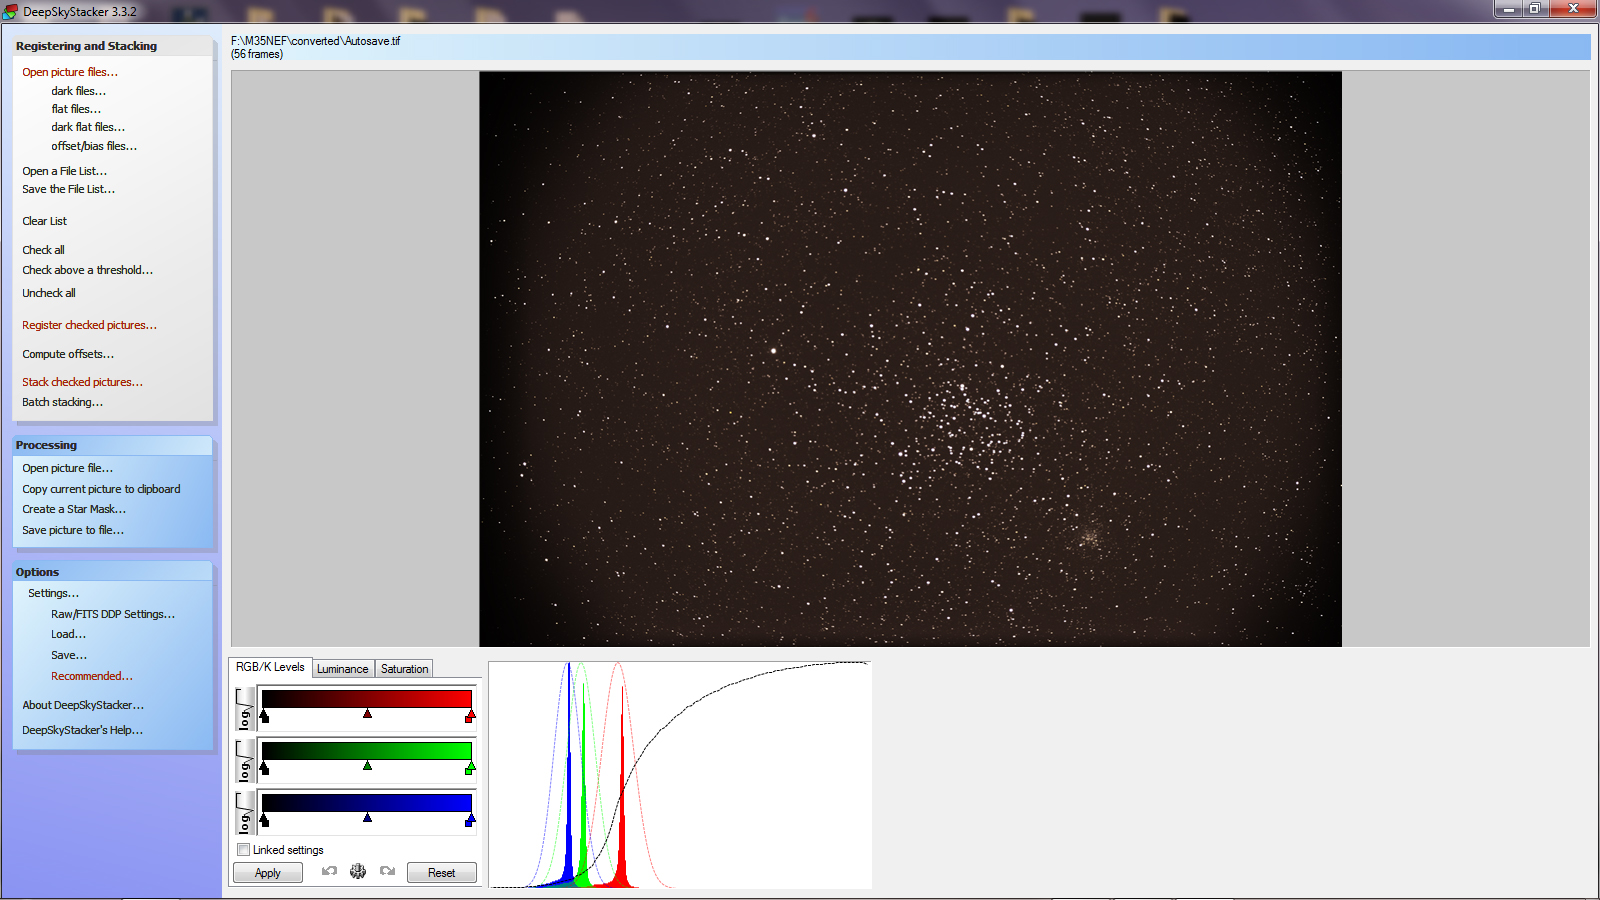
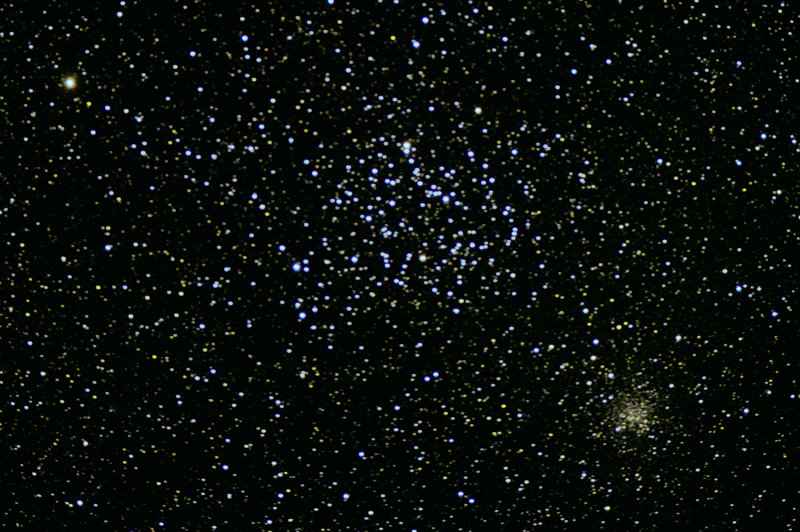
I thus carried out all four pre-processes and stacked the 56 frames in DSS. The results were what I would have expected. In all cases, the output Tiffs from DSS had the red peak over to the right in the histogram caused by the light pollution as seen in the example below.
I tried to process each resulting Tiff output from DSS as closely as possible. Not surprisingly, the Tiffs produced from the .NEF and .dng frames required considerably more stretching that those derived from the Tiff frames as the raw to Tiff converters apply some stretching in their processing. Each output Tiff file was stretched so that the red cast due to light pollution was reasonably prominent. The layer was duplicated and the ‘Dust and Scratches’ filter applied with a radius of 24 pixels. It thinks the stars are dust and removed them giving a layer that represents the light pollution. This can be further smoothed with a ‘Gaussian Blur’ with a similar radius. Some evidence of the brighter stars and the cluster NGC 2158 remained. As the image was taken at high elevation it was reasonable to assume that the light pollution would be constant. The paint brush was used to sample a region away from the brighter stars and this colour was used to paint over the whole layer so giving a totally smooth representation of the light pollution. The two layers were then differenced using the ‘Difference’ blending mode. This gives the image a totally black background. Some further stretching was applied and a slight enhancement to the colour to give the cropped results below.

From the .NEF files
From the Nikon NX-1 Tiff files

The results had somewhat different colour balances which can, of course, be adjusted in Photoshop.
Of the five results think that I preferred the image produced from the RawTherapee Tiff files – the blue stars in M35 had a more uniform colour and were somewhat ‘tighter’ as shown in the comparison below with the directly processed .NEF files.
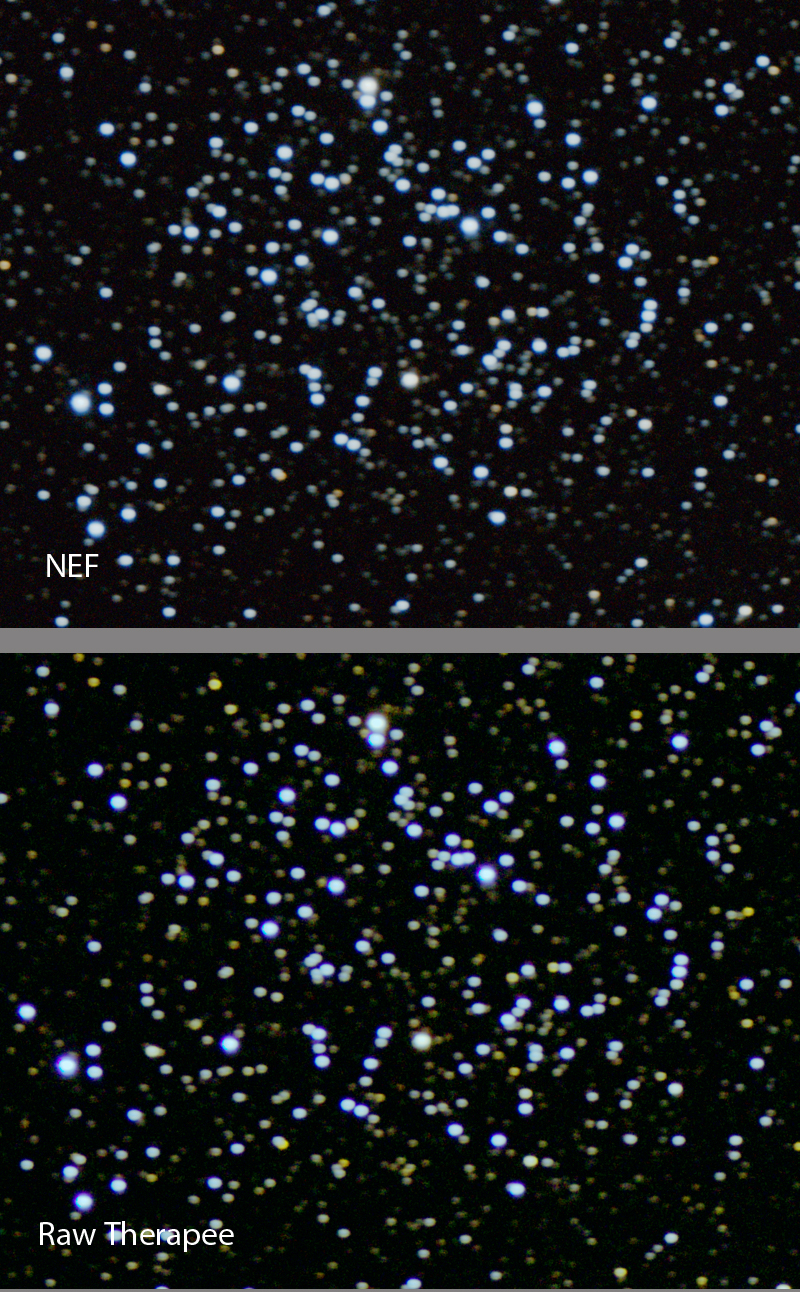
The stacking had lost the colour of the red giant stars which were obvious in a single frame (a 20 seconds exposure had been quite sufficient to show the brighter stars) so an overlay derived from from a single frame was used to bring back their colour to in the result derived from the RawTherapee Tiff files.
Why should the results be different?
I do not have an obvious answer. What is true is that the deBayering algorithm, AMaZE (Aliasing Minimization and Zipper Elimination), used by RawTherapee is, I suspect, more sophisticated than that used by the other conversion programs and certainly better, it is said, than the AHD (Adaptive Homogeneity-Directed) method used in Deep Sky Stacker. But I cannot really see why this should have made the difference. It is interesting to note that a top astrophotographer, Tony Hallas, advocates the processing of raw frames prior to stacking (and does rather more than just a simple conversion into a Tiff file) so there may be something to be gained by taking this extra step in the processing of the data.
I decided to explore a further capability of Deep Sky Stacker.
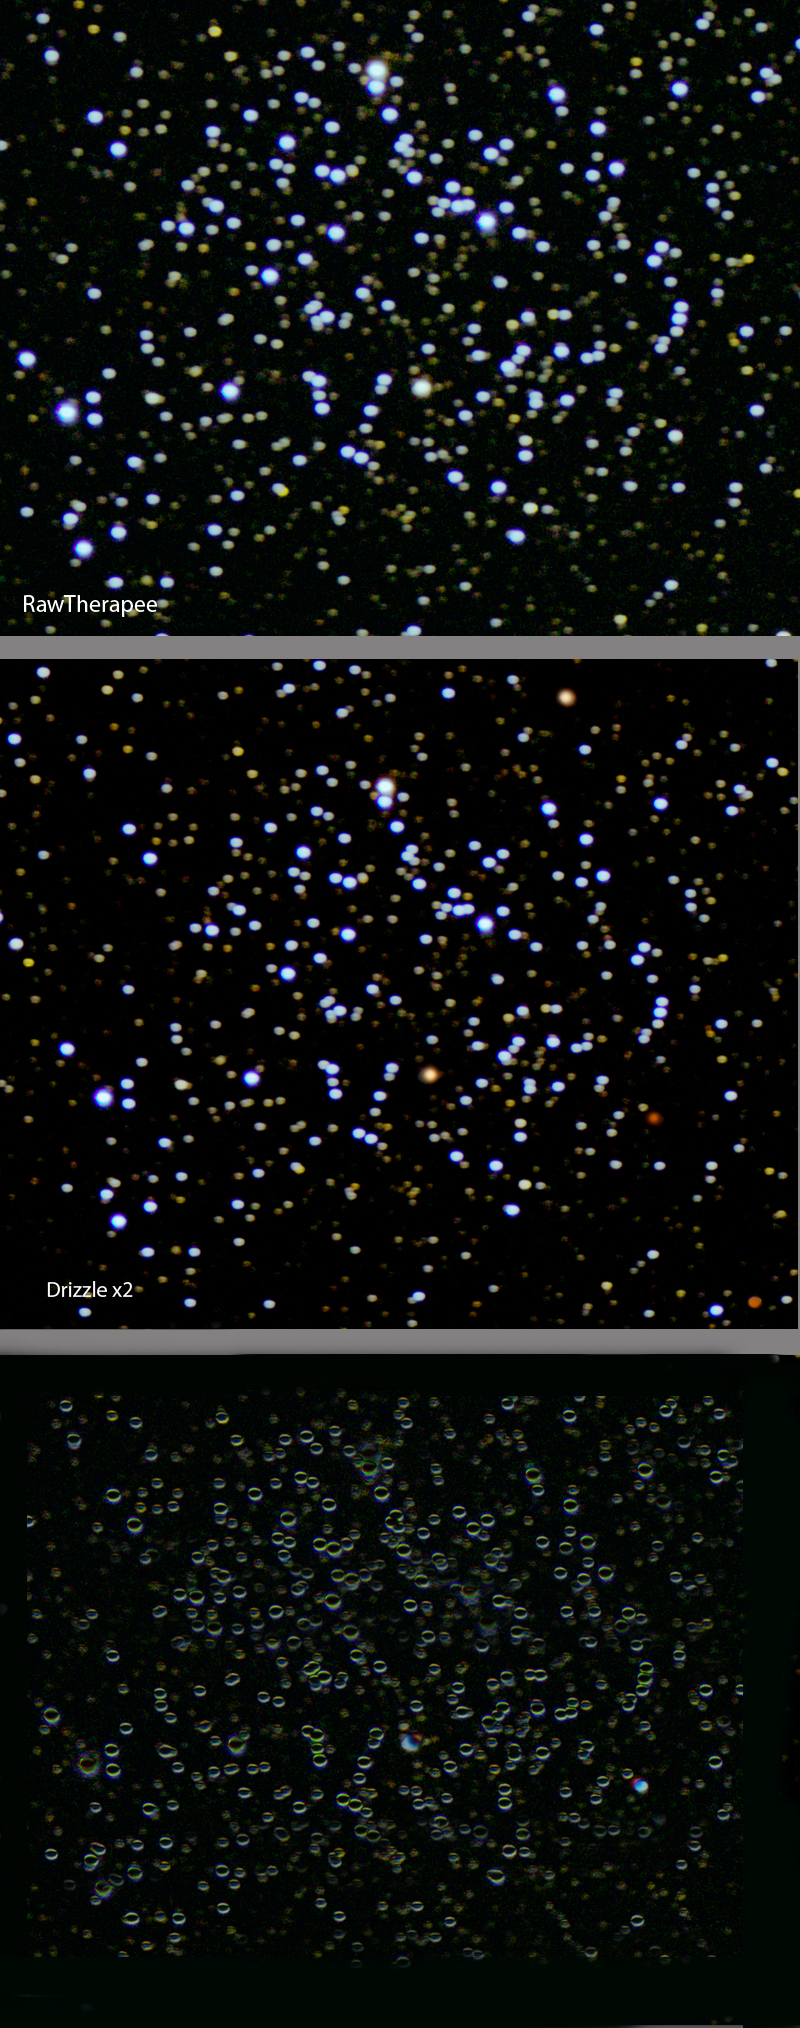
Using 2x Drizzle.
DSS has a mode in which, given a large number of frames to stack, it aims to give a higher resolution image. This sounds unlikely, but the technique is used in a number of cameras to provide say, a 40 megapixel image rather than a 16 megapixel image from a 16 megapixel sensor. (See here: https://www.imaging-resource.com/PRODS/olympus-e-m5-ii/olympus-e-m5-iiTECH2.HTMA.) A number of frames are taken whilst the image stabilization system which moves the sensor shifts the image in both x and y directions by half pixel amounts and these frames are then drizzled. DSS uses the fact that the atmosphere will make, in this case random, shifts of the image over the sensor. In addition, as the mount was not perfectly aligned, the image slowly drifted across the sensor giving the same effect. (Though one might say that this was poor technique, it also has the good result of removing what Tony Hallas has called ‘colour mottling’ so I advise either having a slightly miss-aligned mount, as here, or use what is called ‘dithering’; moving the mount in small random directions during the imaging period. PHD guiding can be set to do this when auto guiding.)
The problem
The image size is doubled when using a 2x drizzle and so a very large memory is required. It is highly likely that if one sets DSS to use 2 or 3x drizzle, it will quickly say ‘out of memory’ − particularly if one was using a 24 megapixel camera! There is one DSS technique that will help. By first clicking on the first (say) image that has been imported into DSS, and then clicking on the opened image with the mouse, two rectangles appear for the use of 2x and (smaller) 3x drizzle which can be moved around by using the mouse. If, as was the case in this imaging exercise, the 2x area covers the region of interest then DSS will only stack this area of each frame so requiring less memory. Even so, with 8 Gigs of RAM, my i7 computer could not stack all 56 frames that I used in the above example. By trial and error, I found that it could stack 40 of the images. I used the RawTherapee derived tiffs and I think that the technique did give a (very) slightly improved image with slightly tighter stars. The third image below is the difference between the two showing a very slight tightening of the stars.
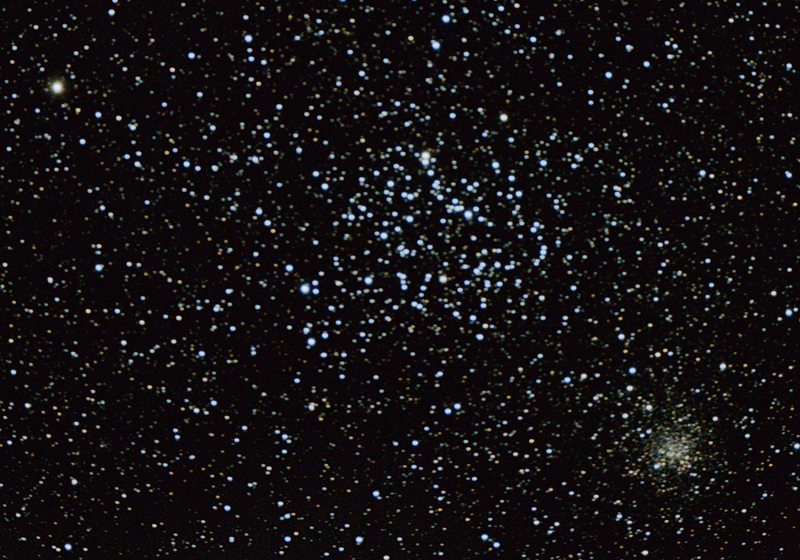
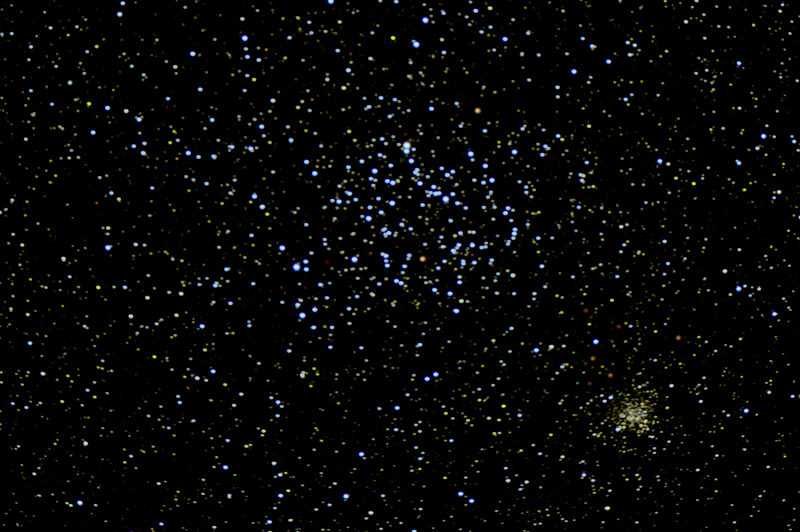
This the final image of the exercise having overlaid the red giant stars.
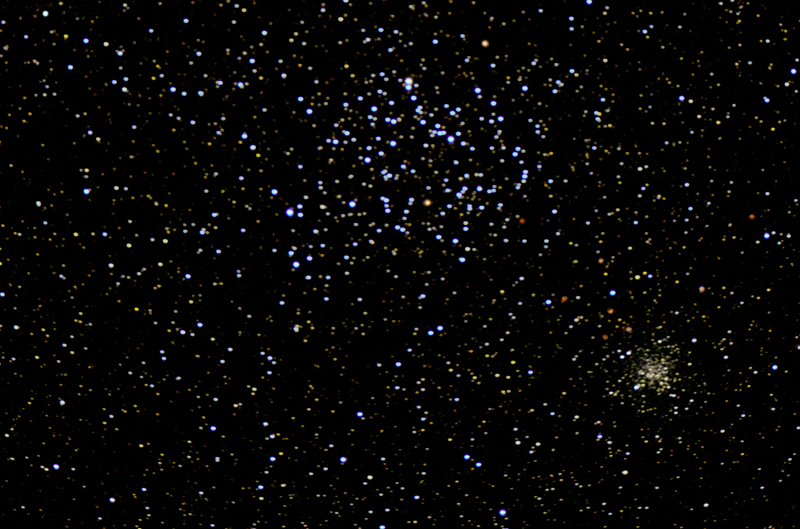
I was quite pleased with this image but compared it with the APOD image of M35 and NGC 2158 : https://apod.nasa.gov/apod/ap130103.html . (Jan 3rd 2013)
From its author’s wonderful website, https://astro-cabinet.com/loggedon.php, it can be found that the APOD image was taken in RGB using a cooled SBIG STL-1100M CCD camera mounted on a ‘Keller 20 inch Cassegrain f/3 in corrected primary focus’ (Wow!). It should be, and is, far better with the stellar images being smaller − as would be expected from a considerably greater telescope aperture given good seeing. A second superb image can be found at:
https://www.flickr.com/photos/olegbr/12385007435.
This was imaged over 4 hours using a 10-inch, f/3.8 telescope.
But, given that I was using just a DSLR and 127 mm refractor from a light polluted site, I think the final result is quite reasonable and it shows what can be done with relatively simple equipment and just 18 minutes total exposure time. The latest DSLR’s are really quite good at astroimaging!
Return to Astronomy Digest home page