APRIL 2020
Enhancing Lunar Images: an example imaging the Moon with a 1,000 mm lens
[This is one of over 100 articles in the author’s Astronomy Digest: https://www.ianmorison.com]
An image of the Moon that might be taken by a telephoto lens or small telescope can very often be greatly improved by first aiming to produce as low noise an image as possible and then by applying suitable post processing in Adobe Photoshop, Affinity Photo (this is now an excellent low cost alternative to Photoshop) or GIMP. These ‘enhancement’ processes can also be applied to images taken when using webcams − particularly if the Moon has been imaged in the infrared to help eliminate the effects of atmospheric turbulence when the result can have rather low contrast. I thus hope that this imaging work through could be useful for all lunar imagers.
It was longtime before I managed to take areasonable qualty image of the Moon with a telephoto lens. An obvious problem is the fact that, as theMoon only subtends ~30 arc minutes, unless a very long focal length lens isused, the pixels in the sensor will not be able to sample the Moon’s surfacesufficiently finely to produce a sharp image. A 500 mm focal length lens on an APS-C sensor is just about sufficientas would be a 1,000 mm lens on a full frame sensor. My attempts with both 400 and 500 mm lenseshad not been satisfactory so I set up a Tamron 500 mm, f/8, SP mirror lenscoupled with a Tamron 2x converter (so producing a 1,000 mm, f/11, lens) for a furtherattempt. It was mounted on a full frameSony a7S, 12 megapixel camera. Perhapsmy Nikon D610 with 24 megapixels might have been a little better. However, asthe Moon’s diameter covered just over a 1,000 pixels − about one pixel forevery 2 arc seconds and given the fact that the atmospheric turbulance wouldprobably limit the resolution to ~2-3 arc seconds, this was probably justsufficient.
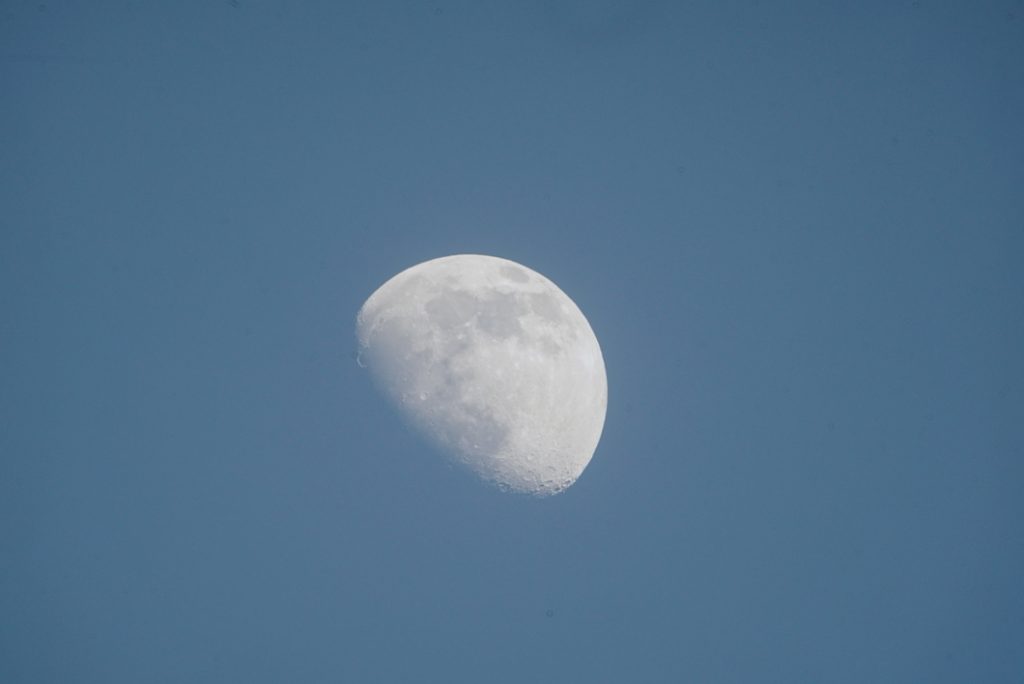
At the start of April 2020, the9 day old Moon was at a high declination so, as dusk approached, was at a veryhigh elevation helping to minimise atmospheric turbulance effects. I took several sets of images from duskthrough to dark skies and was somewhat surprised that the best result came fromthe first set of images when the Moon was highest in the sky but when there wasstill a large amount of sky light as one can see in the image below. This was bound to reduce the contrast in theimage but, happily, this was able to be increased in post processing.
The key to being able to produce a pleasing image of the Moon is to start with as low noise an image as possible. If, as was the case in this instance, the lens was mounted on a fixed tripod, exposures cannot be too long but, as the Moon is quite bright, a high ISO should not be required. One way to reduce the noise in an image is to average a number of images – but it is vital that they are accurately aligned before stacking and averaging. The free program Registax 6 can achieve this so, for this imaging exercise, a sequence of 18 frames were taken. The lens and camera was mounted on a very sturdy tripod and a remote release was used. Being a mirrorless camera, there would not be a problem of blurring caused by the movements of the mirror.
Using Registax 6 to align and stack a set of lunar images.
The 18 frames were loaded into Registax and the ‘Set Align Points’ tab clicked upon. This produced a large number of points across the Moon’s surface, but also some in the sky.
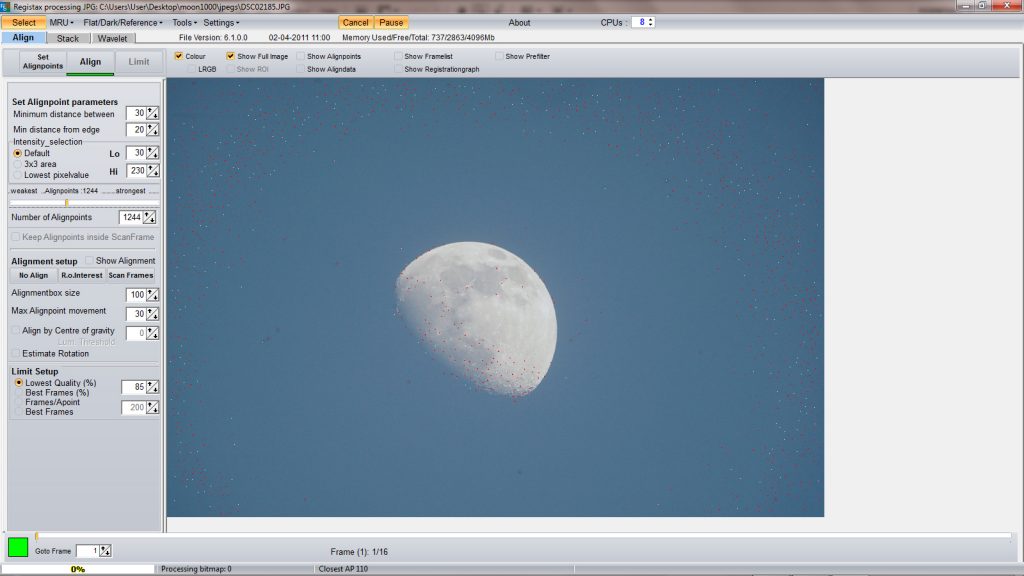
- The ‘Align’ tabwas clicked upon and, when the frames had ben aligned, the ‘Limit’ tab clickedon. This showed green lines stretching along way from each align point. This wassimply due to the fact that, as the lens was mounted on a fixed tripod, theMoon’s image moved across the sensor during the set of exposures – actually agood thing. Providing the lines areroughly parallel there is no problem. (Lines at differing angles would implythat the ‘seeing’ was bad.)
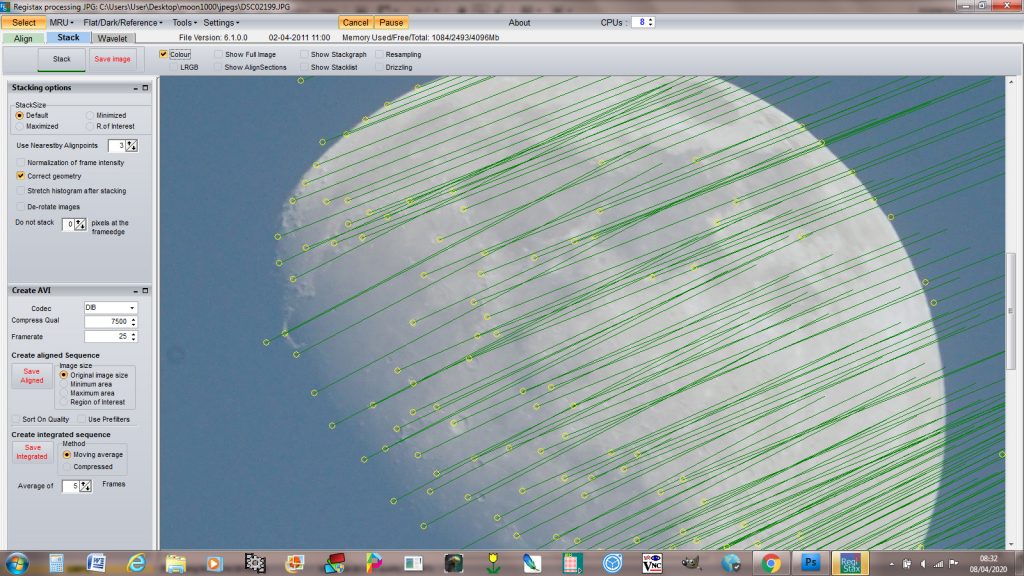
- The ‘Stack’ tab was clicked upon to initate the stacking of the 18 frames to give a low noise result. As the noise in the stacked image is reduced this allows more sharpening to be applied to give a better result.
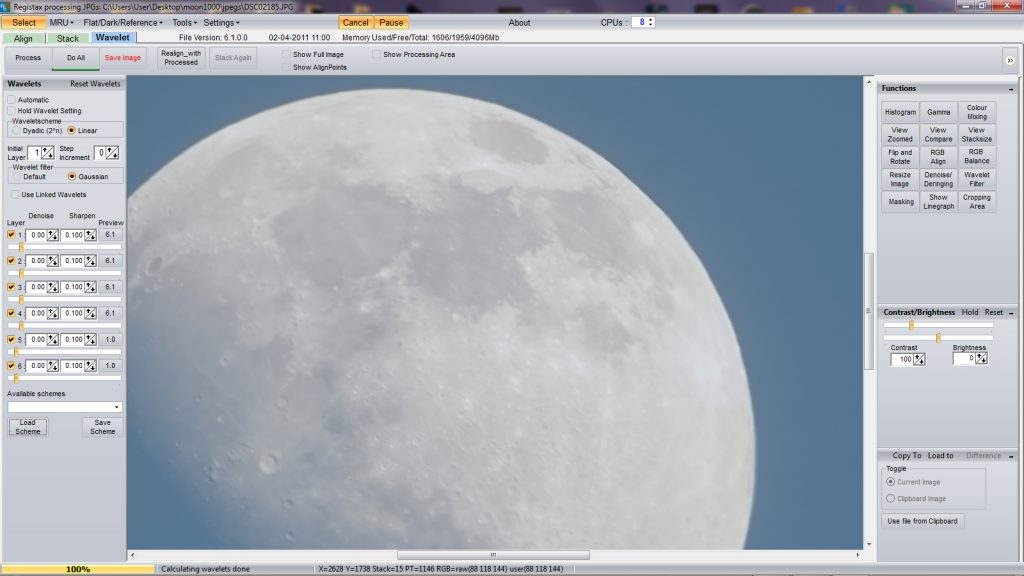
- Registax includes an excellent method of sharpening called ‘Wavelets Sharpening’. If the ‘Wavelets’ tab is clicked upon, a set of 6 sliders appears. As these are moved to the right, different aspects of the image are sharpened. For this exercise, I set all sliders to 6 to give a relatively small amount of sharpening. (The upper sliders apply to small scale features, the lower to larger scale features.) To apply the sharpening across the whole frame, the ‘Do All’ tab must be clicked upon. The resulting lunar image was exported for further processing in Adobe Photoshop, Affinity Photo or GIMP.
Removing the Skylight.
The first, an obvious problem, was that the image was diffused with sky light but this is easily fixed in Photoshop or Affinity Photo. The image layer is duplicated to give two layers. The upper layer (which is active) was smoothed using a Gaussian Blur of 20 pixels; this is just to give a good average of the sky light colour close to the Moon before it is sampled with the paint brush. This top layer was then simply painted over with this colour – assumed to be constant across the image – and, with the blending mode set to ‘Difference’ the two layers were flattened (merged in Affinity Photo). The sky light had disappeared but the Moon had a very bad colour cast!

This was removed by converting the image to monochrome before using the ‘levels’ command to brighten it. This resulted in a very smooth (i.e., low noise) image which had the ability to be further sharpened if desired.

Improving the Contrast
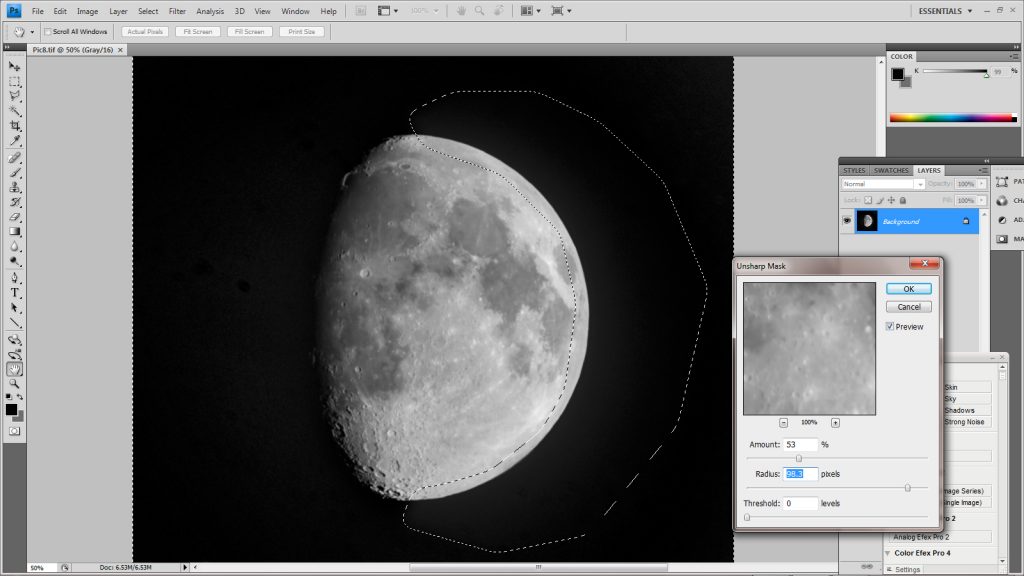
This can be done in many ways but the technique that I prefer to use on lunar images is to increase what is called its ‘local contrast’ using the ‘Unsharp Mask Filter’. This is often used to increase the sharpness of an image when a small radius and large amount is used. Conversely, to increase the local contrast, it is used with a large radius and lesser amount. The two need to be adjusted to suit and for this image a radius of 98 pixels was used and an amount of 53%. The Moon’s image was cropped before the contrast enhancement was made..
There is a problem when using this technique on the Moon as it tends to over brighten the Moon’s bright limb due to it being adjacent to the black sky. So first, the bright limb area is selected using the ‘Poligonal Lasso’ selection tool with a suitable feathering radius (30 pixels was used in this case).
The selection inverted so that the application of the Unsharp Mask filter would not affect the Moon’s bright limb. The selection result in Photoshop is shown below (note the dots around the edge of the image.) along with the increased contrast image.
Sharpening in Photoshop or Affinity Photo
The simplest approach is touse the ‘Smart Sharpen’ filter inPhotoshop (or unsharp mask in AffinityPhoto) using a small radius (3.1 pixels in this case) and adjusting theamount (45%) to increase the sharpness without making the noise in the imagebecome apparent (darker areas will become ‘gritty’).
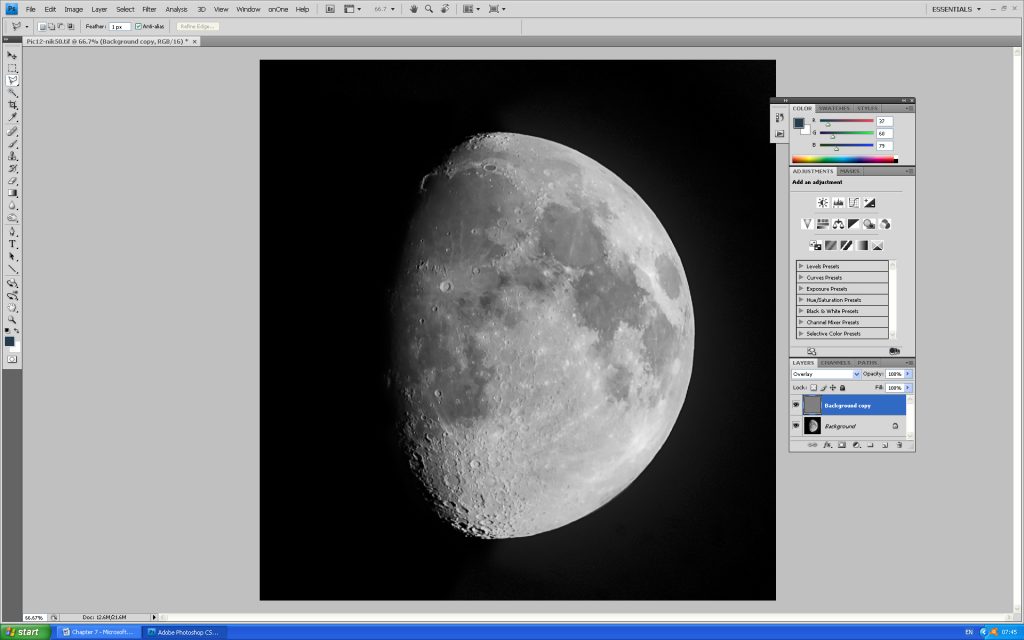
An alternative (and some would say far better) technique is to make use of the ‘High Pass Filter’. The image layer is duplicated to make two layers with the upper copy active. The High Pass filter (under ‘Other’ filters in Photoshop) is applied to the upper layer with a radius of, say, 2 pixels. This gives a neutral grey monochrome result except at the edges of detail in the image.
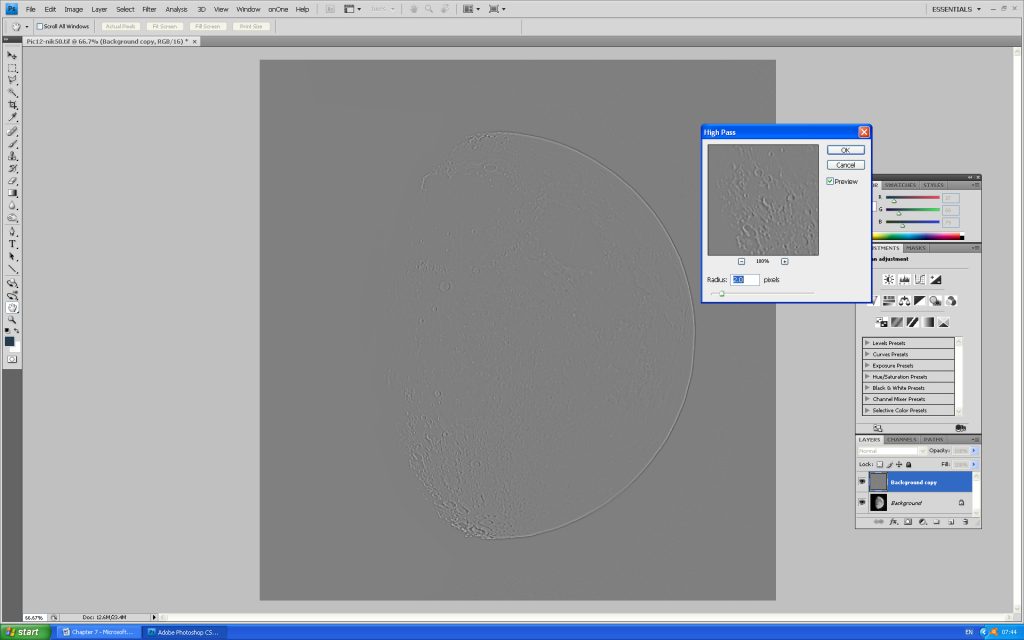
The blending mode is set to ‘Overlay’ with the opacity left at 100%. In Photoshop,the sharpened result becomes visible when the two layers have been flattened. A great feature of Affinity Photo is that, having set the blending mode to ‘Overlay’ the result can be seen before the two layers are merged (equivalent to flatten in Photoshop) so the effects of adjusting the High Pass radius can be observed as it is adjusted − so allowing one to achieve an optimum result. [This is a wonderful feature of this program when using layers which is one reason that some say that it is actually better than Photoshop – at vastly lower cost. The digest does include an article about the program.]
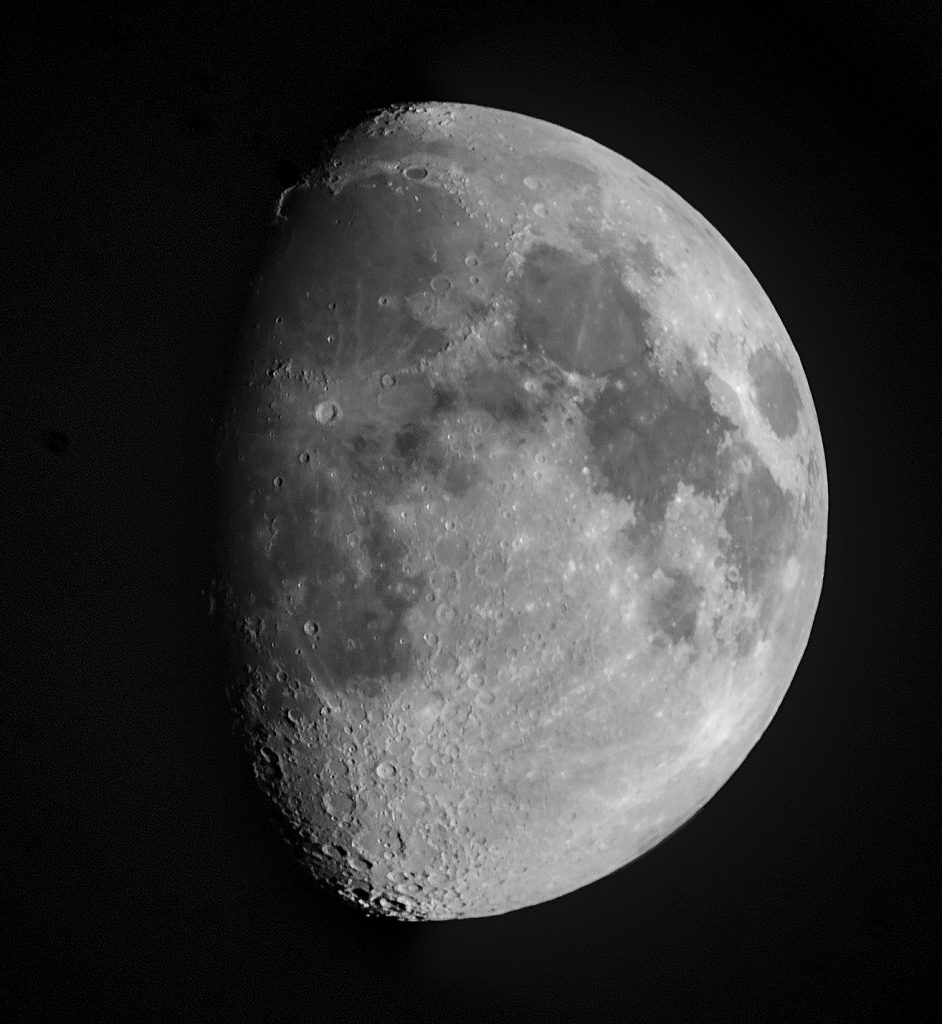
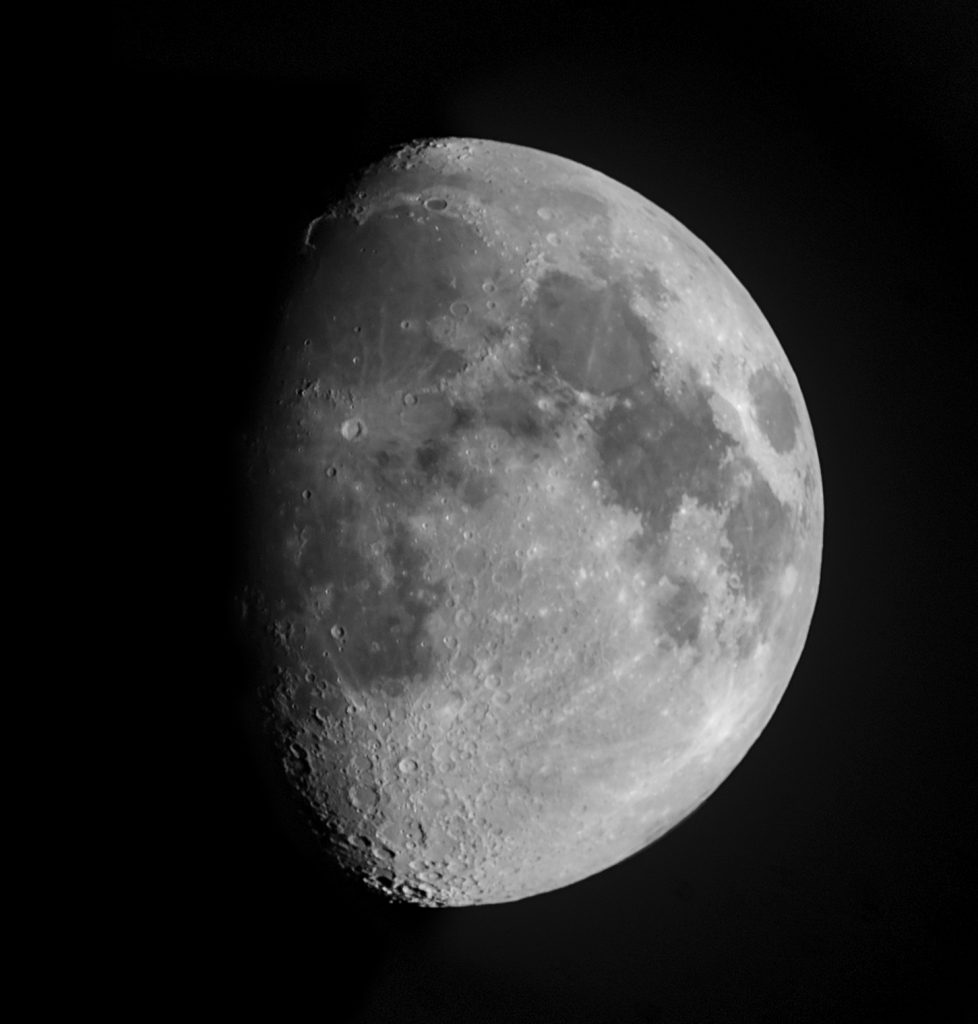
Having flattened the two images, the final result was produced.