MARCH 2021
Imaging an H-alpha Nebula with a CMOS astro camera or astro modified DSLR or mirrorless camera
[This is just one of many articles in the author’s Astronomy Digest.]
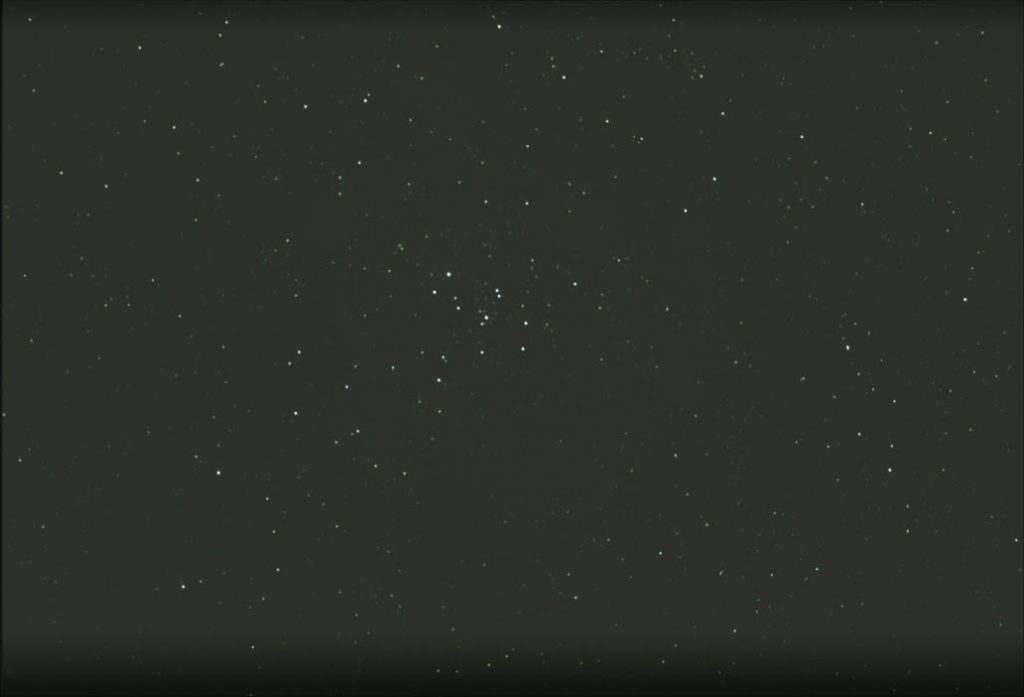
I have had surprising success using a colour CMOS astro camera and an H-alpha filter to capture nebulae such as the Rosette nebula. This is described in the article ‘ Hydrogen Alpha and RGB composite imaging – the Rosette and Horsehead Nebulae’. But what if one does not have a suitable H-alpha filter? For that imaging exercise I had taken identical total exposures with and without the H-alpha filter so the number of H-alpha photons captured by the sensor must have been the same in both cases but it proved impossible to see the nebula when stretching the RGB image. This must be due to sky glow (light pollution) masking the very faint H-alpha emission which is, of course, removed when the H-alpha filter is used.
It occurred to me that the sky glowmasking the H-alpha emission could be reduced in the RGB image and so mightenable it to be seen. The idea actuallyworked, though the result could not really be compared with that taken when anH-alpha filter was used. Given darkerskies than at my suburban garden a really good result might well be achieved. [I suspect that an unmodified DSLR ormirrorless camera which reduces the sensitivity of H-alpha emission to ~25%would probably not be too suitable for this technique but it could not buthelp.]
The fundamental point is this, thesky glow will be present in all three RGB channels of the image, but theH-alpha image will only be present in the red channel. So if this channel only is used to bring outthe nebula, much of the sky glow will have been removed.
Imaging the Nebula
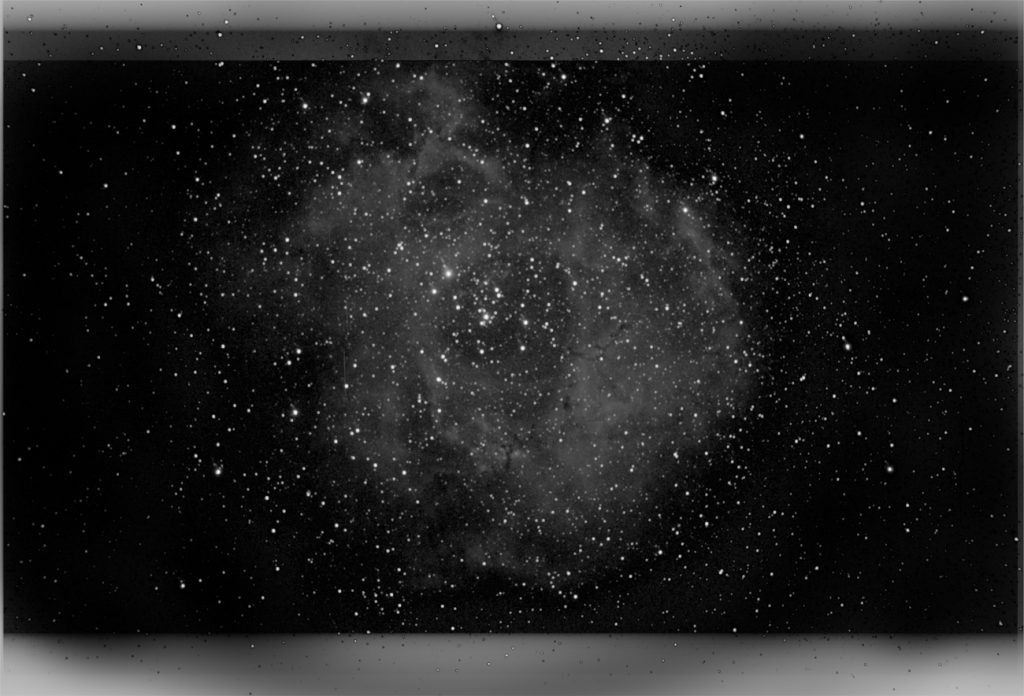
First, the overall sky brightness was removed. The image was duplicated and the ‘Dust and Scratches’ filter applied with a radius of 20 pixels. This removed the stars. A Gaussian Blur was then applied with a radius of 20 pixels to give a very smooth background. At this point, one has to assume that the light sky glow is constant across the whole image. The paint brush was used to select the sky colour towards one corner away from where the nebula was located in the centre of the image and the whole layer painted with this colour.

The two layers were then flattened using the ‘Difference’ blending mode. The red channel was then extracted from the RGB image by, in Adobe Photoshop, opening the Channels window and, in the drop down menu (accessed by clicking on the tab at top right) selecting ‘Split Channels’. Three monochrome images were produced and the green and blue deselected.
Stretching was then applied to theto the red channel image by, in Levels, moving the central slider to the leftto the value 1.3. As this was repeated, the nebula becameapparent.
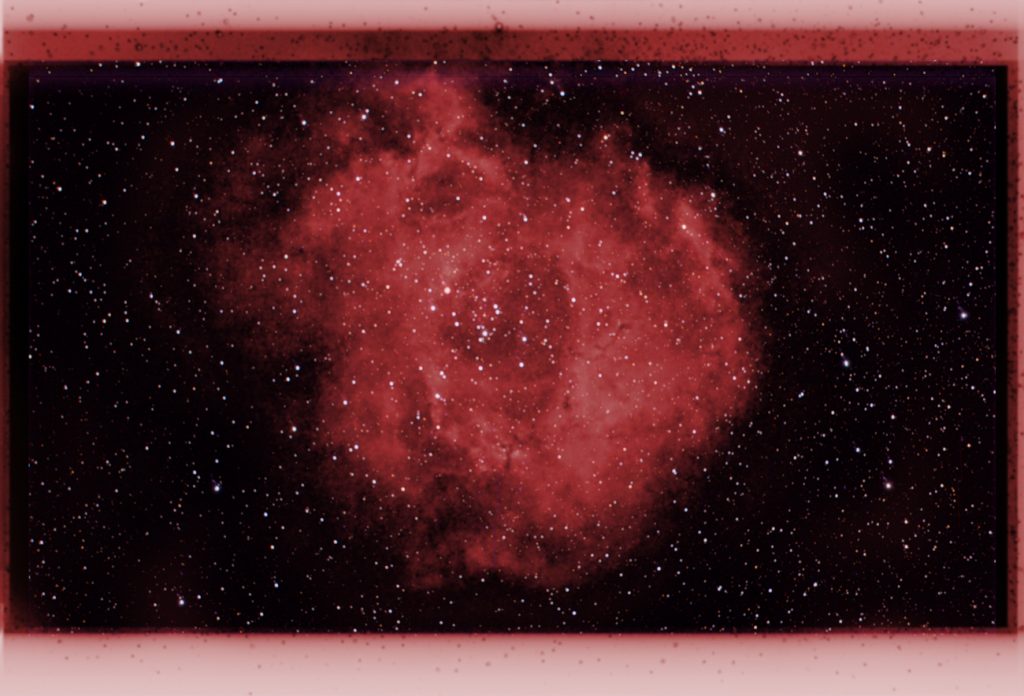
The image was converted to RGB modeand duplicated. The upper layer was thenpainted Red and the two layers flattened using the ‘Colour’ blending mode. (The opacity was reduced somewhat to give apleasing result.) The ‘Hue andSaturation’ tool could then be used to adjust the tint of the H-alpha colour ifdesired.
This image was then imported intothe StarNett++ (see article ‘Using Starnet++ to help enhance Nebula images’) toremove the stars from the image to give just an image of the nebula – called‘Nebula’.
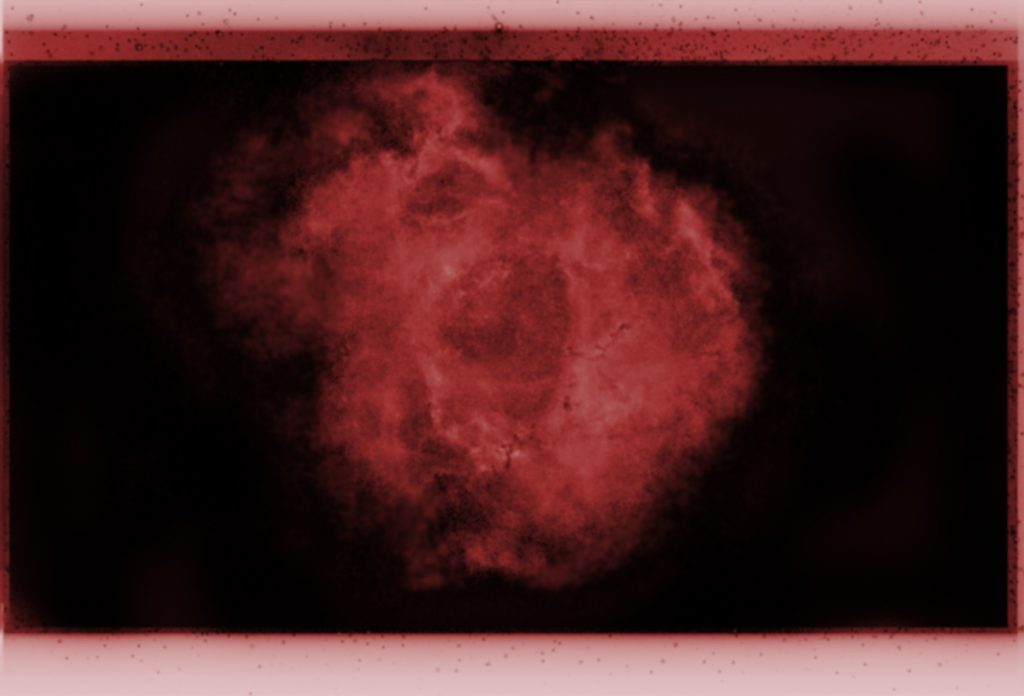
The image was, not surprisingly, noisy so a Gaussian Blur was applied with a radius of 2 pixels to smooth the image. Then the ‘Unsharp Mask’ filter was used with a large radius and small amount to add some local contrast to the image.
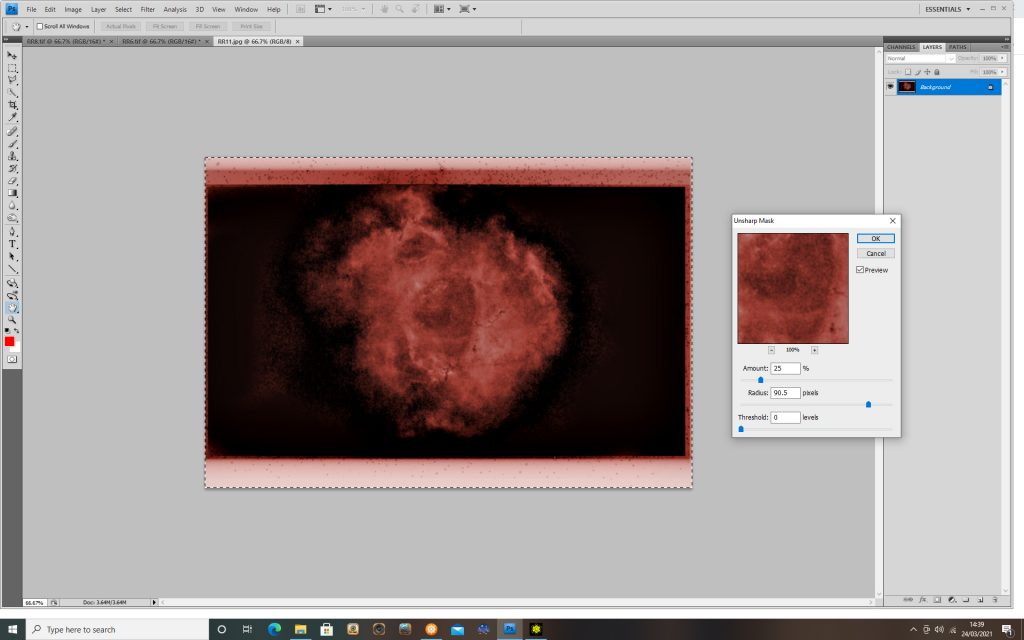
Giving the final ‘Nebula’ result.
Imaging the Stars
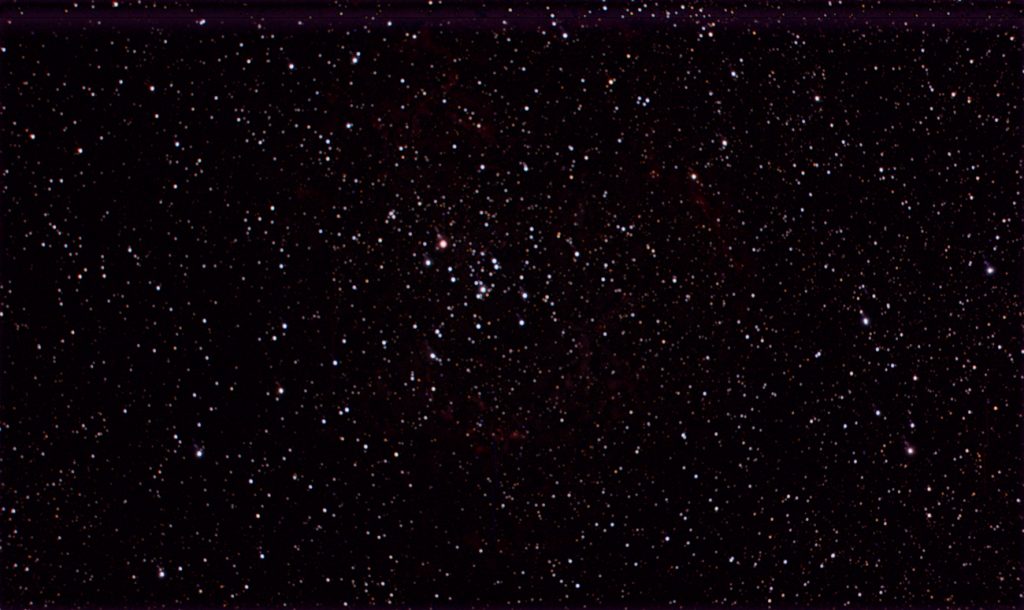
The original RGB image wasduplicated and the ‘Dust and Scratches’ filter applied (Median in Affinity Photo) with a radius of 20pixels and the stars disappear. The twolayers were then flattened using the ‘Difference’ blending mode to leave animage of the stars which could then be stretched as desired using the ‘Levels’technique described above.
Using the, now free, program Images Plus one can enter the ‘Special Functions’menu and select the ‘Star Size ….’ tool and use it to reduce the star sizesand so reduce their dominance in the final image. This became the ‘Stars’ image.
Combining the two images
The Nebula image was opened and the Stars image copied and pasted over it before flattening the two layers using the ‘Screen’ blending mode. The opacity can be reduced if desired to reduce the stars presence within the image. To add a little more contrast to the image, the curves tool was used with an ‘S’ curve (so the low brightness levels were darkened and the high brightness levels brightened) to give the final result shown below.
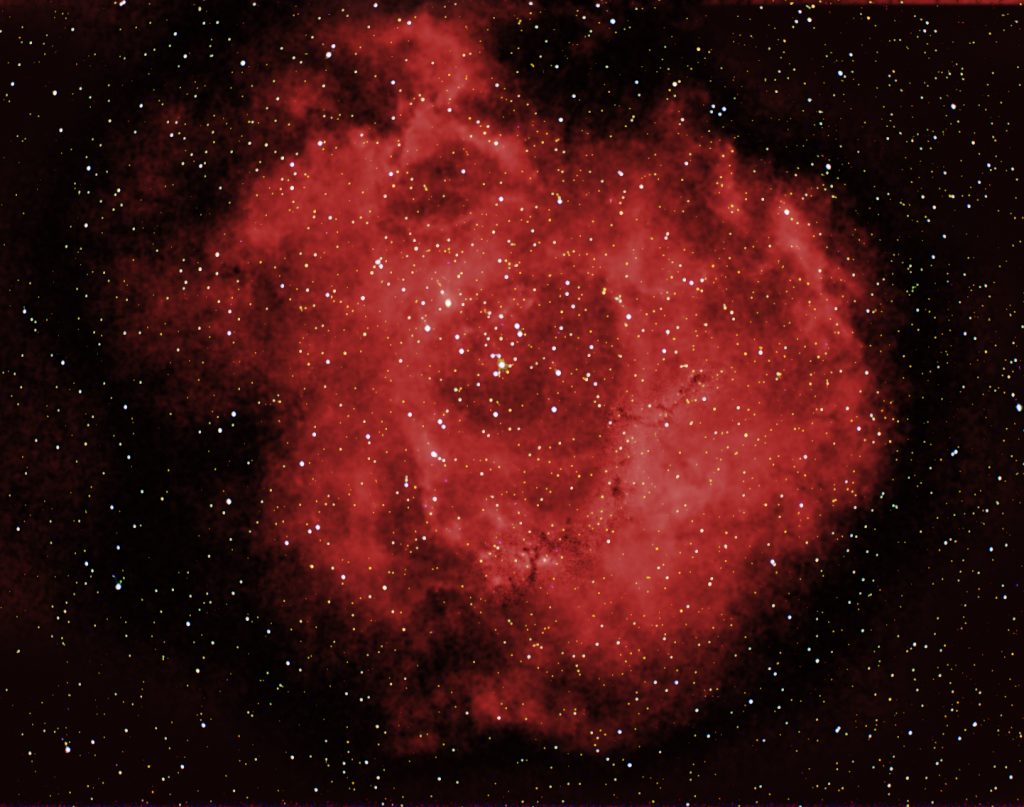
Though it is not as good as that produced when using an H-alpha filter, if one were able to image from a dark sky location I suspect a very comparable result could be achieved.