SEPTEMBER 2022
Imaging the Dumbell Nebula, M27, and the Ring Nebula, M57, with a Celestron 9.25 Schmidt-Cassegrain Telescope
[This is just one of many articles in the author’s Astronomy Digest.]
My first ‘large’ telescope was a Celestron C9.25 SCT havingan aperture of 235 mm and a focal length of 2,350 mm (f/10). The 9.25-inchoptical tube is widely regarded as something of a jewel in the crown ofCelestron’s Schmidt-Cassegrain range. Itsprimary mirror has a larger focal ratio than the other models, so the secondarymagnification factor is less, resulting in a flatter field of view with lesscoma – a distinct advantage for imaging. This does, however make theoptical tube longer – almost as long as the C11. At greater cost (£2,995 rather than £1,895)Celestron produce an Edge HD version which includes some optical elements inthe baffle tube to give a wider, very well corrected, field of view. I was interested to find out if the Edge HDversion would give better images when imaging with a Micro 4/3 sizedsensor. Inspecting the star imagestowards the corners of the field, I found that their shapes were still good soI think that it wouldn’t have made a significant difference when the standard9.25 SCT is used at f/10 – but I suspect would do so if an APS-C sized sensorwere used.
Focussing
I have equipped the telescope with a Starlight Express steel track focuser. This very largely removes the SCT problem of ‘image shift’ when focussing. The camera sensor needs to be at a distance of 146 mm from the rear of the telescope tube so I set the focuser to give this distance to the sensor and used the normal focus control to get to close focus before making any small final fine adjustments using the Starlight Express focuser.
Locating M27
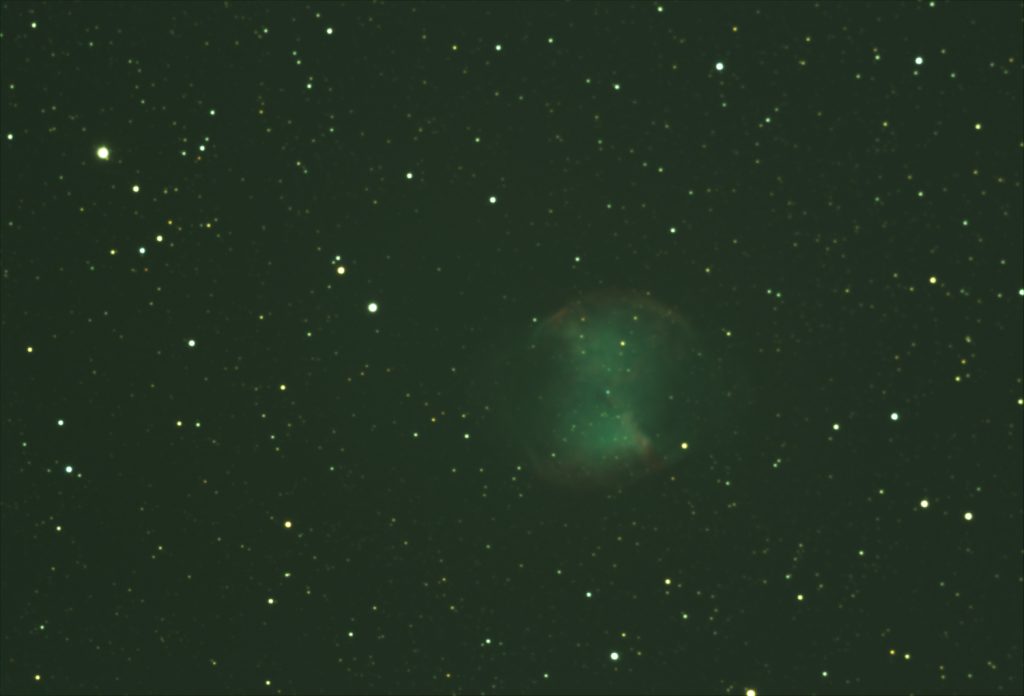
I was hoping to image Saturn andJupiter when they came into view and, in the meantime, decided to take onehours total exposure on the Dumbell Nebula, M27, which was at a highaltitude. The transparency was good and,without doing any star alignments, used the ‘Plate Solve’ feature of SharpCapto centre the field of view on M27. [This is effectively doing a ‘1 starfield’ alignment very close to thetarget.]
Exposures
I was aiming to use 20 secondexposures, but taking test exposures found that some frames were suffering fromwind gusts so reduced the exposures to 10 seconds so that less of the total imagingtime would be lost as frames had to be removed from the stack. The camera temperature was set at -15C. Clouds ended the imaging after 56 minutes. I went through all frames and had to deletequite a few, three due to satellites with the rest due to wind gusts, beforealigning and stacking the remainder in Deep Sky Stacker. [Deep Sky Stacker will remove those frameswhere the star images are not good and, if the Sigma-Kapper stacking mode isemployed, will remove the satellite trails – so my weaning of the frames may not have beennecessary.]
The Altair Astro 294 mc colour oneshot camera has a pixel size of 4.63 microns, with each pixel subtending 0.4 arc seconds on the sky when used with the9.25 SCT at f/10, so suitably sampling an image limited to ~1 arc secondresolution. The resolution of the scopeis 0.6 arc seconds so it is the atmosphere that will limit the achievedresolution. However, each captured framemust have sufficient stars to enable them to be aligned and I usually bin 2×2giving effective pixels of 9.24 microns which reduces the nominal resolution toabout 2 arc seconds – commonly the limit due to atmospheric turbulence in anycase. To try to get back some of thisloss, I select a 2x drizzle when stacking in Deep Sky Stacker. I doubt thatthis makes a significant difference but it cannot do any harm.
The output from Deep Sky Stacker had,as usual, a green cast due the fact that astro-cameras do not compensate forthe fact that there 2 green pixels for each red and blue.
Processing thestacked image
I tend to use my (now quite old) academicversion of Adobe Photoshop CS4 for image processing and will go through thesteps I took using it, but Affinity Photo, Siril and even, now, the freeprogram Glimpse could be used. I willrefer to some aspects of these when applicable.
Removing the sky background
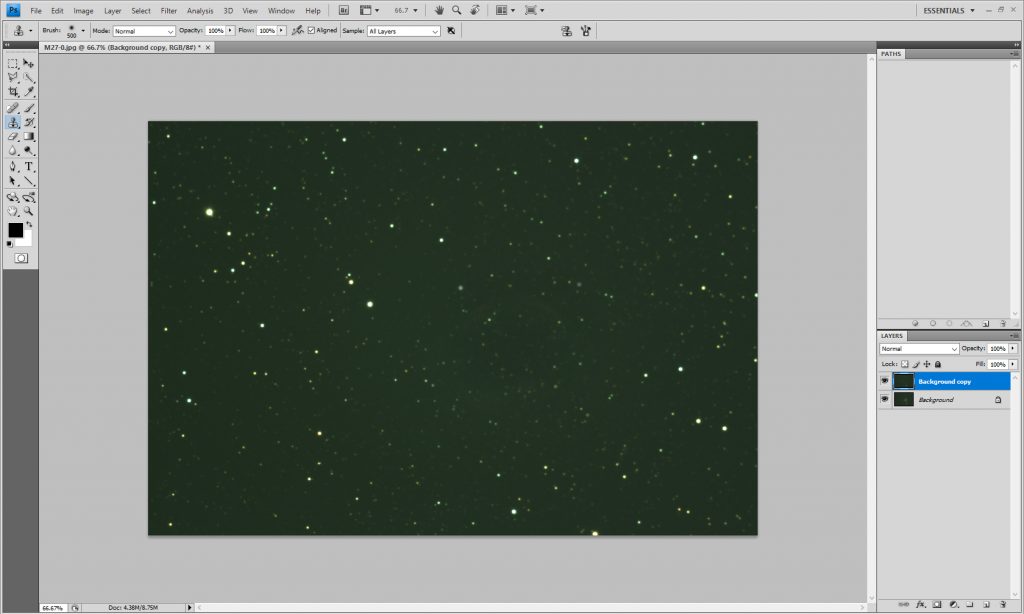
A technique that I have used for manyyears works very well for this image. Theimage was duplicated to give a second layer. Using the clone tool, the nebula region was over written from close by togive the following image.
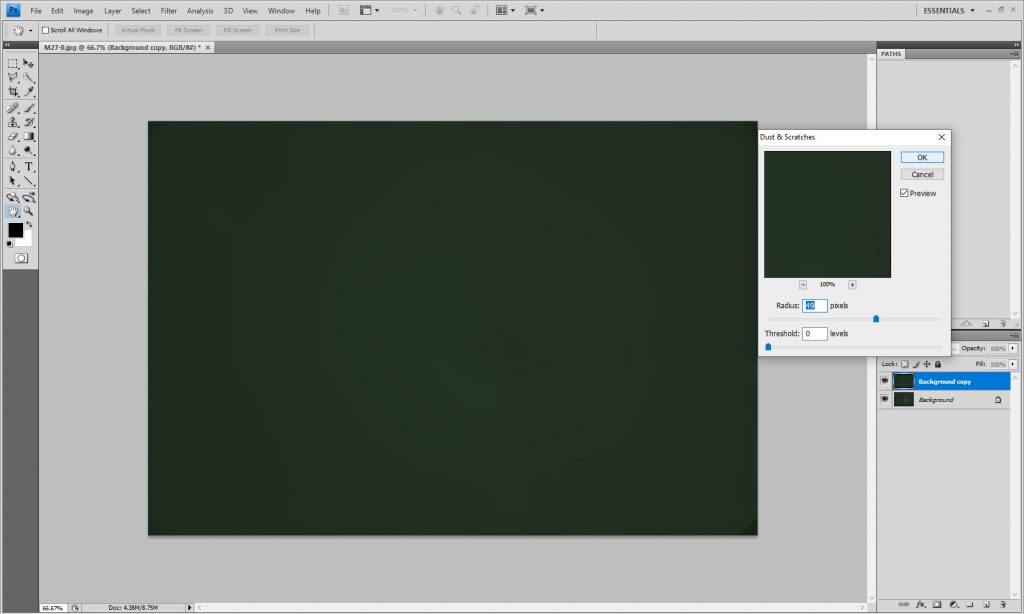
Then the ‘Dust and Scratches’ filter was used with a radius of ~60 pixels when the stars are removed to give an image of the sky background. [In Glimpse, the Median filter is used instead of the ‘Dust and Scratches’ filter.]
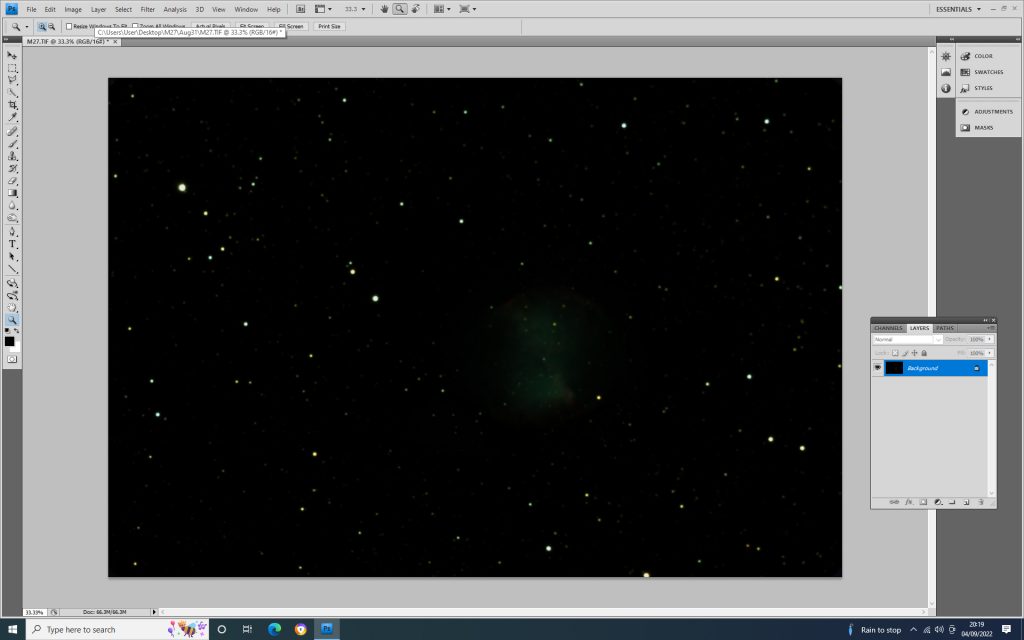
The two layers were then flattenedusing the ‘Difference’ blending mode and the sky background is removed.
[In Affinity Photo, the selectionbrush can be used to select the nebula region and then, under ‘Edit’, the‘Inpaint’ tool used to remove it from the image before applying the Dust andScratches filter. Affinity Photo alsohas a specific ‘Sky Background Removal’ tool which could be used as does Siril (whichis even better) and these could be used instead.]
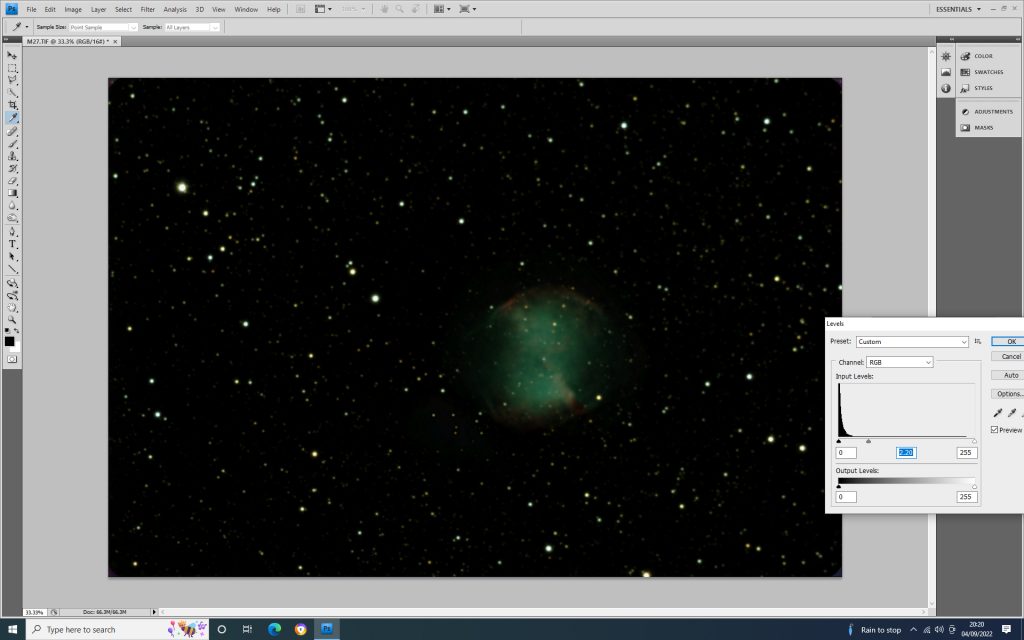
Stretching the image
In Photoshop, I opened the ‘Levels’tool and moved the central slide to the left – this brightens up the fainterparts of the image more than brighter parts. Two or three small applications are probably better than 1 largeone. [Siril has two very goodstretching tools; ‘Asinh Transformation’ and ‘Generalised HyperbolicTransformation…’. One can also use thelevels tool in Affinity Photo.]
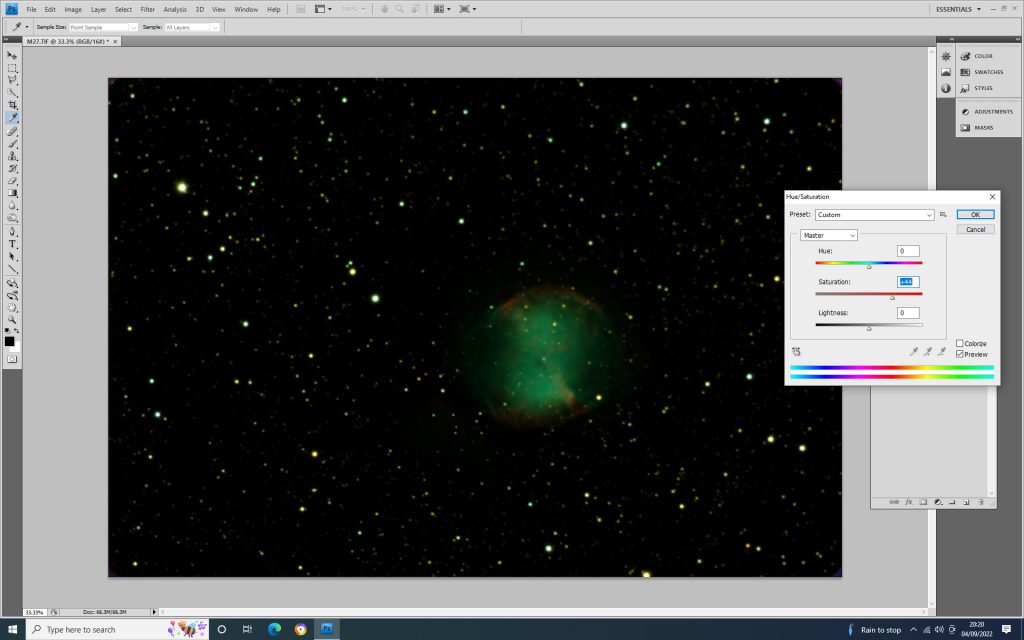
Enhancing the image
I then used the Hue and Saturationtool to increase the saturation somewhat (as can be done in Affinity Photowhilst Siril has a dedicated saturation tool) and then used the ‘Smart Sharpen’filter to make the image a little crisper.
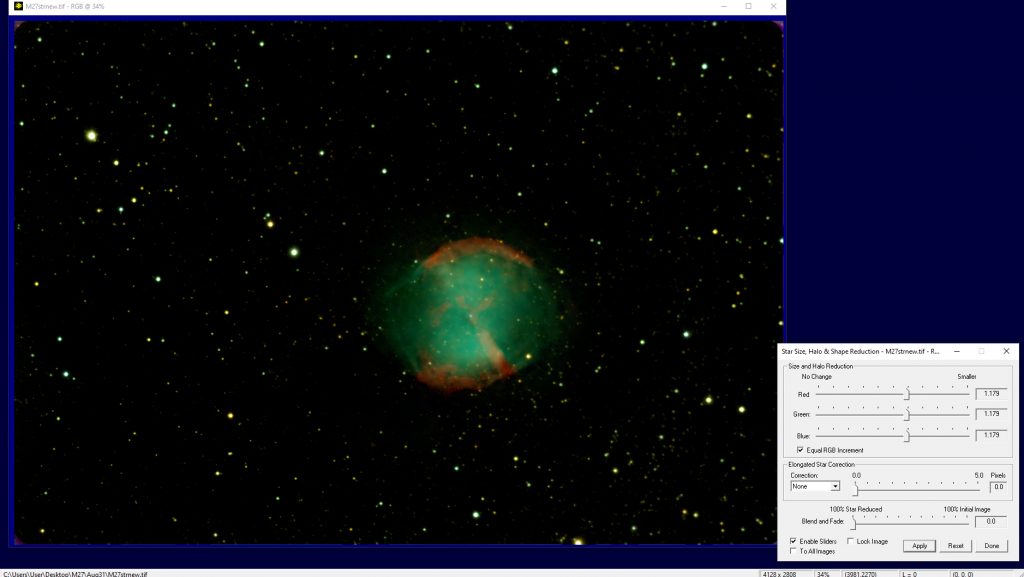
To reduce the impact of the stars, I went into the free program ‘Images Plus’ which, in its ‘Special Functions’ has a star size reduction tool.
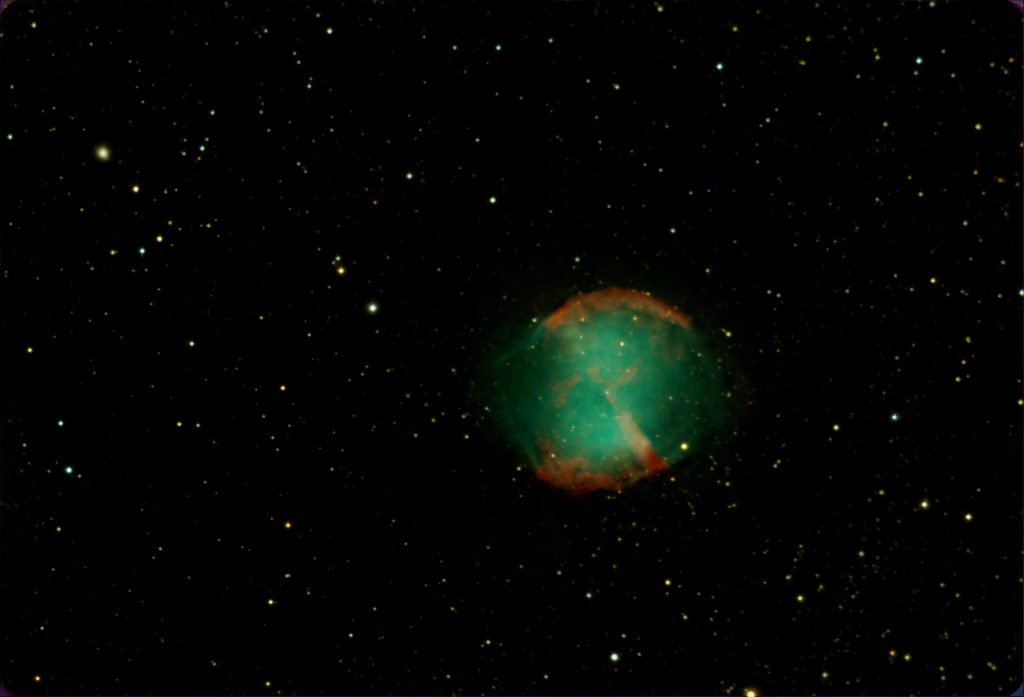
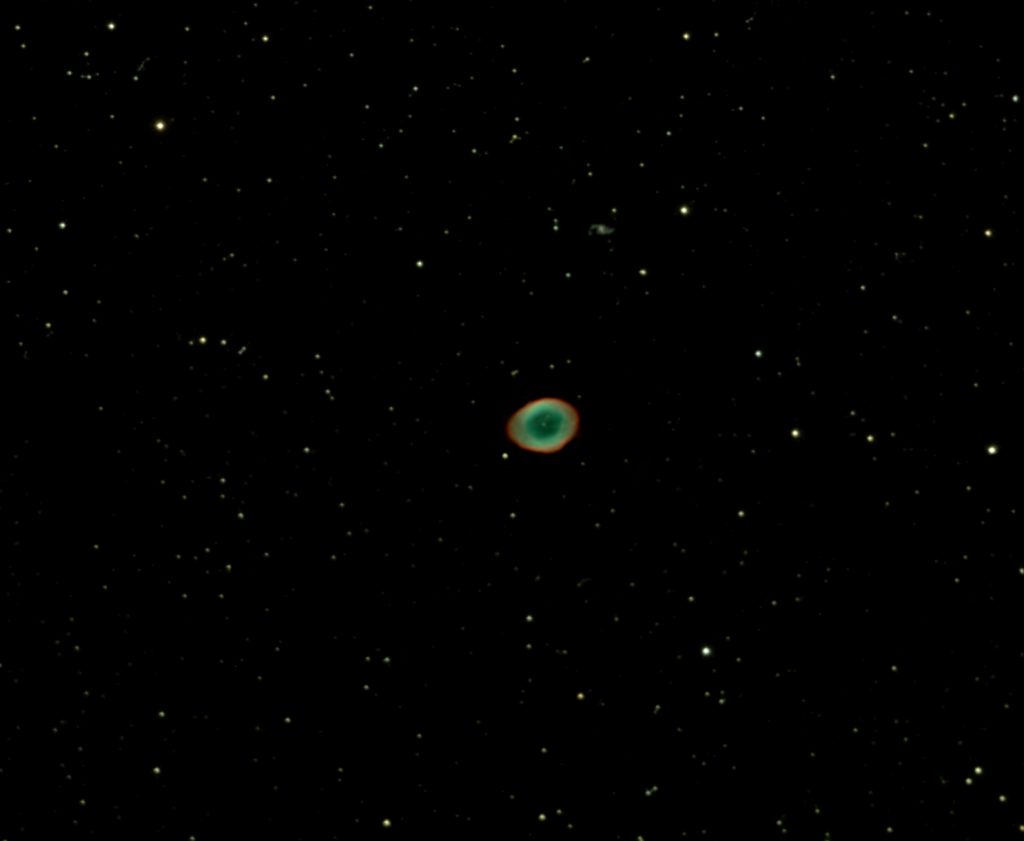
This then gave the final result
The Ring Nebula, M57.
On the following night, whilst again waitingfor Saturn and Jupiter to rise, I imaged and processed M57 exactly as I haddone for M27. Its angular size, as canbe seen from the two images, is far smaller. Pleasingly, the central White Dwarf, at magnitude 15.75, was visible.
It is informative to submit the imageto astrometry.net. This gave an imagesize of 28.5 x 19.4 arc minutes. [Notsurprisingly, exactly the same as for the M27 image.]
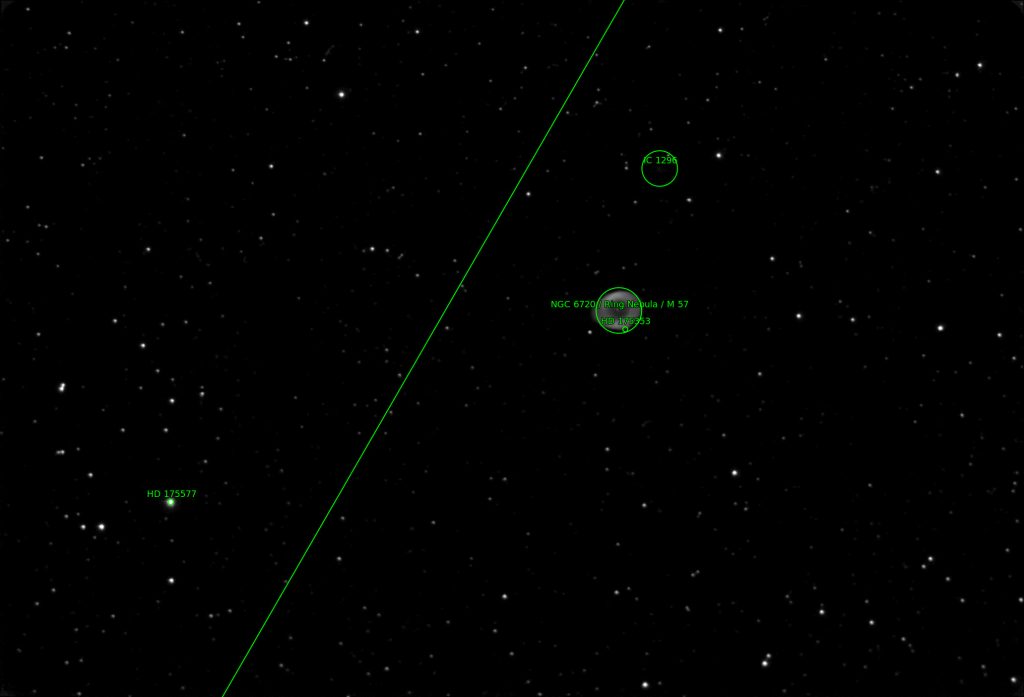
I normally use the ‘Blackwater Skies Imaging Toolbox to see what focal length would best encompass an object. For the Celestron 9.25 SCT and Micro 4/3 sensor camera this gave a field of view of 28.2 x 19.2 arc seconds – a good agreement. The annotated image from Astronomy.net above brought my attention to the galaxy IC 1296 – which I had not initially spotted. Having a magnitude of ~15, this is just visible as seen in the crop below.
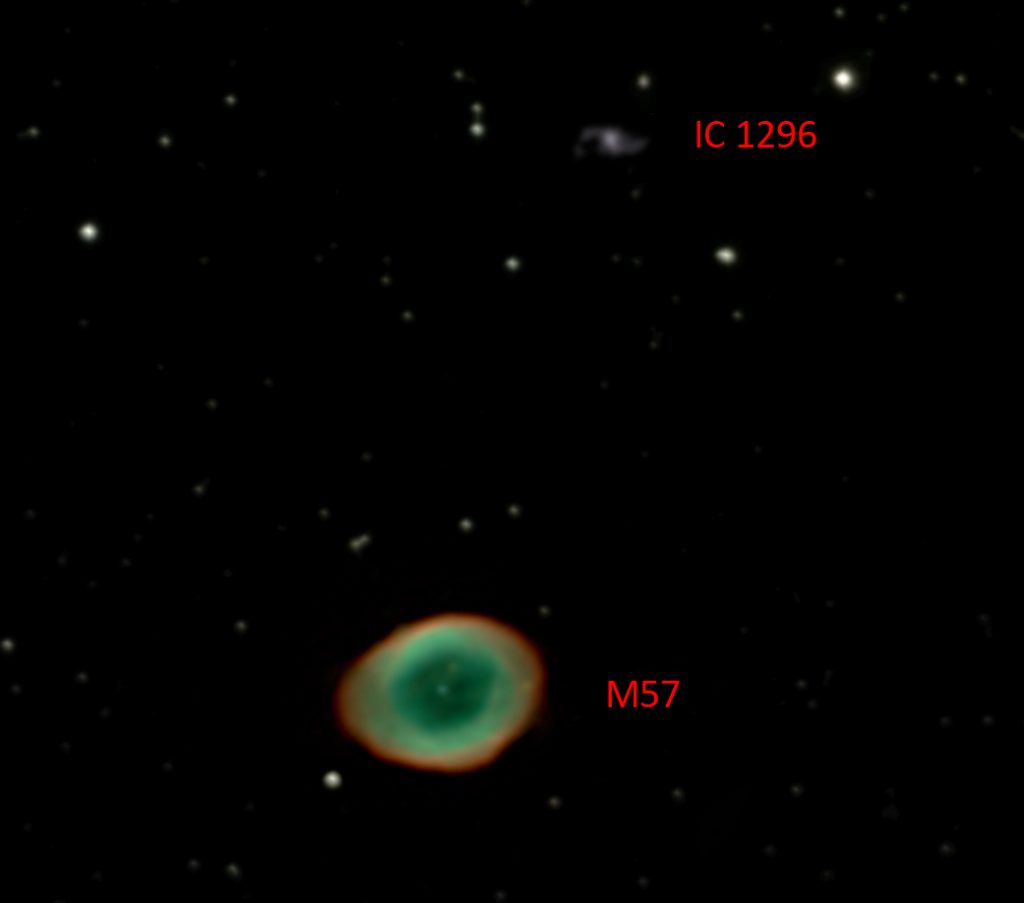
Image Quality
I was very pleased with the stellar images across the whole of the Micro 4/3 frame. A further image taken the following evening of the Globular Cluster M13 in Hercules was even better as I think I has managed to get a slightly better focus. No obvious coma was apparent which is why I suggested above that the standard version will be fine when imaging at f/10 using a Micro 4/3 sensor. I need to do further experiments when using the f/6.3 focal reducer (See updated article ‘The Celestron 9.25 inch Schmdt-Cassegrain telescope’) . I believe the Edge HD version works very well indeed with up to APS-C sized sensors but less so on full frame sensors.
Many celestial objects sit nicely within the Micro 4/3 sensor (which is squarer than APS-C sensors) and so it seems to me that buying a standard Celestron SCT and the smaller sized camera would save considerable cost and have few downsides. [Note: Meade now only produce their ACF models which also give a larger corrected field of view than the original versions.]
Final Notes
I hope that this gives some encouragement to imagers who have to image from light polluted locations as mine which is Boortle Class 5. Reasonable results can be obtained even using an f/10 telescope with less than one hours total exposure.
Everything I did in Photoshop can also be done in the new, and free program, Glimpse so I believe that most astronomical image processing can now be done using free software.