JANUARY 2017
Imaging the Moon and planets in the Infrared
[This is just one of many articles in the author’s Astronomy Digest.]
Imaging in the infrared can give two advantages over the use of visible spectrum imaging:
- The effects of turbulence in the atmosphere affects the infrared less so it should be possible to obtain sharper images when video imaging the Moon and planets.
- It is possible to image planets in daylight as the blue light from the sky is removed.
(But, of course, any resulting images will be in monochrome.)
This essay gives two further examples of infrared imaging as described in ‘The Art of Astrophotography’ and will add something new for readers of ‘An Amateurs Guide to Observing and Imaging the Heavens’. I do hope that it might also be of interest to others.
The six day old Moon
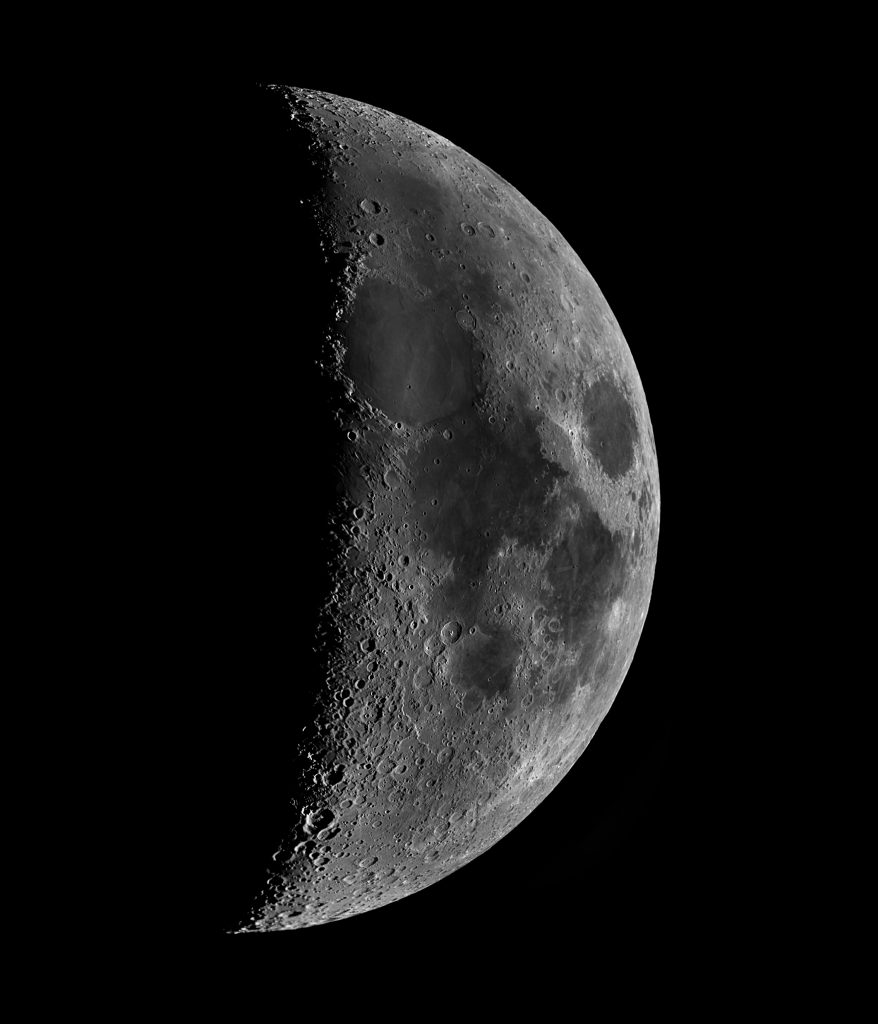 The 6 day old moon on the evening of the 4th January 2017 imaged at ~19:00 UT.
The telescope used was a CFF Telescopes 127mm, f/7, refractor employing an aspherical oil spaced triplet objective. [This Hungarian/Rumanian company makes telescopes of the highest quality – equal to those made by Astro-Physics, TEC, APM ‘LZOZ’ telescopes and some others. A discussion of objectives is given in a recent essay in this digest.]
It was mounted on an Astro-Physics Mach 1 GTO mount. The mount is mounted semi-permanently on some flag stones lying on a bed of sand. This is not too clever as though the mount had been perfectly aligned using the QHY PoleMaster a couple of months earlier (the PoleMaster is a superb piece of equipment that can accurately align an equatorial mount within a few minutes), the alignment was significantly off causing image drift so that even a 30 second exposure showed a little star trailing. (Both amateur astronomy books show how this can be corrected in post processing.)
However, for lunar and planetary imaging a slight alignment error can actually be useful as the image will drift slowly across the sensor. This has two good results. The first is that the effects of any dust on the sensor will be largely removed and the second is that, if using a colour webcam for planetary imaging the image will pass over the Bayer matrix and I suspect a better colour rendition will result. In fact, when I did some imaging having used the PoleMaster to align the mount so that the image was staying rock solid over the sensor I found that could detect the Bayer mask pattern in the image and when ‘stretching’ a monochrome deep sky image the slight sensitivity differences of individual pixels became apparent.
To image the Moon I used a Point Grey ‘Chameleon’ USB2 mono camera which employs a Sony 1/3” sensor having 1296 x 964, 3.75 micron, pixels. (This had been bought at a very advantageous price from the ‘UKastrobuysell’ website as with much of my equipment.) With no image compression it can download 15 frames a second. I initially had the problem with my imaging laptop in that, though the data could be buffered at the full frame rate in the computer’s RAM, it took nearly twice as long as the actual imaging sequence to download this for storage in either the hard disk or a USB3 external drive. So that the data could be stored in real-time I thus replaced the hard disk with a SSD drive and also purchased an SSD external drive. [There are now Point Grey cameras which employ a USB 3 interface and which can operate at higher frame rates.] On advantage of the Sony ICX445 sensor used in this camera is that its sensitivity in the near infrared is still quite high. Screwed into the 1.25-inch camera barrel was the Astronomick Planet IR Pro 742, 1.25 inch, filter which only passes the near infrared part of the spectrum.
The mount was slewed to the Moon and 10 areas of the moon were captured as video files each of ~500 frames. These covered all parts of the surface with plenty of overlap − important when the resulting ‘panes’ are combined into one. Each video sequence was then loaded into the free program Registax 6 which aligned and stacked the best ~250 frames of each video sequence as described in both of the CUP amateur astronomy books; ‘An Amateur’s Guide to Observing and Imaging the Heavens’ and ‘The Art of Astrophotography’. The wavelets tool with all sliders set to 10 was then used to sharpen each resulting pane which was then saved as a Tiff file. Then the free program Microsoft ICE (Image Composite Editor) was opened up and the 10 panes selected. ICE then aligned and combined the panes to produce the full disk image. I am always amazed how well ICE achieves this! The result was output as a Tiff file and imported into Adobe Photoshop. I tend to use two filters to enhance the image. The first is to use the ‘Unsharp Mask’ filter with a large radius and small amount. This nicely increases the contrast in the image making the darker parts darker and the brighter parts somewhat brighter. To prevent the highlights burning out, it is best if the original video sequences are slightly under exposed. One can also use the ‘Polygonal Lasso Tool’ to select the brightest areas in the image and then invert the selection before applying the Unsharp mask filter which will also prevent the brighter parts becoming over exposed. A possible further filter to apply is the ‘Smart Sharpen’ sharpening filter – but it is really important not to over sharpen the image. The ‘Brightness/Contrast’ tool might then be used to adjust the overall brightness.
Given a focal length of 890mm, each 3.75 micron pixel of the Chameleon sensor should subtend 0.86 arc seconds on the Moon’s surface so, in accordance with the Nyquist sampling theorem, one should not expect to achieve a resolution of more that twice this, so ~1.7 arc seconds. This actually fits very well as one would not expect the atmospheric turbulence to allow a better resolution that ~2 arc seconds. The resulting image had 2,200 pixels across the lunar disk; somewhat more than its 31.8 x 60 = 1,908 arc second angular diameter at the time of the imaging so, as expected theoretically, each pixel subtended 0.86 arc seconds. Looking in detail at the image, the smallest bright points were ~2 pixels across so, again, agreeing with theory. How does this agree with the theoretical resolution of the telescope? With its aperture of 127mm, the nominal resolution of the telescope used is 1.1 arc seconds. However, that is in green light at 5,500 Angstroms, and the Moon was being imaged in the infrared at ~8,000 Angstroms so the theoretical resolution is reduced to ~1.6 arc seconds. I find it interesting that all three resolution calculations are quite close and thus the system was well matched to image the Moon and I hope that you will agree that the result was very pleasing. There is one further interesting aspect of the telescope’s performance. It is guaranteed to have a Strehl Ratio of 0.96 (as described in the accompanying essay on refractors) but that is in green light. The performance of all refractors will fall of towards the extremes of the spectrum and more so in the infrared but, for this triplet objective, the performance had not appeared to have fallen off by a significant amount. One might suspect that, in general, reflectors might be better suited to infrared imaging.
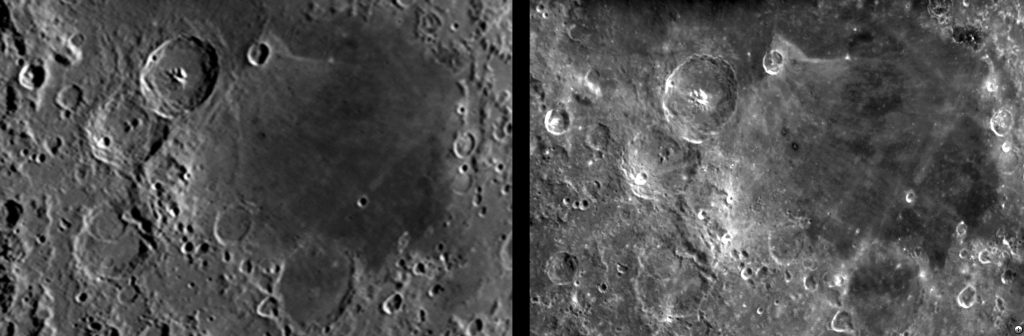
It is possible to obtain higher resolution images by using a larger aperture telescope. This would have a higher theoretical resolution and, almost certainly, a longer focal length so giving a lesser image scale (good). In this case, resolutions of 1 arc second or less are achievable given excellent seeing. The number of panes required to achieve such resolution across a lunar disk becomes very large and, in order to produce ‘The World Record Lunar Image’, 10 imagers worked in parallel. This is a superb image and the link to it is given on my ‘Night Sky’ page (search for Night Sky Jodrell Bank). However a single imager could still aim to image interesting parts of the lunar surface such as the Hyginus Rille and the Alpine Valley. Although the lunar phase was not the same as that in the World Record image, I carried out a comparison of part of my image (which was upscaled to match that of the World Record Image and so make the comparison fair) with that of the World Record image at full resolution and the result is shown below. Not surprisingly, the World Record image (right) is obviously better, but my image (left) holds up rather better that I expected.
Imaging Venus in the Infrared
This was carried out at ~15:00 UT on the following day, the 5th January 2017, and exploited the fact that infrared imaging can be carried out in daylight. The fact that the result is monochrome does not matter when Venus is imaged as it is essentially white in colour. At the time of imaging, Venus was at an elevation (altitude) of 23 degrees so some effects of atmospheric dispersion would be apparent when observing visually and would spread the spectral colours over ~3 arc seconds − significant when the disk was just 22 arc seconds in diameter. However using a narrow spectral band will reduce the effect; in the green it would be just 0.8 arc seconds in the red 0.6 arc seconds and even less in the infrared. When Venus was viewed that afternoon, a ZWO Atmospheric Dispersion Corrector (described in ‘The Art of Astrophotography’) was used to remove the atmospheric dispersion and, although not really necessary, was left in the imaging chain.
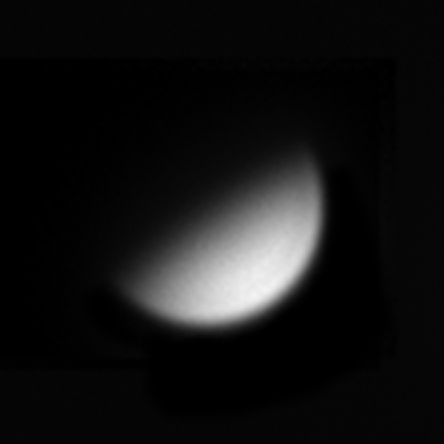
Though not improving the expected resolution, a TeleVue x2.5 Powermate was used to increase the image size on the Point Grey Chameleon sensor. The exposure was reduced to the point that no part of the disk was over exposed − there was quite a wide dynamic range in the image − and a 500 frame video sequence made. This was imported into Registax 6 which, not surprisingly, only set one alignment point on the featureless disk. The video frames were aligned and the best frames stacked as usual before a little wavelet sharpening was applied. Considering how the individual images appeared due to the atmospheric turbulence I was surprised how clean the result appeared. This image is not in the least bit exciting but it does show the cytherean (nice word!) phase quite nicely.
Venus on the 26th April 2017
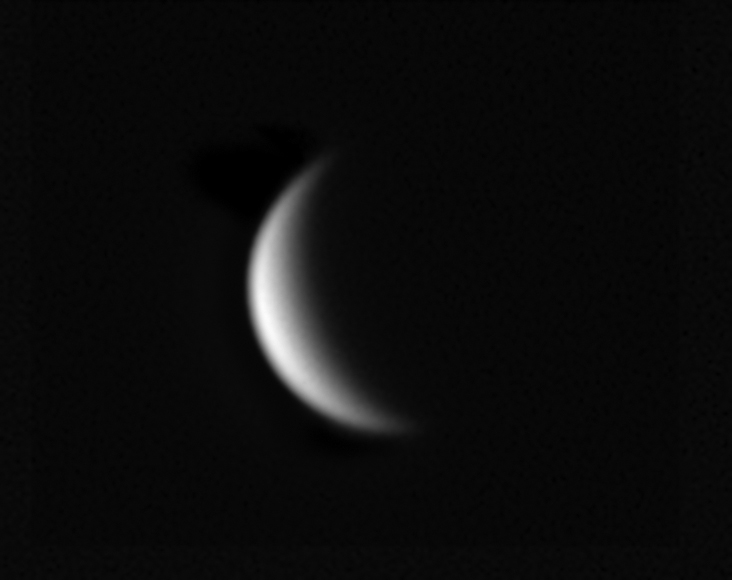
This was taken during a short break in the clouds at 09:30am BST. The telescope employed was a Takahashi FS102 4-inch fluorite doublet refractor used with a TeleVue x2.5 Powermate to give an effective focal ration of f/20. Video sequences were take with an Imaging Source DMK 21AU1618.AS monochrome webcam equipped with an Astronomik Planet IR Pro 742 infra-red filter. This time, I processed the video sequences in Registax 4.
Return to Astronomy Digest home page