DECEMBER 2022
Imaging the Sword of Orion – a complete work through
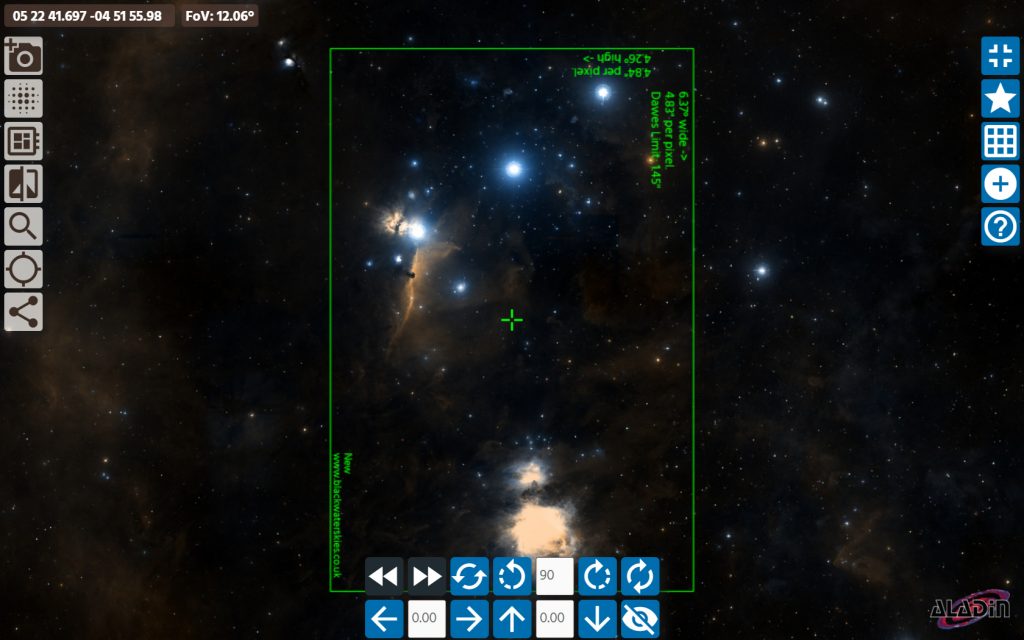
This was an imaging exercise using a Full Frame Sony A7 II camera and Zeiss (East German) 200 mm lens. As seen in the Blackwater skies field of view calculator, the combination would just encompass the region but I wanted the Orion Nebula to be central in an image to achieve the best image quality and so chose to take two images, one centred on the Nebula and the second on the stars of Orion’s belt.
Exposure Length andISO
The ‘500’ rule for a full frame camera can determine the maximum exposure length when the camera is mounted on a fixed tripod. (One simply divides the lens focal length into 500 for a full frame camera or 350 for an APS-C sensor camera.) For a 200 mm lens this gives a maximum exposure of 2.5 seconds – which is not too practical. So the camera was mounted on a ‘star tracker’ to allow longer exposures. In fact, there is a problem imaging the Orion Nebula as the central region around the trapezium is very bright and can be very easily over exposed. So the exposures were limited to 15 seconds and controlled using an intervalometer. An ISO of 2,000 was used. Pleasingly, coupled with the short exposure, the first frame, shown below, is suitably exposed. No hot pixels were evident – neither were any apparent in the 53rd frame.

File Formats
Both raw and Jpeg files were taken. Conventional wisdom is that raw frames must be better as they have a 16-bit depth rather than 8-bits for Jpegs – which are also compressed. However, if many Jpeg frames are stacked – in this case ~50 – then the effective bit depth is increased and the effective bit depth may not be significantly different. By averaging many Jpegs, the artefacts that may be present in the Jpegs may also be averaged out. When the Jpeg is derived from the raw data in camera, I believe some ‘stretching’ is applied (it was in this case) and, in fact, nebula regions may sometimes be better captured in a Jpeg derived image.
So, my advice is to capture both raw and Jpeg files and process both. You may be surprised.
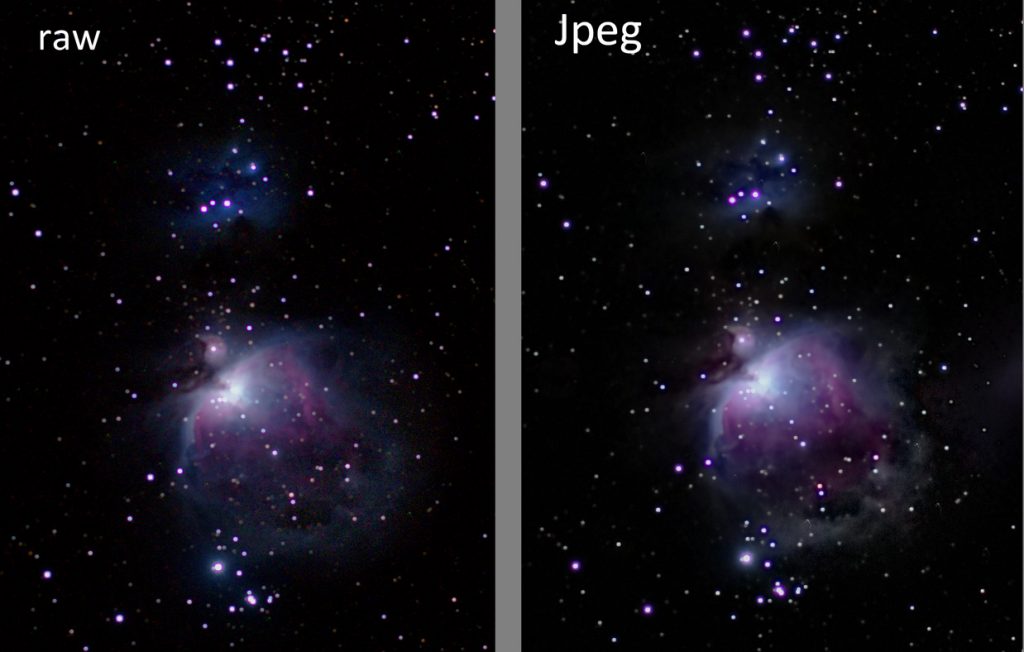
As seen in the very last raw/Jpeg comparison image of the article, I could see virtually no difference between the raw and Jpeg images. It was true that the camera had stretched the raw data as I had to apply more stretching to the raw image. The Jpeg image showed, I think, the nebulosity down to the right of the nebula somewhat better, so I actually preferred the Jpeg derived image.
Dark and Flat frames
Neither were taken. In the presence of light pollution the dark current may well be overwhelmed and nothing will really be gained by taking dark frames. As the camera sensor temperature will be changing over the period of the exposures, it would be difficult to take suitable dark frames in any case. The lens does vignette, but this is easily corrected in post processing if desired. No corrections were made. In fact, as I was going to merge two frames, the extreme corners of each individual frame – where the vignetting would be worst – would be cropped out in the final image.
Aligning and stackingthe captured frames.
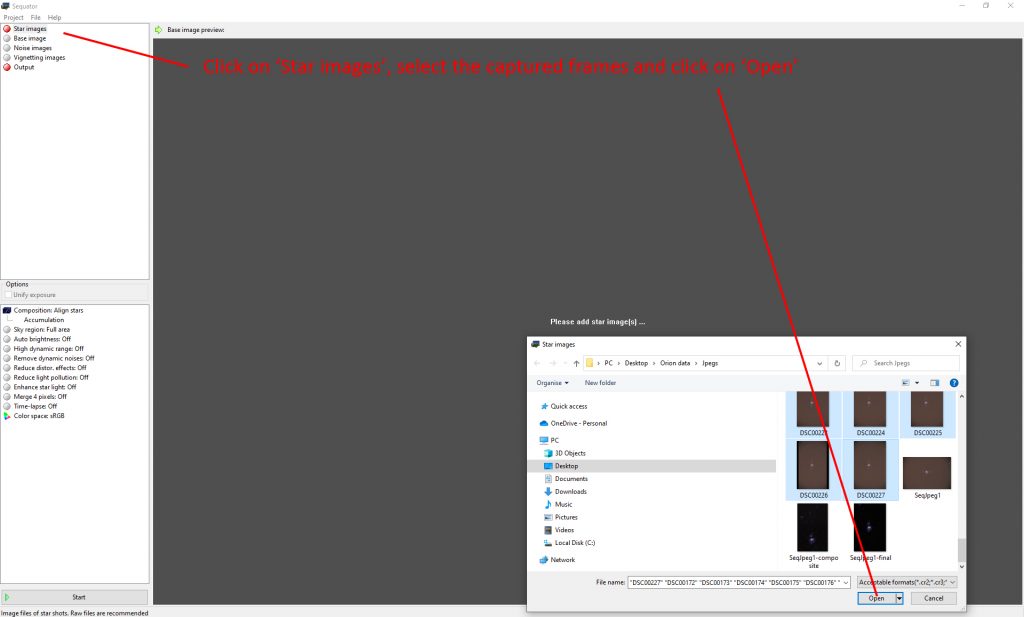
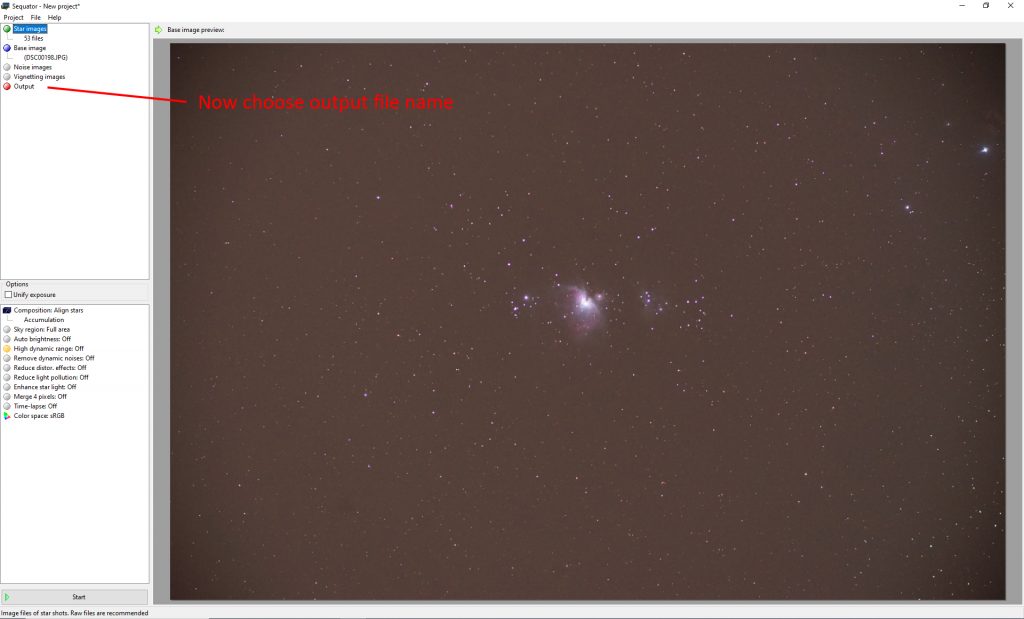
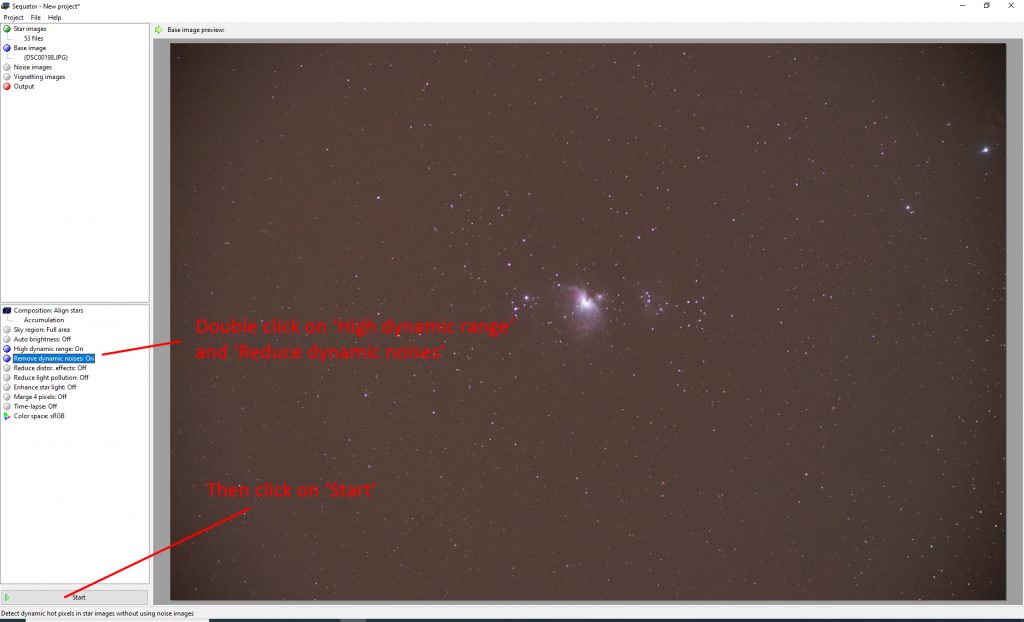
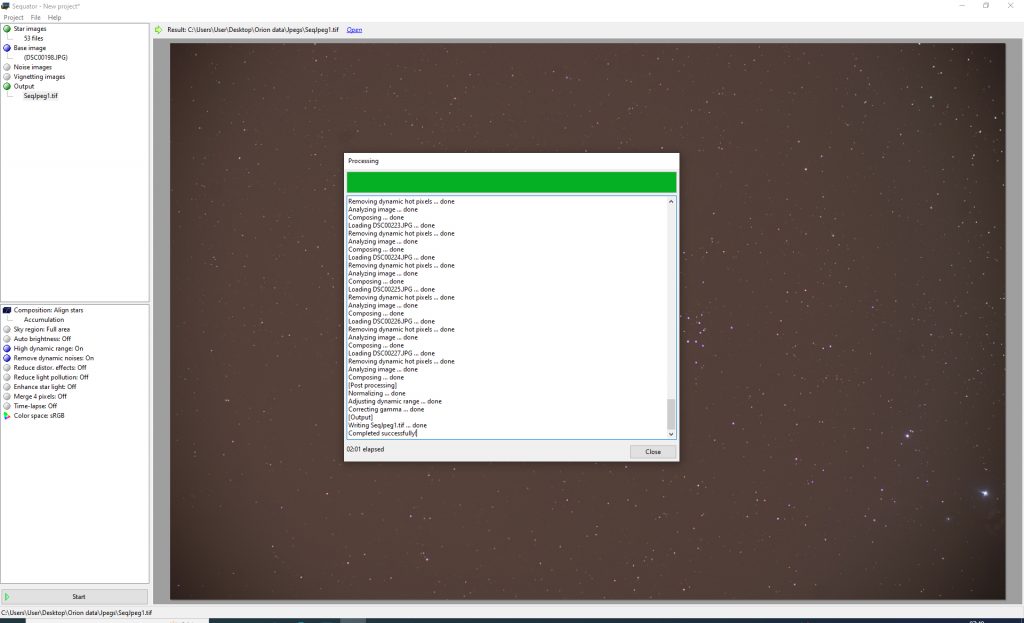
The program Sequator is probably the easiest to use. It first asks for you to select the frames tobe used, then the name of the resulting aligned and stacked image which will beplaced in the same folder. There are anumber of stacking options to choose from, and I select ‘High dynamic range’ and ‘Remove dynamic noises’ by doubleclicking on them. The former will helppreserve the central part of the Orion Nebula and the latter will remove ‘hotpixels’ from the image. One then clicks on‘Start’ and after some time the process is complete. [As you can see in the final Sequator screenshot, it took 2 minutes to process the 53 frames using an i7 processor. Using an i5 processor took around 5 minutes.]
Processing the twoaligned and stacked images
The screen captured that I will include are the result of using Adobe Photoshop 4. However, one can now use the free program ‘Glimpse’ to carry out almost the exactly same procedures. The description relates to the first image having the Orion Nebula in the centre.
1) Removing the lightpollution
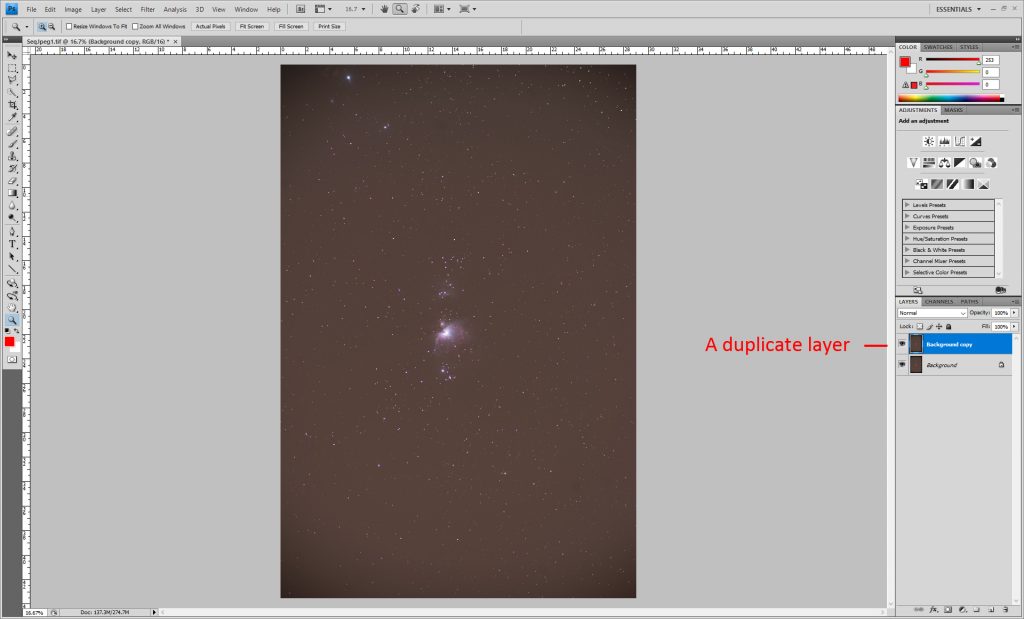
The Sequator image was opened and duplicated to give twolayers.
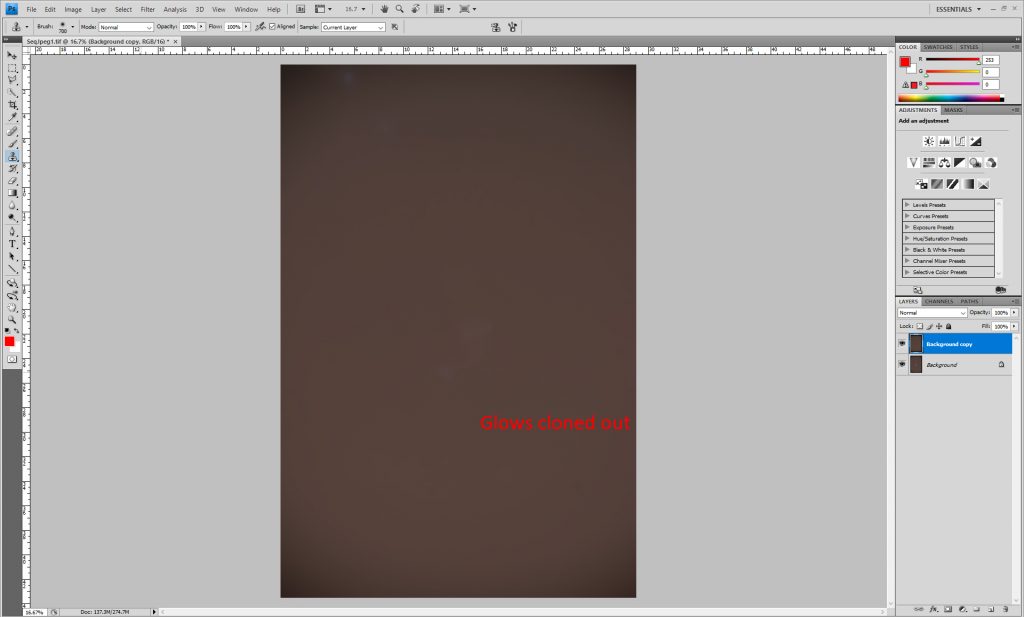
The ‘Dust and Scratches’ or ‘Median’ (Glimpse) filters are applied to the upper layer with a radius of 60 pixels. This removed the stars from the image but left a ‘glow’ around the Orion Nebula and, above, the Running Man Nebula.

The clone tool was used to clone out the residual glows froma nearby part of the image (just to their left and thus at the same elevation). This is assuming that the light pollutionvaries very slowly across the image. Theresult is a smooth image of the light pollution.
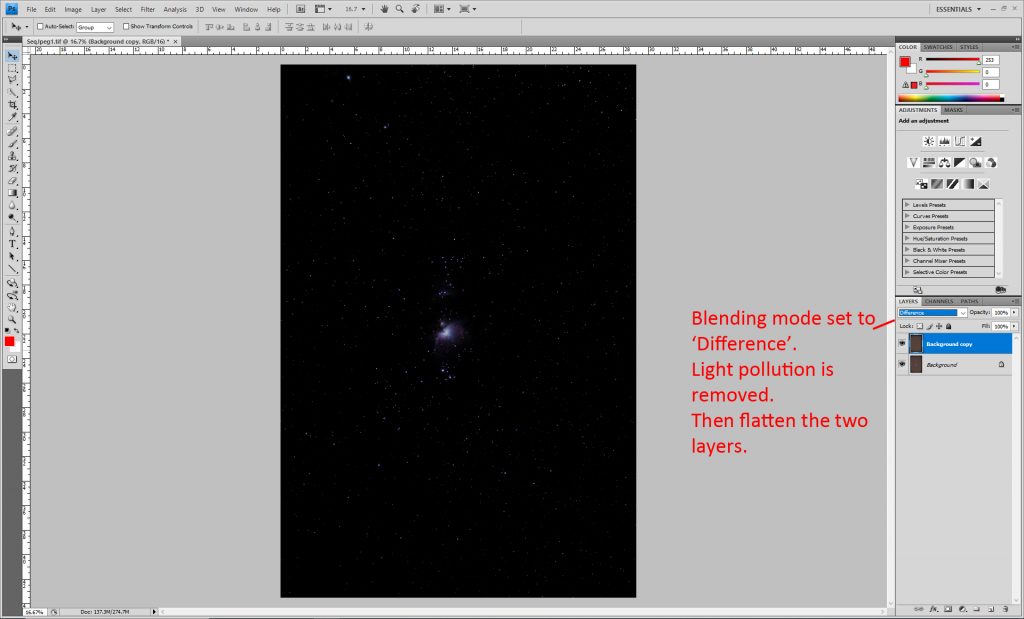
The two layers were flattened or (merged in Glimpse) usingthe ‘Difference’ blending mode. The result leaves the stars and nebulaeagainst a black background – the light pollution having been removed.
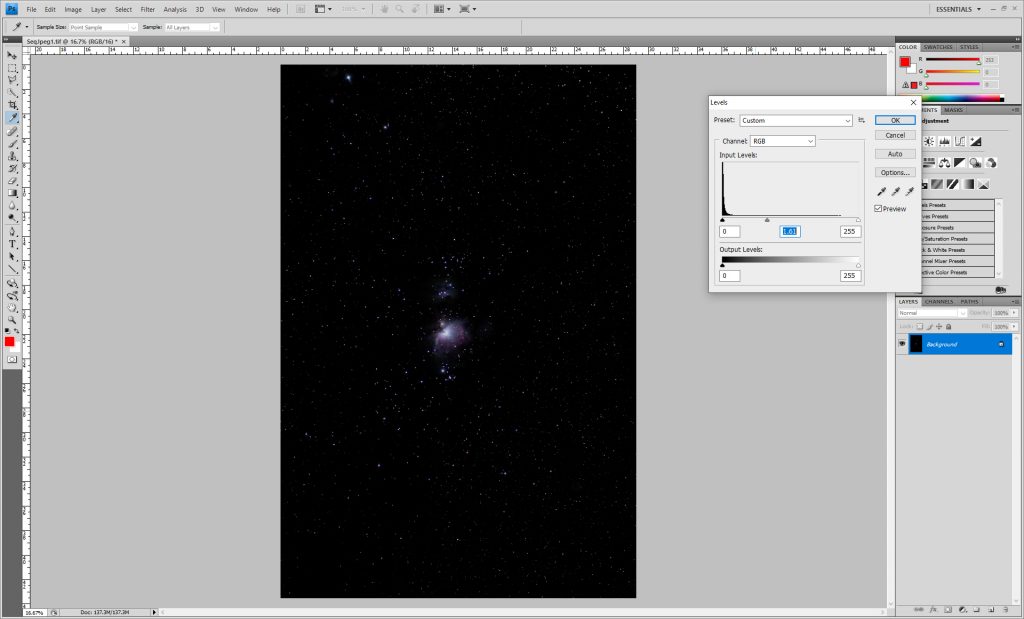
Stretching the image
The ‘levels’ command was applied to the image with the central slider moved a little over to the left. This brightens the fainter parts of the image more than the brighter parts. A second application can be made but it is important that the central part of the Nebula is not ‘blown out’.
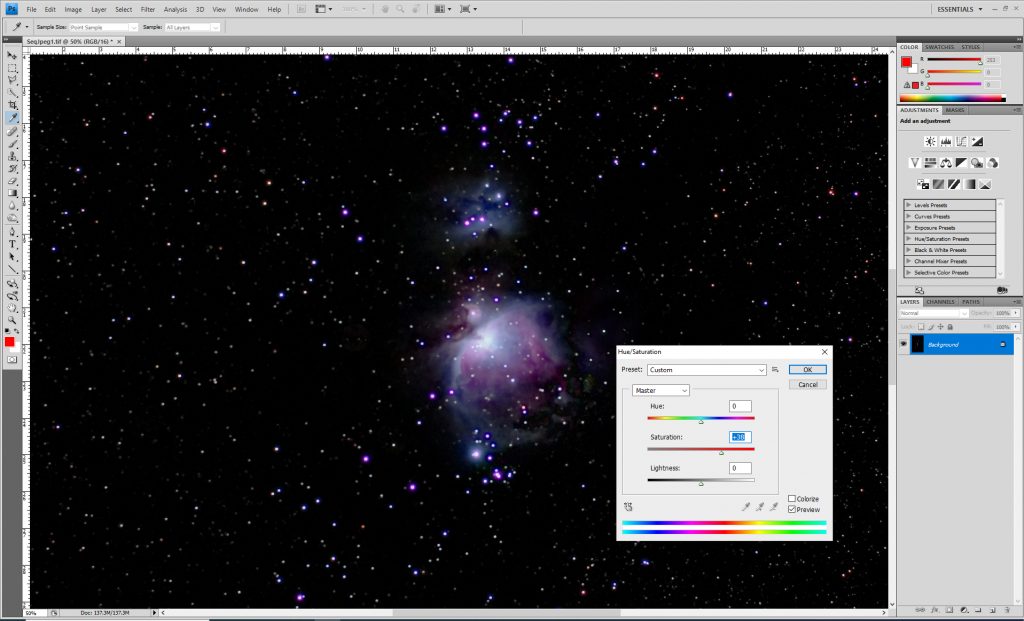
Increasing theSaturation in the image
The saturation slider in the ‘Hue and Saturation’ tool (or‘Saturation’ tool in Glimpse) is moved to the right to increase the colour inthe image.
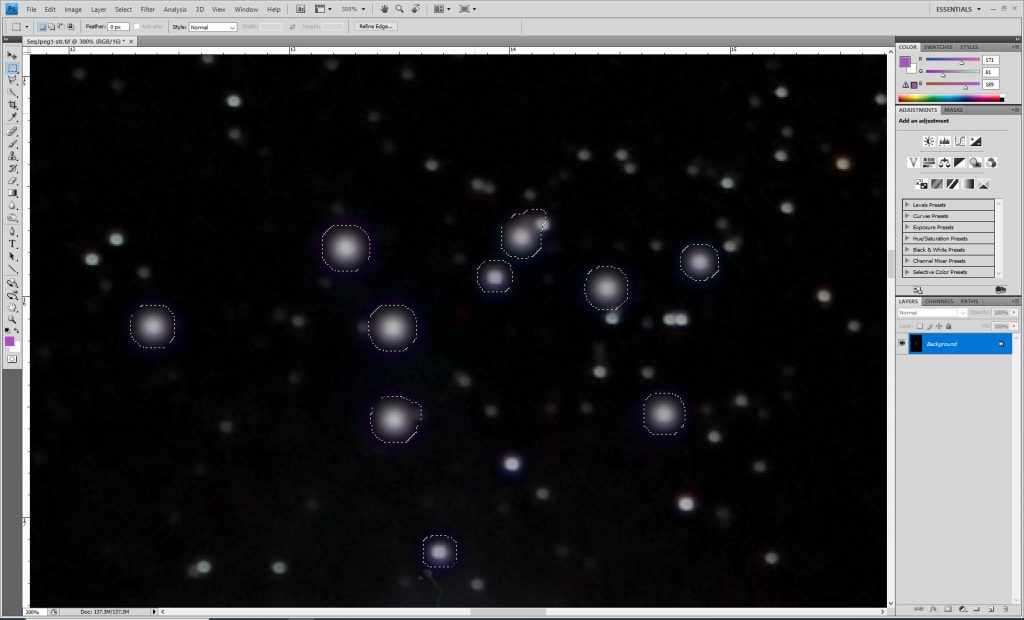
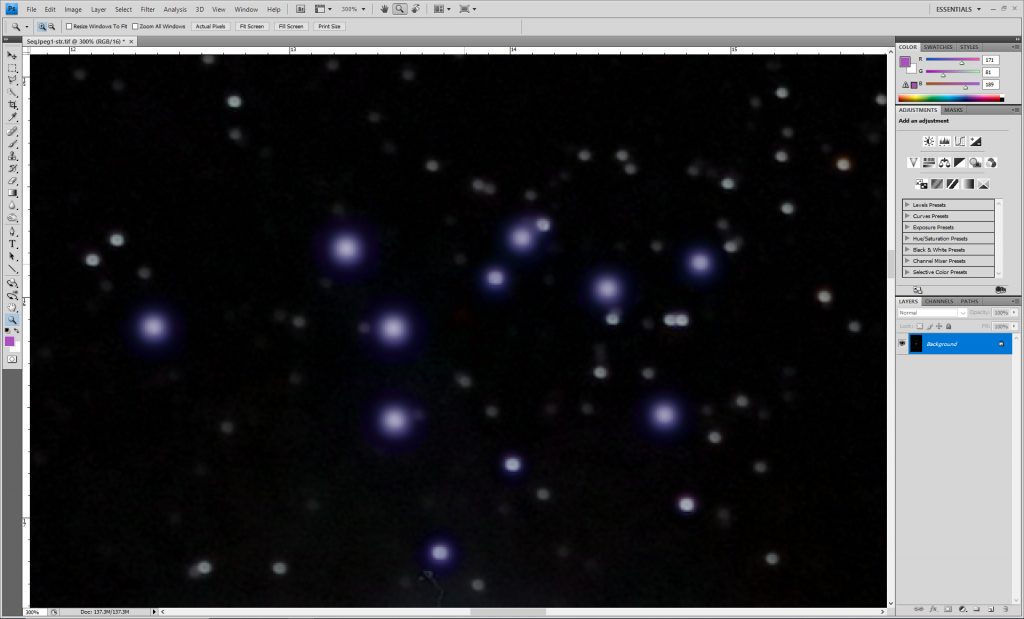
Correcting themagenta fringing around some of the brighter blue stars
Using the ‘Select Colour’ picker a region of the magentasurrounding one of these stars is selected.

The selection is expanded – Select>Modify >Expand – in Photoshop (or Grow in Glimpse) by 5 pixels. This increases the selection size to fully select the stellar images.

The Saturation tool is used to reduce the saturation and somake the stars white.

These stellar images do not look good so a ‘Gaussian Blur’ of 3 pixels is applied to smooth their appearance.
As these stars were blue, it does not see unreasonable to put back some blue colour into them by using the Colour Balance tool.
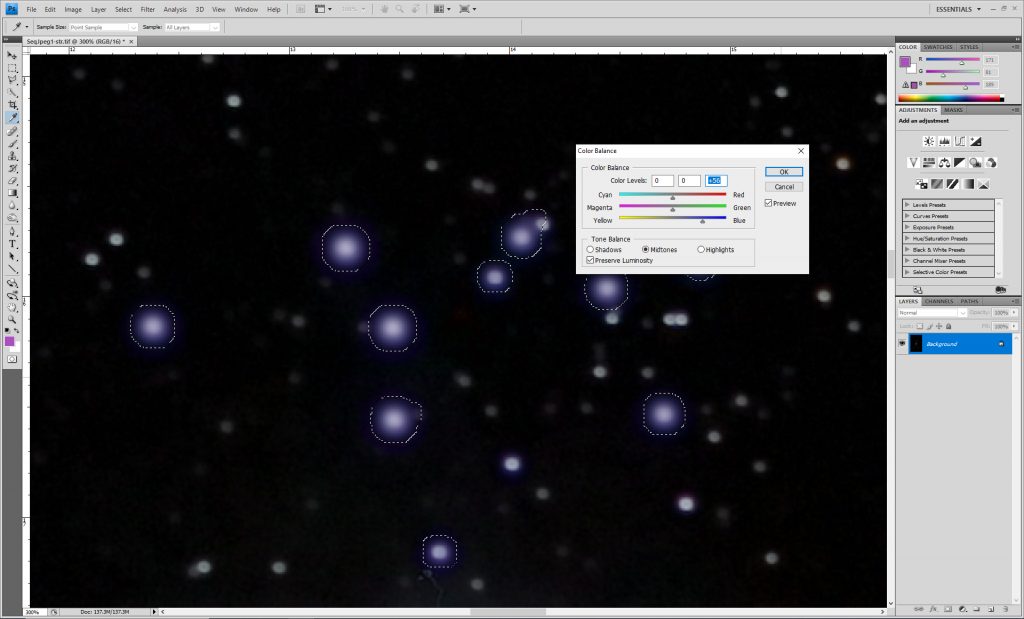
The selection is removed.
This is then the ‘Orion Nebula’ image.
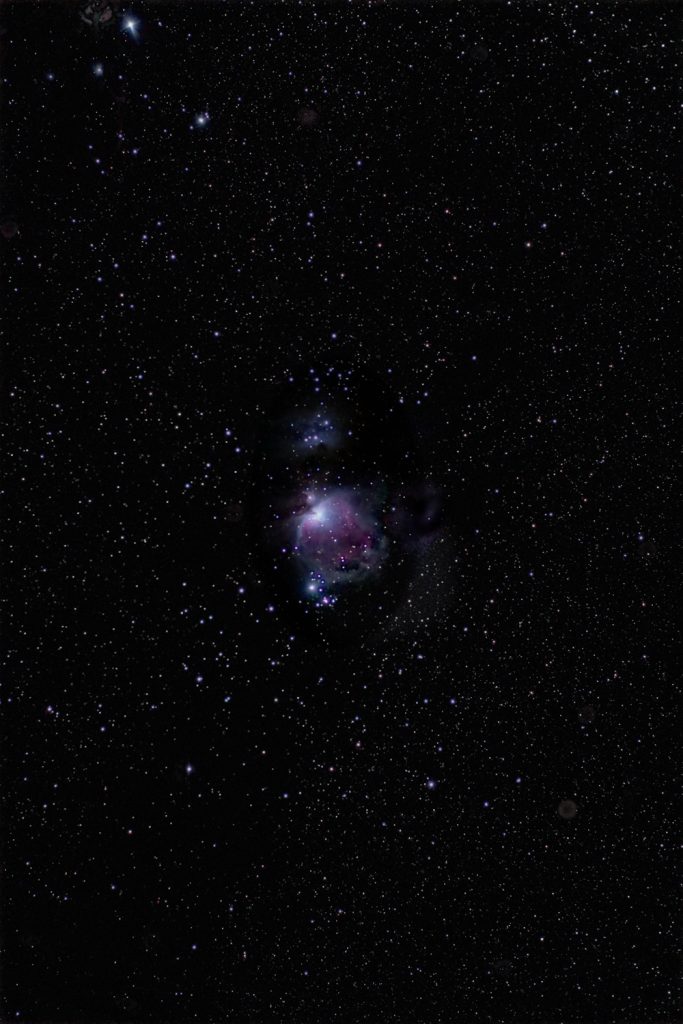
You will notice that Alnitak at the upper left of the imagesuffers from severe coma – which is why a second image was taken with the beltstars central.
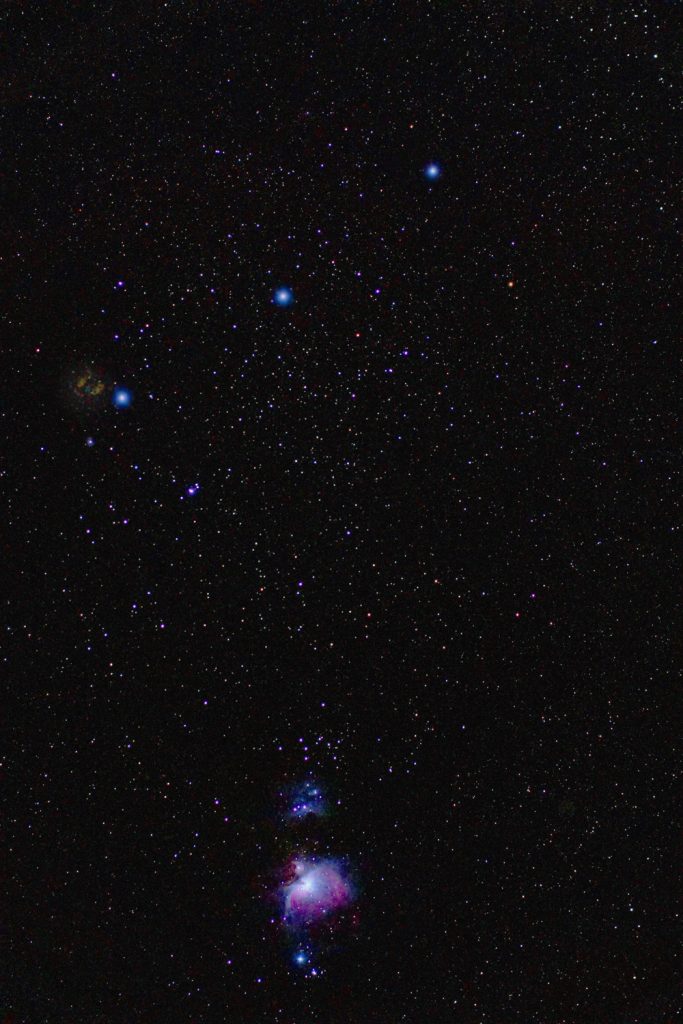
Exactly the same processes were applied to the ‘Orion’s Belt image to give the second image. The ‘Flame Nebula’ to the left of Alnitak is just visible. In fact, this is a good image of Orion’s Sword in its own right but by combining the two images a slightly better result is achieved.
Combining the twoimages
The canvas size (in black) of the Nebula image was increased upwards to allow the Belt image to be added.
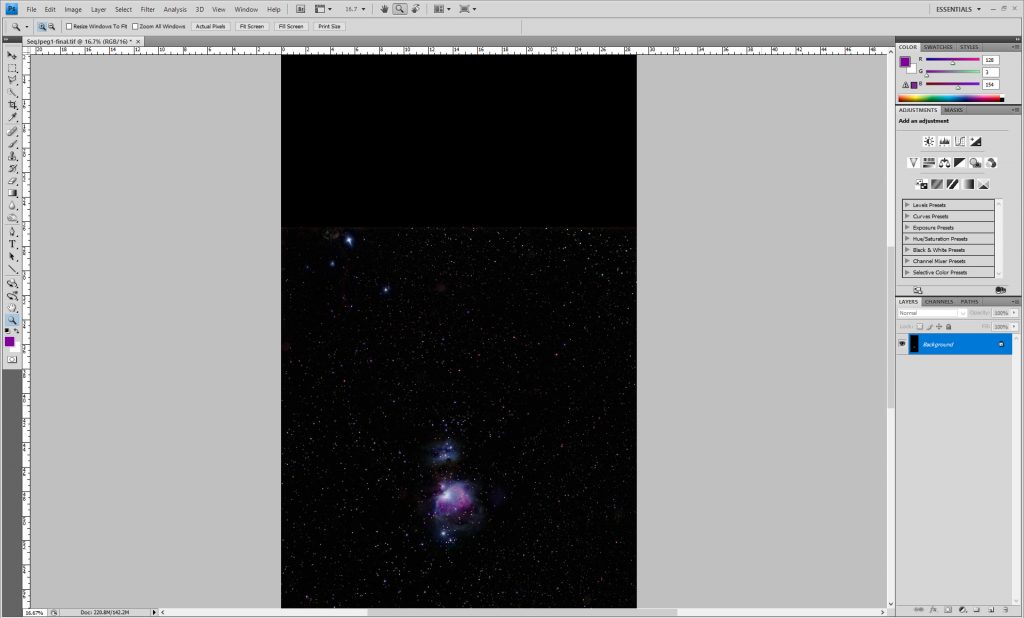
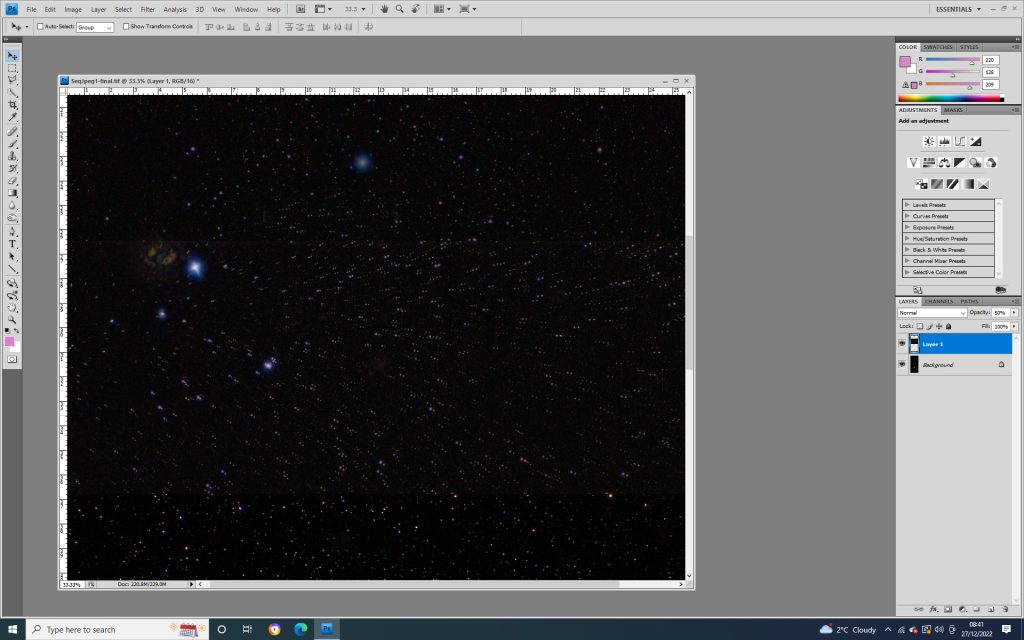
The belt image was cropped and copied and pasted over the Nebula image. The ‘Normal’ blending mode was set to an opacity of 50%. This showed Alnitak, the lower left of the Belt stars, in two positions. The upper layer was moved to overlay the two images.
Having aligned the two images of Alnitak, the opacity was increased to 100% before Flattening or (‘Merging in Glimpse) the two layers.
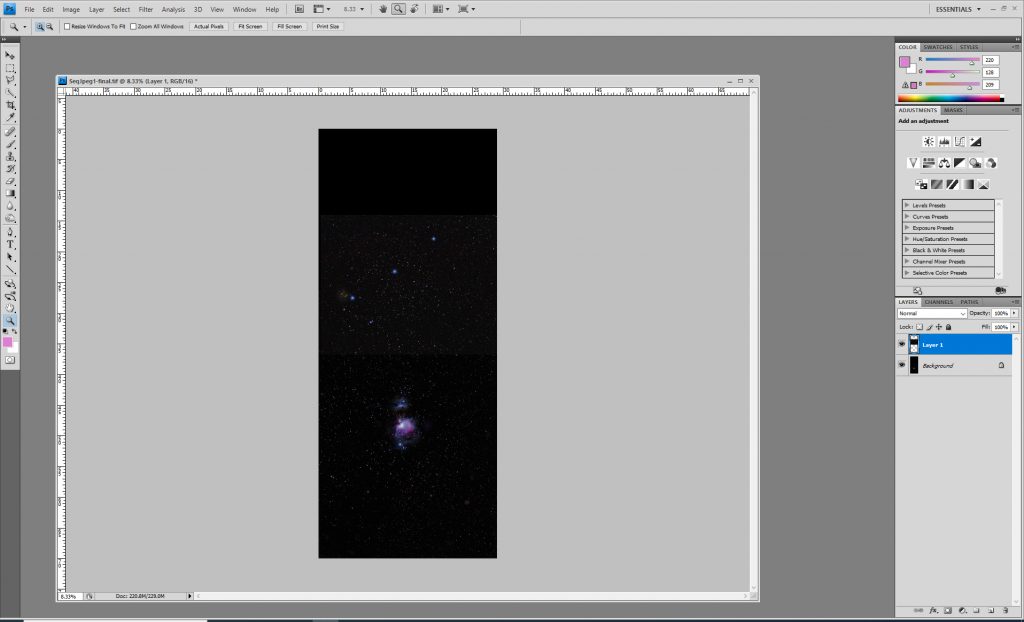
Cropping the result
The crop tool was used to suitably reduce the image size to give the final ‘Sword of Orion’ image.

I had processed both raw and Jpeg frames. For this comparison I had not attempted to remove the chromatic aberration around the brighter stars. As shown in the comparison below, aside from some slight colour differences, there was essentially no difference but that the nebulosity down to the lower right of the nebula showed ups rather better in the Jpeg derived result.