SEPTEMBER 2017
Practical Aspects of Observing and Astroimaging
[This is just one of many articles in the author’s Astronomy Digest.]
At home
Let us assume that the telescope set-up is in the garden and that one does not have an observatory. The fact that this is close to the house has two major advantages: firstly, mains power can be used and secondly, imaging can often be carried out inside in the warm.
Mains power must be used with care and a mains leakage trip placed between the extension lead out to the garden and the mains socket. It could then be used to power all parts of the telescope system including the mount and dew strips surrounding the telescope objectives or corrector lenses. There is, however, a question regarding providing power to a CCD camera. If the mains power supply is not too well smoothed, some have found very low level brightness banding in highly stretched images. This can also be caused by ‘ground loops’. Should either of these be the case, then the use of battery power as discussed within the ‘Dark Sky’ section might well be better.
Imaging from inside the house
This has the obvious advantage that, once having set up the mount, telescopes and cameras it enables one to keep warm during the imaging session. But there are several considerations to take care of. The majority of cameras used for imaging and guiding are controlled using USB connections which have relatively short leads. It is, however, possible to buy powered USB extension cables to extend these into the house. With the control laptop inside, it would be not be possible to focus the imaging and guide cameras unless one has remotely controlled focusers. This problem can be solved by buying a long VGA extension cable to drive an external monitor located beside the telescope.

A guided telescope imaging setup with the controlling laptop inside: 17 ampere-hour Golf Caddy batteries power the mount and imaging CCD camera, powered USB extension cables link the imaging and guide cameras to the laptop inside. Out of view was an external VGA monitor to allow focusing of the guide and imaging cameras.
Focussing and auto-guiding calibration
When initiating an imaging session I will align and then synchronize the mount on a bright star which would be used when focusing both the imaging and guide cameras using a Bahtinov mask as shown in the image below. Then one can then slew to the object to be imaged and centre it in the field of view of the imaging camera. If guiding is to be used, one would then select a suitable guide star, calibrate the guiding commands and initiate auto-guiding. [It is best to calibrate the guide commands where the mount is to be tracking as these might need to change in different regions of the sky.]
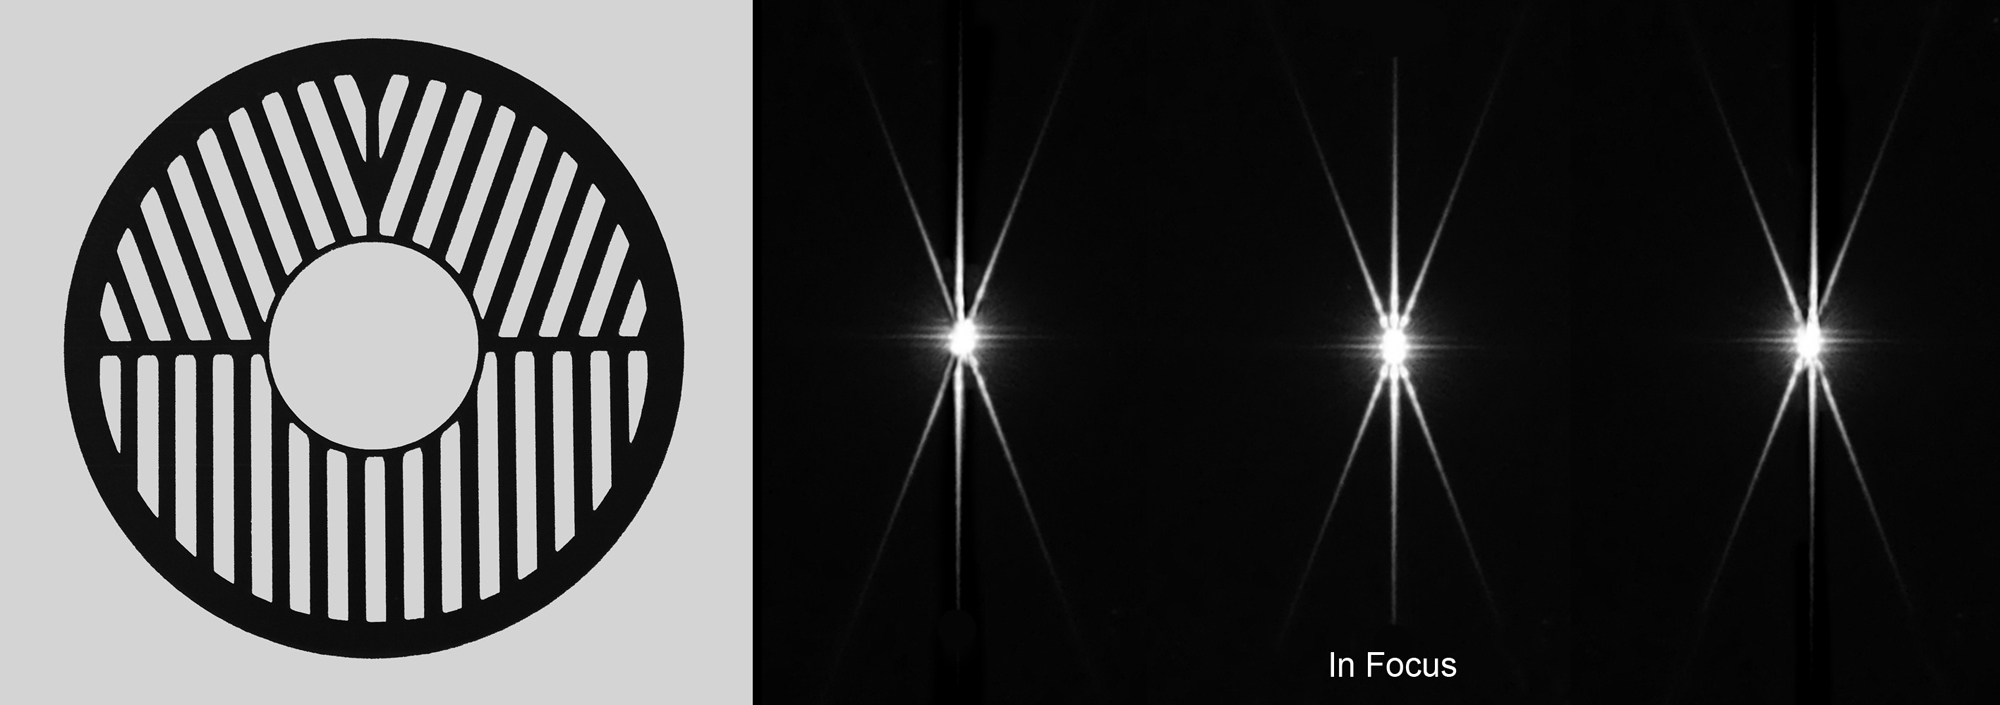
Focusing an imaging camera using a Bahtinov mask: the focus is adjusted to bring the moveable ‘spike’ central within the outer pair.
Remotely Controlling the Mount
If one is only going to image one object during an observing session then the mount need not be remotely controlled, but if not, it is nice to be able to command the mount from inside. Many imaging programs allow for telescope control as do planetarium programs such as Cartes du Ciel, Stellarium and Sky Safari Plus.
Imaging from a Dark Sky Site
Mounts
The mount that is used at one’s home location may well be portable so that it can be taken to a dark sky location but, if not, it can be worth considering an alt/az mount as these are easier to setup. If one was using an equatorial mount, I would highly recommend the purchase of a QHY PoleMaster (see review elsewhere in this digest), which can be used to accurately align it on the North Celestial Pole in just a few minutes.
Battery Power
The majority of mounts, dew tapes and CCD cameras run on 12 volts DC. There are quite a number of options. Sky-Watcher and Celestron provides ‘Power Tanks’, having 7 or 17 ampere-hour capacities which also include lamps. Two 12 volt sockets are provided. However the cost per ampere-hour is quiet high.
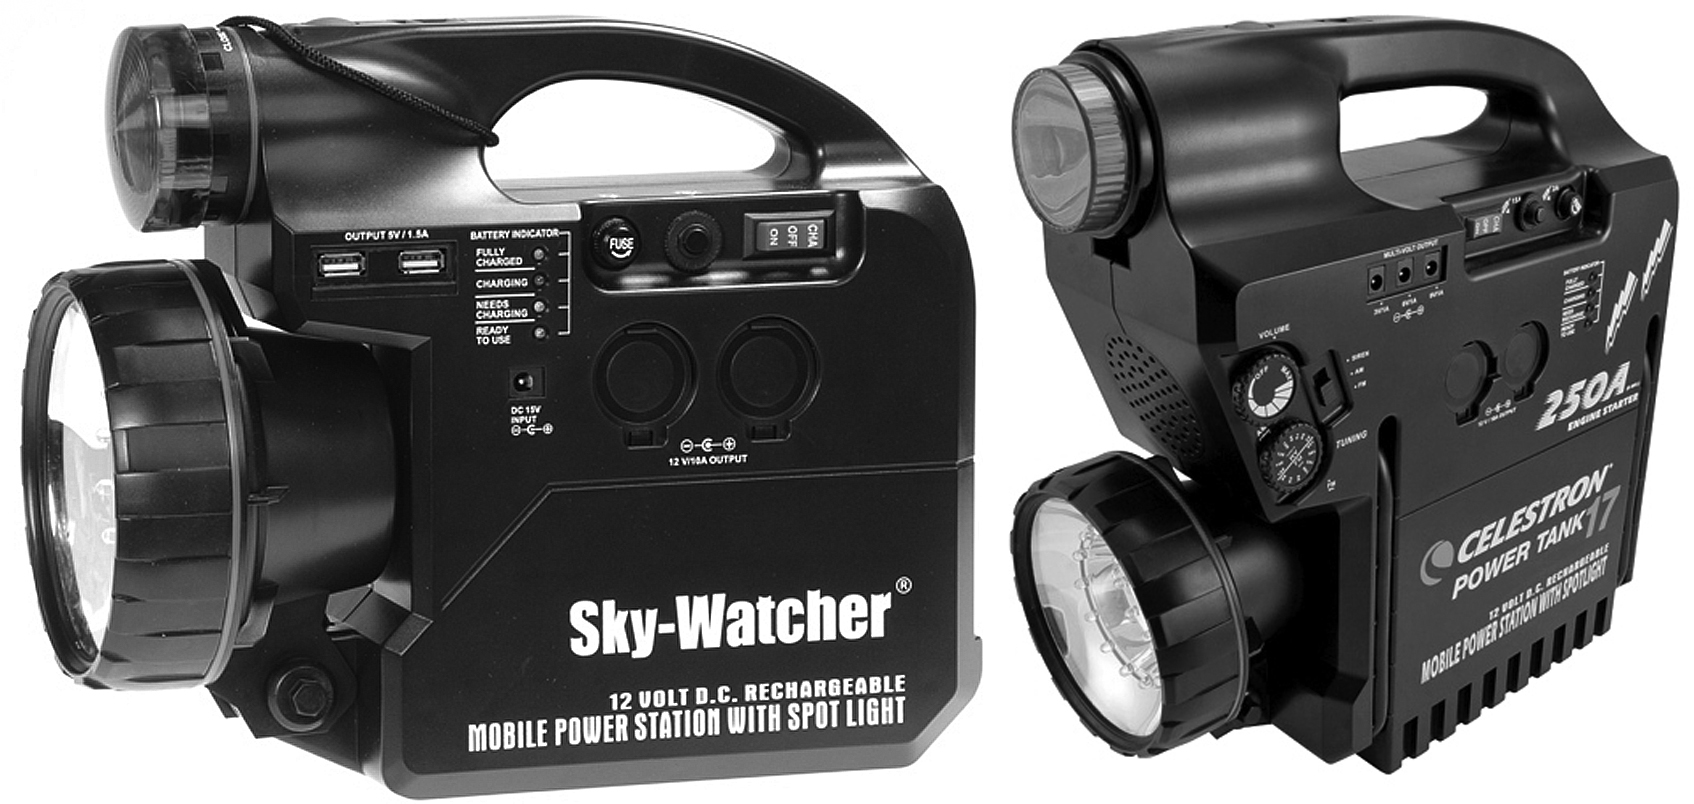
Sky-Watcher and Celestron 7 and 17 ampere-hour ‘Power tanks’.
Many companies now provide ‘jump-start’ batteries with a 17 ampere-hour capacity that have one or two 12 volt sockets and these can work out significantly cheaper. Even cheaper per ampere-hour, if not so convenient, are 22 ampere-hour Golf Caddy batteries. To charge them, one will need to buy an appropriate charger and I have acquired a ‘Noco genius’ G1100 charger, available from ~£35, which is regarded as one of the very best. One will also need to provide a 12 volt socket or use a cable directly from the battery terminals which has an appropriate plug for the mount and other equipment such as dew zappers or cameras. It would be a good idea to include a fuse in the +12 line.
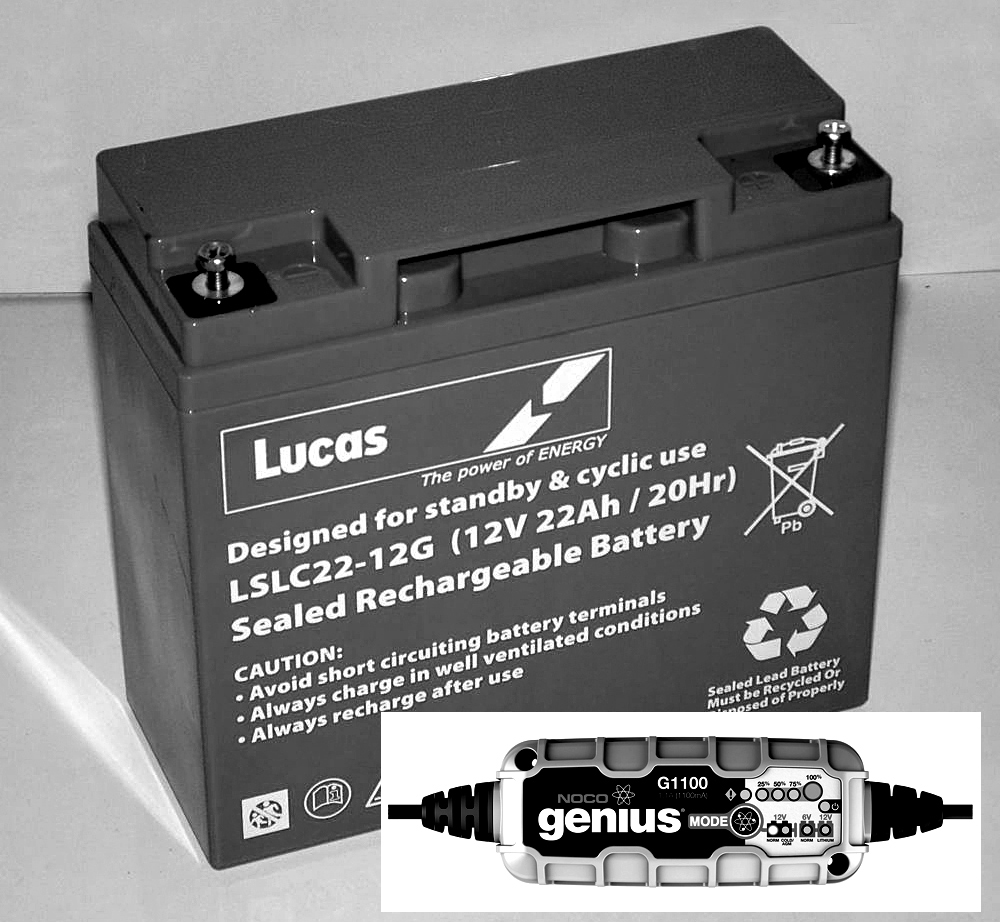
17 ampere-hour Golf Caddy battery with Genius charger.
The latest, surprisingly light, batteries available are based on Lithium Polymer technology and manufactured by Tracer High Performance Batteries. Suitable connecting cables will also be required. Allowing over 300 charge/discharge cycles, this type of battery gives a very flat discharge curve so more of the nominal Ah capacity can be used. They also have a ‘power gauge’ to allow one to check the battery power remaining and come with a charger. Their only disadvantage is their rather high cost per ampere-hour with an 8 Ah battery costing ~£116, a 14 Ah battery ~£166 and a 22 Ah battery ~£224.
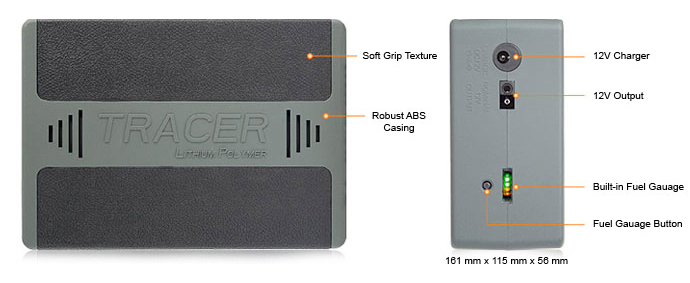
Tracer 22 ampere-hour Lithium Polymer battery.
Laptops
If, such as at a star party, there are other observers and imagers nearby, the light from a laptop screen can be a real problem. Some programs purposely use a red screen for their display but otherwise it is a good idea to cover the screen of the laptop with a red gel. Some imagers will use a box having a front opening in which to locate the laptop to limit any light leakage. Red torches should of course be used and it is usually forbidden to use a green laser pointer. It is likely that a laptop will be used to acquire the images and perhaps control the auto-guiding system. Their batteries may well not last for a full night’s imaging session. A good solution is to use a 1,000 or 1,500 W, 12 volt to 240 volt, inverter (~£30) and 12 volt battery.
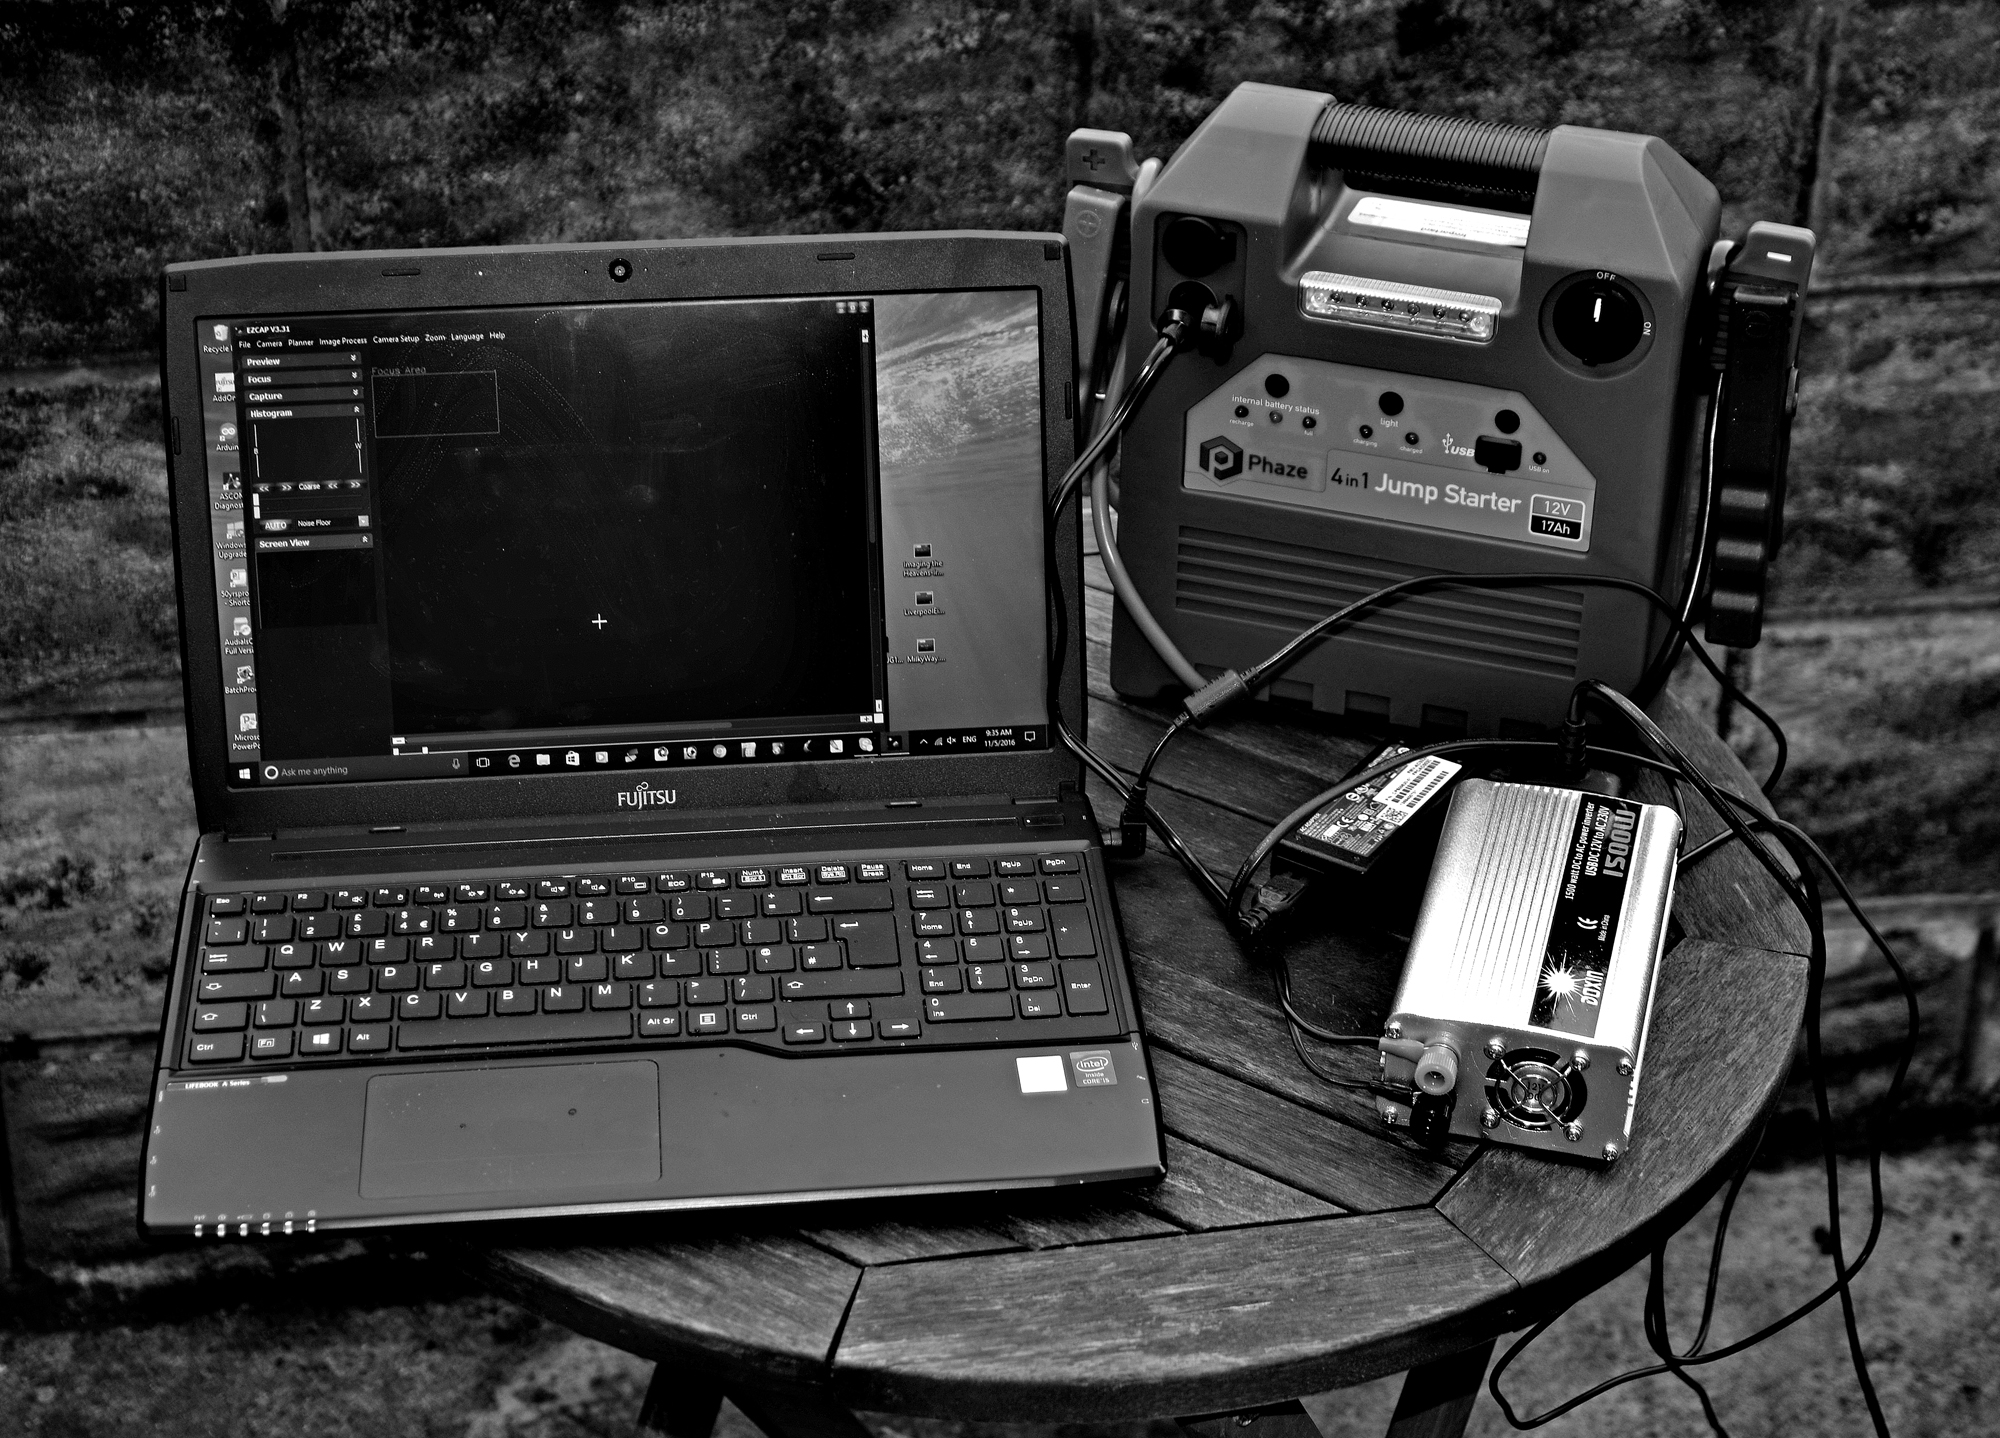
Laptop powered with a 1,500W inverter and Halfords 17 ampere-hour Jump Start Battery.
Using a laptop in the dark is not the best environment for them and they could suffer knocks. I have replaced the hard drive in my imaging laptop with an SSD (solid state drive) and also have a SSD external drive to back up the images.
Return to Astronomy Digest home page