JUNE 2017
Imaging the Moon and Jupiter with a telephoto lens
[This is just one of many articles in the author’s Astronomy Digest.]
This article describes the use of a long telephoto lens mounted on a DSLR to shoot a conjunction of the Moon and Jupiter and includs a method of correcting for short star or planet trails. Processing was carried out in Adobe Photoshop. The same technique can be used if using a small telescope and DSLR or compact camera.
On the night of May 7th 2017, the waxing gibbous Moon passed just 2 degrees ( 4 lunar diameters) above the planet Jupiter. In ‘The Art of Astrophotography’ I describe how a similar event was imaged using a telescope and planetary webcam mounted on an equatorial mount. For this imaging exercise, I chose to use a long focal length zoom lens (Sigma 150-500mm) and Nikon D7000 with APSC sized sensor so giving an effective focal length for a full frame sensor of 750mm. It was mounted on a tripod so the sky was not being tracked so, if long exposures were to be used, trailing of Jupiter and its moons would be expected.
An ISO of 200 was chosen and images were taken with a range of exposures. The captured images were visible on the rear camera screen. The Moon being so bright, an exposure of 1/2,000th second was sufficient to correctly expose it. Jupiter, but not its moons, was visible faintly with this exposure. Several frames were taken so that four could be stacked to reduce the noise (by half) in the lunar image.
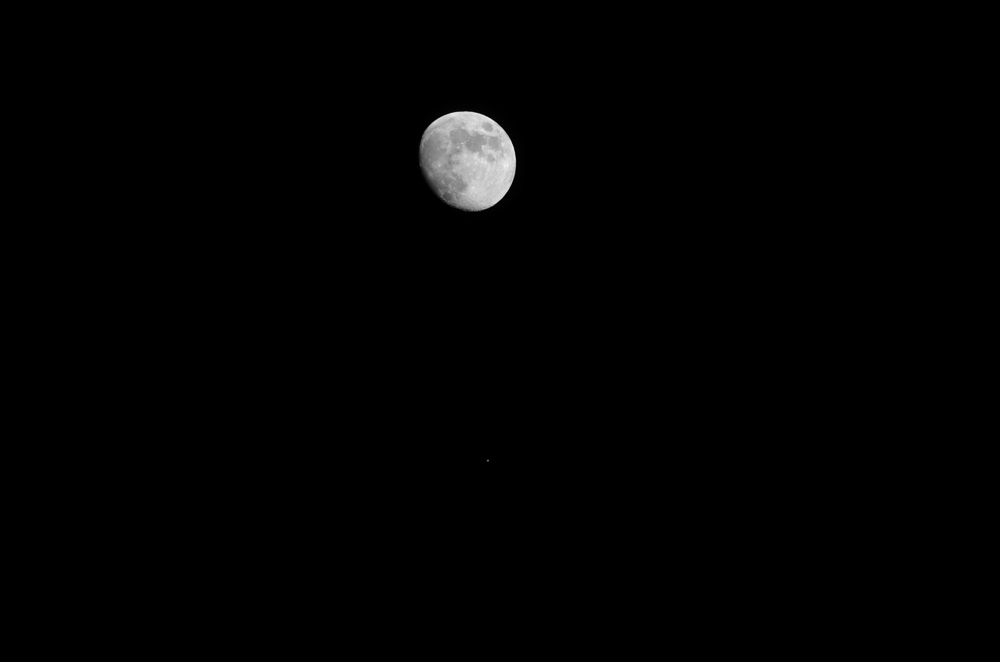
The full frame image.
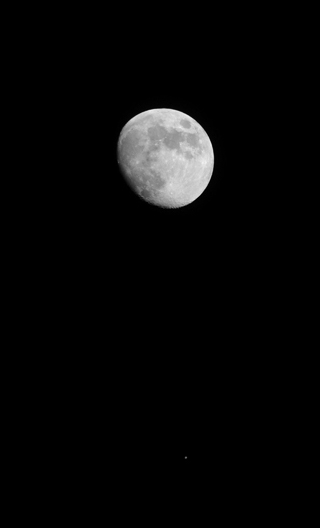
A cropped frame to show more detail. Jupiter is just visible.
A longer exposure of 1/20th second was made to image the Jovian moons. As expected, Jupiter was overexposed and the images of Jupiter and its moons were trailed.
The Moon
First, the region surrounding the Moon on these 4 images were cropped to give images M1 to M4. M1 and M2 were opened and then M2 was selected (Ctrl A), copied (Ctrl C) and then pasted over M1 (Ctrl V) to give two layers. With the ‘Normal’ blending mode selected (it appears by default) the opacity was set to 50% and the two layers flattened to give the image, M12, which was saved. In the same way image M34 was produced. Finally, using the same process, these two were averaged to give M1234. Having averaged four frames, the noise in the image should have been reduced by a factor of two. (One could in principle average 8 frames to reduce the noise further but, using an ISO of 200, the noise was not too obvious even in a single frame.)
The lunar image was enhanced somewhat by an application of the ‘Unsharp Mask’ filter with a radius of 100 pixels and a small amount (15%) which applies some local contrast enhancement to darken the mare regions. The colour was enhanced by using the ‘Match Color’ (American spelling) tool to show the slight colour differences between the Mare regions. Mare Tranquillitatis appears slightly bluer due to the fact hat there is more Titanium in its basalt. Then an application of the ‘Smart Sharpen’ filter was made to bring out the detail. It is important not to over sharpen. The final result was saved as ‘Moon’.
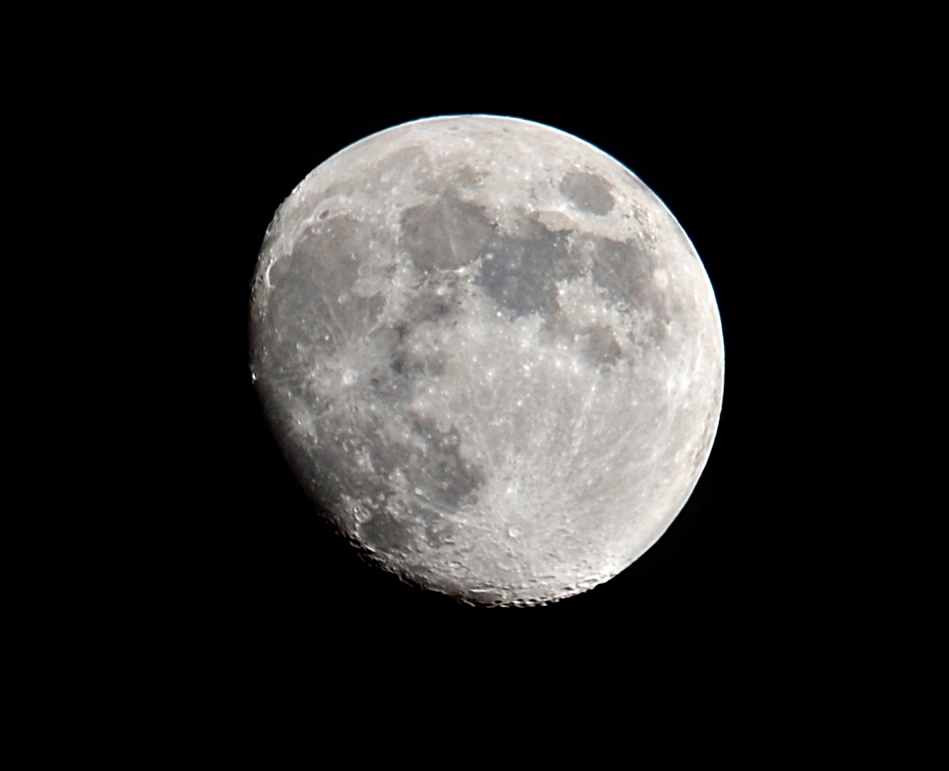
A stack of 4 lunar images slightly sharpened and colour enhanced.
Jupiter
Jupiter was just visible in the 1/2,000th image. The region around Jupiter was cropped and the ‘levels’ tool used to brighten the under exposed image of Jupiter to give an image called Jupiter. With just 13 pixels across the disk, no features would be expected to be seen, but there was just a hint of the equatorial belts.
![]()
The brightened Jovian image cropped from the original image. (The number of pixels across Jupiter is just 13.)
The Gallilean Moons
As the exposure was far longer, the trailing of Jupiter and its moons was obvious.
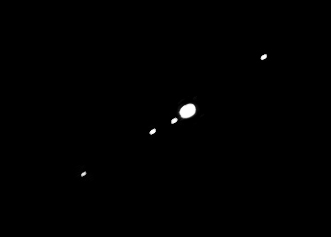
The trailed images of Jupiter and its moons.
The image was duplicated and the ‘Darken’ blending mode selected. Using the ‘Move’ tool the upper layer was moved over the base layer and the satellite images made circular before flattening the two layers. The levels tool was then used (by moving the right hand slider to the left) to brighten the moons.
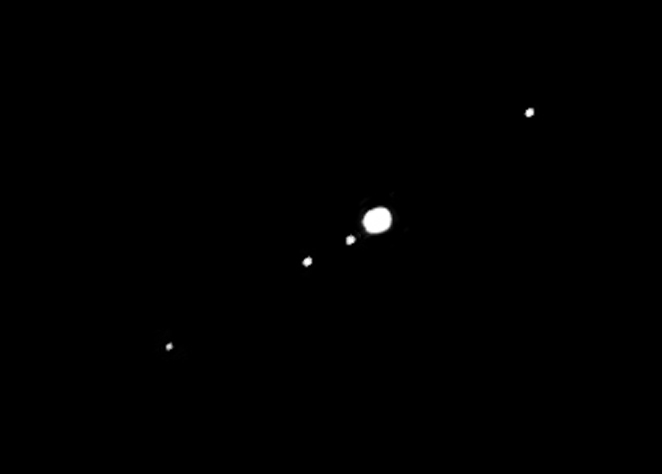
The trailing corrected image of Jupiter and its moons. Jupiter is overexposed.
The brightened image, shown above, of Jupiter derived from one of the original images was opened and cloned over the over exposed image of Jupiter in the image shown above to give an image called ‘Jupiter and Moons’
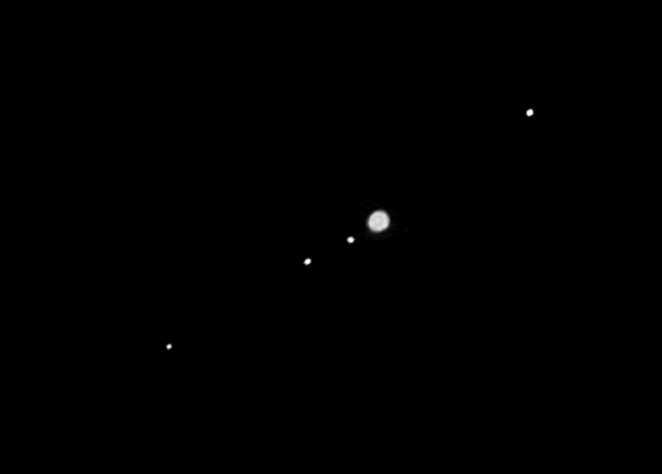
The combination of the brightened Jupiter image together with its trailing corrected moons.
Combining the enhanced images to produce the final image
One of the 1/2,000th images correctly exposed for the Moon was opened up and saved as ‘Moon and Jupiter’. The ‘Moon’ image was opened up in a second window and ‘cloned’ over the image in the ‘Moon and Jupiter’ image to replace the Moon with the enhanced lunar image. Then the ‘Jupiter and Moons image’ image was opened up in a third window and cloned over the less bright, but visible, image of Jupiter in the ‘Moon and Jupiter’ image to give the final result.
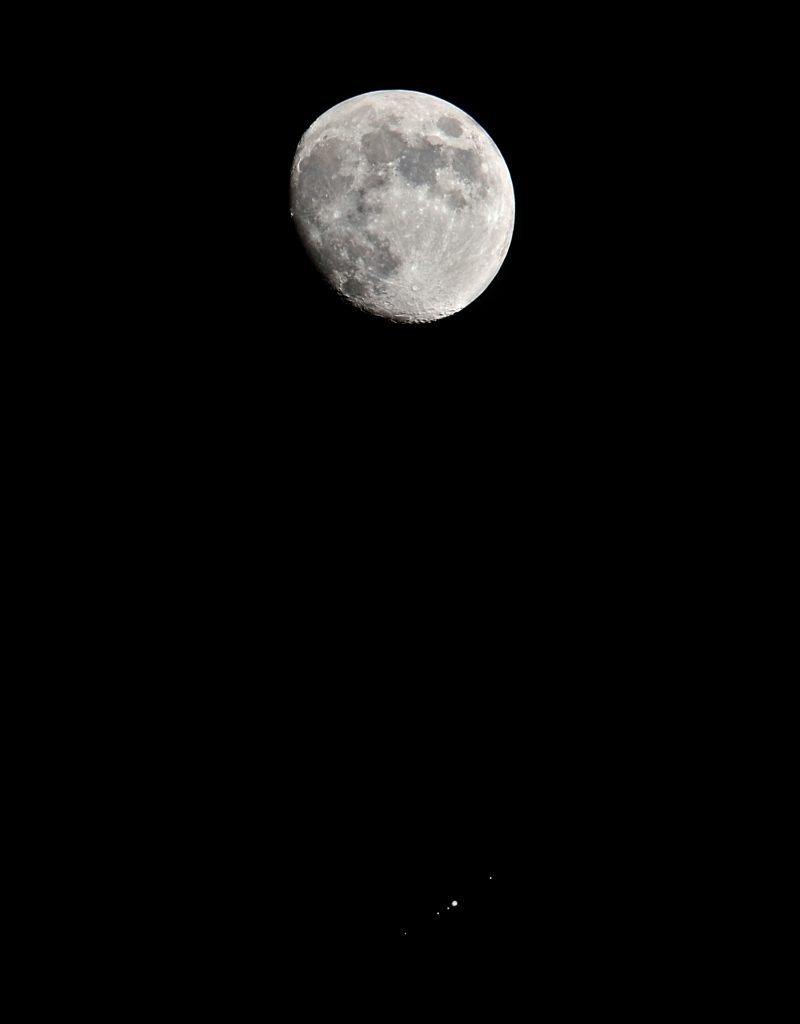
The Moon and Jupiter 7th May 2017
If one has used a telescope and DSLR on an equatorial mount (or even a substantial tracking mount) then exactly the same process could be carried out except that one would not need to correct for the trailing of Jupiter and its moons.
Return to Astronomy Digest home page