MAY 2017
The QHY PoleMaster – an innovative way to polar align an equatorial mount
[This is just one of many articles in the author’s Astronomy Digest.]
In order for an equatorial mount to be able to accurately track objects across the sky, its polar axis must be aligned on the North Celestial Pole. The accuracy does not need to be too great if one is visually observing but, if taking images, better alignment will allow longer exposures to become possible before star trailing is seen. Should the mount be autoguided, then fewer guiding commands will be needed and so the tracking will be further improved. This review is to highlight an innovative new device that can be used to rapidly align an equatorial mount to very high accuracy providing that the region around the Pole Star is visible.
The QHY PoleMaster
The PoleMaster, available from Modern Astronomy (www.modernastronomy.com/) for just under £300, uses a lens and sensitive camera system which is usually mounted at the front of the hollow polar axis tube to point along the Right Ascension axis of the mount. Mounting adapters are provided for a wide range of equatorial mounts. The adapter (figure top , having an anodized cover, remains on the mount. For use, the cover is removed (Figure, bottom left) and replaced by the Polemaster (Figure right). Impressively, a custom USB 2 connector is used which is screwed into the camera so eliminating a problem found with many cameras whose USB connectors can occasionally becomes unattached.
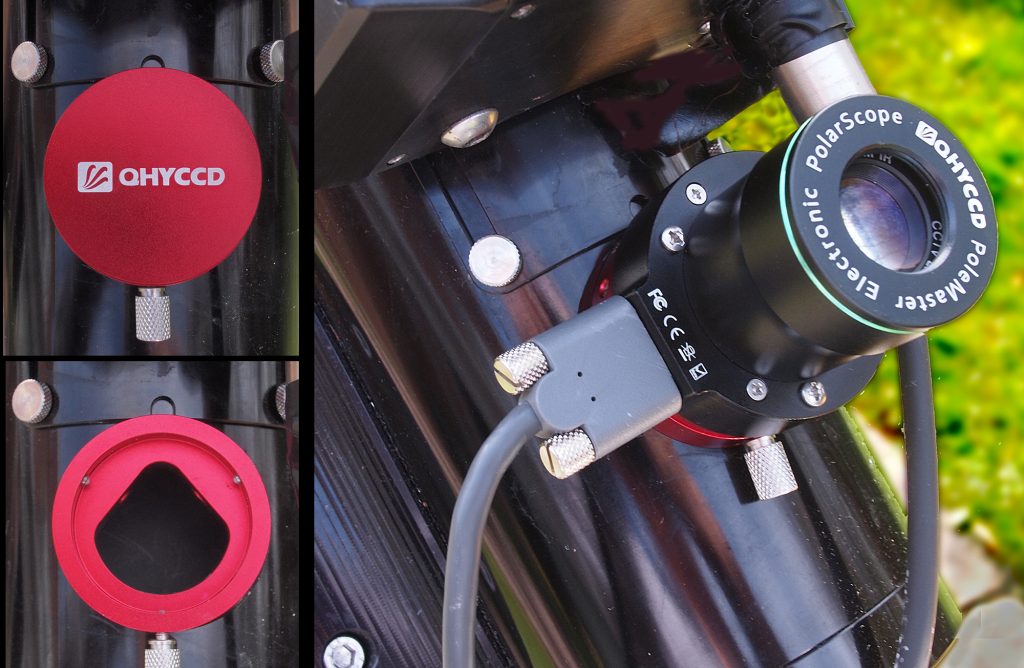
Mounting the QHY Polemaster
The highly sensitive camera, having a field of view of 11×8 degrees, is used to capture the region of the sky around Polaris. This allows nearby, fainter, stars to be imaged so allowing the software to calculate the position of the North Celestial Pole. I found (as seen in the following screen shots) that many stars were visible even though a full Moon was high in the sky.
The alignment procedure
The mount must be approximately aligned first. The first step is to make the base of the equatorial head horizontal as this prevents the altitude and azimuth adjustments interacting with each other. The polar axis need to be pointing due north and with an altitude dependent on the latitude which can be simply found clicking on your location on Google Maps. The second step is to point the polar axis towards true North. An obvious way is to use a compass and, usefully, in the UK true north is currently very close to magnetic north.
The software guides the user through the alignment process so, once the PoleMaster has been mounted along the mount’s polar axis, no reference to the manual is required. The first task is to set the sensitivity of the camera so that Polaris and its neighbouring stars are visible on the screen display as seen in the figure below. Polaris should be seen near the centre of the field of view but, if not, a first adjustment to the mount should be made.
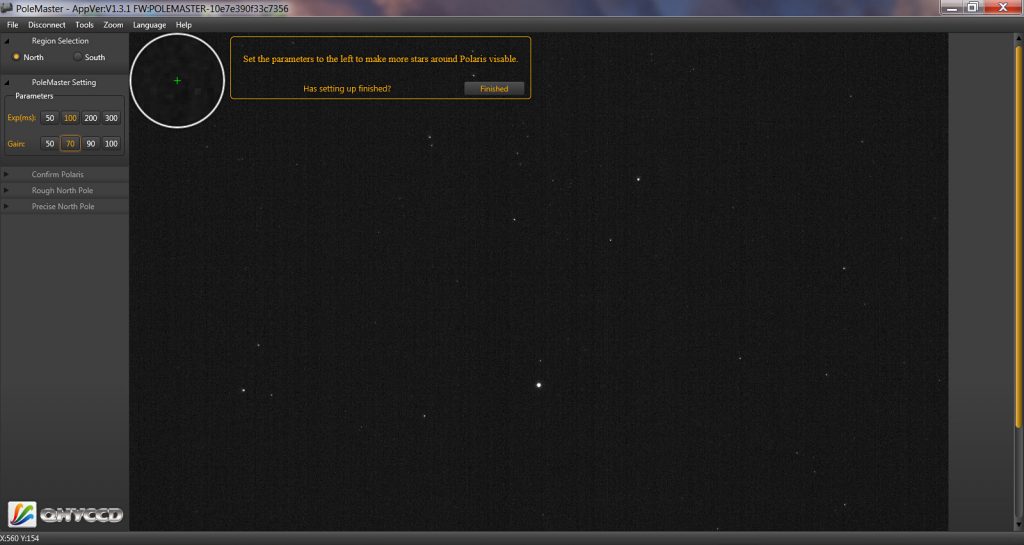
Polaris within the field
Polaris is double clicked upon and an overlay of five, red, circular patches is shown that can be rotated to align on five surrounding stars to confirm that Polaris has been correctly located as seen in the figure below. [Not all may be seen dependant on the position of Polaris.]
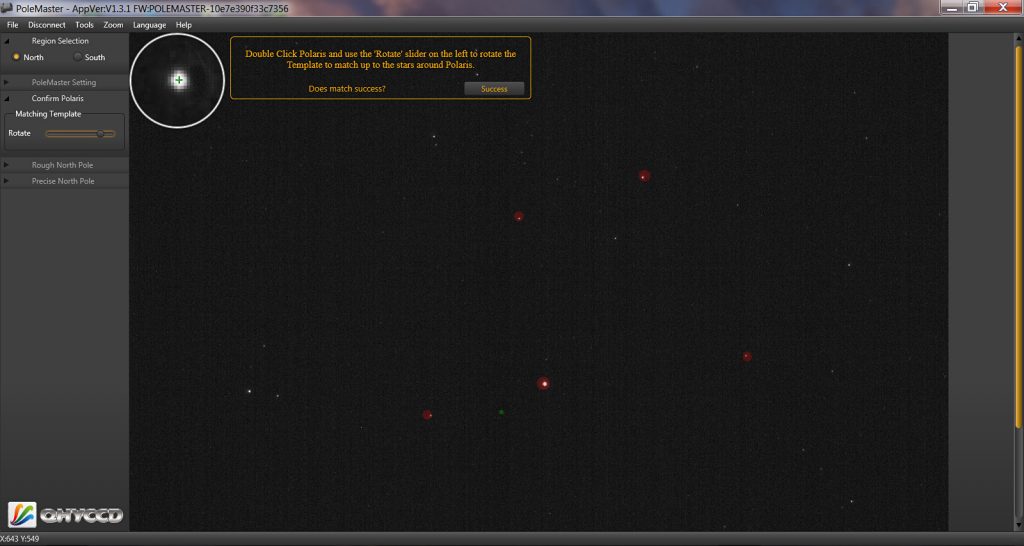
A set of masks is rotated to align on stars near Polaris so confirming that Polaris has been located
One of these stars is selected by double clicking on it, and the mount is then rotated in Right Ascension from its ‘home position’ by ~30 degrees. A green arrow, seen in the figure below, shows in which direction to rotate the mount and care must obviously be taken to prevent any collisions.
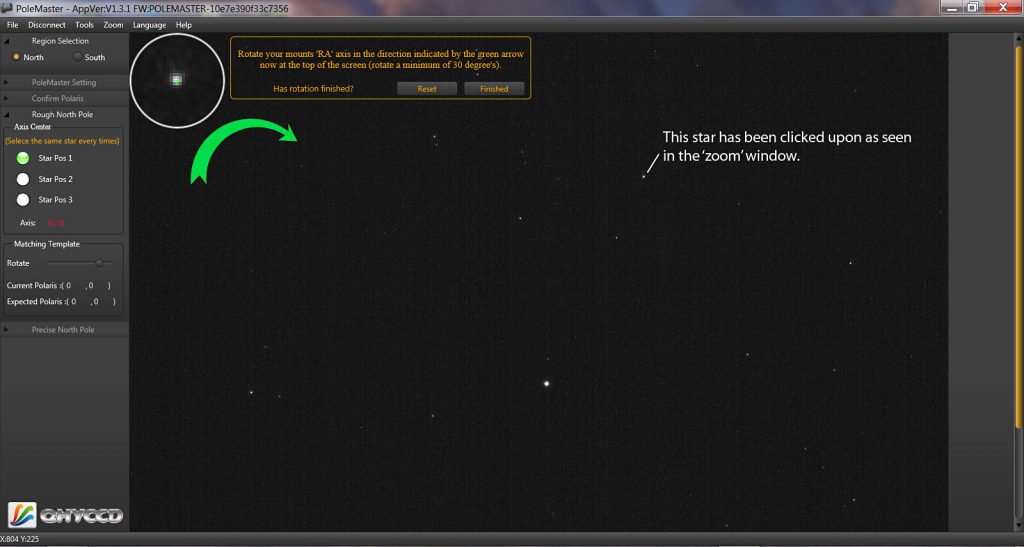
Preparing to rotate the RA axis
Once rotated, the same star is clicked upon and then the mount is then rotated by a further ~30 degrees and the star clicked upon a third time. This allows the software to calculate the position of the mount’s rotation axis as shown with a small red dot. Also at this point, a green circle appears, passing through the selected star and centred on the rotation axis of the mount, both as seen in the figure below.
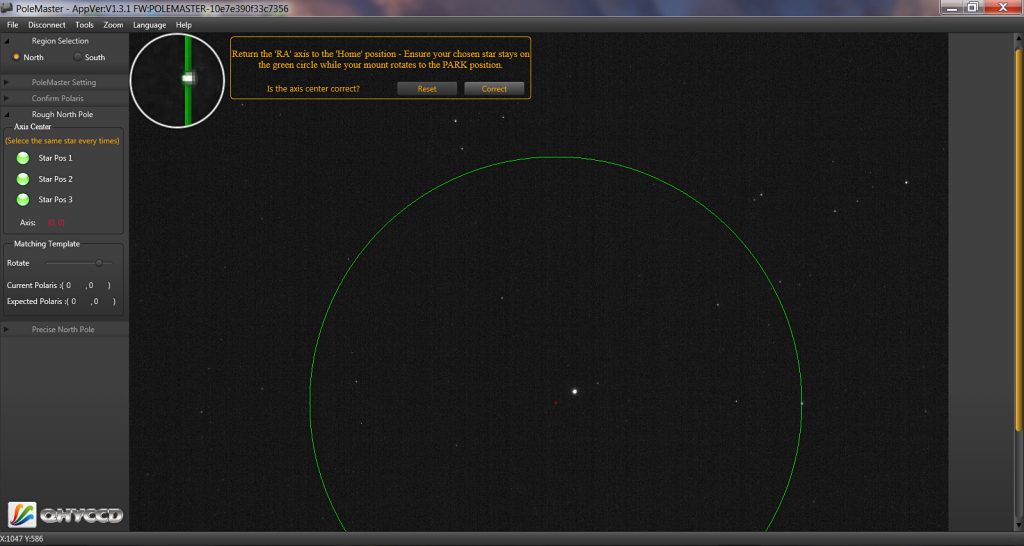
The rotation axis of the mount has been located at the centre of the green circle
The mount is slewed back to its original position in Right Ascension and, if all is correct, the selected star will be seen to follow round the circle back to its original position. The program will then place a small green circle on the screen and the mount’s polar axis is then adjusted in altitude and azimuth so that Polaris lies within this circle The figure below is shown as the adjustment is being made).
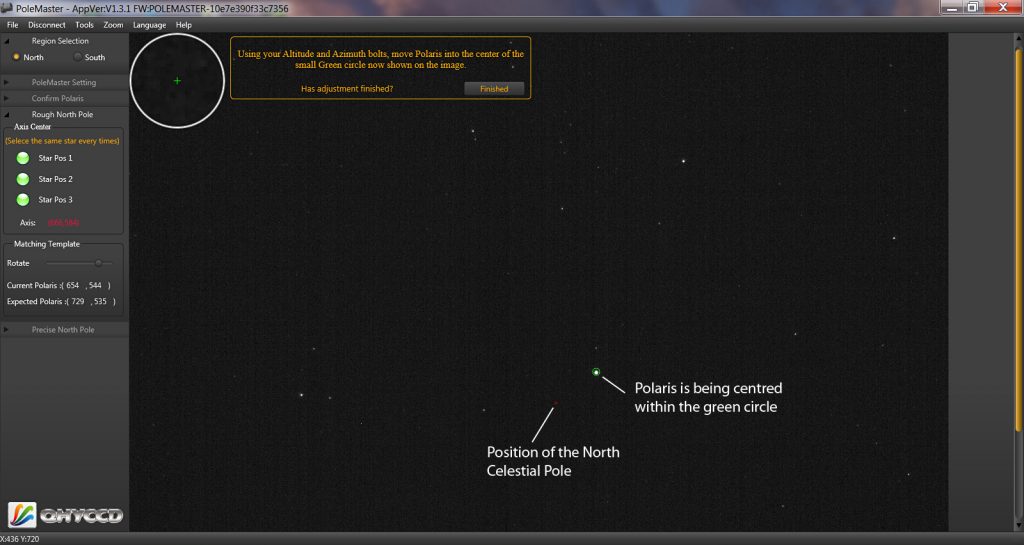
The mount is adjusted to bring Polaris into the centre of the small green circle
Once aligned, the user is prompted to click on the ‘Start Monitor’ button whereon small red and green circles appear on the ‘monitor’ screen as seen in below.
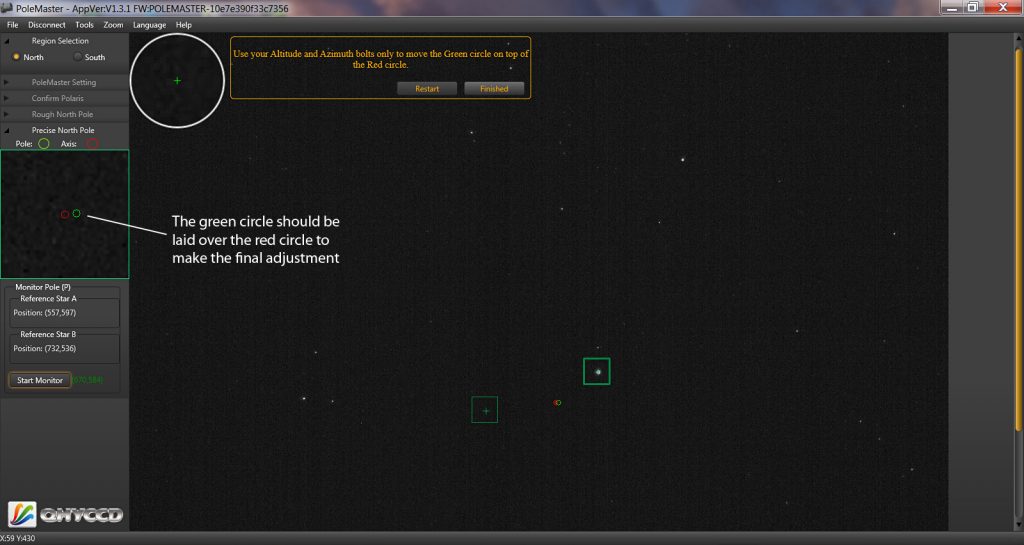
Initiating the fine adjustment sequence
Fine adjustments are then made to bring these together at which point the polar axis is aligned with an accuracy that can approach 30 arc seconds. [The typical accuracy when using a polar scope is ~5 arc minutes.] The whole process can be completed in close on five minutes. There are excellent video tutorials for its setup and use on ‘YouTube’. Having acquired one I found that it worked superbly, giving the most accurate alignment of my Astro-Physics Mach1 GTO mount that I have ever achieved.
A word of warning for those carrying out webcam imaging of the Sun, Moon and planets; for this use, the tracking can then be too good. I found that, having aligned my mount using the PoleMaster, the images being video captured stayed totally stationary on the sensor and the resulting stacked image showed the sensor pattern in the form of an obvious grid. To prevent this, the alignment should be slightly less than perfect so that objects being imaged move very slowly across the sensor during the taking of each video sequence. This will remove any sensor pattern, better sample the colour if a colour webcam is used and reduce the effects of any dust moats on the sensor.
In short, I believe that the QHY PoleMaster will totally change the way that equatorial mounts are accurately aligned in future and cannot recommend it too highly.
Note: the PoleMaster can be used with the SharpCap imaging program to carry out polar alignment. This uses ‘plate solving’ and I think that using it is better than the technique used in the PoleMaster software.