JANUARY 2020
The Sony A7S (rather than the A7S II): could this be an astrophotographer’s dream camera?
This is one of ~60 illustrated articles to be found in the author’s Astronomy Digest.
I thinkthat the answer is yes – but there is one point that must be addressed first whichis relevant to the title; the Sony ‘Star Eater’ problem. To ‘improve’ the low light performance of theSony α7 range of full fame mirrorless cameras, Sony chose to implement a noisereduction algorithm which was applied when long exposures are taken and,annoyingly for astrophotographers, this was also applied to the raw files. Aiming to eliminate hot pixels, the algorithmtended to remove small stars as well − hence the name. There are some ‘workarounds’, in particular byusing a ‘continuous’ shooting mode for which details can be found on theweb. In the later Sony α7S II, the noisereduction was applied to any exposures longer than ~3 seconds but, pleasingly,in the Sony α7S it is only applied when in ‘bulb’ mode so defined exposures upto 30 seconds in manual mode are not affected. As I explain in the digest article ‘What exposure to use forAstrophotography’, I feel that the effect (not quite) of a single long exposureof, say, 30 minutes, is best achieved by aligning and stacking 60, 30 second,exposures so for the Sony α7S I do not believe that this a real problem.
So it could well be that the older Sony α7S is a better buy than the α7S II and the new price for the body has dropped to ~£900. In addition, they are now available in some numbers on the second hand market with ‘good’ copies available for ~£600. I was able to acquire one in very good condition for this sum which, pleasingly, had a very low shutter count.
An Imaging Example
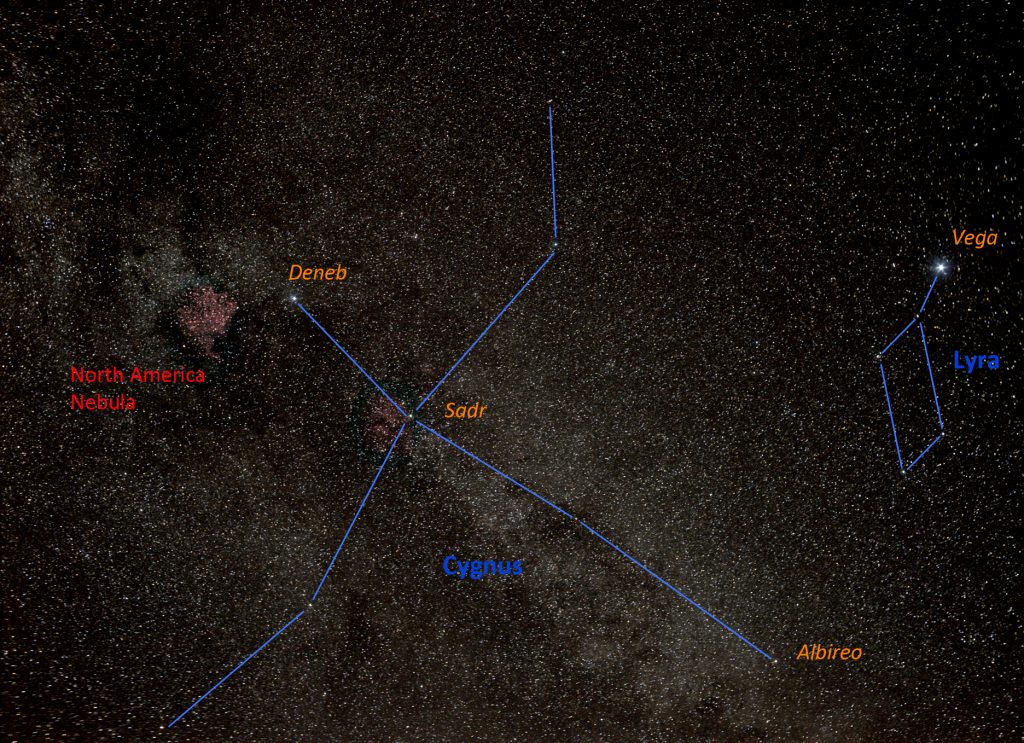
This image of the Cygnus and Lyra constellations was taken using a Zeiss 45 mm Planar lens – one of the sharpest Zeiss lenses ever made.
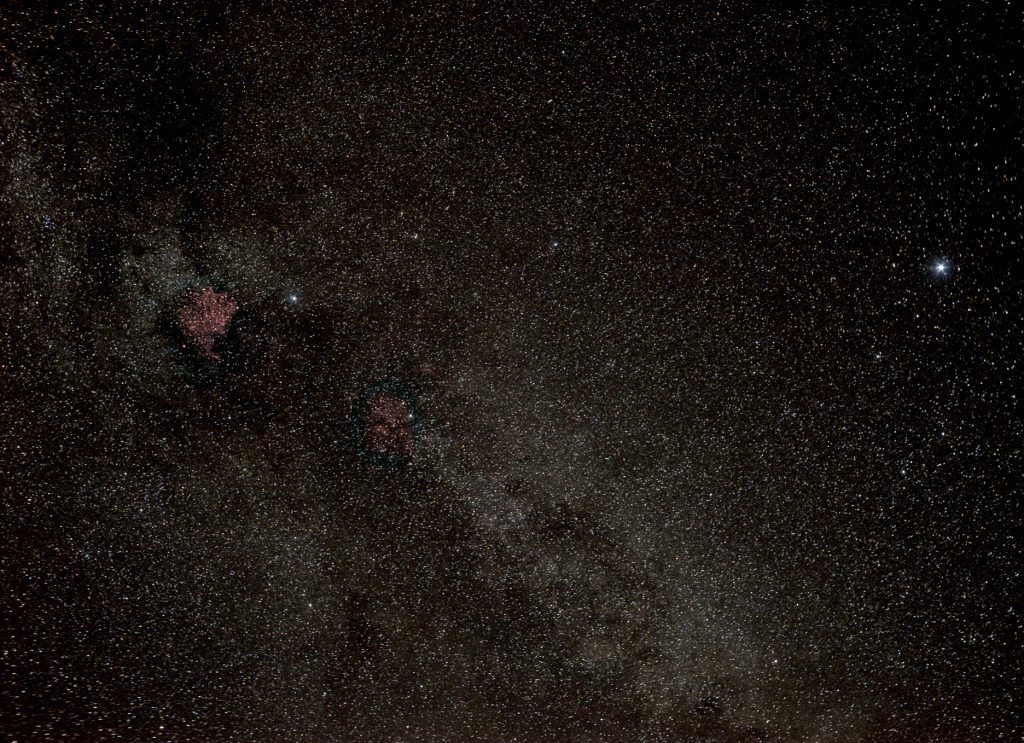
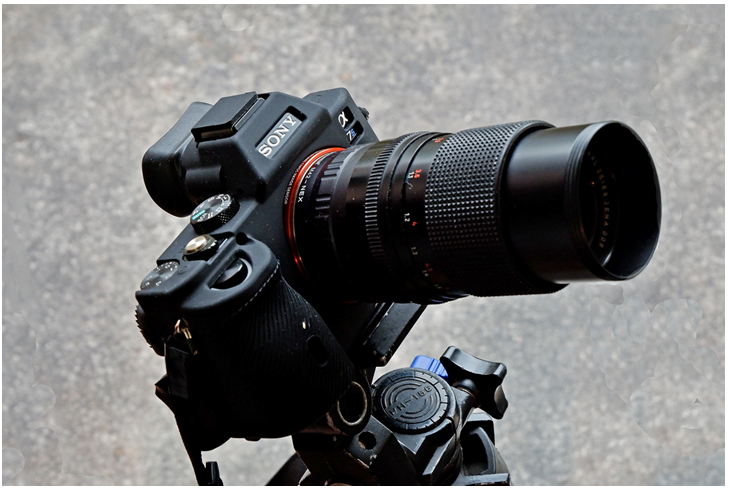
This image was taken using the Sony A7S coupled with a Zeiss 135 mm lens using a M42 to Sony E-mount adapter.
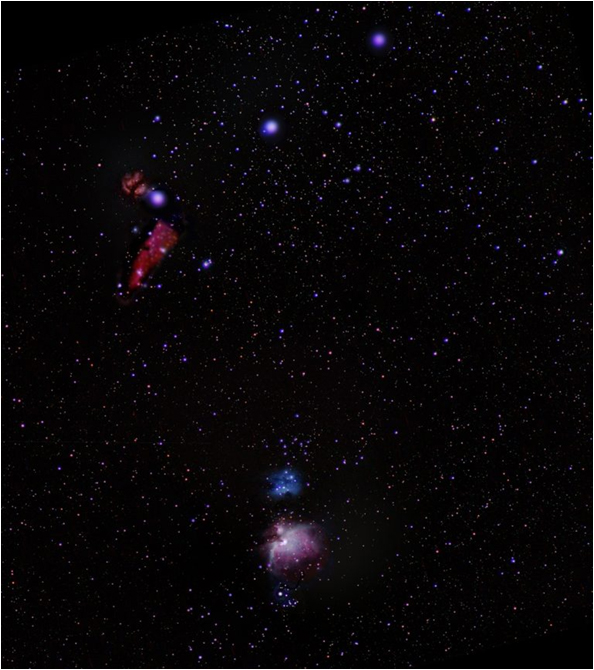
Pleasingly, both the Flame and Horsehead nebula are visible close to Alnitak, the lower left star of Orion’s Belt.
Unlike anyother modern full frame camera, the α7S series has just 12 megapixels − when 24or greater has become the norm. As thepixels are larger, each pixel can collect more light and so the camera hasexcellent low light capabilities so, at first sight, making it better forastrophotography than the high resolution full frame cameras. This is not quite true. Assuming the quantum efficiency is the same,what really matters is the total size of the photon collecting area and thiswill remain fairly constant independent of the number of pixels on the sensor. To make a real comparison, one needs tocompare the noise performance of a high resolution sensor such as that in the Sonyα7 III when scaled down to the same size (in pixels) as the α7S. This will average or ‘bin’ adjacent pixels soreducing the noise. It turns out thatthe effective sensitivity is pretty much the same.
There is, however, a real advantage for astrophotography − that when aligning the camera on its target. By initially setting a very high ISO, the ‘live view’ enables faint objects such as, for example, the pair of galaxies M81 and M82 in Ursa Major to be visible without having to take trial exposures to make them appear in the frame. I have often spent several minutes taking a number of exposures in order to align and orientate a camera when either using a lens or when mounted on a telescope (when the problem tends to be worse as the focal ratio is typically greater). One will, of course, reduce the ISO, as discussed below, before actually taking the series of frames to image the field of view.
The α7S has a very high quantum efficiency of 62% (greater than the α7S II at 55%) and each pixel can hold ~153,000 electrons (its well depth) before saturating − higher, I believe, than any other camera save the α7S II which is fractionally greater. This is not surprising as their pixels are typically 4 times the size of other full frame cameras. This should help in giving it a high dynamic range.
Imaging Meteors
The very high sensitivity should make perfect to capture meteors, either when doing a continuous sequence of, say 20 second exposures – when many more meteors will appear than seen by eye – or making a video when, with a very high ISO of say 12,800, 1/30th of a second exposures can be used to follow their path towards the ground. I doubt that this would be possible with any other camera. Alyn Williams has a Youtube video showing this in action.
All mirrorless cameras have two advantages (onegreat) over a DSLR.
Firstly, asthe distance from the lens flange to the sensor is less than that in a DSLR, ‘nonretrofocus’ lenses can be designed which may give a better image quality. (Not all use this advantage; the ‘kit’ lensfor the α7S has a lot of space between the rear element and the lens mount andis almost certainly an adapted DSLR design.)
Secondly, and of real importance, is that by the use of adapters (such as those made by K&C Concept for ~£25) it is possible to mount full frame lenses from almost any full frame DSLR or Film camera system onto the A7S e-mount. They will need to used in manual focussing mode when astroimaging (as one would in any case). This makes available a vast range of legacy full frame lenses which can be used and I have adapters so that I can mount lenses from my collection of Nikon film camera lenses, some full frame lenses made for my Sony A-mount DSLR camera and also, the Zeiss lenses that I acquired for my Contax G film camera. It is great to give them a new lease of life! One example is the Tamron Adaptall 24mm f/2.5 which, when stopped down to f/4, has an excellent performance. They can be obtained for £60 to £100 along with an adapter to enable it to be mounted on the α7S. This lens is perfect for wide field imaging of the Milky Way with a full frame camera. [The K&C Concept adapters will, where possible allow the lens aperture to be set but for lenses which have an included aperture control, simpler adapters can be used such as, for example, some of my legacy Nikon lenses such as the Micro Nikkor 55mm or Nikkor 200mm lenses.]
What ISO to use for astrophotography
There is adetailed article in the digest which would be well worth reading. Many Sony camera are aid to be ‘ISOInvariant’ meaning that it is possible to use a lower ISO than one wouldnormally use and then increase the brightness of the fainter objects (stars ornebulae) in the image in post processing. This preserves the dynamic range so that the brighter stars are notbrightened as much as fainter objects. If a higher ISO is used the all parts of the image are brightenedequally in camera so that the brightest parts of the image may be blown out –such as the ‘Trapezium’ region in the Orion Nebula and the heart of theAndromeda Galaxy. At low ISOs, the Sonyα7S is not as ISO invariant as many other Sony cameras as its sensor has a ratherdifferent amplifier-gain architecture than most current Sony sensors. There is an unusual step in itscharacteristics when ISO 2,000 is reached where it is believed that theanalogue to digital converter switches to a low read noise mode. Beyond this ISO, the camera is essentiallyISO invariant. As increasing the ISO alwaysreduces the dynamic range I suspect that, in general, the use of ISO 2,000 or 3,200would be best for astroimaging. However, in order not to over expose verybright regions in an image as mentioned above it may then be better to use alower ISO to give a greater dynamic range.
Focussing
Using amanual lens (or an autofocus lens in manual focussing mode) there is a focusmagnifying feature. If the ‘c3’ button (‘delete’when viewing images) at the bottom right of the camera is pressed, an orangesquare appears in the centre of the frame. This can be moved across the frame by pressing on the control ring. By pressing the centre ‘OK’ button this area is magnified first by 4.2 timesand, with a second press, by 8.3 times. Thoughslower, this enables a more accurate focus to be achieved than with the ‘focuspeaking’ feature. For astrophotographyuse, I have often carried out this procedure in daylight and then taped up thefocus ring. In fact, the older nonautofocus lenses usually have an accurate end stop at infinity so thatfocussing is not a real problem.
Tilting Screen
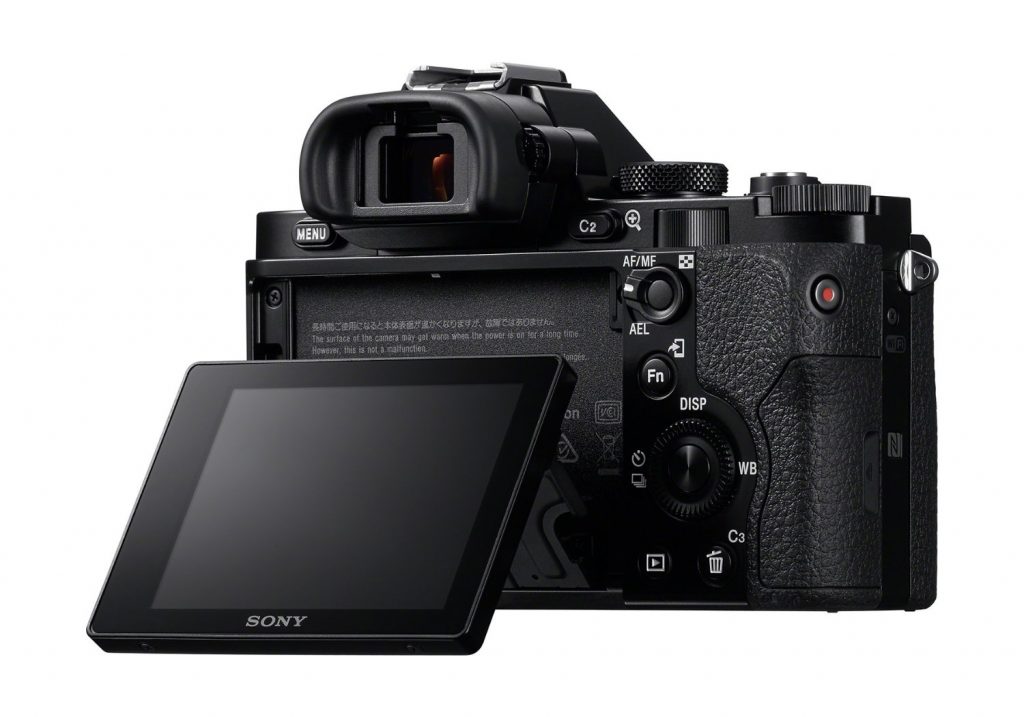
The α7S hasa tilting screen which makes it ideal when imaging at high elevations. There is a second advantage: when opened out,it allows air to reach the rear wall of the camera behind which lie thecamera’s electronics and so helps to keep the sensor cooler thanotherwise. It would even be possible toinsert a small icepack between the screen and rear wall so applying some‘active’ cooling to the camera.
Long Exposure Noise Reduction
By default,when taking long exposures most cameras employ this technique to remove hotpixels from the image. The α7S is noexception. A second exposure (a darkframe) of the same length is taken with the shutter closed and the twodifferenced in camera. This is fine whensingle exposures are taken but probably not when a long sequence of exposuresis taken when astroimaging. Firstly andobviously, it halves the total time capturing photons from the sky andsecondly, but not so well known, the dark frame actually adds some noise intoeach frame. Hot pixels can be removed inpost processing and so it is almost certainly best to switch off the process inthe camera’s menus.
Camera Control when astroimaging.
When astroimaging one often takes a series of short exposures, say 30 seconds, which will then be aligned and stacked in Deep Sky Stacker or Sequator. It is obviously good if these exposures can be taken automatically. Some cameras, such as my Fugi X-A10 have an internal intervalometer mode but, sadly, the Sony α7S does not. There are, however, two ways in which the taking of a sequence of short exposures can be made
- Using an external intervalometer
Costing ~£15 the control cable can be plugged into the micro USB port and set to give the desired number of exposures with its interval set to a few seconds longer than the manual exposure to allow time for the frame to be written into the SD card.
2. Using the camera’s WiFi facilty with an app running on a smartphone or tablet
I have used two free Apps called Timelapse and DSLR Dashboard to actas intervalometers which run on my Samsung tablet. Selecting the ‘Smart Remote Embedded’ in thecameras applications menu, a password was provided that was inputted into Time Lapse to initiate the WiFi linkingbetween them. The App first allowssingle exposures to be taken to enable the camera to be aligned onto the targetobject(s). When a single image iscaptured, it appears in the ‘gallery’ and can be zoomed into to check that thelens is focussed on ‘infinity’. It can thenbe used to take a sequence of frames.
Having linked the camera to my Samsung Tablet in the Time lapse App, I then found that Icould then control the camera using a rather more versatile App, DSLR Dashboard.
Battery Charging
My, secondhand, α7S came with an external mains power supply which provides 5 volts overa micro USB cable to plug into the micro USB port when the camera is off. Thischarges the battery internally. (Anorange LED beside the USB port shows when the battery is being charged.) This can be useful when driving as the batterycan be charged using a 12 volt to USB 5 volt converter (such as the Anker CarCharger ~£6 from Amazon).
Howeverthis is not good when several batteries are needed to be charged − and theywill be as the A7S battery is really rather small. (But, pleasingly, the same battery is used asin my Sony A5000 camera.) In this case, itis best to buy a dual battery charger with two batteries such as the Powerextracharger available from Amazon for ~£19.
Using a ‘dummy’ battery.
As thecapacity of the batteries used by the camera is not great, for seriousastrophotography use it may well be best to use an externally powered dummybattery. They can either be powered fromthe mains as a combined unit or with 5 volts from a USB port. I think that the latter will be best. This type could either be powered from the mainsunit that was supplied with the camera to internally charge the battery. A better solution would be to use a ‘powerbank’ as used with smart phones or tablets. These, such as my Grundig, 8,000mAH capacity unit, will easily power afull nights imaging.
Could the α7S be used as a general purposecamera?
In thiscase one would probably want to acquire lenses which are autofocussing andperhaps image stabilized. The goodquality, image stabilized, Sony 28-70 mm f/3.5 to 5.6 ‘kit’ zoom can beobtained second hand for ~£140.
General Photography
Does oneneed more than 12 megapixels? Veryrarely, and it is possible to make prints of 14 inches by 10 inches at 300 dpiand even ‘competition’ prints at 16 by 11 inches would still be at ~260dpi. A little interpolation andsharpening could provide excellent prints for any normal use.
I have tosay that, though less in weight than my Nikon D610 DSLR, it is not light incomparison to my mirrorless APS-C cameras and I will continue to use these forgeneral ‘out and about’ use. Inparticular, my 21 megapixel APS-C Sony A5000, which is reviewed in the digest,has a tiny extending kit lens and fits easily into a jacket pocket.
Landscape Photography
This is wherea higher number of pixels could well be required. But, usually, the subject is static and soone can ‘stitch’ a number of frames (which are taken using a longer focallength lens) together in software such as the (free) Microsoft Ice program. The α7Shas a 4240 x 2832 pixel sensor. If the camera is held vertically and threeoverlapping frames are taken and combined, a similar proportion 3×2 image willresult having 6360 x 4240 pixels, giving nearly 27 megapixels! I have done some tests stitching three imagestaken with a focal length of 58 mm and compared the result with a single imagetaken at 38 mm giving the same field of view. The stitched result is obviously a lot sharper, but what I was notexpecting is that, when reduced in size from 27 megapixels down to 12, the stitchedresult is still significantly sharper than the 12 megapixel image.
Video Photography
The Sony α7Swas not designed for astrophotography − it was really designed to take videos inlow light and can even output 4K video to an external storage device. It can produce excellent AVCHD 2.0 videos andcan also use the higher quality XAVC-S codac. It has provision for an external microphone (quite common on DSLRs) butalso allows the use of headphones (which most don’t). This is another of my interests and is amajor reason why I have purchased both the camera and the 28-70 imagestabilized lens mentioned above.
Conclusion
If I am honest, I do not really expect to take higher quality astrophotos than with my Nikon D610 full frame camera which has a superb 24 megapixel sensor. But I do think that it will be easier to use; the alignment problem is greatly eased and the WiFi remote control ability very useful. As its size and weight is less, I will be more inclined to take it with me by air to dark sky sites and so perhaps produce better images than with the Micro 4/3 or APS-C cameras that I have, so far, been using when travelling afar.