AUGUST 2021
Tri-band and other narrow band imaging of emission nebulae with a colour camera
[This is just one of many articles in the author’s Astronomy Digest.]
Narrow band filters, be they Dual-Band, Tri-band orQuad-Band filters enable images of emission nebulae to be captured using colourcameras under light polluted skies.
Emission nebulae are objects such as star formation regionslike M42, the Orion Nebula, Planetary Nebula such as M27, the Dumbbell Nebula,and Supernova Remnants such as M1, the Crab Nebula. These emit much of their light in four wavelengths,those of the Hydrogen Alpha (H-alpha) and Hydrogen Beta (H-beta) spectral lines, twoclose Oxygen III lines and the Sulphur II spectral line.
These are often imaged using monochrome astro-cameras and a set of narrowband filters but it is both expensive to buy the suitable filters and somewhat complex to make separate images through them and the combine the resulting images. Although, in principle, it does not take more time as mono cameras are more efficient with all pixels in use for each band.
Many astroimagers now use colour cameras; either colourastro-cameras or DSLR and mirrorless cameras that have been modified to be moresensitive (from 25% to ~95%) at the red H-alpha wavelength. For imaging these objects from urbanenvironments, one can now buy a variety of filters to pass two or more of thesespectral line wavelengths but which greatly reduce the effects of sky gloweither from terrestrial light pollution or moonlight.
The strongest lines are that due to H-alpha in the red and OIII in the green parts of the visible spectrum. Less strong is the H-beta line in the blue-green with the weakest being theSulphur II line in the deep red.
At a cost of near £1,000 it is possible to acquire a ‘quad-band’ filter that has very narrow band passes at all four spectral lines. This will essentially eliminate all sky glow and is, perhaps, the perfect choice. – but their are less expensive alternatives.
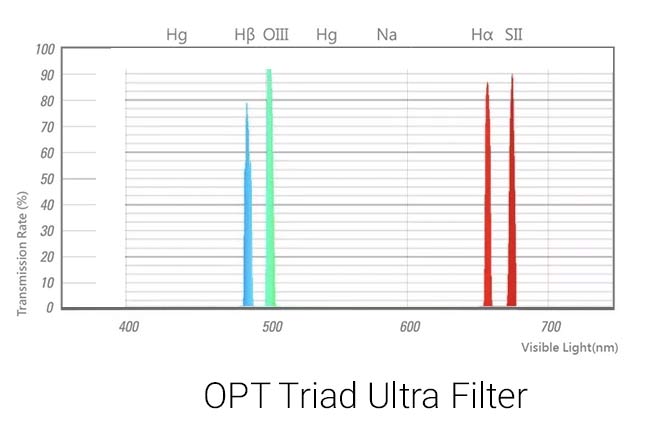
Altair Astro in the UK provide three filters to cover virtually all requirements.
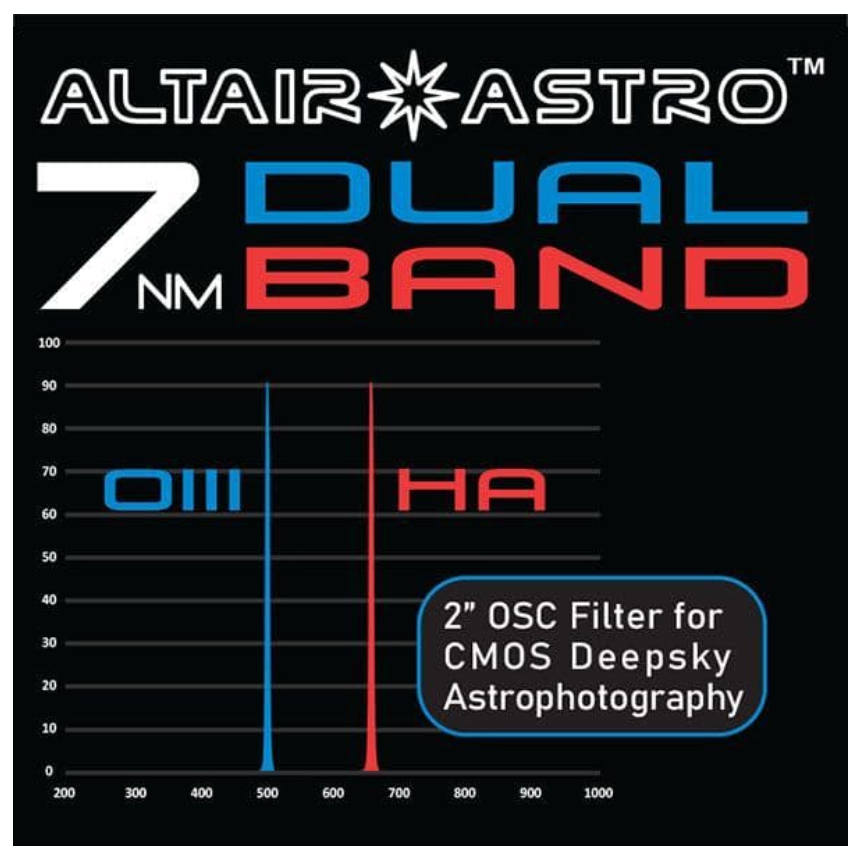
Their latest product, at a cost of £235, is a 2″ dual band filter with two very narrow bands of 6.5 nm and 7 nm covering the H-alpha and O III spectral lines respectively. Their total bandwidth of 13.5 nm compared to the 300 nm of the visible spectrum covered by LED streetlights means that light pollution is virtually eliminated – wonderful for imaging emission nebulae from urban locations. It incorporates an UV/IR blocking filter and anti-reflection coating.
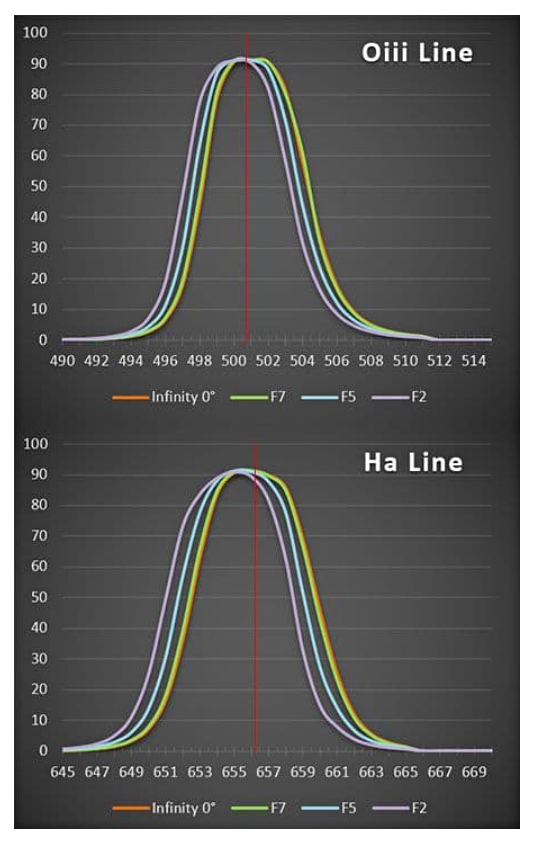
The filter employs ‘Flat Top Spectral Shift Compensation’ so it will work very well with very fast f-ratio such as the ‘Fastar’ converted Celestron Schmidt-Cassegrains or their 8” Rowe-Ackermann Schmidt Astrograph f/2 telescope.
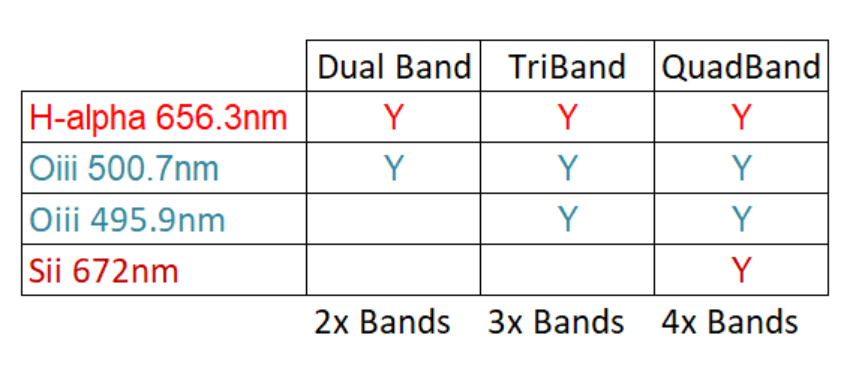
One can also purchase their ‘Tri-Band’ (from ~£139 upwards for 2″ filters) or ‘Quad-Band’ (from ~£160 upwards for 2″ filters) filters. Pedantically, one could argue that neither title is correct as both have only two pass bands. Neither does ‘Tri’ or ‘Quad’ define the number of spectral lines acquired. As seen in the diagram below, Tri-Band filters have a narrow pass band to select the H-alpha wavelength and a broader pass band which passes the two O III wavelengths along with the H-beta line.
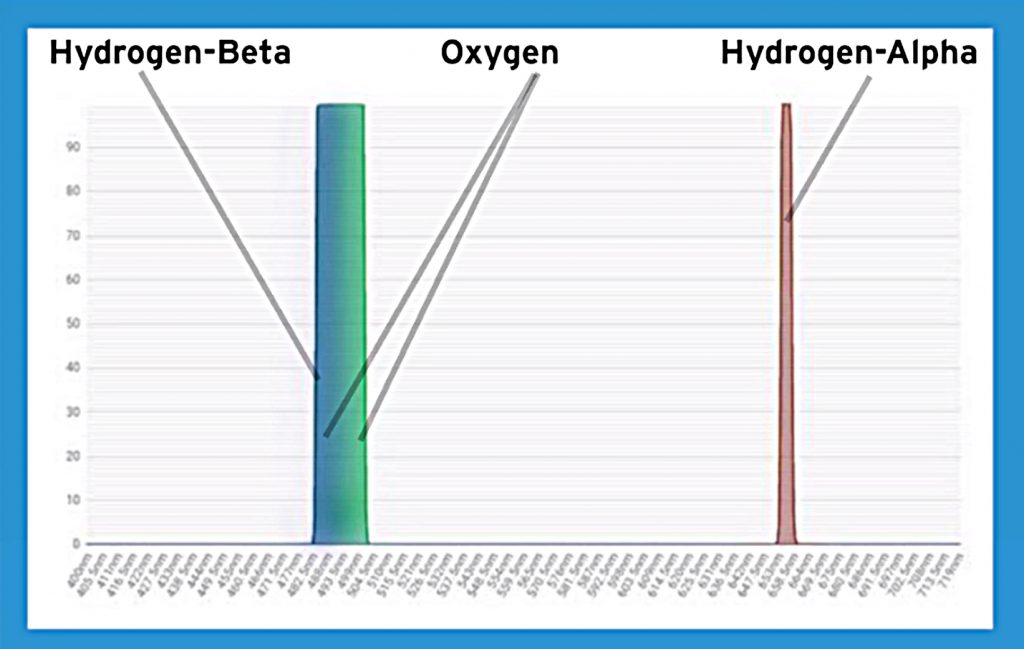
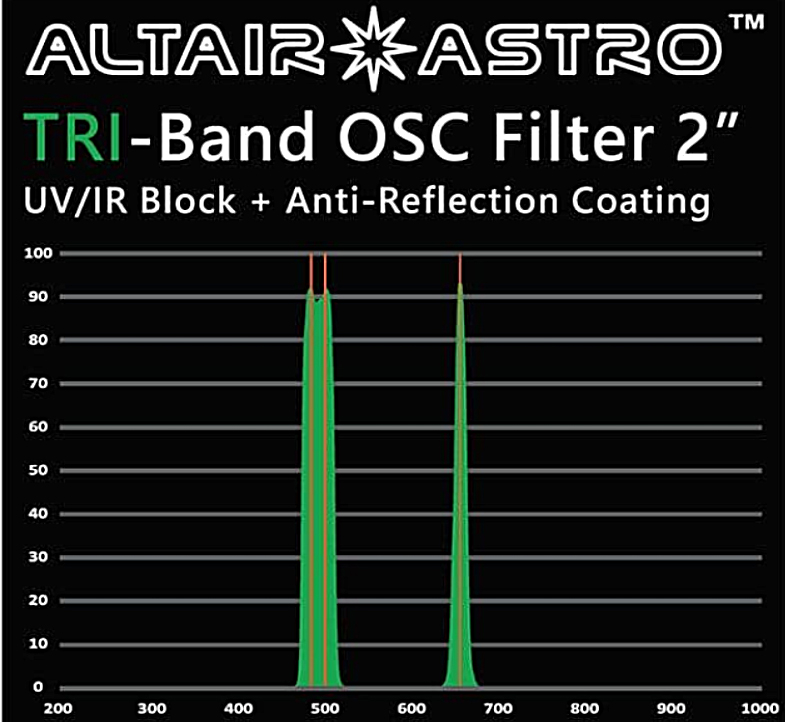
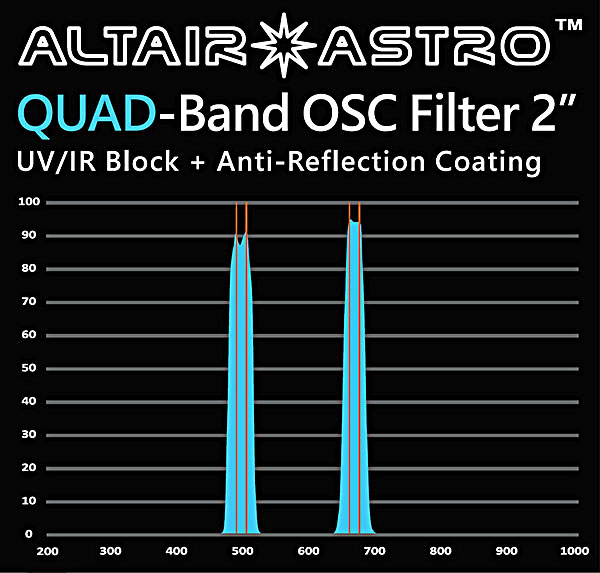
In the case of the Quad-Band filter, the band in the redpart of the spectrum is broadened so that it also encompasses the S IIwavelength. They do, however, correctlydefine the number of elements whose spectral lines are captured.
The total bandwidth of the AA Tri-Band filter is 47 nmcompared to the visible bandwidth of from ~400 nm to ~700nm, so some 300 nmwide. Given that the LED street lightsin use are now are full spectrum, the amount of sky glow captured from them whenusing the filter should be significantly reduced as would also be the case whenimaging in moonlight. Perhaps it shouldbe pointed out that if imaging from a very dark site with no Moon, such filterswould not be needed.
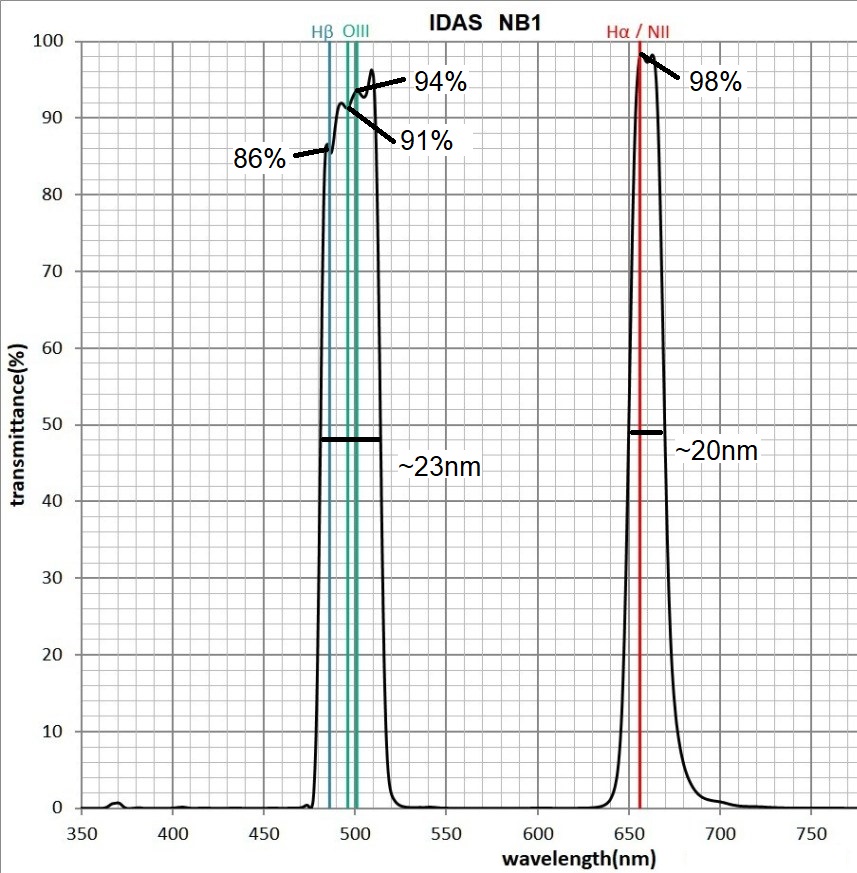
A similar ‘Tri-Band’ filter is the IDAS N-1 filter costing£189.
An imaging example –the Witch’s Broom Nebula
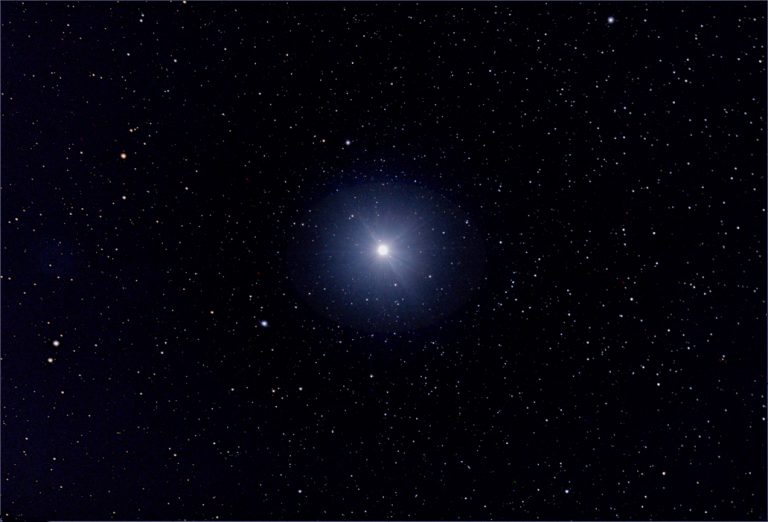
This is part of the Cygnus Supernova remnant and lies adjacent to the star 52 Cygni. This was the first object that I chose to image having acquired the AA Tri-Band filter. The sky transparency was very poor so that the effects of light pollution were very marked. It was, however, close to New Moon. Using the ‘Blackwater Skies’ field of view calculator I found that it would be nicely encompassed when using a Teleskop Service (TS) 90 mm, f/6.6, triplet refractor allied to the Altair Astro 294c PRO cooled colour camera employing a Micro 4/3 sensor. The superb TS 2″ field flattener was employed to remove the effects of field curvature. This combination is capable of producing superb images showing no obvious chromatic aberration and pinpoint stars across the field – as that shown of the region surrounding Vega below.
A total of 211, 30 second exposure, ‘light’ frames weretaken followed by 20, 30 second exposure, ‘dark’ frames. Both sequences taken at a temperature of -15Celsius. No bias frames were required asboth the exposure time and sensor temperature were the same. With the 4/3 sized sensor, no ‘flat’ frameswere required either. The Astro-Physicsmount’s tracking easily allows for up to 60 second exposures without guidingand, for these exposures, the image was moving across the sensor by ~0.2 arc seconds during each exposure and sonot materially affecting the sharpness of the single frames.
I aligned and stacked the light and dark frames using two programs; Deep Sky Stacker and Affinity Photo (a superb low cost program!). Affinity Photo is quite processor intensive but, using an i7 desktop processor, it was able to stack the 211 frames in 5 minutes – having rejected three frames. The AA 294c accentuates the green part of the spectrum hence the prominent green cast. Some evidence of the nebula is visible beneath the sky glow.
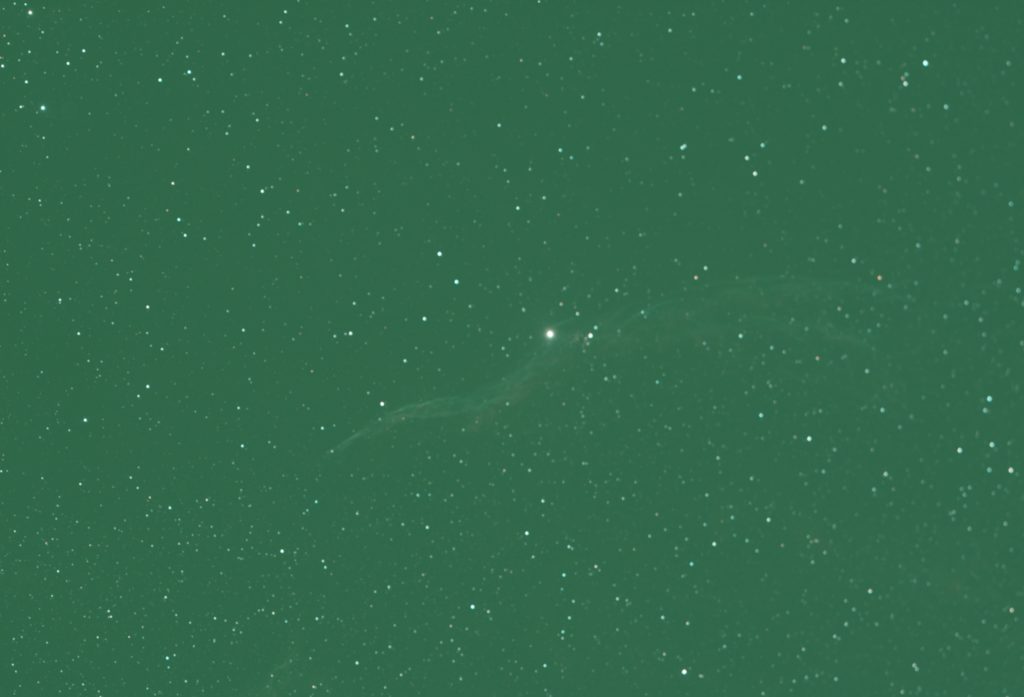
Comparing the stacked result from the two programs, it wasapparent that the image of the bright star, 52 Cygni, was ‘tighter’ in theAffinity Photo result and so this was used for further processing.
Using the ‘Info’ tool it was possible to see that the skyglow was uniform across the field – perhaps not too surprising as the nebulawas being imaged at high elevation. Thismade it very easy to remove: the image was duplicated to give two layers, theupper layer was smoothed using a Gaussian Blur of 40 pixels, the paint brush wasused to select the colour away from the nebula regions and then to paint thewhole layer with this colour before, finally, the two layers were flattenedusing the ‘Difference’ blending mode.
The use of ‘levels’ or curves can then be used to lift upthe fainter regions of the image to give the following result.
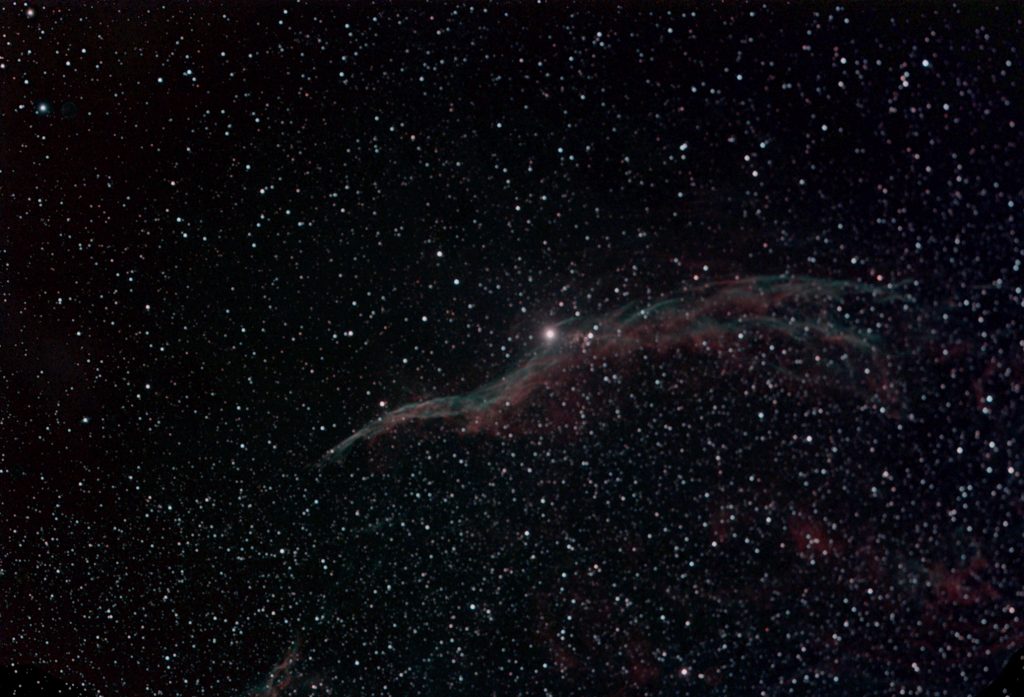
In the Digest there is an article entitled ‘Using Starnet++ to help enhance Nebulae images‘ that describes how this program can separate the image into two; that containing just the nebula and that containing the stars as seen below.
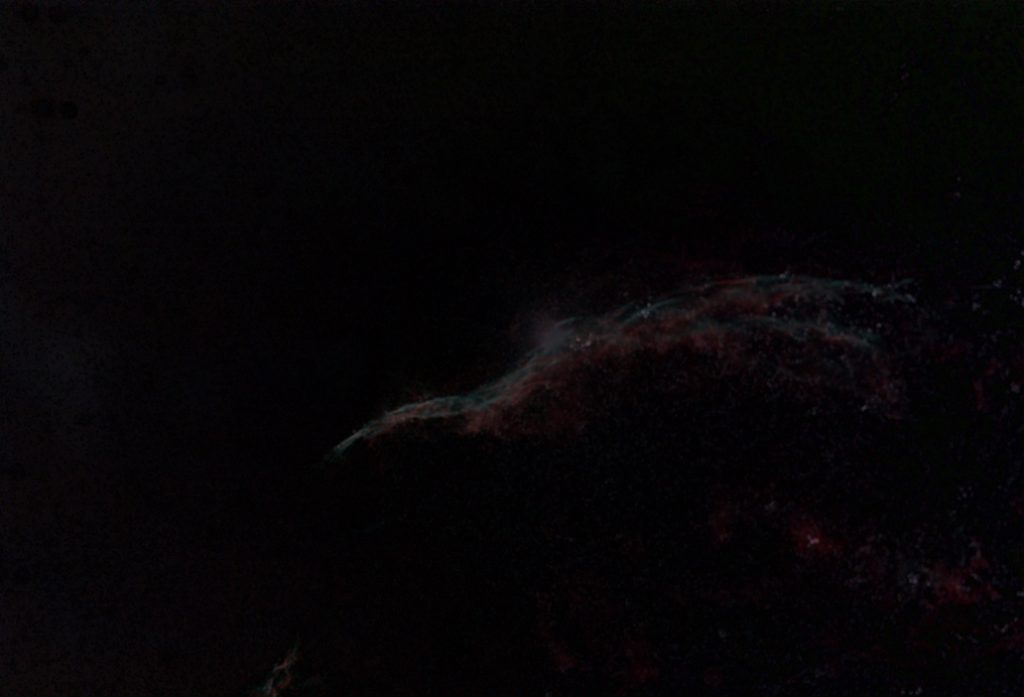
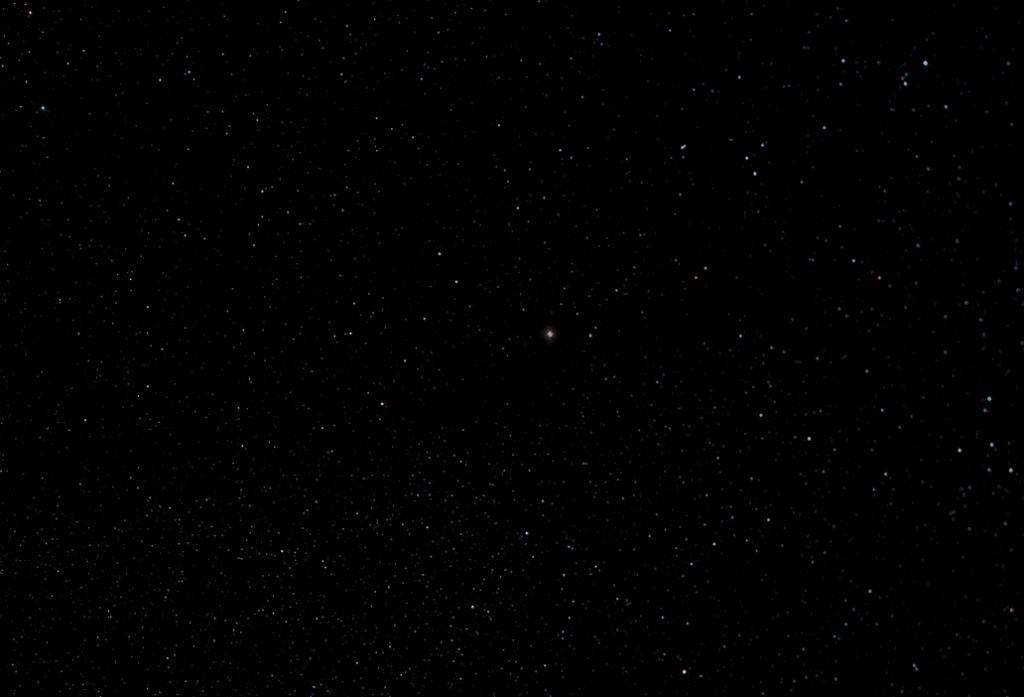
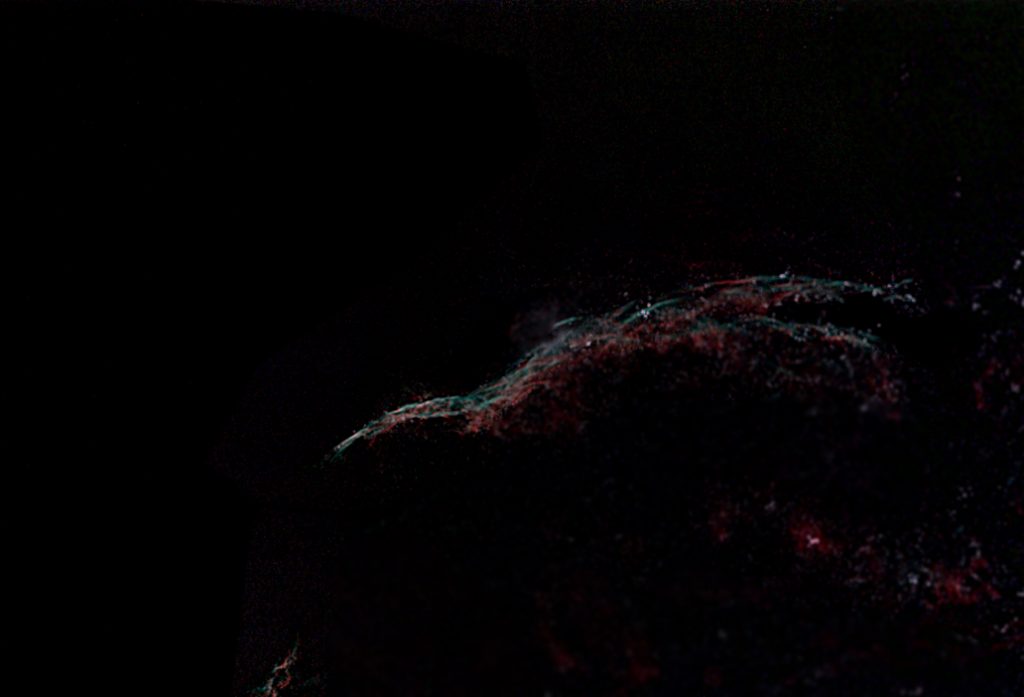
It is then possible to enhance the nebula using the ‘Unsharp Mask’ filter with a large radius and small amount and the ‘Smart Sharpen’ filter with a small radius and an amount adjusted to suit.
The ‘stars’ image in then overlaid over the enhanced nebula image and the two flattened using the ‘Screen’ blending mode to give the final result.
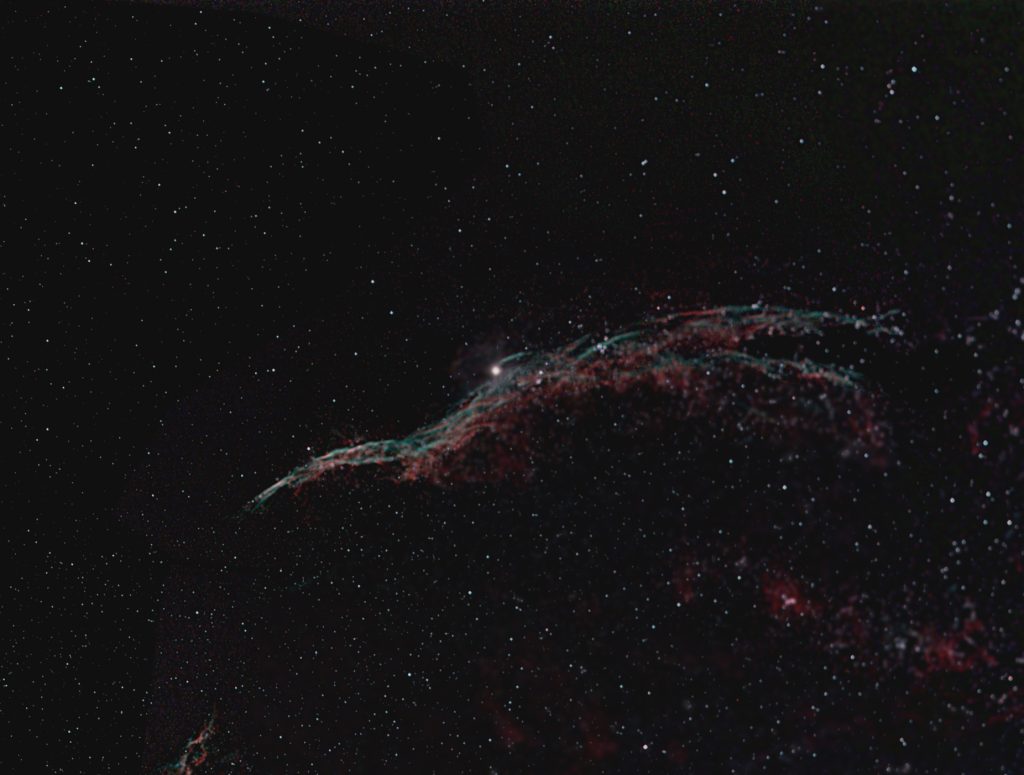
I was quite pleased with this image but was, in one respect, confused. The OIII spectral line is towards the blue end of green and is stronger than the H-beta spectral line. The colours of the nebula should thus be red, the H-alpha spectral line, and ‘teal’, the blue-green combination of the O III and H-beta spectral lines just as is shown in my image. However, the majority of the images that one finds on the WEB show blue nebulosity where my image shows teal. This cannot be correct. It may be what is produced when using a monochrome camera and narrowband filters – though observing a white light source through my O III filter the image is definitely green. I suspect that the blue-red combination is more attractive and so imagers have ‘adjusted’ the image colour to suit and are wrongly guided by what they see on the WEB. I have posted my query into a ‘Cloudy Nights’ forum and the consensus is that the colours shown in the image above are correct.