MAY 2022
Using an astro camera as a webcam to image the Moon
[This is just one of many articles in the author’s Astronomy Digest.]
Some time ago I bought a cooled Micro 4/3 294mc colour astrocamera for deep sky imaging and was a little surprised to find that it could beused as a very creditable webcam saving, for example, .avi videos in SharpCapusing a number of formats. The area ofthe sensor used can be adjusted to find the most appropriate size for theobject, Moon or planet, being imaged.
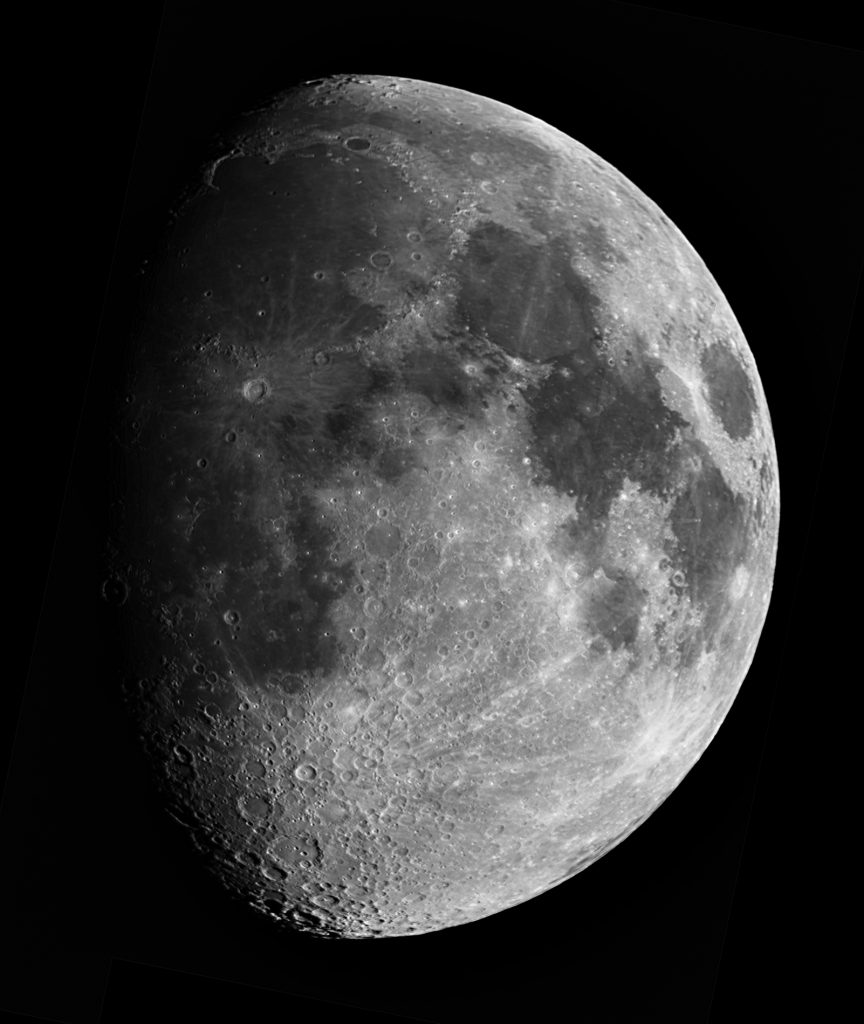
On the 11th May 2022, a 12.2 day old Moon was at a high elevation and I chose to image it with an 8 inch Ritchey-Chrétien telescope having a 1,625 mm focal length. The 4.63 micron pixels of the 12 Megabyte 294mc camera subtended 0.6 arc seconds, so would well sample the lunar image if the ‘seeing’ was ~2 arc seconds. Pleasingly, the sensor could encompass the full lunar disk at the this lunar phase so only one video sequence would be needed.
As I hoped to produce acolour image I chose to save a .avi file using one of the ‘colour spaces’ offeredby SharpCap: raw8, raw14 or RGB 24. Theoretically, raw 14 would give the bestresults, using 2 bytes per pixel when saving each frame. However, when averaging many frames, the effectivebit depth is increased, so I am not sure that much would be gained over raw8. In both these cases, the ‘debayering’ (or demosacing) will be carried out by thealigning and stacking software. If RGB24 is chosen, then SharpCap will debayer the raw data before saving 3 bytes perpixel – so 36 megabytes per frame for this camera!
If using the raw data, it is important that the stacking program ‘knows’ the format of the RGB matrix – there are 4 possibilities; RGGB, GRGB, GBRG and BGGR. I was once sent an image of Jupiter from a friend who could not understand why the Red Spot was green! He had to change the selected debayering matrix.
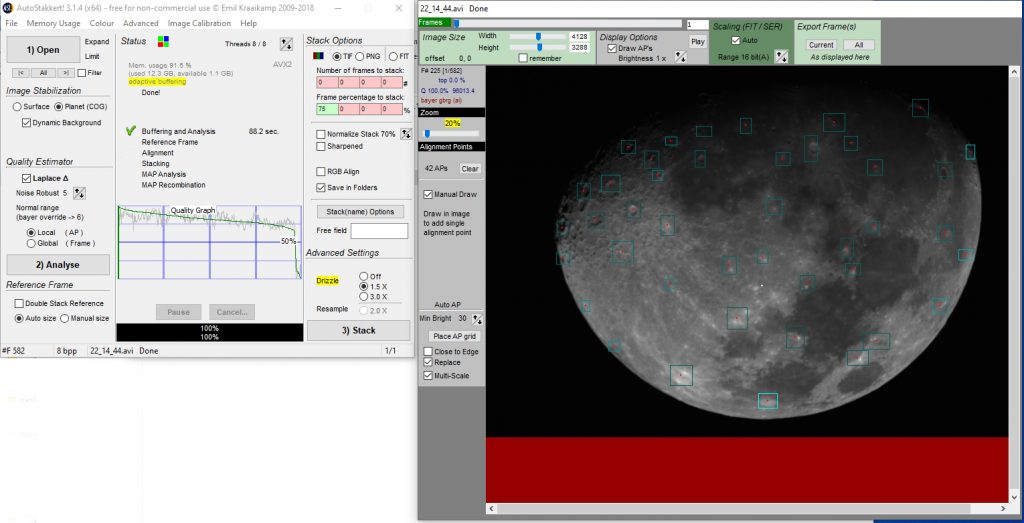
Perhaps unwisely, I chose the RGB24 colour space. Not surprisingly, with each frame containing 36 Megabytes of data, the .avi file of 525 frames was over 12 Gigabyte in size! Autostakkert shows a colour image – provided that in the ‘Colour’ submenu Auto Detect or RGB is selected. Luckily, I do have a computer with an i7 processor and 16 Gigabytes of RAM which could handle the processing in reasonable time. [Should one have a less powerful computer, Raw8 could be used which the processing software, Autostakkert or Registax 6, will debayer.]
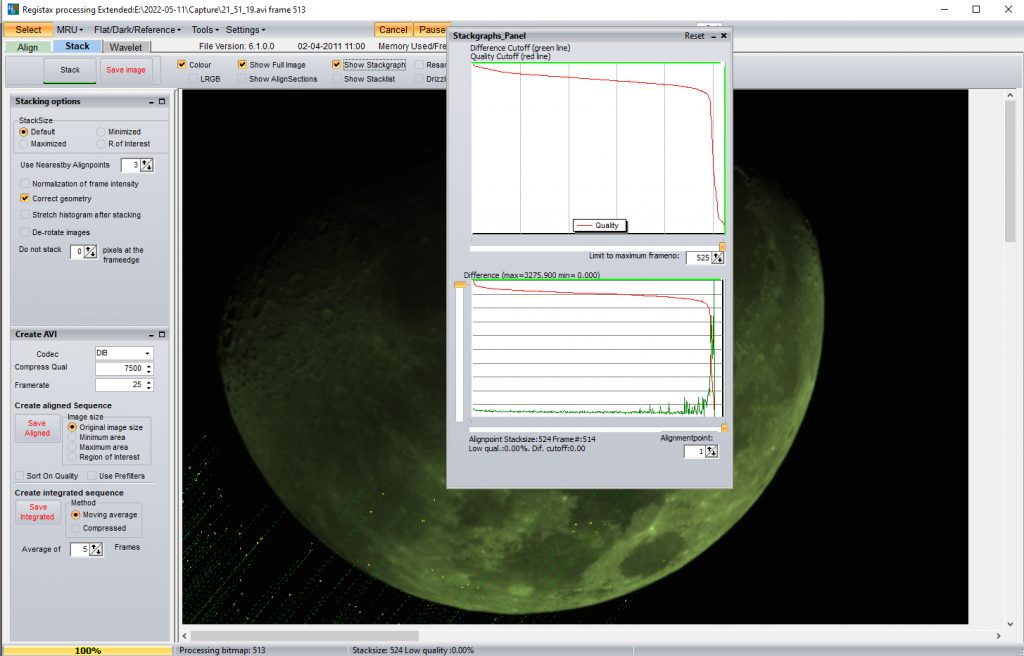
I actually used both toprocess the image. In each case a plotof the image quality is provided with the sharpest frames shown at theleft. I have never before seen suchhigh quality plots.
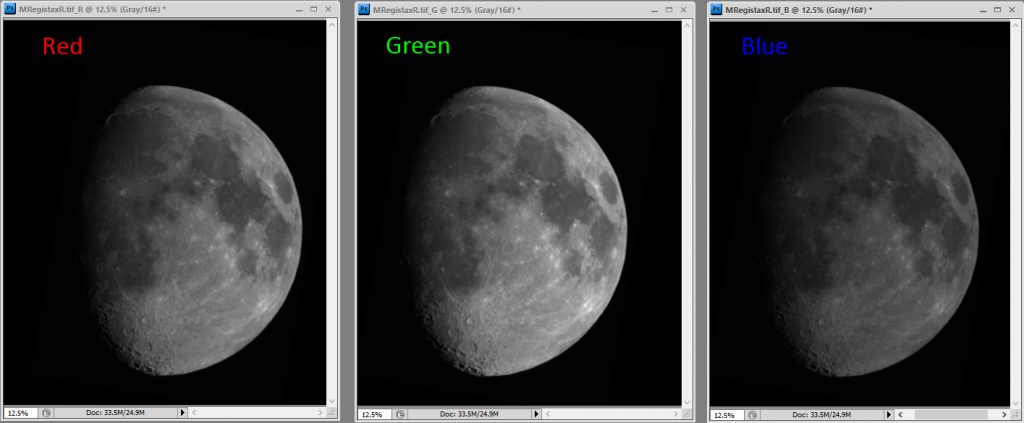
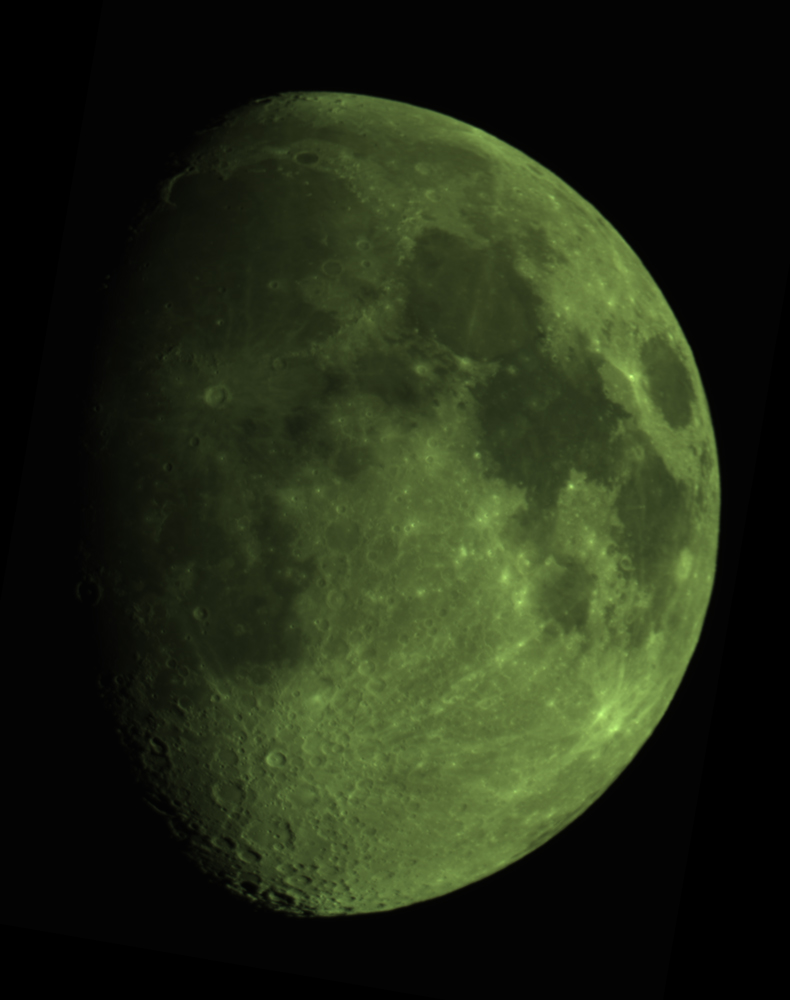
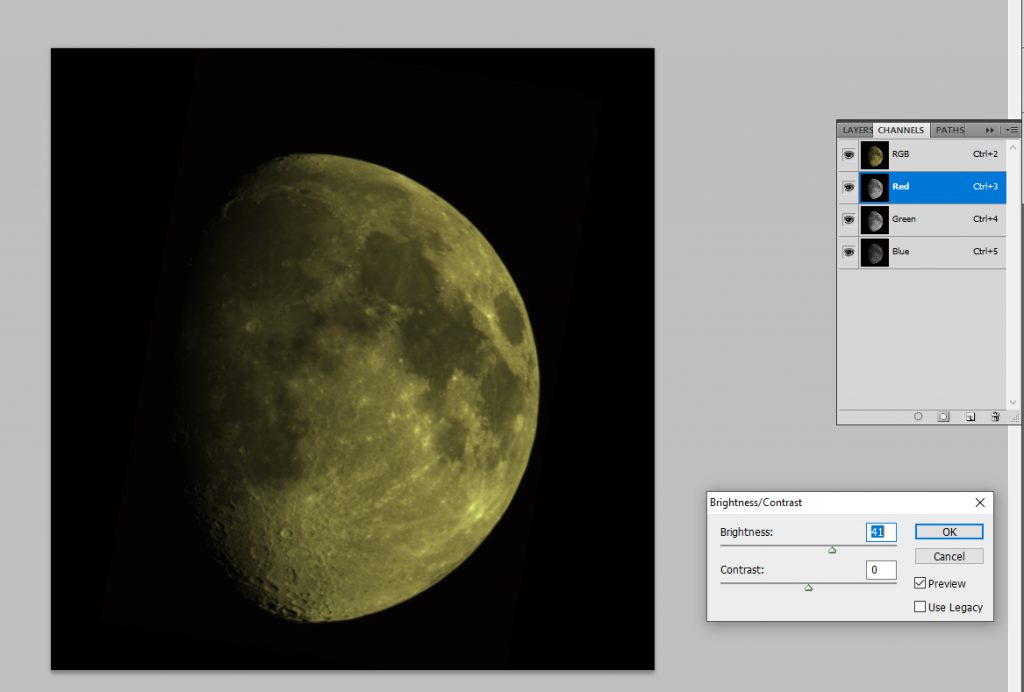
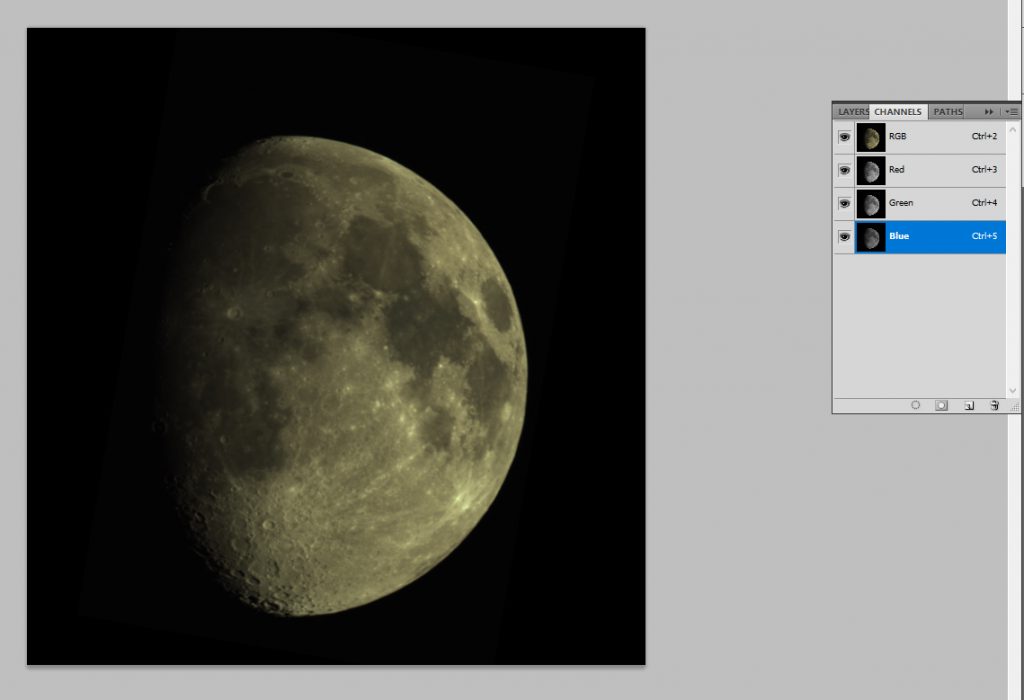
There is a problem using a colour astro camera when lunar imaging which is that because there are 2 green pixels for each red and blue pixel and this gives the resulting image a prominent green cast. As seen below, splitting the channels into red, green and blue shows this well – the green channel is significantly brighter.
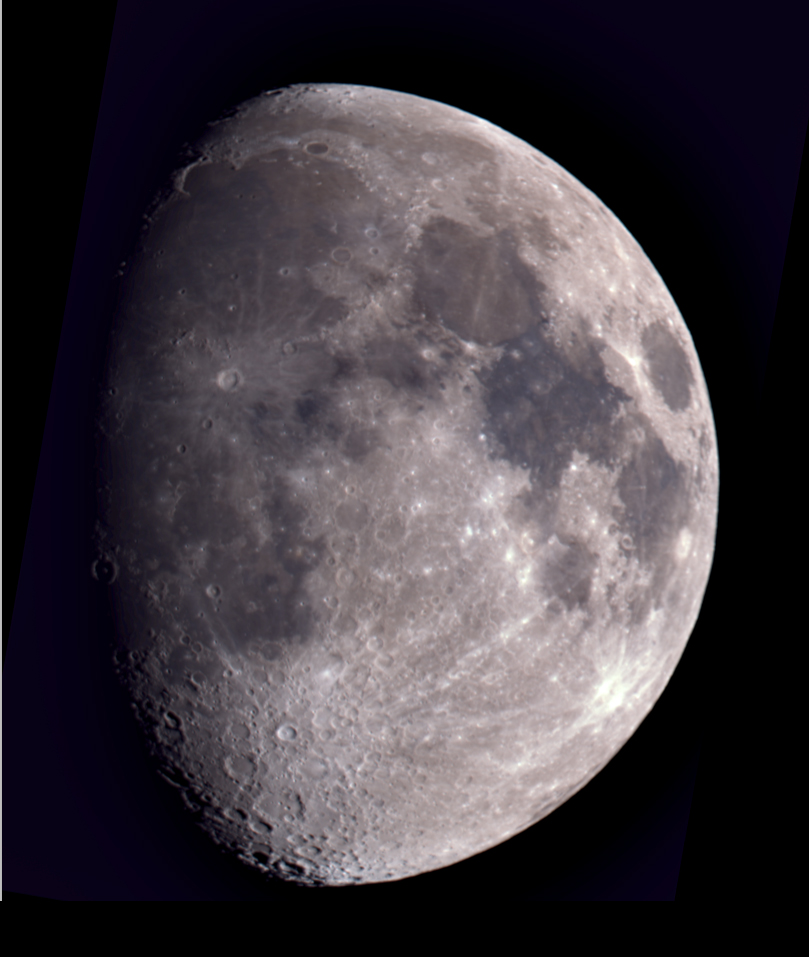
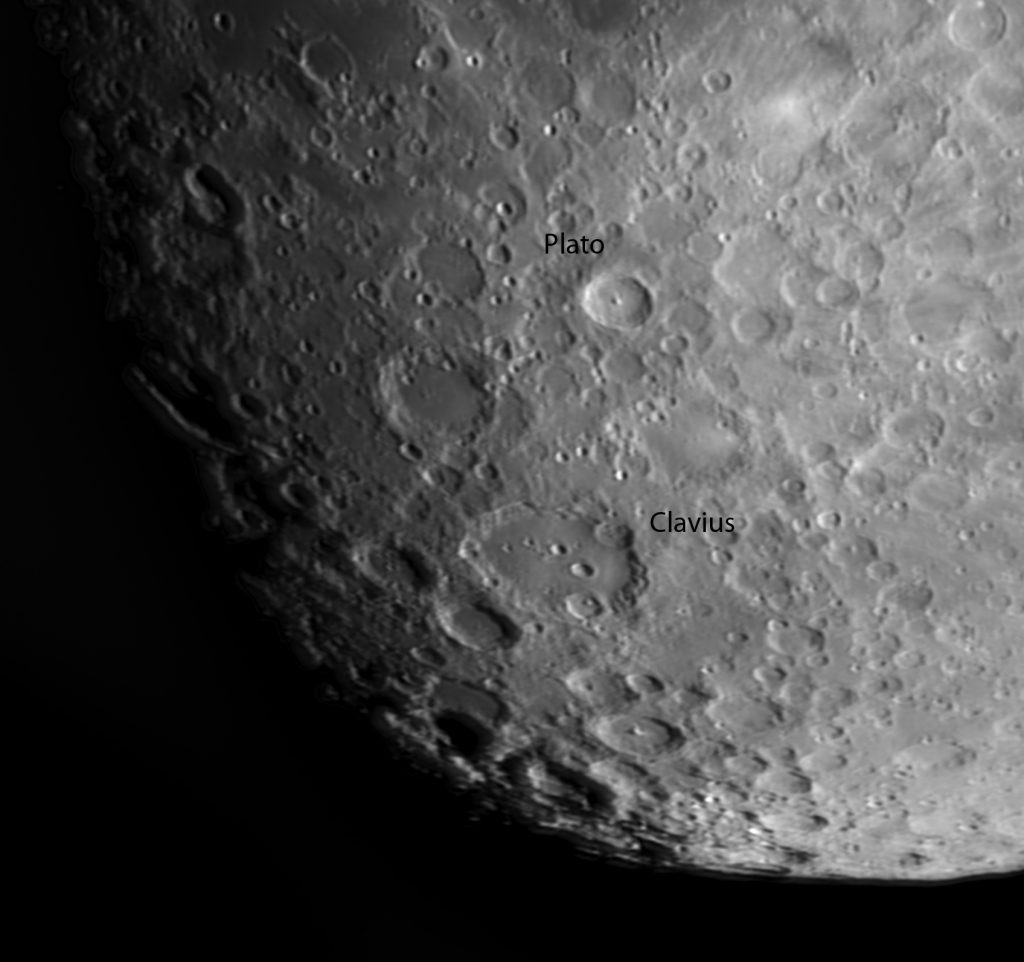
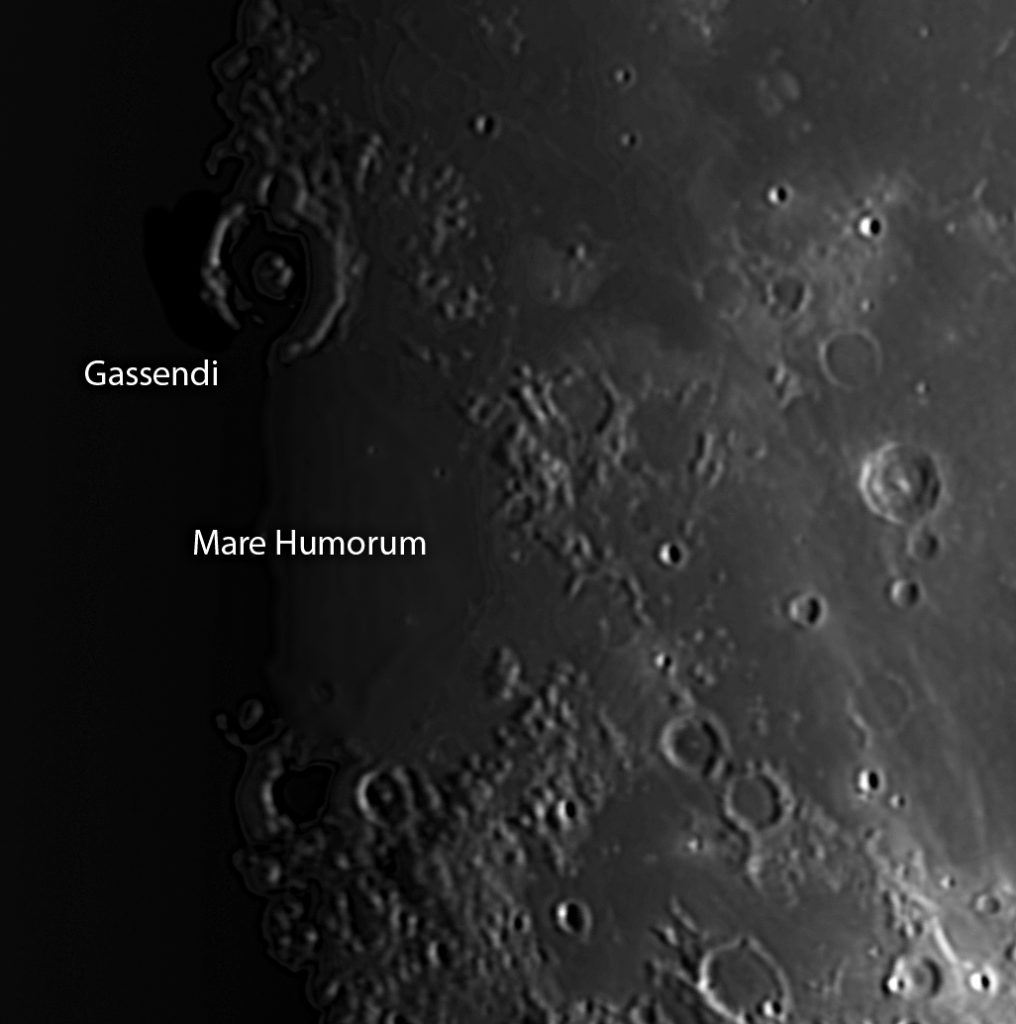
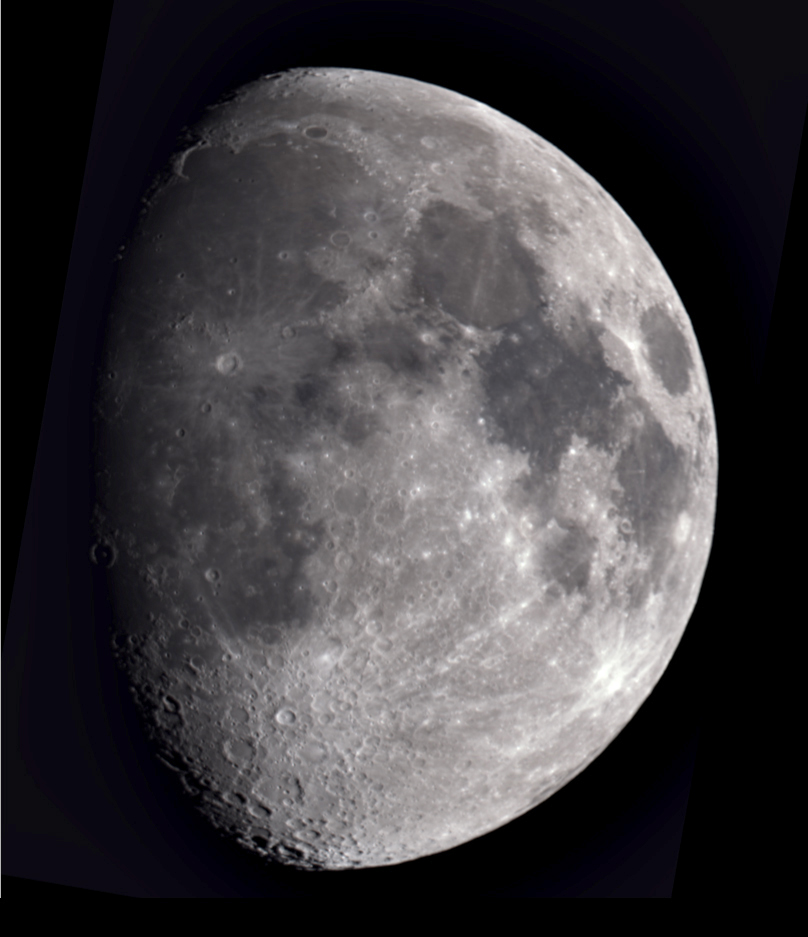
To produce a monochrome image (which often looks best) one only needs to make a greyscale (mono) version by changing the image mode. Applying some local contrast enhancement (using the ‘Unsharp Mask’ filter with a very large radius and small amount) and sharpening (Smart Sharpen in Photoshop), this was the result. I believe that the resolution was close to 2 arc seconds. [The Ritchey-Chrétien was used without a field flattener and the image is commendably sharp across the frame with the Moon filling much of the Micro 4/3 sensor as seen in the Autostakkert Plot above.]
However to produce a colour version one need to correct for the green excess in the image.
I think the best way to start is to open the channels and, with all ‘eyes’ selected, one can click on individual channels (they go blue) and adjust their individual brightness until as near as possible a balanced image results. There are two options; one could either reduce the brightness of the green channel or increase the brightness of the red and blur channels. I chose the latter.
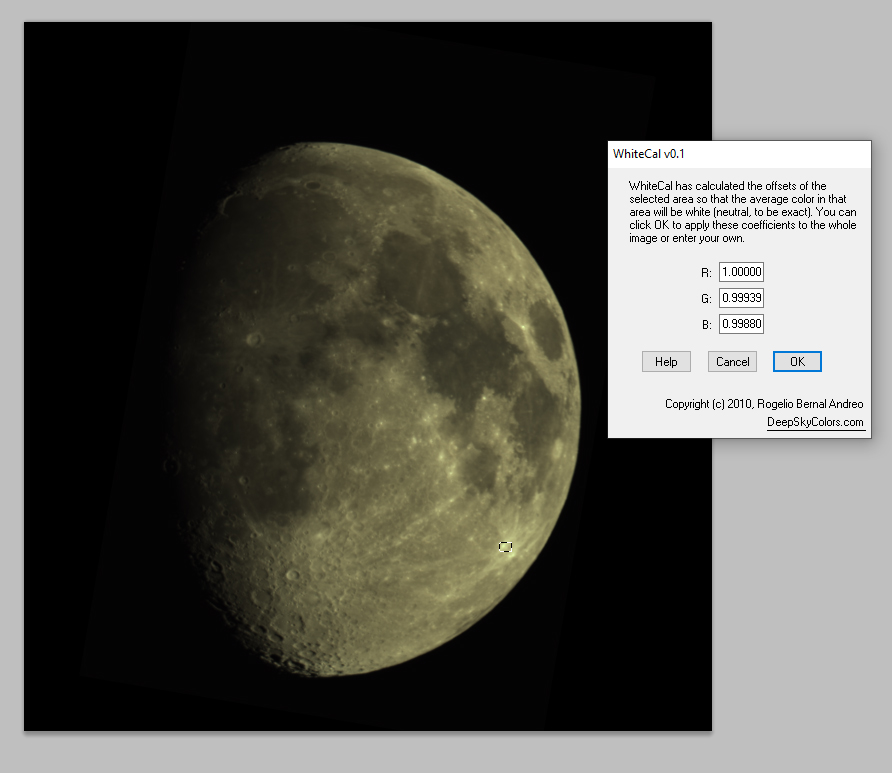
To check how well I had achieved my aim, I selected a very small bright region – which I hoped should be white – and applied the ‘WhiteCal’ filter downloaded from ‘Deep Sky Colours’. The values it gave for Red, Green and Blue were; 1.000, 0.999 and 0.998 showing that (assuming that this area was white) an excellent colour balance had been achieved. [It is important that this area is less than the maximum brightness.]
The image was brightened, had some local contrast enhancement applied and then sharpened.
Finally, the saturation was increased to bring out the surface colours. The upper half of Mare Tranquillitatis is bluish as there is up to 5.6% titanium in the basalt whereas Mare Serenitatis is reddish as its basalt contains more iron.