JULY 2017
Using qDslrDashboard and a tablet to control a DSLR for astroimaging
[This is just one of many articles in the author’s Astronomy Digest.]
When using my Nikon DSLR to take wide field images of the constellations, I have been using an intervalometer to control the camera and take a sequence of exposures. There has then always been the problem of setting the correct infinity focus using the small screen at the back of the camera − some of my old manual prime lenses do have an infinity stop but more modern autofocus lenses do not.
Having acquired a 10.1 inch Samsung Galaxy tablet, I investigated the web to see if it could be used to control the camera as, if so, one would have a far larger image to view when adjusting the focus in manual mode. I found and purchased the qDslrDashboard App (~£7) which is available for Android and which can be used to control Nikon, Canon and some Sony cameras. The App can communicate with some cameras using wi-fi but my Nikon camera needs a USB connection so I acquired a StarTech.com, USB OTG Adapter Cable (~£3), which plugs into the universal port on the tablet and provides a single USB socket to link with the camera.
[Note: the latest version can also be used with iOS tablets and phones but only when it is possible to connect to the camera with wi-fi.]
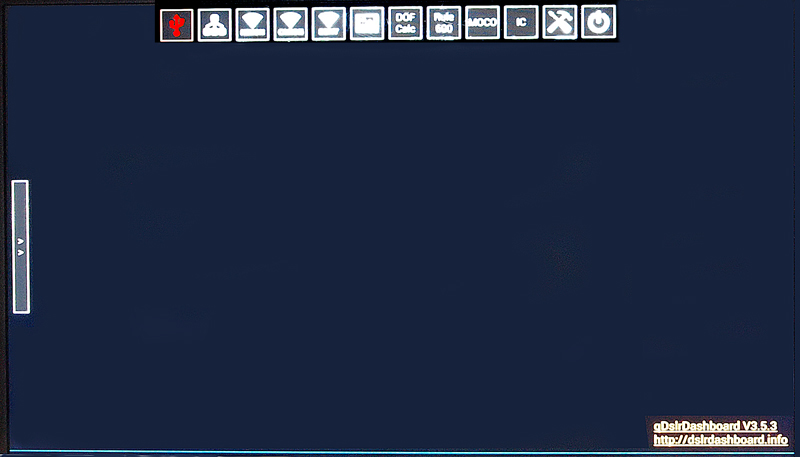
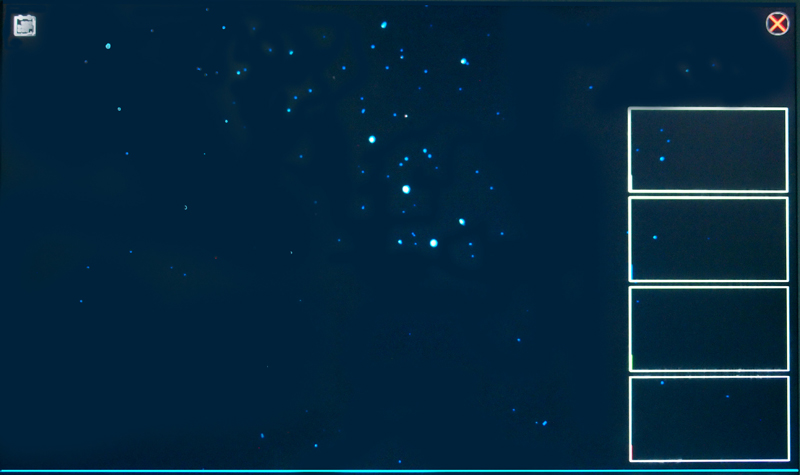
The image below shows the opening screen. When the USB connect button is tapped it is highlighted as shown.
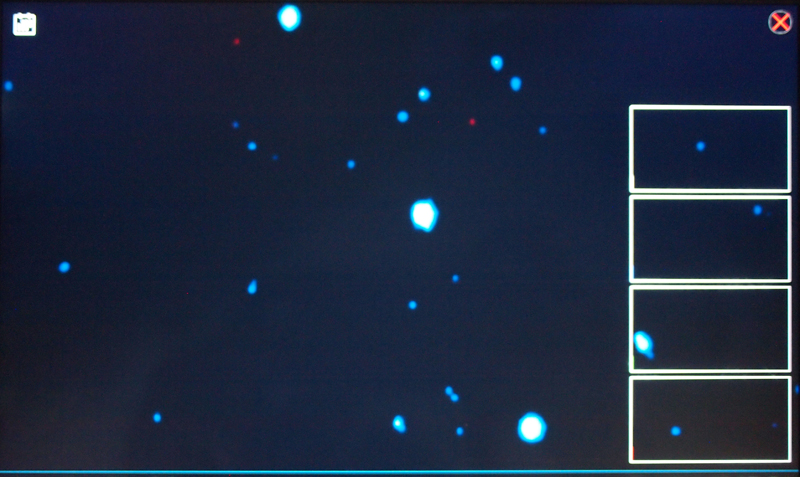
One then turns on the camera. [On occasions I have had to then switch it off and on again to make the connection.] The image below shows the screen when the camera has been connected. It will normally set the camera to provide a ‘Live View’ image. When viewing a dark sky, the camera will boost everything to enable an image to be seen and thus the image will be very noisy but the hope is that some stars will be visible.
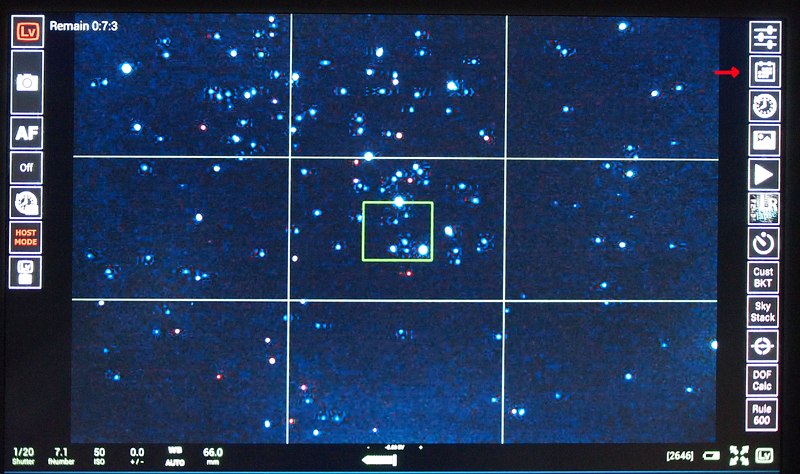
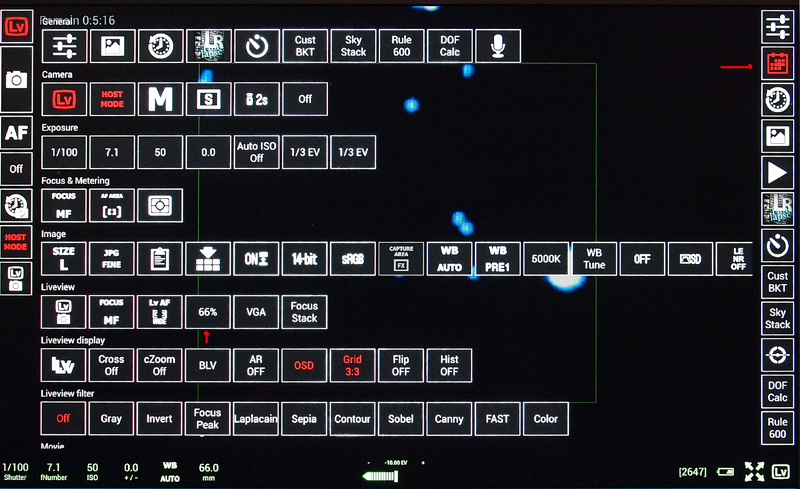
By tapping onto the second to top ‘button’ on the right hand side (see arrow), a setting screen appears and, in the ‘Live View’ set of controls one button will display 0%. Tapping on this will open a drop down menu allowing the display to expand up to 200%.
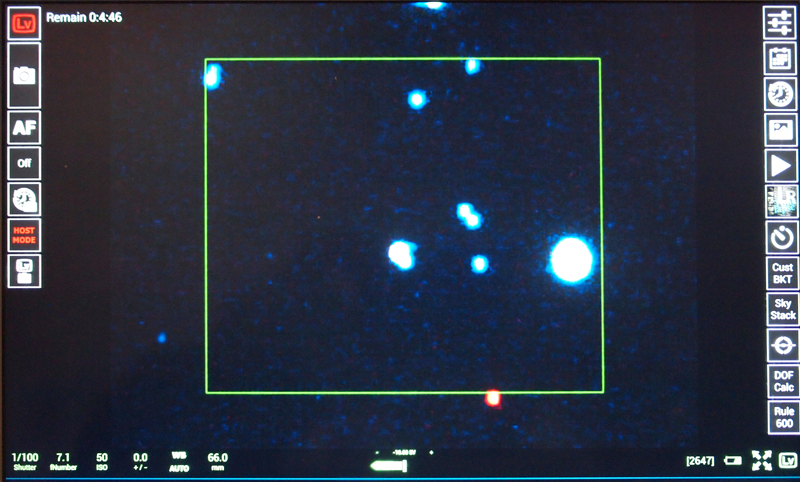
Assuming that some bright stars can be seen in the live view field then accurate focus can be easily achieved.
If the live view mode cannot ‘see’ any stars, then a sequence of longer exposure single images would need to be taken whilst making fine adjustments to the focus.
[Having found precise infinity focus, I tend to ‘lock’ it using some insulating tape.]
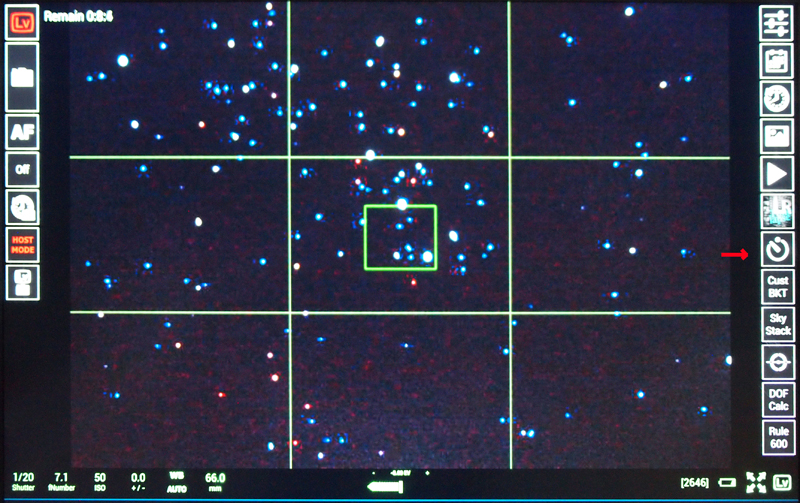
At the bottom of the screen it shows the current capture settings which can be adjusted by tapping on a parameter and then selecting from a drop down menu. For constellation imaging, an ISO of ~800 should be used with, preferably, the lens stopped down by one or one and a half stops to improve the image quality. I tend to use exposure times of 30 seconds when the camera is used with a tracking mount. One can take some single trial images by tapping on the camera ikon, second to top on the left. The image is downloaded and displayed along with individual colour and overall histograms. [Note: the star field is simulated, and thus the exposure time and ISO shown at the bottom are not what would be used when capturing the real sky.]
Spreading one’s fingers on the screen one can then zoom in on the image to check that the focus is correct.
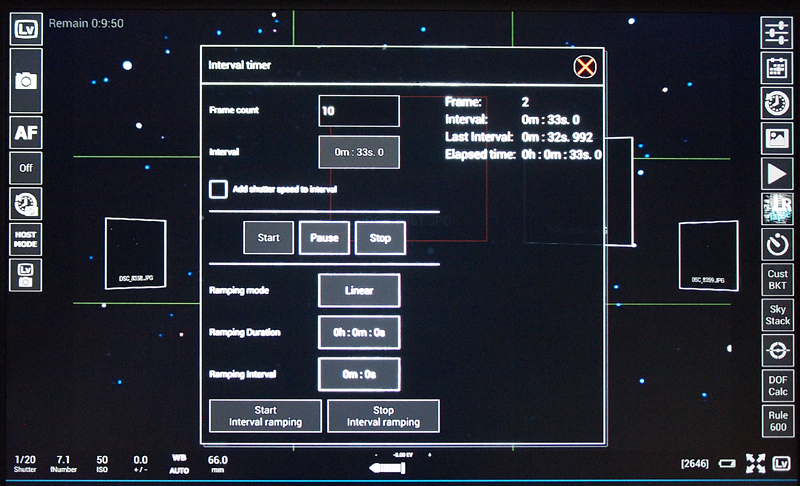
One can then set up the App to take a sequence of frames by tapping on the Interval Timer ikon (just below the Time Lapse ikon on the right).
In the screen that is displayed, one can set the required frame count and the interval between each frame capture. (Allowing perhaps a second or two between each capture.)
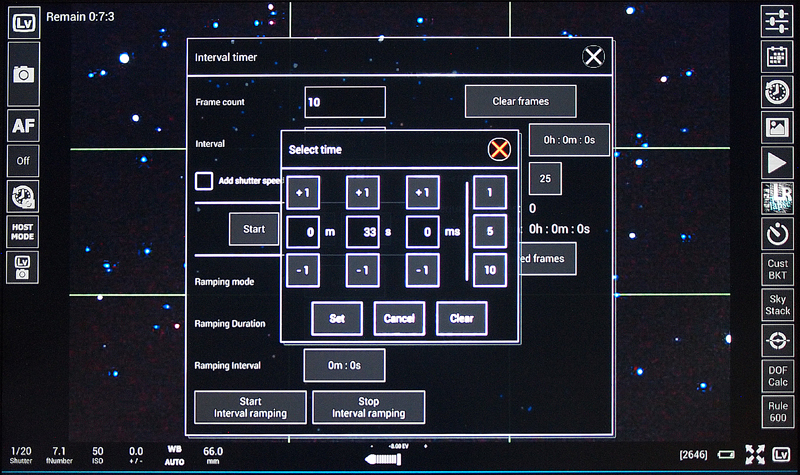
Tapping on the Interval Timer ikon again one can then tap on the ‘Start’ button and the sequence of frame captures begins.
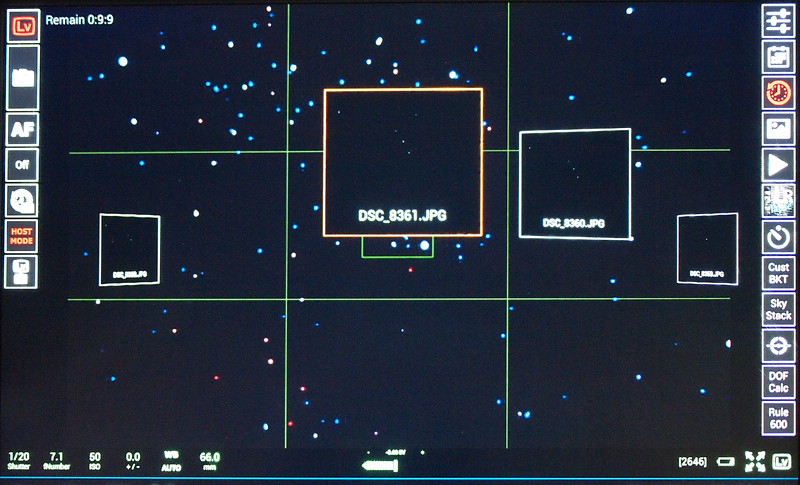
The last frame is downloaded and displayed just as when a single frame is captured and can be checked to ensure all has gone well.
One can exit the App by tapping on the top right ikon and then tapping on the right hand ikon of the top row.
[The App is also available for smart phone use and I have seen one in use with a camera mounted on a very high monopole to give a very different viewpoint of an event than most others would have. It is also widely used by photographers taking time lapse sequences as it can automatically control the exposure as, for example, when taking a sunset sequence leading into darkness when the Milky Way might be seen. Clever!]