JANUARY 2023
A Guide to Stacking, Background Extraction and Stretching
In some of the examples described below, I have used an old version of Adobe Photoshop that some of you may have bought, as I had, in the past. Exactly the same things can now be done in the new upgrade to GIMP called Glimpse which means that everything described below can be achieved using free software. In fact, having aligned and stacked the captured frames in Sequator, one could complete the image processing just using Siril.
Download Links
Sequator: https://www.sites.google.com/site/sequatorglobal/download
Glimpse: https://glimpse-editor.org/downloads/
Siril: https://siril.org/
Affinity Photo: https://affinity.serif.com/en-gb/photo/
Stacking
I have an article in the digest comparing a number of alignment and stacking programs which you might like to read.
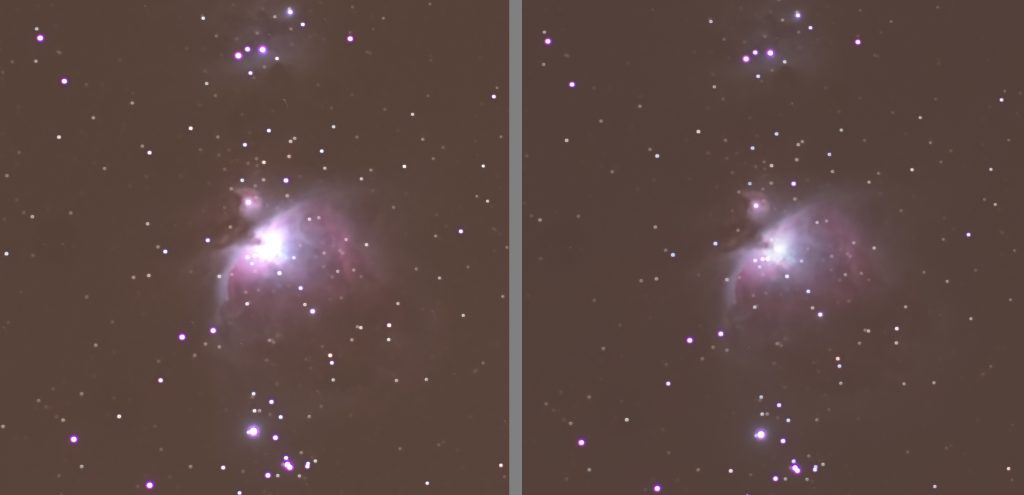
I have found that Sequator, which is free, gives images with the greatest colour saturation. It is simple to use, very fast and has two useful options; ‘High Dynamic Range’ and ‘Dynamic Noise Reduction’. The former prevents the ‘blowing out’ of bright regions in an image – such as that of the Trapezium region in the Orion Nebula shown nicely in the following comparison with (right) and without (left) its use and the latter will help to remove hot pixels and, perhaps, satellite trails. I am tending to use it for most imaging and would certainly recommend its use to beginners.
A step by step use of Sequator is given in the article: https:// Imaging the Sword of Orion – a complete work through
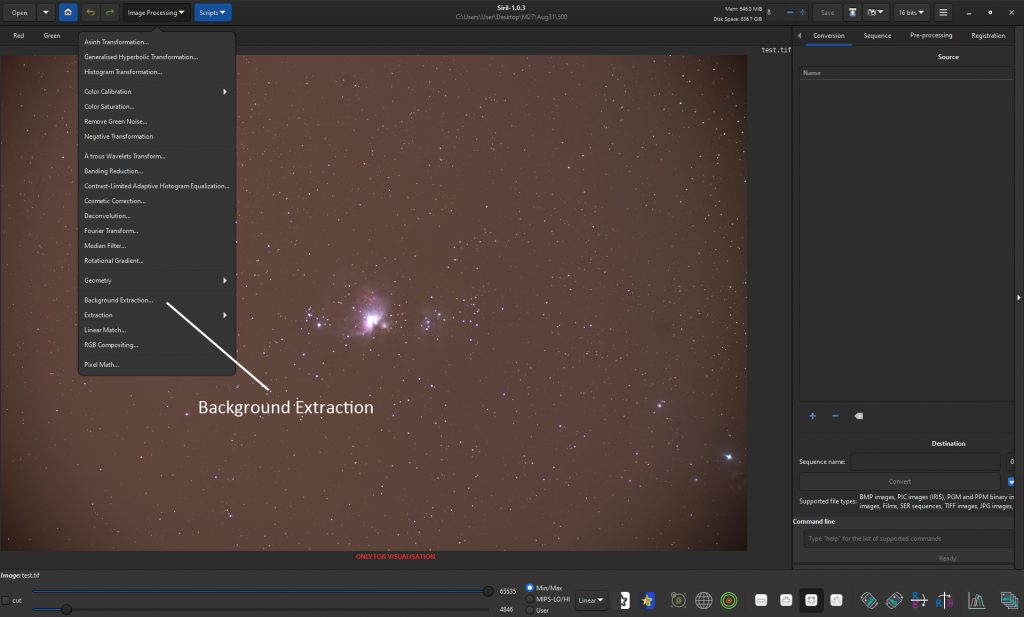
Background Extraction
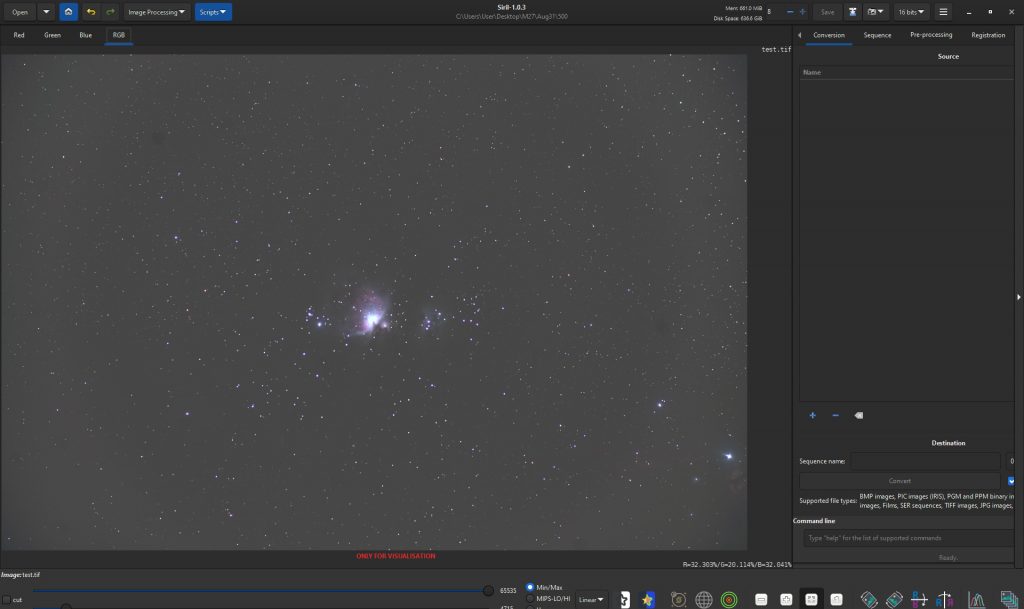
A couple of programs: Siril, which is free, and Affinity Photo, which is an excellent, far lower cost, alternative to Adobe Photoshop, both have dedicated background extraction functions. Using Siril, a grid of points is placed over the image and a ‘model’ of the sky background will be made. It is important that any regions of nebulosity are not included as it would then regard them as sky background and remove them! The really clever thing is that it attempts to avoid nebula regions as seen in the set of images below. One can removed additional grid points if needed before it removes the sky background.

Using Affinity Photo, one manually places sample points across the image from which the model of the background is made. Clicking on ‘Apply’ the background is removed.

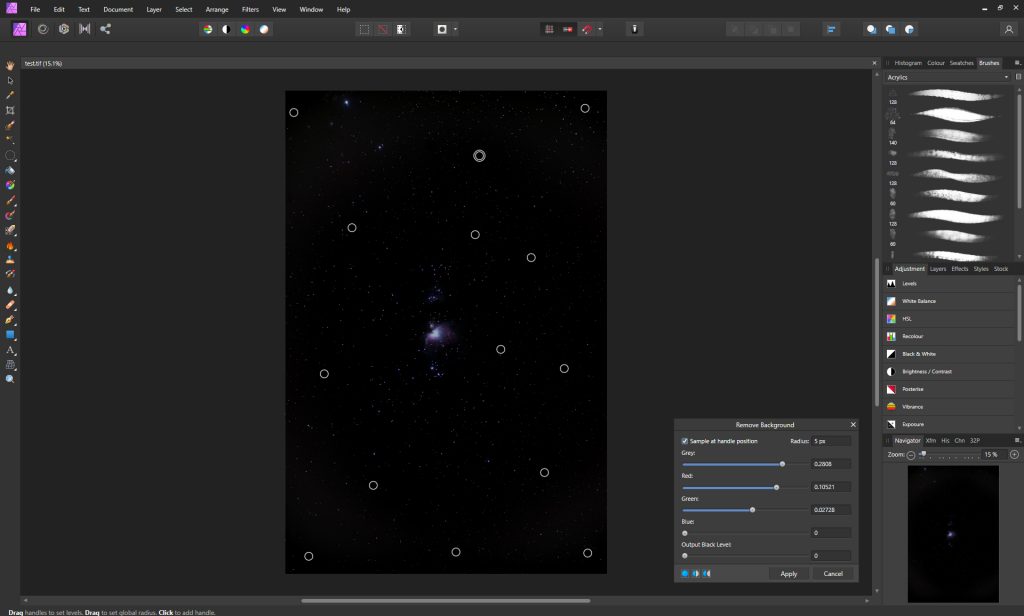
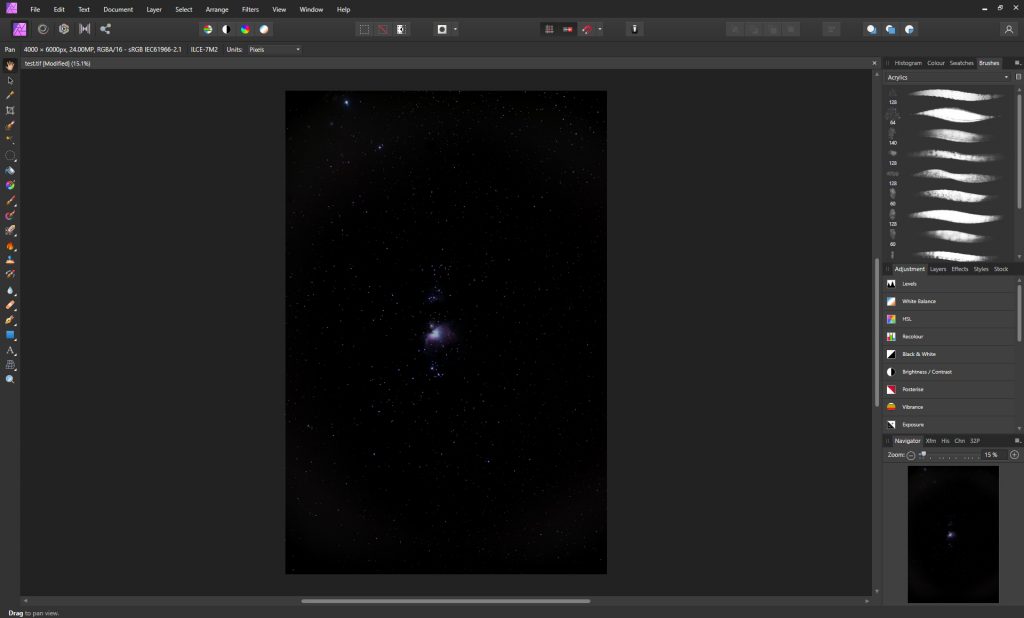
It should be pointed that with both, the vignetting produced by the lens that took the image has not been totally removed. The technique described below does achieve this – and is normally the technique that I use.
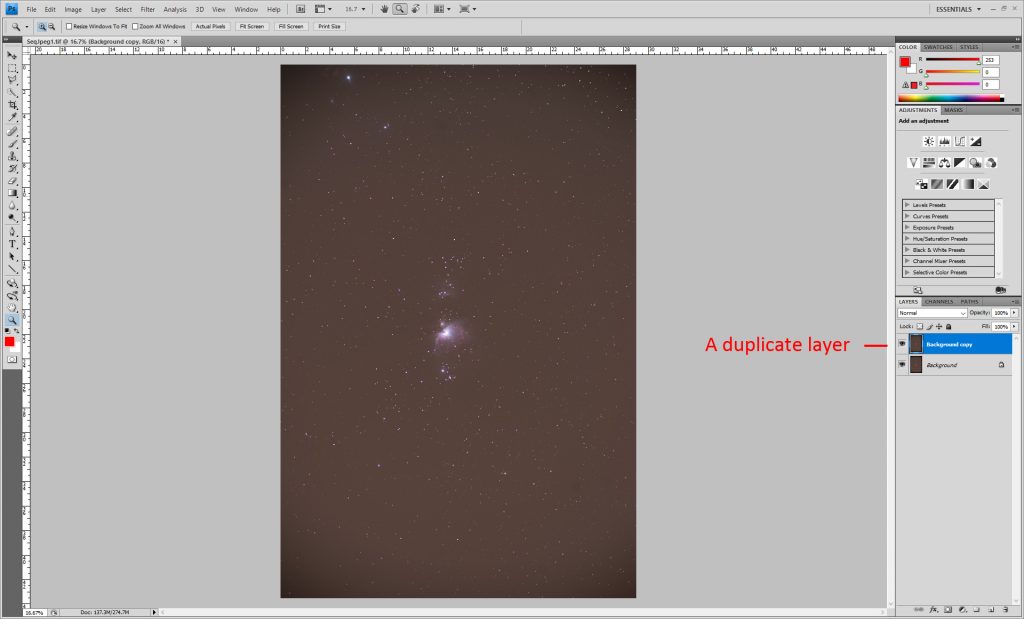
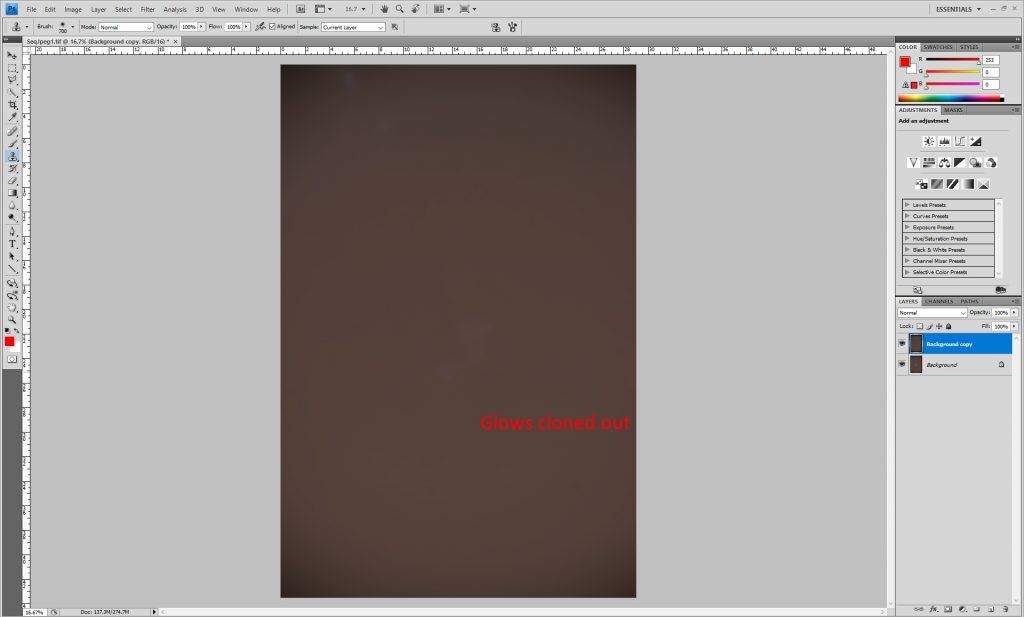
A simple technique can be used with programs that can use levels such as Adobe Photoshop, Affinity Photo or the new free update to GIMP called Glimpse. The light polluted image is duplicated and the ‘Noise and Scratches’ or ‘Median’ filters are applied with a large radius of, say, 60 pixels.
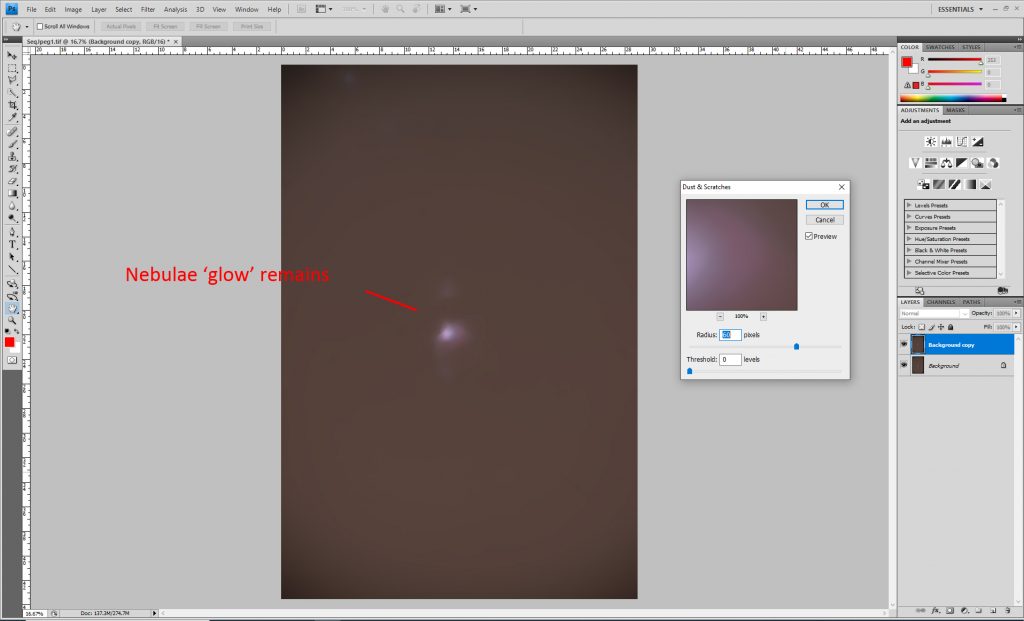
The stars disappear but some nebulosity such as seen below in the image of the Sword of Orion may be left. These can be cloned out from a surrounding region in the image.
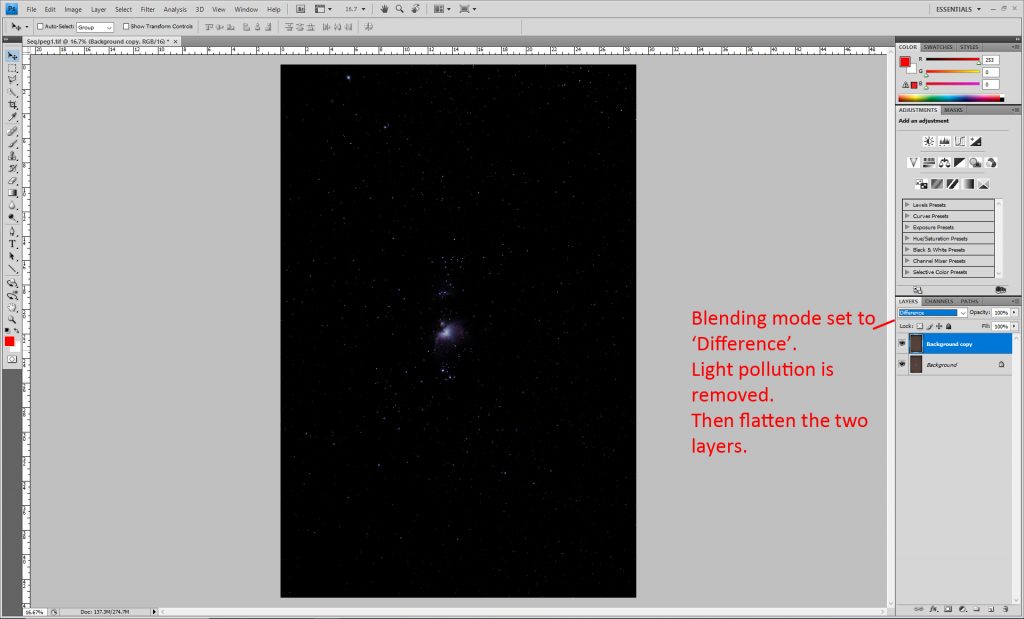
Affinity Photo has a ‘selection brush’ to select these regions and then the ‘Inpaint’ function is used to remove them. The two layers are then flattened (or merged) using the ‘Difference’ or ‘Subtraction’ blending modes so removing the light pollution gradient.
If there is a large amount of nebulosity in the image, forexample imaging the North America Nebula, one has to hope that the lightpollution is uniform across the frame. One can then use the paint brush to select the colour of dark region inthe duplicate image where there is no nebulosity present and paint this colourover the whole layer before flattening the two layers as above.
Stretching
The objective of stretching an image is to bring out thefaint details in an image, usually nebulosity, without ‘blowing out’ the brightstars or regions. There are two tools inAdobe Photoshop, Affinity Photo or Glimpse; ‘Levels’ and ‘Curves’ that can beused whilst Siril has two dedicated stretching functions.
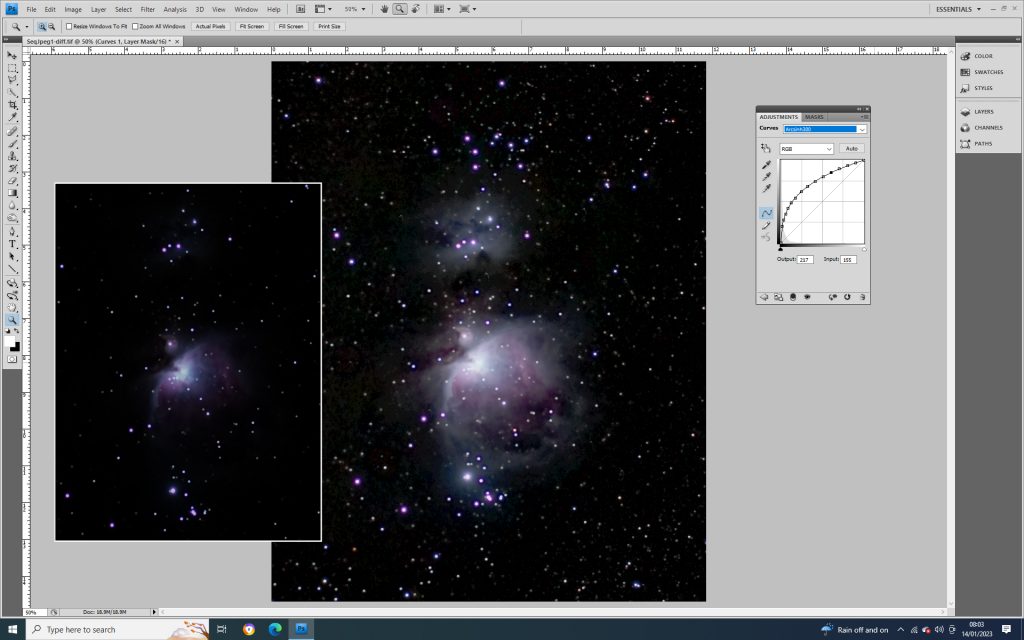
Arcsinh Curvestransformations – Siril and Adobe Photoshop
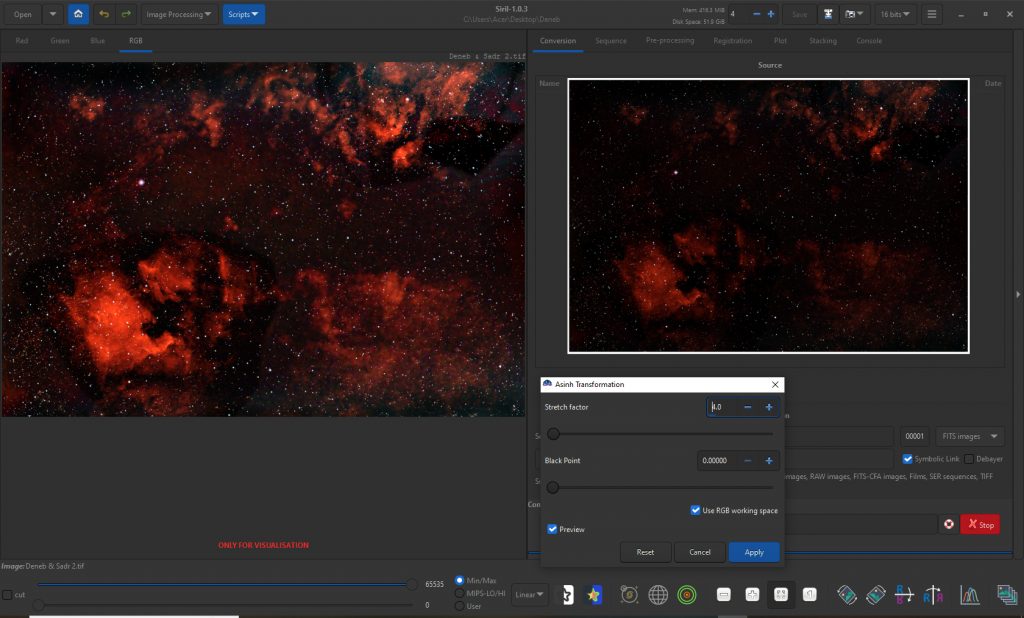
The image is loaded into Siril and, under the ‘Image Processing’ tab, the ‘Asinh Transformation’ is selected. One can then adjust the ‘Stretch Factor’ and Black Point to suit as seen in this image of the region of Cygnus and Sadyr in Cygnus. The original image is shown in the inset.
The following image is that when the Asinh stretch isapplied to the Orion Nebula region. Theunstretched image is shown as an inset. The stretched version appears to saturate the colours as well.
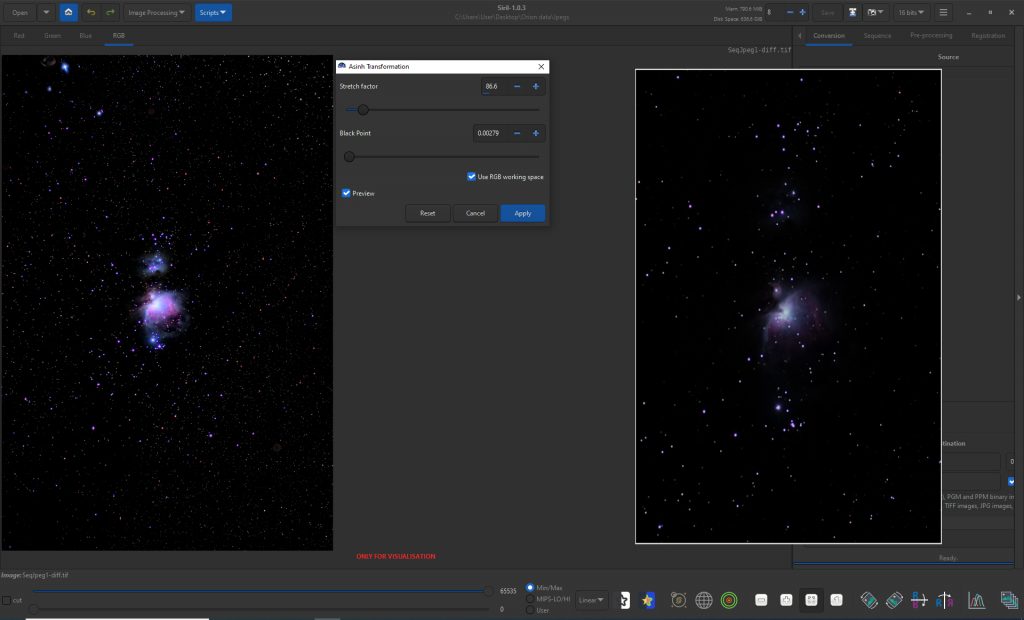
The Arcsinh Transformation is regarded as perhaps the best stretching function so I would be inclined to use Siril for stretching my images. Siril has a more sophisticated stretching function as well – but this is, perhaps, difficult to use as there are quite a number of parameters to adjust.
A set of Arcsinh transformation presets for Adobe Photoshop (which perhaps can be used in Affinity Photo) can be downloaded from the link in this url:
https://www.cloudynights.com/topic/595610-photoshop-color-preserving-arcsinh-stretch/
The figure below shows the very impressive stretch made using the Arcsinh300 curves preset from this set with the unstretched image inset.
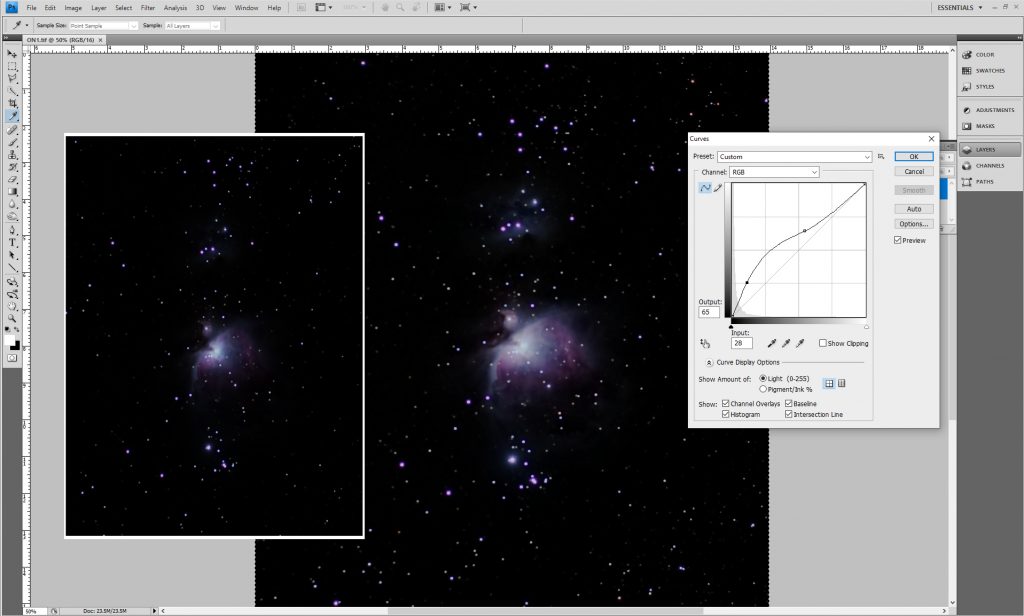
Curves
Opening the Curves tool in Adobe Photoshop, Affinity Photoor Glimpse shows a histogram with a linear diagonal line from the bottom left(the dark end) up to the top right (the light end). Using the mouse, the line can be lifted nearthe dark end to form a curve which lifts the darker parts of the image morethat the brighter parts. The top part ofthe curve can be brought back towards the linear track so that the brighterparts of the image are not brightened. The screen shot below shows such a curve applied to an image of theOrion Nebula (Inset) so that the bright central region around the Trapeziumstars is not blown out.
Levels
Opening the Levels tool in Adobe Photoshop, Affinity Photoor Glimpse shows the histogram. In oldversions of Photoshop, there are three tabs below. Stretching is carried out by sliding thecentral tab, initially at 1.00 to the left. I prefer to use two or more smaller adjustments rather than a singlelarger one. The image below, which hasstretched the image well, is the result of two stretches the result of thesecond of which is shown.
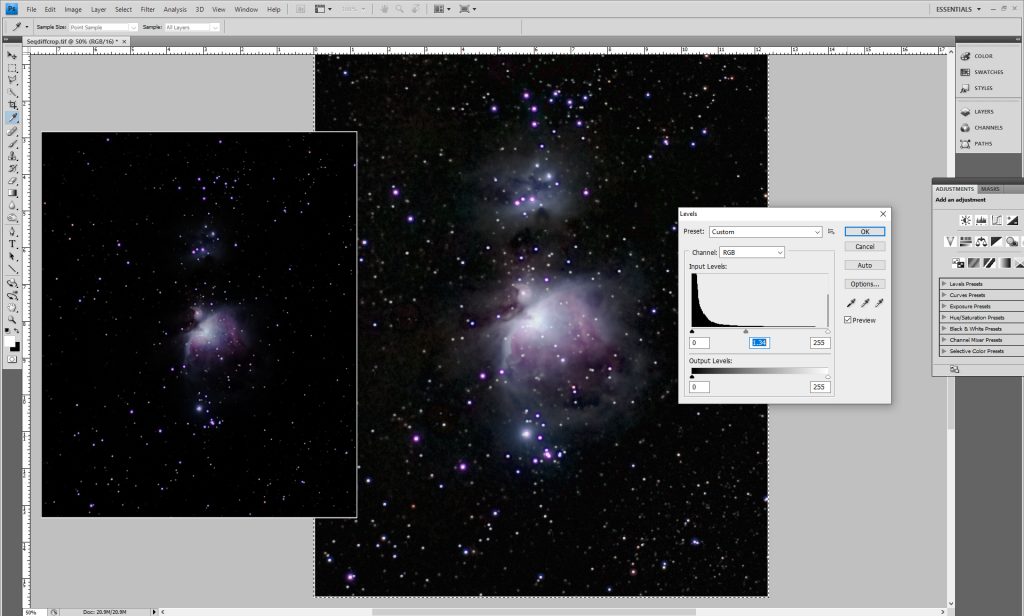
This has shown several ways of stretching an image. All seem to be able to give comparable results but I think the use of Siril, which gives a more colourful image, might be the way to go.
Image Tweaks
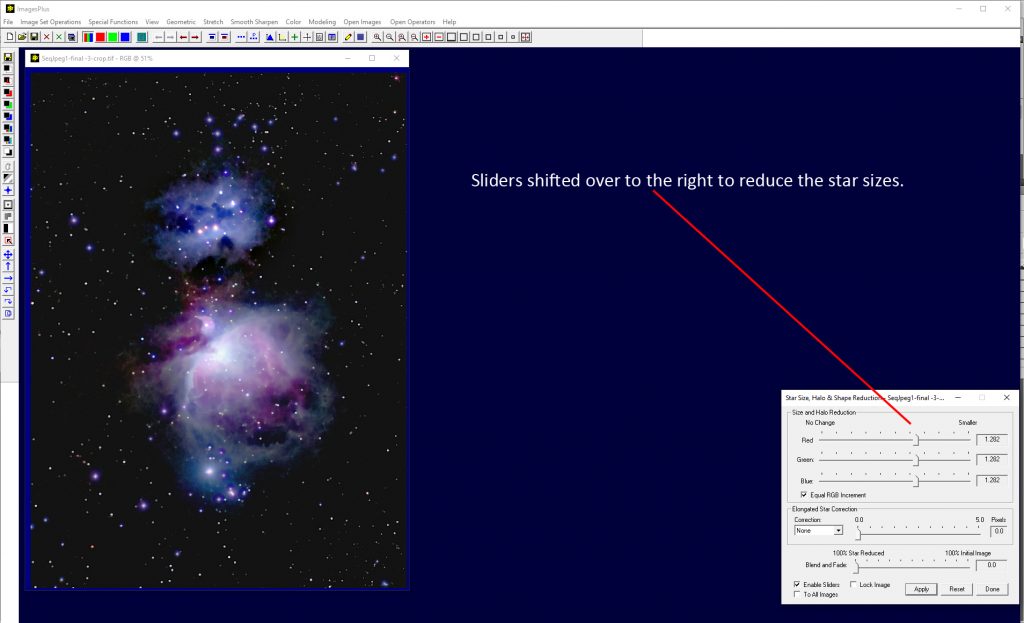
Two things that might then be done to the stretched image are to increase the saturation and perhaps use the ‘Star Size Reduction’ tool in the, now, free program ‘Images Plus’.
https://imagesplus.software.informer.com/
The image is loaded and, under the ‘Special Functions’ pull down menu, ‘Star Size, Halos ….’ is selected.
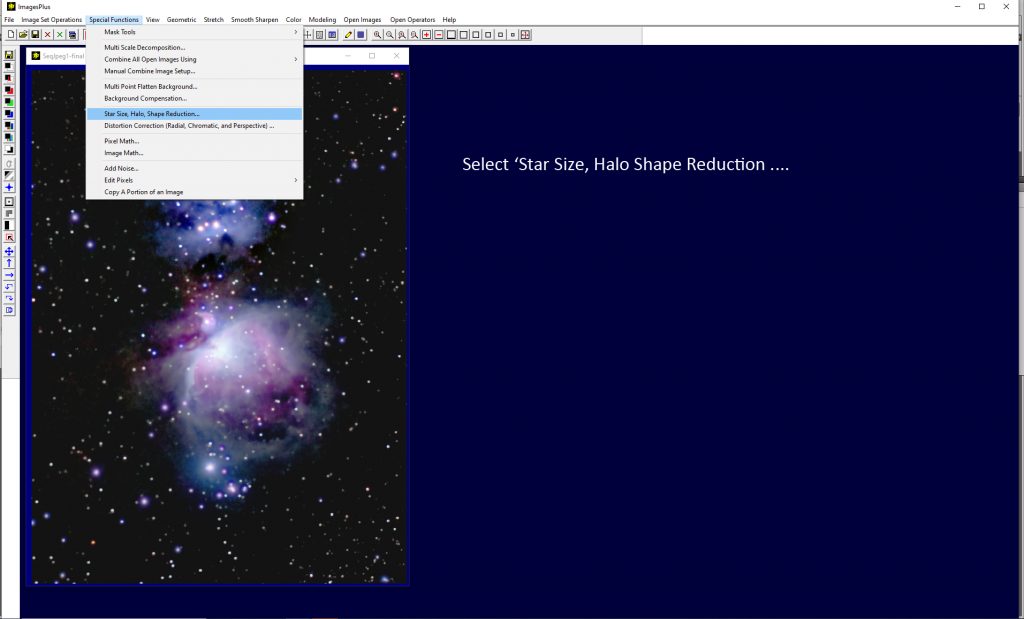
In the window that will appear, move the sliders over to the right as seen in the following image to give the desired result.