APRIL 2023
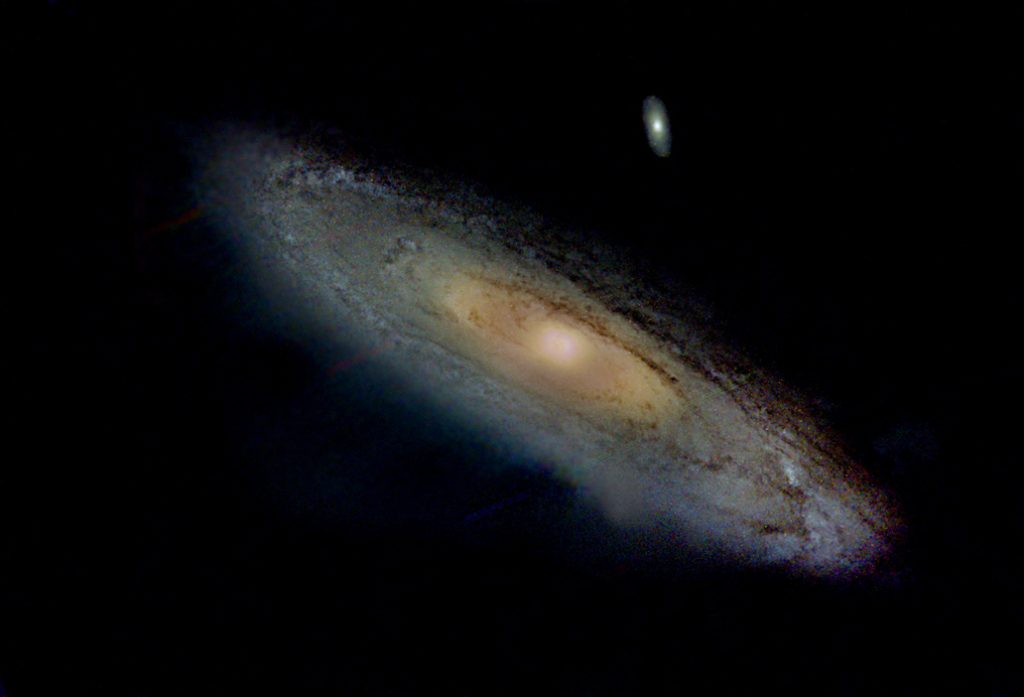
Imaging M31, the Andromeda Galaxy
ASTAP was used alignand stack the captured frames.
Siril was used toremove the sky background, Photometric Colour Calibrate and stretch the image.
Starnet++ was used toenable the image to be split into ‘Galaxy’ and ‘Stars’ images using Photoshop,Affinity Photo or Glimpse.
Images Plus was usedreduce the star sizes in the image.
Photoshop or other equivalentprogram was used enhance the Galaxy image and add back the star’s image.
Note: The screen shots and images look better when the display size is increased to 300% in Windows 10.
**********
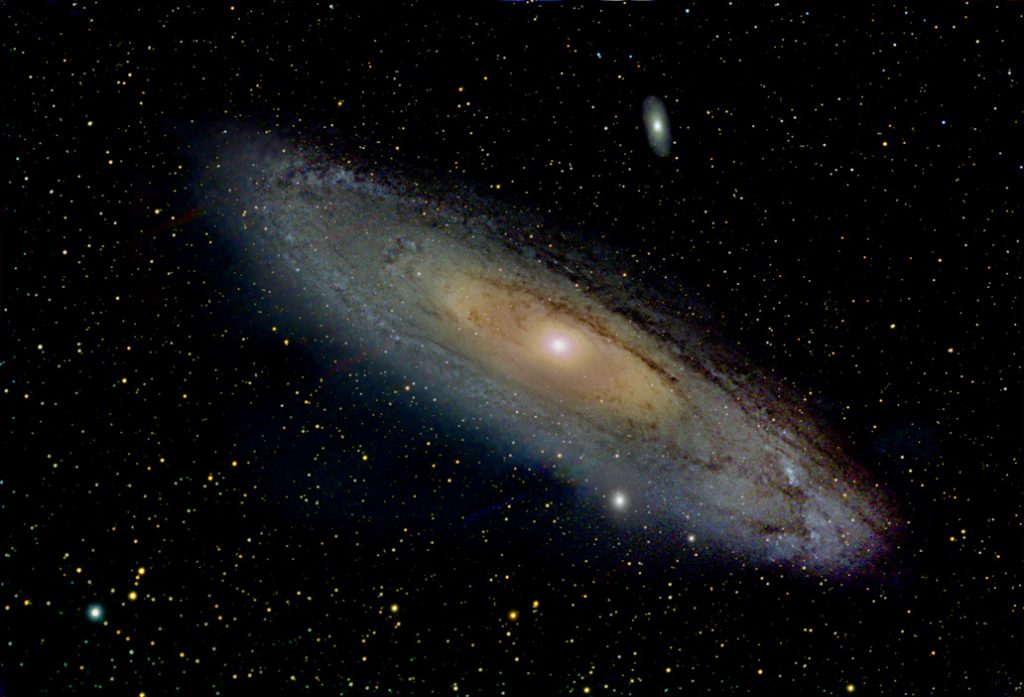
Whilst waiting for Jupiter to reachthe Meridian in mid October 2022, I thought I would attempt to image M31 usingan Altair Astro 294mc, colour camera coupled to a Teleskop Service ‘ImagingStar 65mm f/6.5 Quadruplet Astrograph’. This telescope uses a tripletobjective employing one FPL-53 element and an ED glass field flattener elementwithin the tube assembly. With a focal length of 429 mm, it claims tohave an imaging circle of 44 mm so when used with a Micro 4/3 sensor shouldprovide pinpoint star images across the whole frame with no vignetting. It does. A helical rack and pinion focuser is employed which is farbetter for supporting cameras than a Crayford focuser.
A total of 290, 18 second, frames were taken under the control of SharpCap Pro and saved as Tiff files – so 87 minutes total exposure. The camera sensor temperature was set at -15 C and 46 dark frames at the same temperature, gain and exposure were taken. Flat frames were definitely not needed and, as I think bias frames are not needed if dark frames are taken at the same temperature and exposure time, none were taken.
The telescope was mounted on an Astro-Physics Mach 1 mount (along with a Celestron 9.25 Schmidt-Cassegrain for later imaging Jupiter). It was not guided and so the image moved very slowly across the frame – but just ~0.03 pixels per exposure so no star trailing would be apparent. In fact, this is a good thing as it will avoid ‘colour mottling’ which can give rise to a coloured sky background.
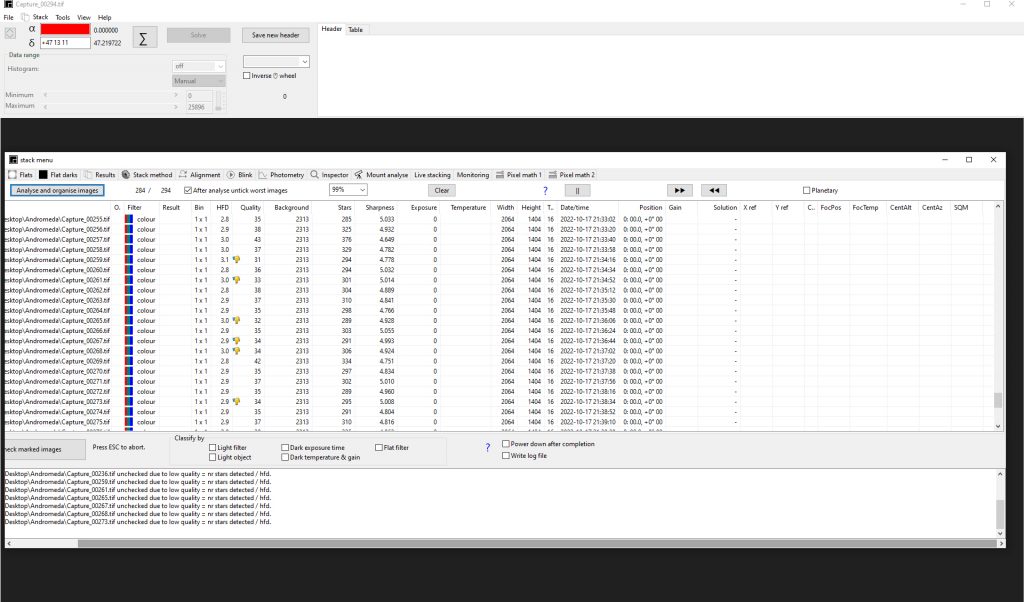
Aligningand Stacking in ASTAP
The 290 light frames and 46 dark frames were imported into ATAP and the light frames analysed. Frame 83 was selected as the reference frame having the highest quality rating and 7 frames with the lowest quality were rejected from the stack. (See article referred to below for details of how to load the captured frames.)
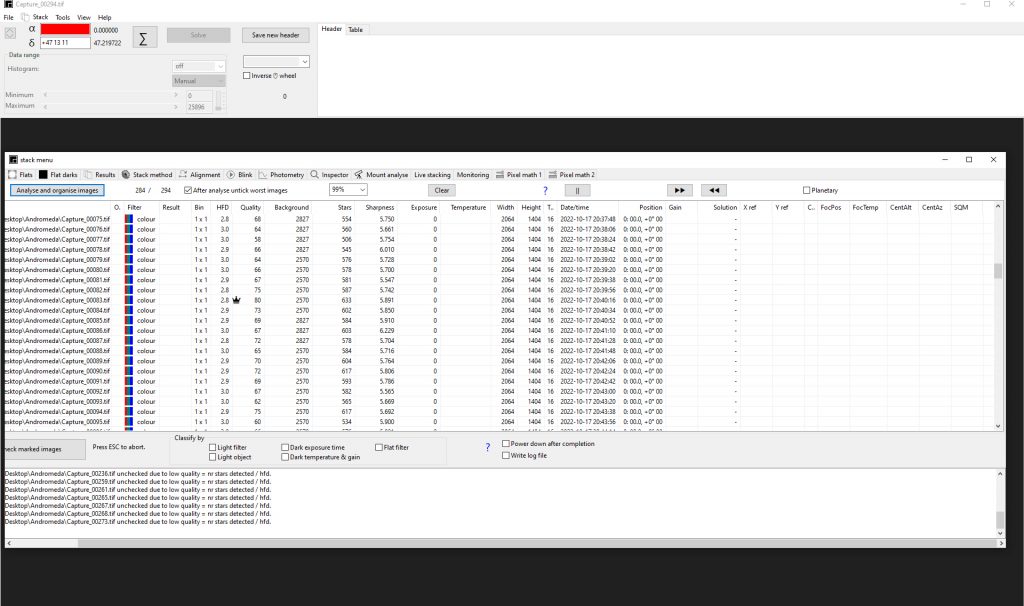
To align the frames, ASTAP finds ‘quads’ of stars and calculates their centriod. For each frame it produces two complex equations to allow it to be aligned to the reference frame: x, y displacements and rotation. See details here: https://www.ianmorison.com/astap-an-excellent-stacking-program/
ASTAP saves the stacked result as a FITS file which can beimported into Siril.
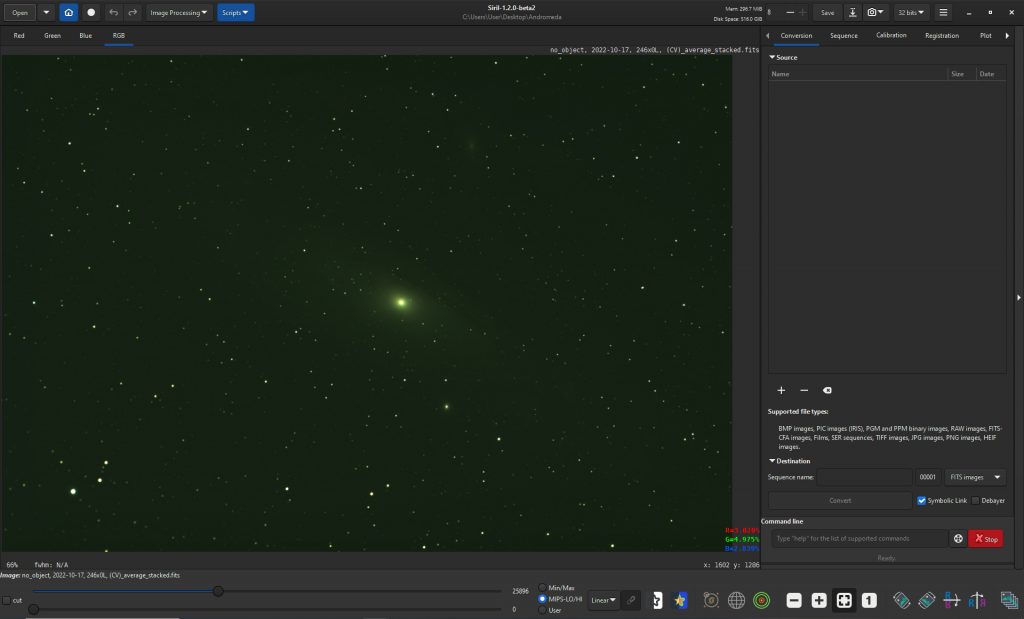
Processing in Siril
BackgroundExtraction
The first process to be carried out is to remove any sky glow(such as light pollution) using the ‘Background Extraction’ tool. In the command window that opens, one selectsthe grid size and clicks on ‘Generate’ when a grid of red boxes appears overthe image. The clever thing is thatSiril will aim to avoid nebula regions so as not to regard them as skybackground and remove them from theimage.
One sees that much of M31 is clear from the red boxes.
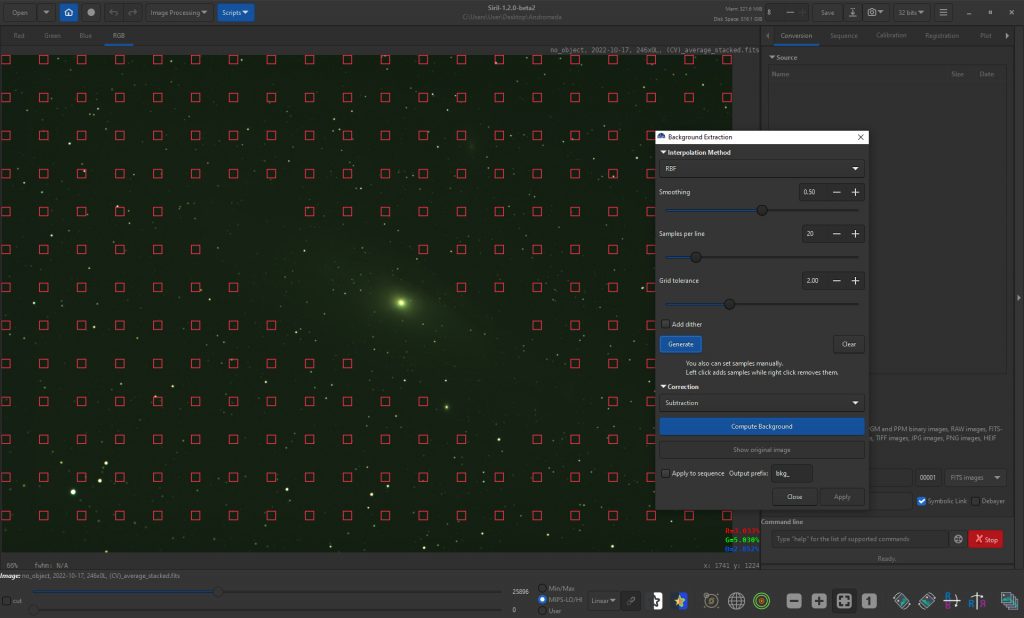
However, by right clicking on the red boxes, one can remove moreso that none of M31 is covered.
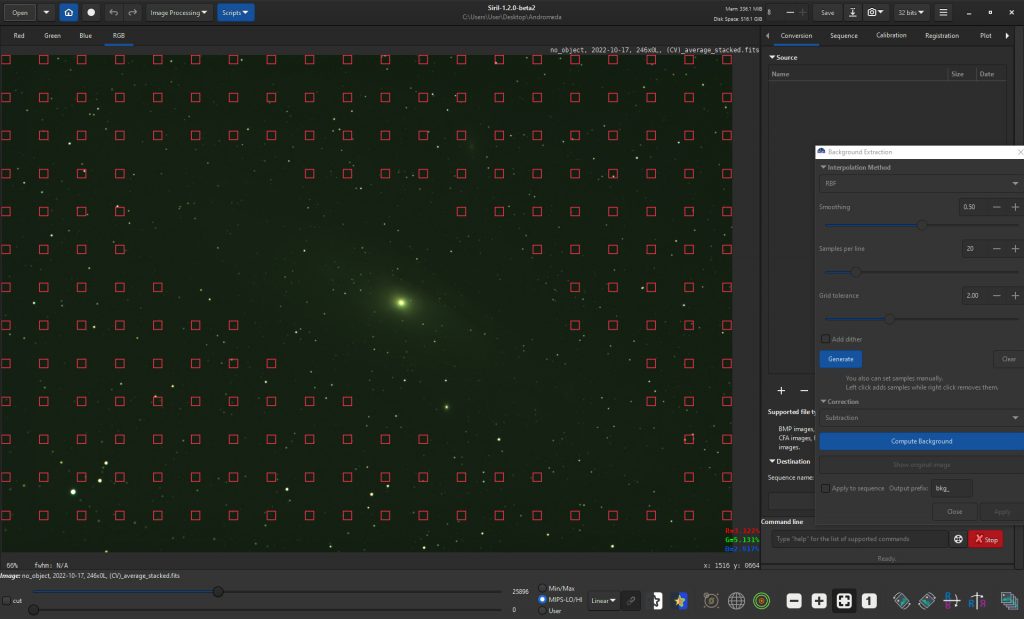
One then clicks on apply to remove the sky background
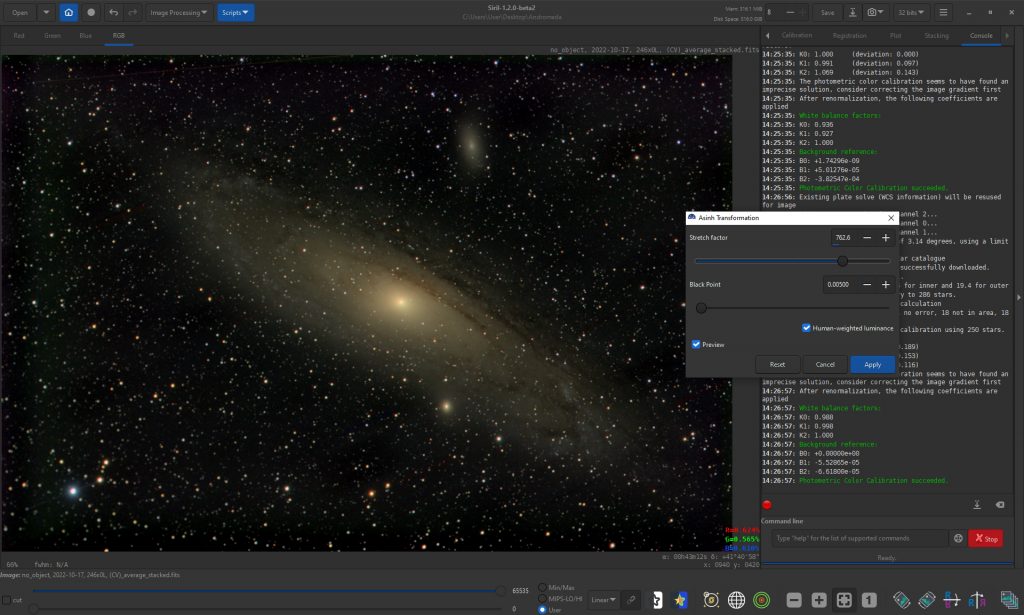
PhotometricColour Calibration
This is a superb way to get thecorrect colour balance in the image and does so by comparing the star colourswith those in a photometric star survey. One can choose either NOMAD or APASS. (Sometimes one will work when the other does not.) In the command window one must first give thecentral RA and Dec coordinates on the image – in this case use ‘Find’ to getthe coordinates of M31. One then has toset the focal length of the telescope and pixel size of the camera. (Having plate solved the image, it willreplace the specified focal length with the calculated value.) One then clicks on ‘go’ the process is carried out – though apparently not alwaysfor wide field images. If successful, inthe log at right will be given the relative weighting so be given to the red,green and blue channels to adjust the colour balance. Incidently, if one repeats the process thesevalues become very close to 1.

Asinhimage stretching tool
In the command window that opens up, one simply adjusts the ‘Stretch Factor’ and Black Point to give a surprisingly colourful stretched image which can be exported as a 16 bit TIFF file for use in, for example, Photoshop.
Using Stranet++ to separate the Galaxy and stars in the image.
This can either be done using the Starnet++ GUI (Graphical User Interface) as shown here or one can now access Starnet++ directly from Siril once one has set up the process. At the end of the article I have shown how to do this and then use it . The setting up does not take much time, so I do think it would be worthwhile.
Using the Starnet** GUI
For brevity, I renamed the Siril output file ‘in’ as it was to be the input file to the Starnet++ GUI. In the command box that opens up when the GUI is opened, I browsed for the ‘in’ file in the Andromeda folder as seen in the screenshot. The name of the output file is initially the same, so ‘In’ was changed to ‘Out. When the image of the galaxy alone had been computed, it appeared as ‘Out’ in the Andromeda folder. This name was changed to ‘Nebula’.
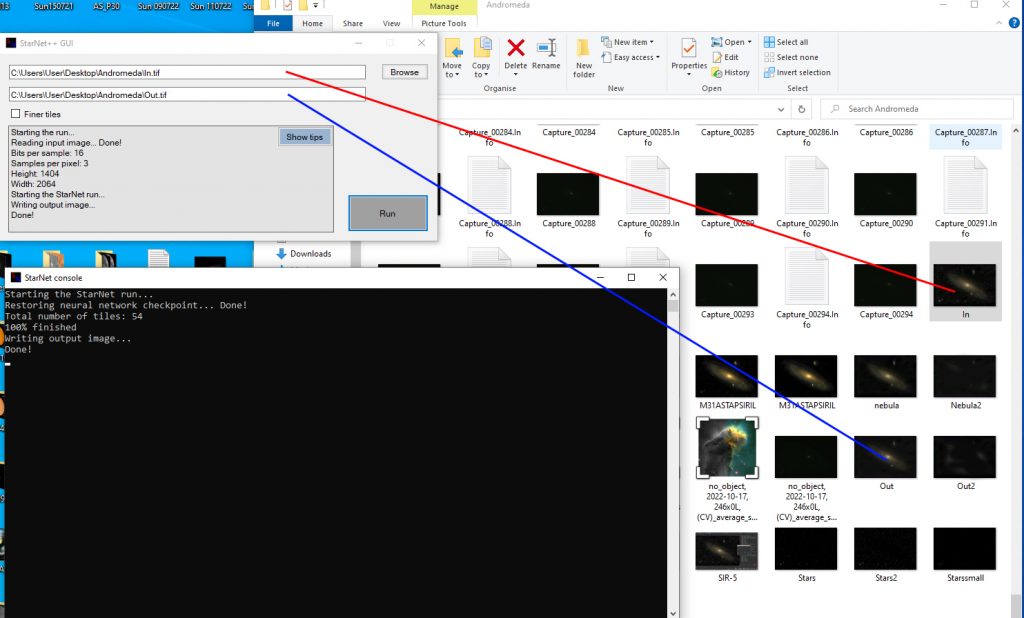
In Photoshop, the ‘In’ image was copied and pasted over the Nebula image and the pair of layers flattened using the ‘Difference’ blending mode – which left an image of the stars saved as ‘stars’. (Nebula +stars – Nebula = Stars)

Enhancingthe Nebula image
The local contrast of the galaxy wasincreased using the ‘Unsharp Mask’ filter with a very large radius and smallamount.
It was then sharpened using the ‘SmartSharpen’ filter in Photoshop though the ‘Unsharp Mask’ filter could be usedagain with a small radius (say 4 pixels) and an amount to suit.
Finally the saturation was increased alittle. The result was saved as ‘Nebulaenhanced’.
Reducingthe star size in Images Plus
In the ‘Special Functions’ drop down menu Images Plus has a star reduction tool. In the command window one simply moves the coupled sliders to the right. The result was ‘Saved as a copy’ with the name ‘stars reduced’.
Combiningthe Nebula Enhanced and Stars reduced images
The Stars reduced image was copied and pasted over the Nebula Enhanced image and the two layers flattened using the ‘Screen’ blending mode. The ‘Opacity slider’ can be used to reduce their brightness if desired to give the final result shown at the top of the article.
Setting up Starnet++ in Siril
In the Starnet download page in the ‘Command Line Tool’ select the windows version.

Download this zip file and extract the contents into a suitable folder.
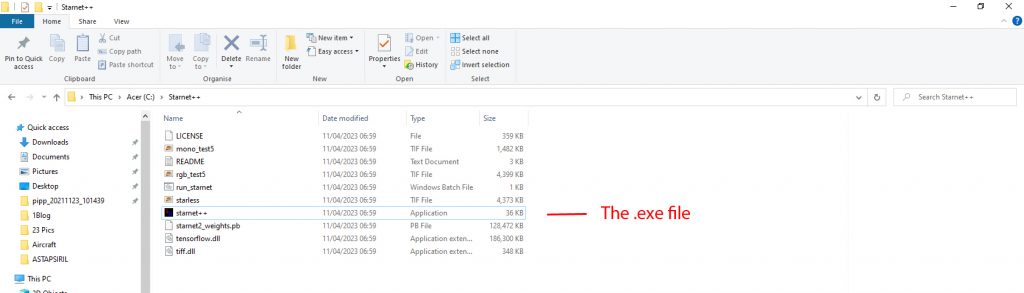
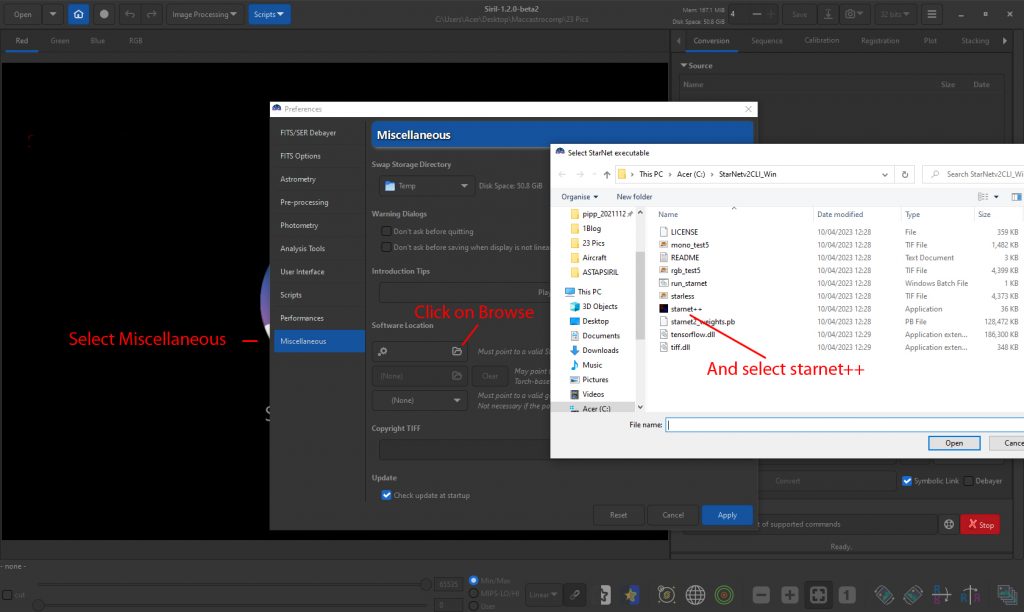
Now, in Siril click on the three bars at the top right and first select preferences.
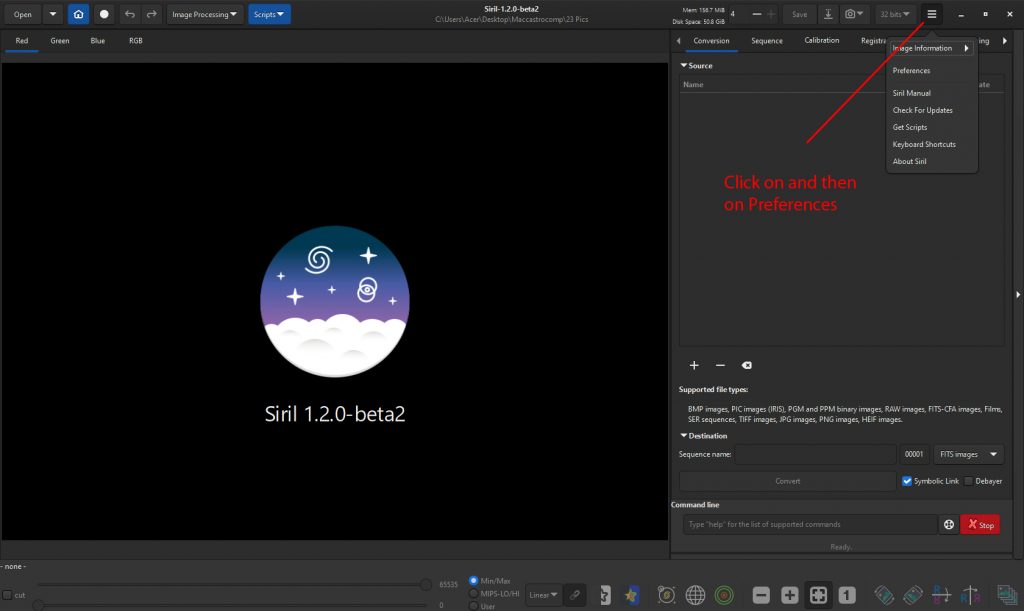
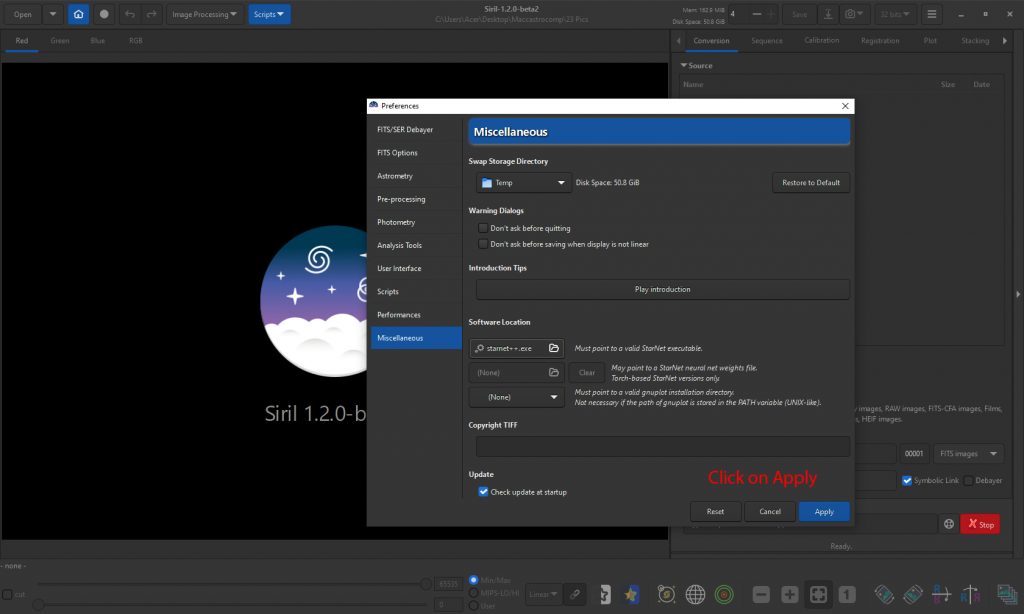
Then select ‘Miscellaneous’. It contains a panel in which to select the Statnet++ .exe which uses the browse tab to select the .exe file in the downloaded folder.
One finally clicks on apply and now the link to Starnet++ is installed.
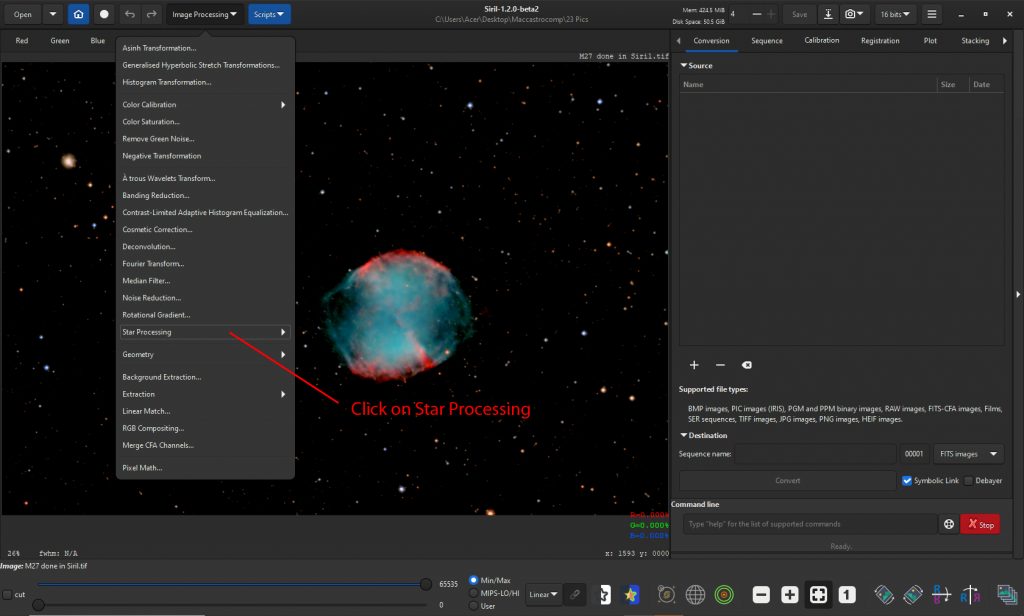
Now in the Image Processing drop down menu select ‘Star Processing’.
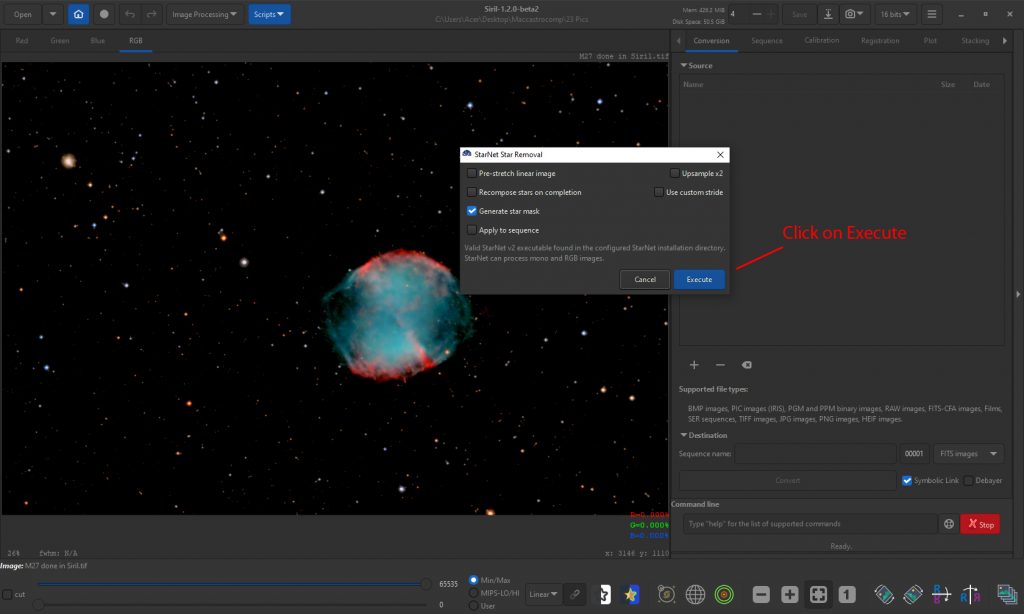
And the select ‘StarNet Star Removal’
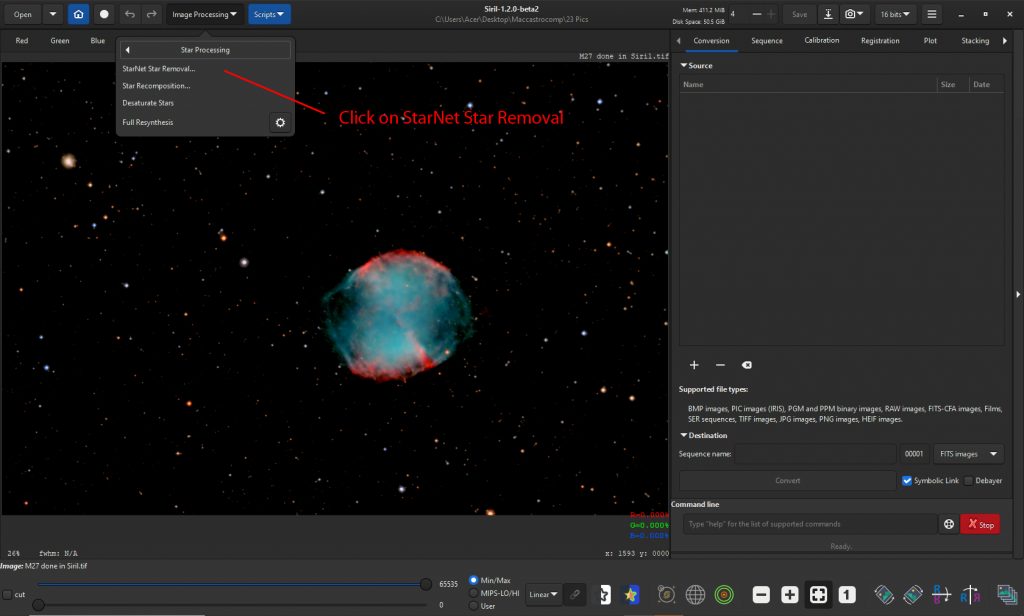
One then clicks on ‘Execute’
And after a while the image appears with the stars removed.
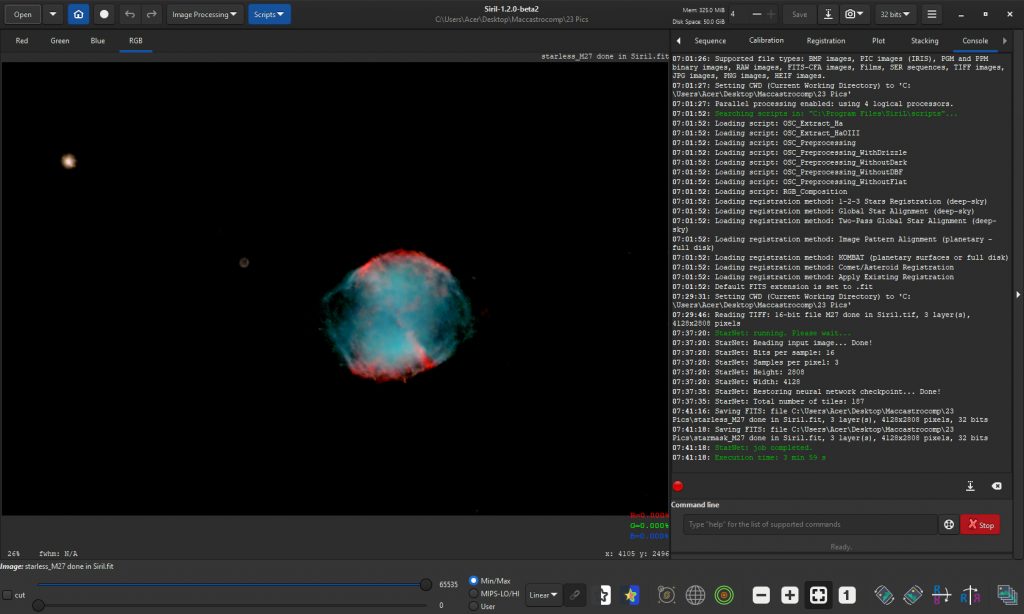
This can be saved as would have been the original image and the two then processed to to produce a ‘stars’ image as described above.
.