APRIL 2017
The iOptron Alt-Az mounts.
[This is just one of many articles in the author’s Astronomy Digest.]
iOptron now only produce the AZ Mount Pro GOTO mount at ~£1,398 with a 1.75 inch tripod. The head alone can be purchased for ~£1,065. It can also be purchased with a ‘Tri Pier’ for £1,698. These can be obtained from a number of UK suppliers. I have also included details about the earlier MiniTowers in case one comes upon them second hand. The very early ones may have a problem (solvable) with their GPS modules giving the wrong date as described in the specific article in the digest.
Astrophotography with a Az Mount Pro
It is too often said that one cannot use an Alt/Az mount for astrophotoraphy – but this is not true providing steps are taken to eliminate the effects of Frame Rotation. I have written an extensive article on this: Astrophotography using an Alt/Az mount.
A good feature of using an Alt/Az mount is that they do not suffer from ‘meridian flips’ as do many equatorial mounts but, on the other hand, cannot really be used to image objects at elevations greater that ~60 degrees.
The Az Mount Pro
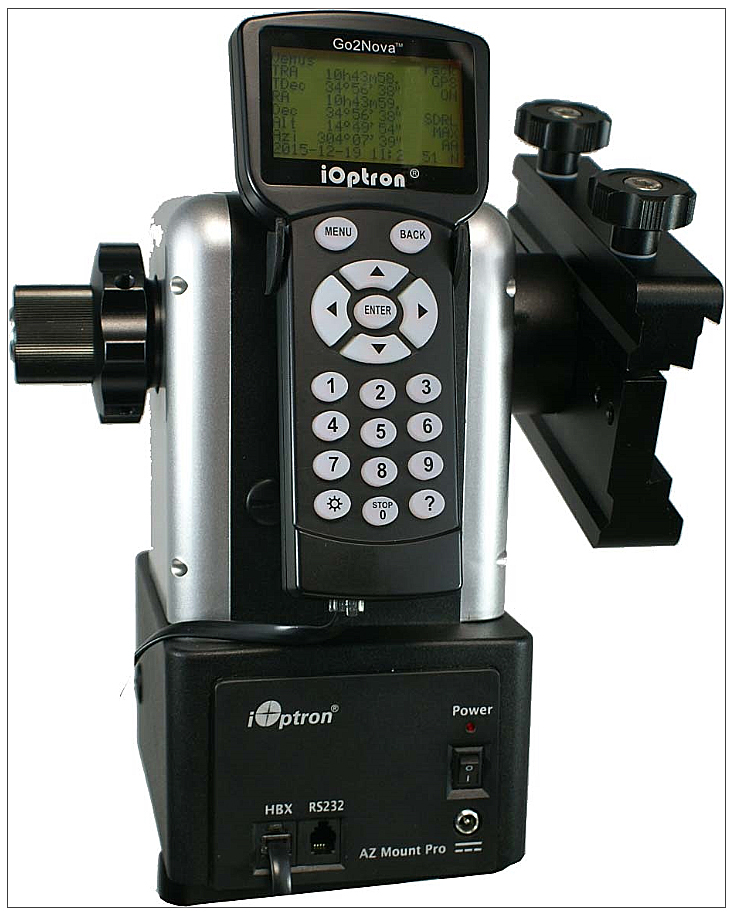
The iOptron AZ Mount Pro GOTO mount has a carrying capacity of 33 pounds using the supplied counterweight. It has a dual Losmandy/Vixen head. It can be equipped with a second vixen dovetail mount which can be purchased for £69 so that two telescopes (the second up 10 lbs weight) can be mounted together.
[Note: on my Az Mount Pro, I cannot easily lock the counterweight bar – as has been found true for some others – so that a second telescope could be mounted on it. I could tape it in position so it will not rotate and then I could mount a second telescope. (Continuum and H-alpha telescopes.) This is the only real problem that I have found. I also found it necessary to add the four ‘lock levers’ into the elevation locking collar so that sufficient purchase could be applied. These are now supplied as standard but, for earlier mounts can be bought from First Light Optics.]
The levelling of the head is a two step process: first, using a spirit level, the top of the tripod or Mini Pier is levelled by adjusting the tripod legs, then, using the three adjustable length pillars on which the head is seated, the head is finely adjusted using the incorporated bubble level. As will be described later, the older lower cost versions are easy and simple to set up but their new mount makes this even easier as iOptron describe:
“The term used to describe iOptron new AZ Mount Pro’s simple set up routine is called ‘level and go’. Using its built-in precision level indicator, the operator simply levels the mount and turns on the power; this capable computerized alt-azimuth telescope mount takes it from there. Utilizing the on board 32 channel GPS receiver and built-in position and angular detection sensors; the AZ mount Pro calculates its global position as well as the telescope orientation. Automatically the mount slews the instrument to an easily identifiable bright object in the night sky. The user need only confirm a bright object is in the centre of the view, to activate tracking and GOTO functionality.”
It incorporates a built-in rechargeable lithium ion battery for up to 10 hours use in the field and, pleasingly, uses a belt drive for smooth tracking and very quiet operation.
It has a built-in WiFi adapter so that it can be controlled remotely using ASCOM, iOptron CommanderTM or Sky-Safari – a beautiful program!
All parts of the mount except for the tripod fit within a compact aluminium flight case so the mount is very portable making it a superb ‘pick up and go’ package, ideal if you want to get away from the lights of your town and set up in a dark sky location.
One can purchase an iOptron Mini Pier for £118 to lift up the head by ~8 inches to allow longer focal length refractors to be used without fouling the tripod.
The iOptron websites list a number of other good features:
Quiet, low power consumption, stepper motors.
Zero backlash.
Automatic position and angular detection sensors
Serial port for computer control and firmware upgrades.
The Mini Pier
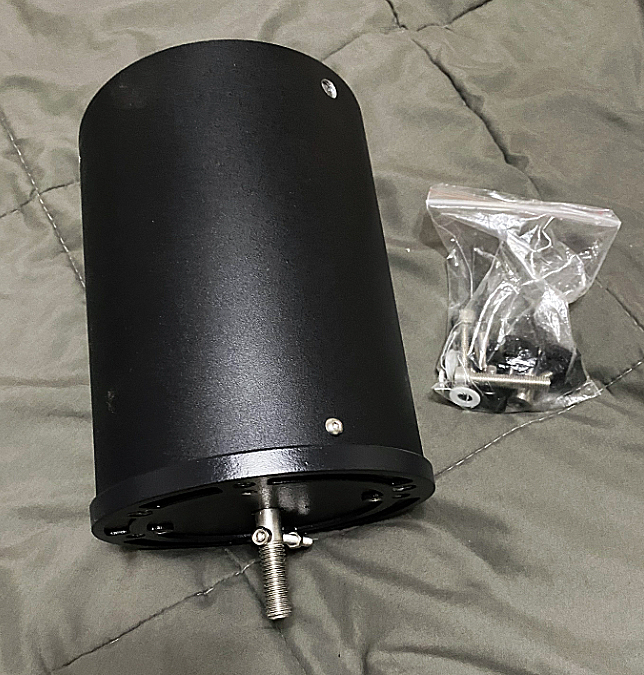
The Tri Pier and Mini Pier 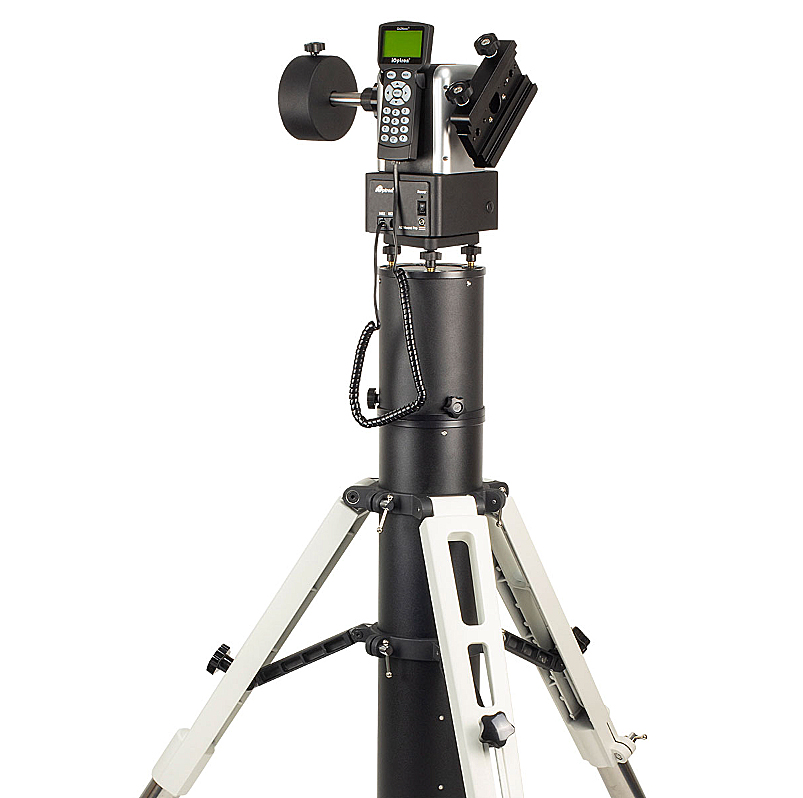
First light with an Az Mount Pro
I have been able to acquire an Az Pro mount with Mini Pier and 2 inch Tripod. First light was during a very clear morning so that I could image the Sun. First the Mini Pier was levelled using the extendable tripod legs, the head attached and a 90 mm telescope with Baader Heschel Wedge mounted in the dual Losmandy/Vixen clamp opposite the supplied counterweight. I have found the attachment of the head to the Mini Pier to be somewhat fiddly. The fine levelling of the head was then carried out using the adjustable mounting screws whilst observing the bubble level on the head.
When switched on, the mount does over a complete rotation – the head ascertains the direction of north and places the telescope in the home position pointing vertically – and then moves to a bright object. This was the Moon! It then askes one to agree with the time and location that, by then, should have been found by the GPS module. Having agreed by pressing ‘Enter’ the mount thinks a bit and then slews to a bright object such as the Moon or Jupiter in the daytime.
[It then asks one to slew the mount left or right to bring the object into the field of view. If the mount is accurately horizontal, only the azimuth should be wrong depending how well the mount had located true North. The slew rate initially very low but can be increased by pressing one of the numeric keys – 9 giving the the fastest slew rate. Having brought the object into the field of view and then pressed enter one can now use all the arrow keys to centre the object in the centre of the field.]
The Moon was not visible, so I lied and simply told the Mount that I had correctly aligned on it. I then selected the Sun and the head moved round to it location. Depending on how well the head had ascertained North, the Sun should be very close. No matter if it is not. If the head is well levelled, only the azimuth should be incorrect so one sees to which side the Sun lies and slowly slews the head in the appropriate direction to bring it into view and then use the arrow keys to centre it. The mount then tracked it perfectly. [I had found that, perhaps due to the proximity of a car, the found ‘North’ direction was not very accurate.]
Astro Imaging Problem
This over 180 degree rotation could be a real problem if the mount is to be used for astro imaging as cables to the camera (and perhaps even a power cable if the internal battery was flat) could be wound up. Apparently, iOptron did not expect the mount to be used for astrophotography.
First Light Images
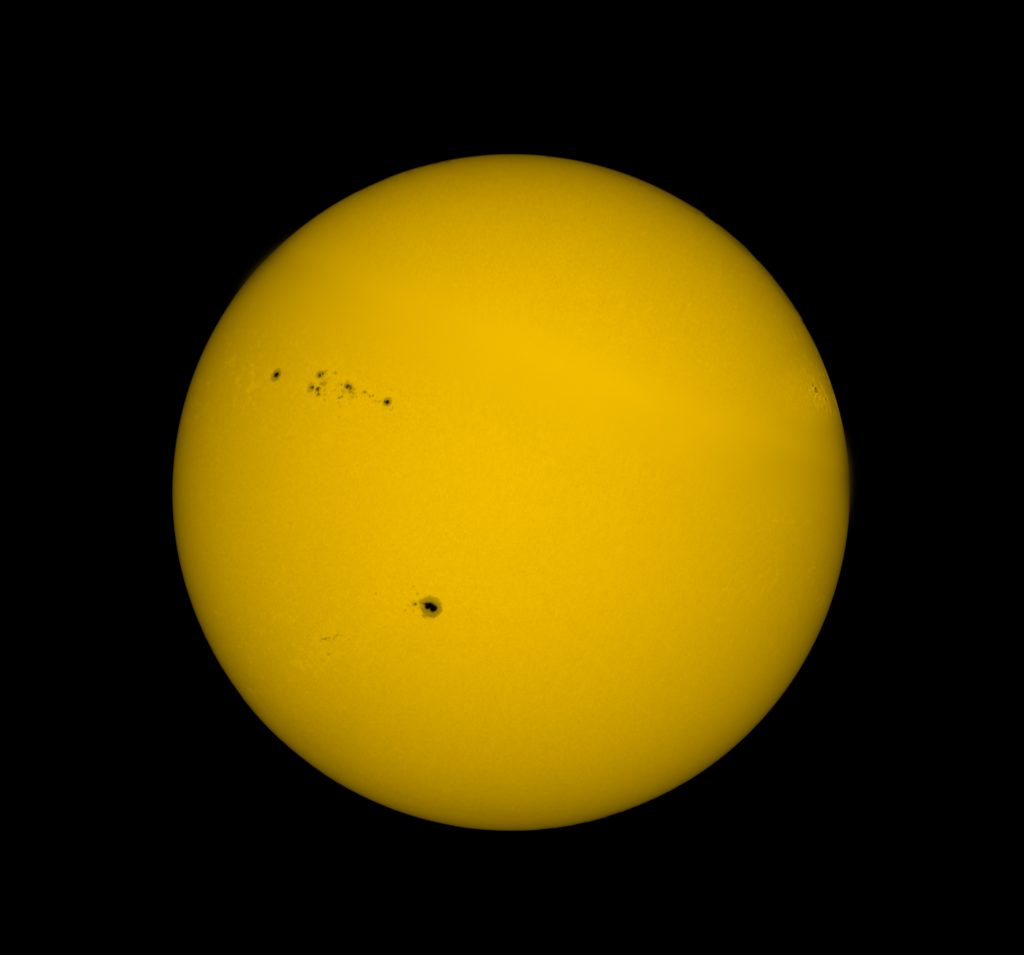
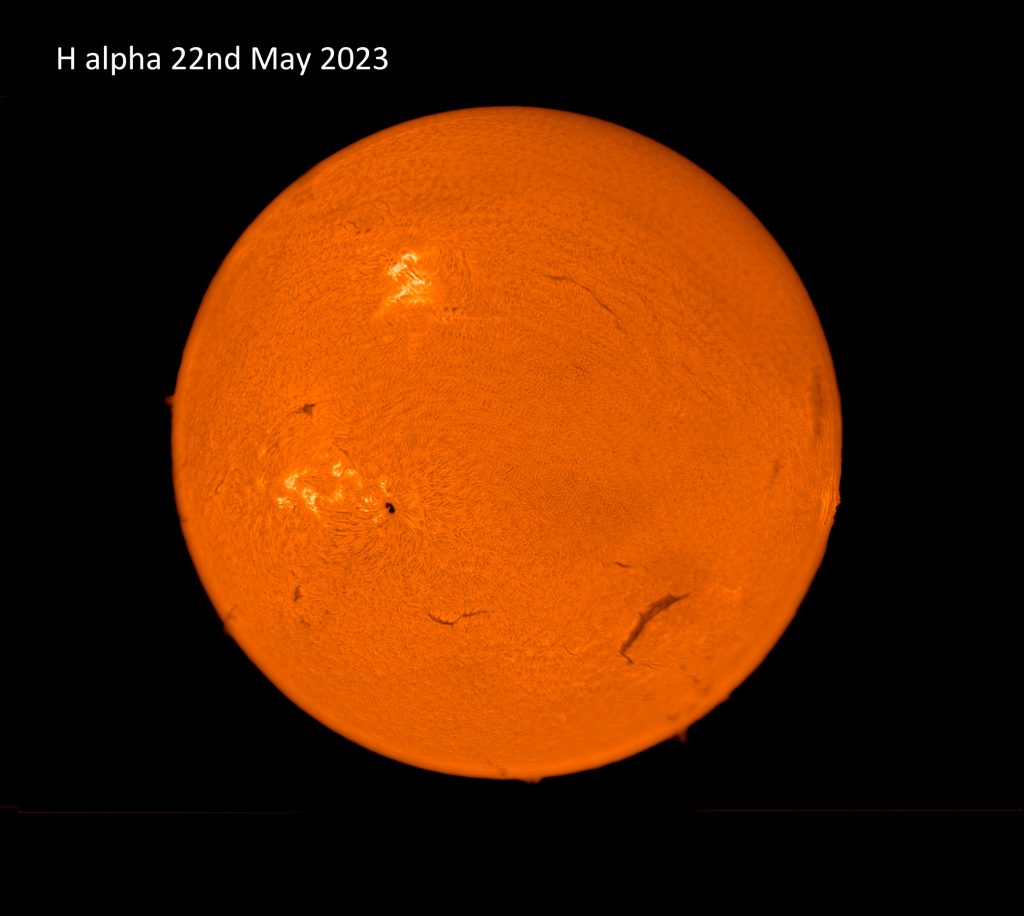
The Sun was imaged using a ZWO 178 webcam and the first light images, in Continuum light and H-alpha are shown below.
Nighttime Use.
The mount chooses a bright object which, not surprisingly, was Venus shining that night brightly in the west but, sadly, behind a tree. Pressing ‘Back’ it found a second object, the star Arcturus high in the southern sky, which was centred. I then selected a number of other stars and objects. The mount slews almost silently to them and all were within the field of view of my 90 mm telescope and 22 mm Televue Panoptic eyepiece. No finder scope was needed.
The earlier Minitower Mounts

The iOptron V2 MiniTower. Note the secondary adjustment pillars used to make the head horizontal.
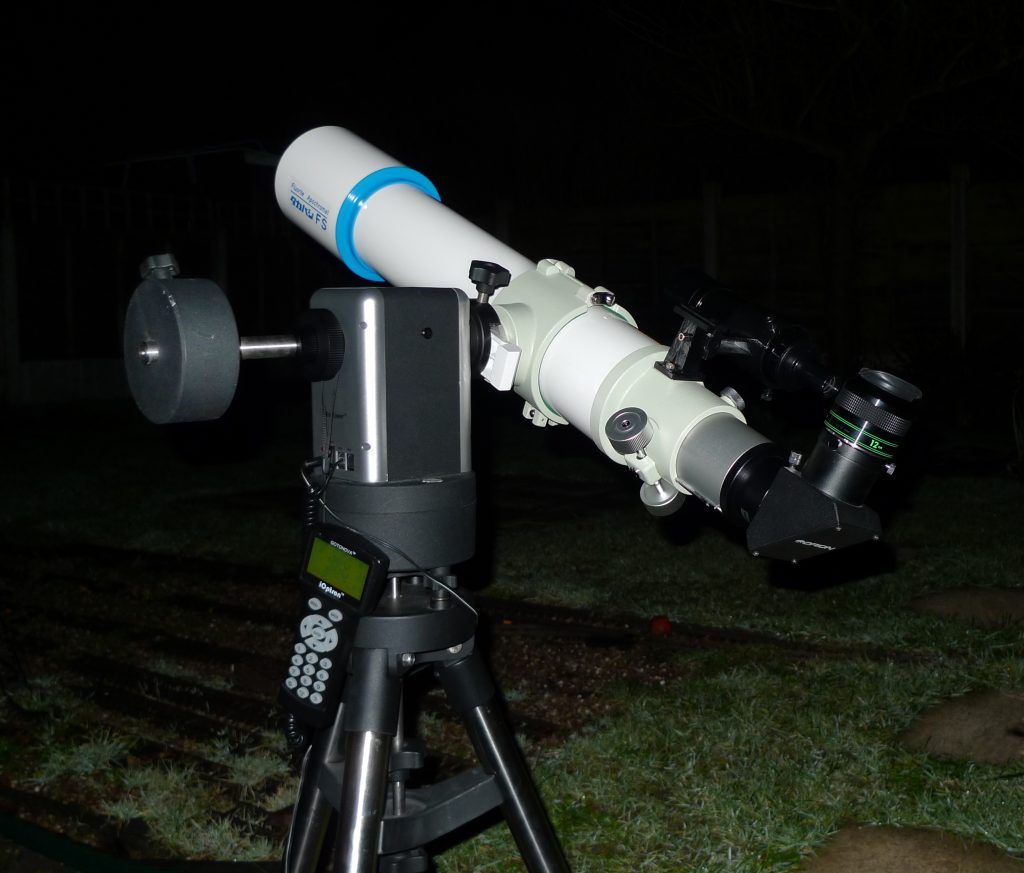
Takahashi FS102 and counterweight.
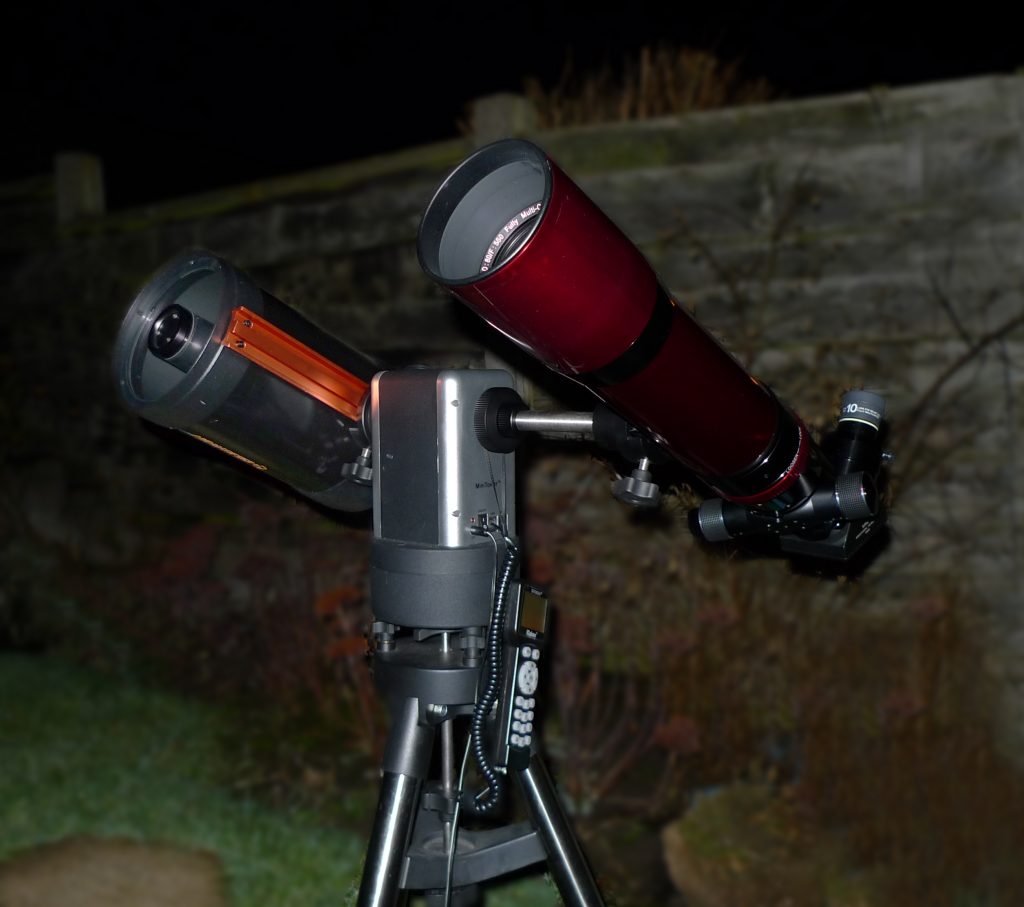
Celestron C6 SCT counterbalanced with a WO 80mm ED refractor
Using an iOptron MiniTower
The following essay, written some time ago during the last solar minimum, describes the use of the V1.0 MiniTower whose use is identical to that of the later V2.0 mount which incorporates enhanced components and encoders compared to the V1.0. Though these are no longer available, the essay will give a feel of how easy the mounts are to use.
“The mount’s ‘first light’ was under the watchful eye of the amateur astronomers attending a SPA (Society for Popular Astronomy) observing weekend. As dusk fell and Jupiter appeared in the south-west, my 80 mm ED refractor was mounted in the Vixen dovetail. The mount has first to be set into its ‘park’ position with the telescope vertical and alt-az head aligned to the south. (There is an arrow on the rotating base.) The substantial tripod was set up with its top approximately level. The head is then positioned on it, supported by three coupling rods that can be finely adjusted whilst one can easily observe and centre the air bubble in its inverted cup – so quickly giving a perfectly levelled mount. There is an azimuth clamp that must be loosened whilst this is done and this also allows the head to be rotated to face south. Not being able to see the pole star meant that was not too accurate but, as you will see, this was not a problem.
The mount was powered up and after a short while the integral GPS system had updated the location and set the accurate time. The next task with a computerised mount would normally be to align it before one is able to slew to an object that you wish to observe. But with this mount this is not demanded of you. You can simply select ‘Select and slew’ and choose the object that you wish to observe. We selected Jupiter and the telescope immediately slewed round towards Jupiter but ended up a little to its west – not surprising as our alignment to the South was only approximate. But, as the head was accurately horizontal, the elevation should be correct and the only significant error would be in azimuth. A low speed azimuth slew quickly brought Jupiter into the centre of the low power field. Moving to a higher power and some very minor tweaks in position accurately aligned the mount on Jupiter. At this point, ‘Sync. to target’ is activated and the computer will then internally compensate for our inaccurate alignment south. This took less time that it takes to read this and we had effectively carried out a ‘One Star Align’ but with the object of our choice. If, as we were, you were going to observe this object anyway, then the alignment has essentially taken no time. Brilliant! The seeing was surprisingly good and the belts and zones showed up well. We then slewed to Andromeda high in the west. It was an impressive sight using a TMB 40mm Paragon eyepiece so we became more ambitious and slewed to M33 in Triangulum. Heavy showers earlier in the day had cleared the atmosphere and M33 was easily seen with averted vision. We wanted to try mounting a TMB 110mm refractor so selected the ‘Park Scope item on the menu. The telescope moved to the vertical position and the head aligned itself due south – so now we knew accurately where south was. The somewhat heavier telescope was handled with ease but advancing cloud soon ended our observing, but not before leaving us with a very favourable first impression.
The following night the clouds cleared and an observing site was found with good views from south-east round to north. This time our first target was the Pleiades Cluster on which we synchronized just as we had had on Jupiter. Our observations then took in the Orion Nebula, clusters in Auriga and Gemini and finally, as the clouds encroached from the west, the galaxy pair M81 and M82. In all cases, using a Televue 20mm Plossl, the objects were very close to the centre of the field of view. The go-to precision displayed by the mount on those first two nights had been very impressive, but what impressed our group most was the how fast we were able to begin our observations!
The next outing for the mount was at an astronomy weekend at Burton Manor College. The skies only cleared for a short while during one morning but gave our group a chance to see if the Sun had come out of its deep sleep. It hadn’t, not a sunspot could be seen! Unlike many computerised mounts, the MiniTower does allow one to move to and then synchronise on the Sun − after a suitable warning of course. This time we mounted an 8″ Celestron Schmidt-Cassegain on the mount and used the supplied counterweight along with a second of similar weight to balance it. The mount had no problems slewing or tracking smoothly, indicating that the MiniTower can support a scope of this size. For safety, the finder objective was covered and the telescope eyepiece pointed down to project an image onto card. The Sun’s image was easily centralised and synchronised on. Then we were able to do something I, personally, have never been able (or dared) to do before – find Venus in daylight just 9 degrees from the Sun. Having executed a slew to Venus, it was immediately seen as a tiny gibbous disk virtually in the centre of the field of view!
The MiniTower provides three options for its power supply. Perhaps the neatest is to use 8 AA batteries that fit into the tower unit. It was pleasing to find that rechargeable Ni-MH batteries worked well, giving over 3 hours of use. Alternatively, a mains adapter and a 12 volt plug and cable for use with rechargeable battery packs are provided.
The mount’s hand controller has a large, informative, 8 line display. I did find the controller’s back lit buttons rather ‘squishy’ but at least it does means that one is unlikely to activate one by mistake! Pressing the ‘Menu’ button brings up the main menu which includes eleven options. The most used will be ‘Select and slew’ which opens up the object menu which has eight submenus to reach the ~130,000 objects in its database including the Planets ,Sun and Moon, all the usual catalogues, 190 comets, 4096 asteroids, 88 constellations, up to 256 user objects and the ability to enter the RA, Dec of an object. The controller also has an USB port to enable the mount to be computer controlled.
The MiniTower has the capability of putting a supplied counterweight on the opposing side of the mount to balance the telescope – obviously a good thing to minimise wear and give the best possible slewing and tracking performance. For light scopes though, iOptron state that a balance weight in not needed. Even better, a second dovetail is provided which may be located on the balance arm so that a second telescope can be mounted in parallel with the first. Very neat!
The mount uses 12 volt DC servo motors which are very quiet in operation (great if you have close neighbours) and the positioning is monitored and controlled using optical encoders having a resolution of 1 arc second. With an accurately levelled mount, the selected object was always close to the centre of the field of view of a medium power eyepiece. To enhance the go-to performance it is also possible to carry out a two star align that will correct for any small errors in setting up the mount. The next important requirement is that, once an object has been centred in the field of view, it remains there as the mount tracks the object across the sky. For this test, a 6″ Schmidt-Cassegrain was set on the mount and a 7mm eyepiece used to view the planet Jupiter. Having centred Jupiter in the 20 arc minute field of view it was good to find that it was still precisely centred in the field well over an hour later.
It is often said that an alt-az mount cannot be used for astrophotography due to the fact that the field of view rotates with respect to the sky. In fact, lunar photography and webcam imaging of the planets present no problems, but long exposure CCD imaging is not possible. However, by stacking a number of short exposure images, it is possible to make deep sky images by using a program such as ‘DeepSkyStacker’ which automatically de-rotates the images before combining them.
All parts of the mount except for the tripod fit within a compact aluminium flight case so the mount is very portable making it a superb ‘pick up and go’ package, ideal if you want to get away from the lights of your town and set up in a dark sky location. As I hope I have shown, it is very quick to set up and its go-to ability and tracking could not be faulted. What more could one want? This year, I gave myself a new year’s resolution not to buy any more telescopes but I had omitted to include mounts. Good!”