APRIL 2023
The best free astronomical data image processing software: ASTAP and Siril
This is just one of well over 100 articles in the author’s Astronomy Digest : https://www.ianmorison.com.
To process a set of frames of an astronomical object one needs to first align and stack the frames and then stretch the stacked result to bring out the faint details. It is likely that light pollution (sky background) in the image will need to removed and the final result colour balanced. For many years I have been using Deep Sky Stacker to align and stack the frames and Adobe Photoshop CS4 to remove the sky background and stretch the image. I had found a neat way of removing the sky background in Photoshop as described in detail in some of the digest articles.
The captured data
I had taken a 369, 20 second exposure, data set of Messier 13 using an Altair Astro 294 Micro 4/3 cooled (to -15 C) camera coupled to a Vixen VC200L 200 mm catadioptric astrograph. It has a sub-aperture corrector and additional optical elements within the baffle tube to give a flat field which has virtually no vignetting when used with a Micro 4/3 camera. I had taken dark frames but, as I believe that bias frames are not needed if the dark frames have been taken the same exposure and temperature as the light frames, none were taken and neither were flat frames needed.
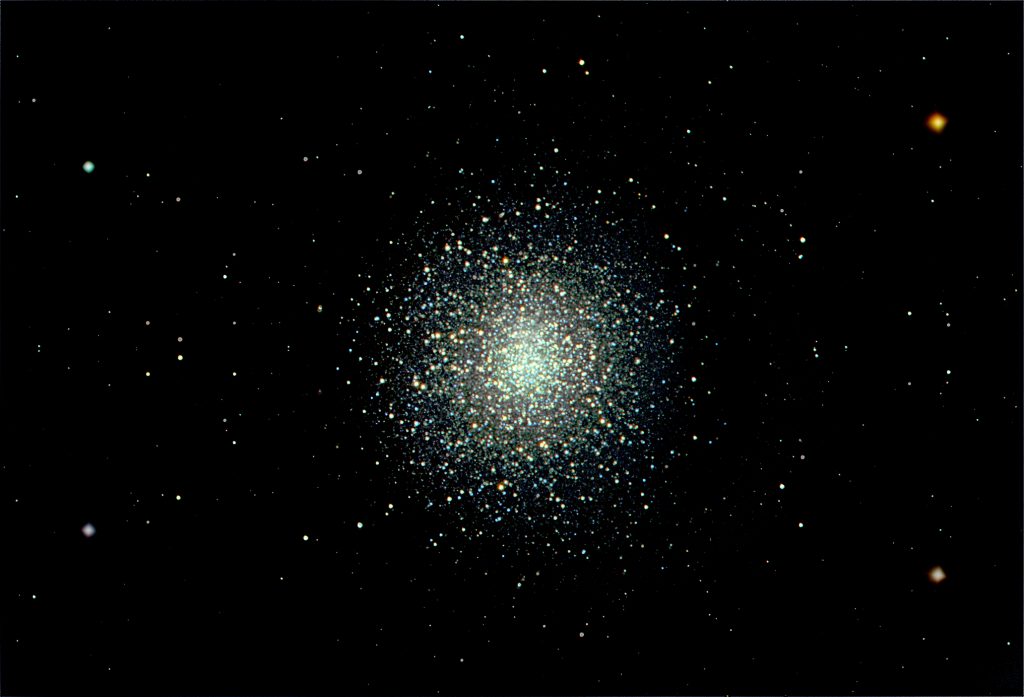
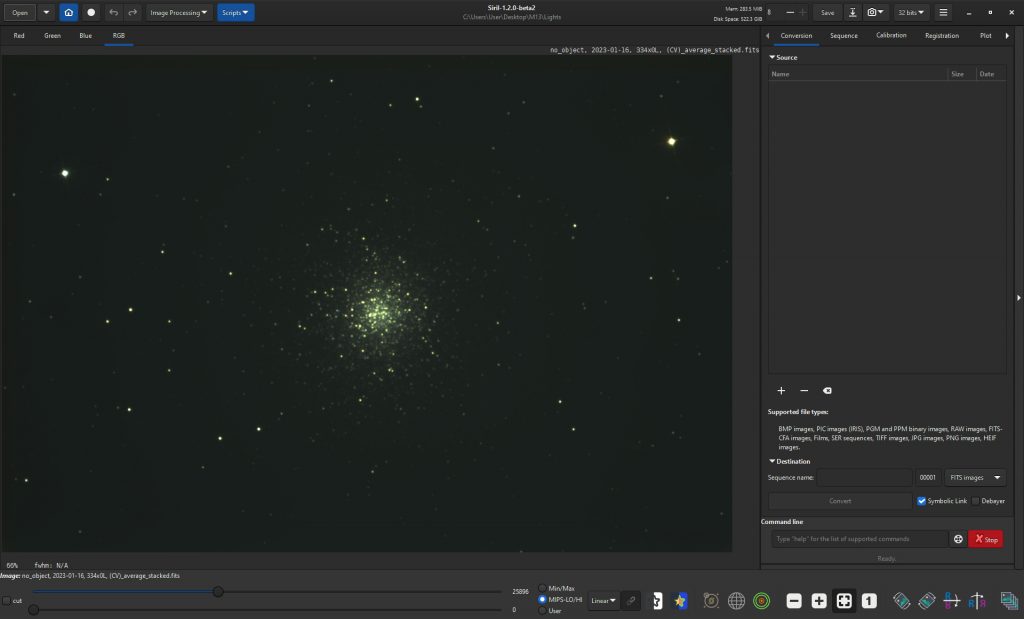
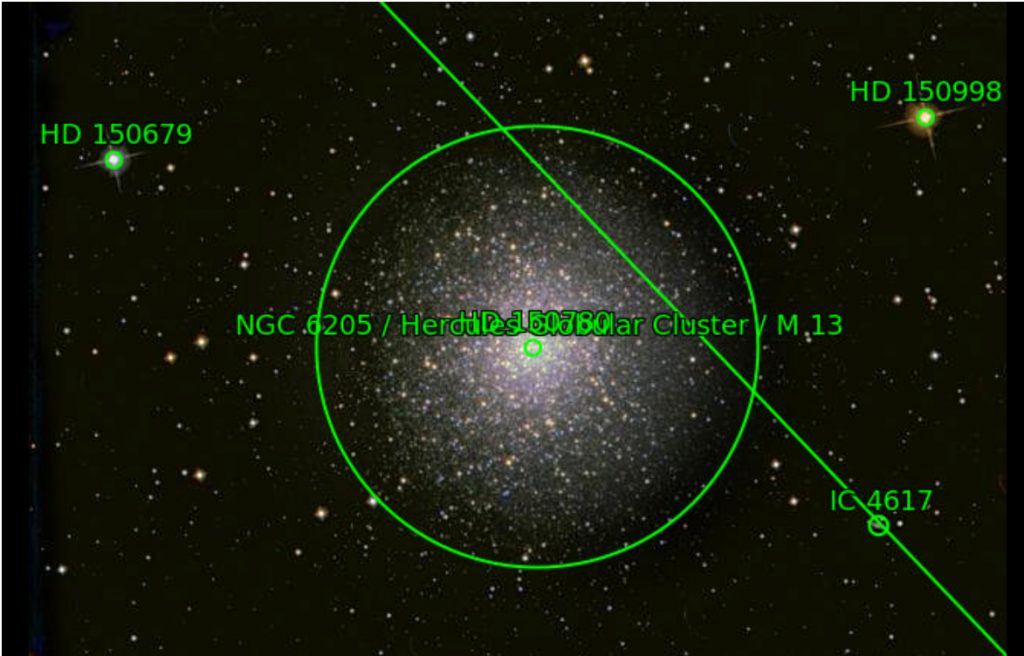
When taken, I had processed the captured frames using Deep Sky Stacker and Adobe Photoshop and produced the following image. I knew that M13 subtended a greater area than the image showed, but assumed that it outer parts had been obscured by the light pollution.
Stacking the capturedframes
Since then, I have tried a number of aligning and stacking programs and written this up in the Digest Article: https://www.ianmorison.com/thoughts-about-aligning-and-stacking-software-sequator-deep-sky-stacker-dss-siril-and-astro-pixel-processor-app/. More recently, I came across a further free program called ASTAP and written up a review here: https://www.ianmorison.com/astap-an-excellent-stacking-program/
Nico Carver in his ‘Nebula Photos’ Youtube video: https://www.youtube.com/watch?v=fbzE1YcICGU, has thoroughly reviewed nine stacking programs and found that Pixinsight gave the best result. This program is, however, quite expensive. A close second was ASTAP which uses a complex method of aligning frames as described in my article which uses ‘quads’ of stars rather than single ones. As a result, it is quite slow in operation but may well produce a better result. (Nico found that Siril and Deep Sky Stacker came next in terms of quality.)
As I have described, the latest version of Siril has some superb features, including a ‘Photometric Colour Calibration’ tool, and I have been using this to remove the sky background, set the colour balance and stretch the image. It thus seemed a good idea to use these two programs to process the data.
ASTAP aligning and stacking
ASTAP first analyses the frames, selects the ‘best’ for use as the reference frame and removes from the stack those whose quality is not good. This took ~7 minutes to complete. As seen in the screen shots below, it selected frame 269 – which had the highest ‘quality’ rating – as the reference frame and had eliminated 18 frames from the stack with the lowest quality rating.
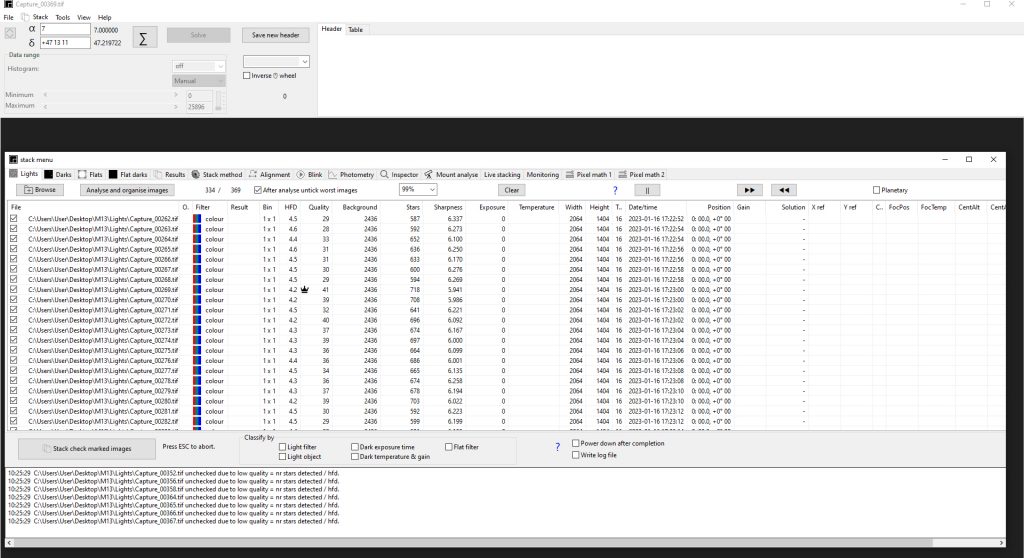
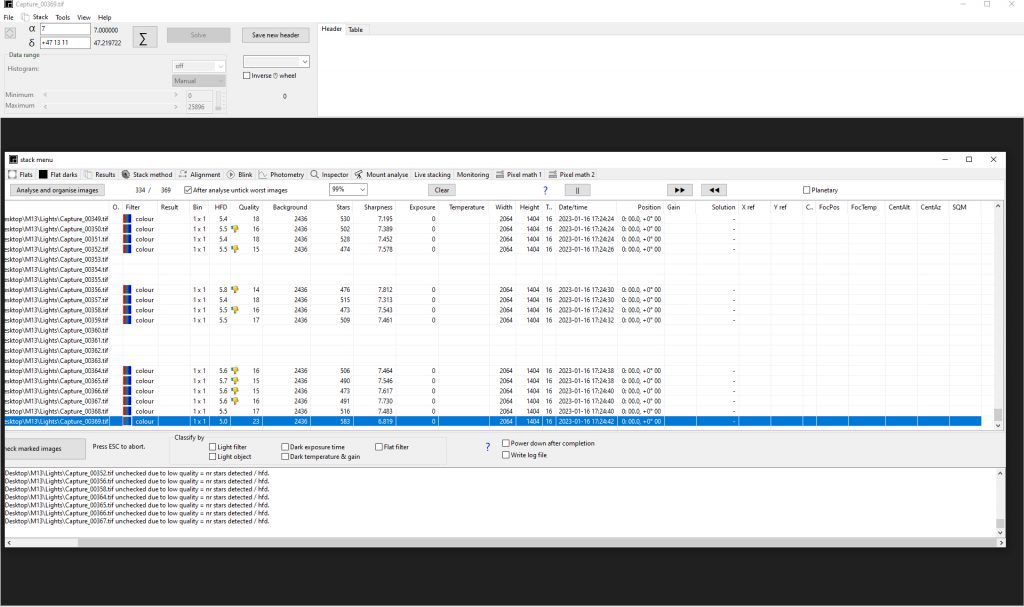
The stacking is then initiated which took a further 6 minutes to execute. For each frame ASTAP derived two equations to specify the lateral and rotational displacements from the reference frame.
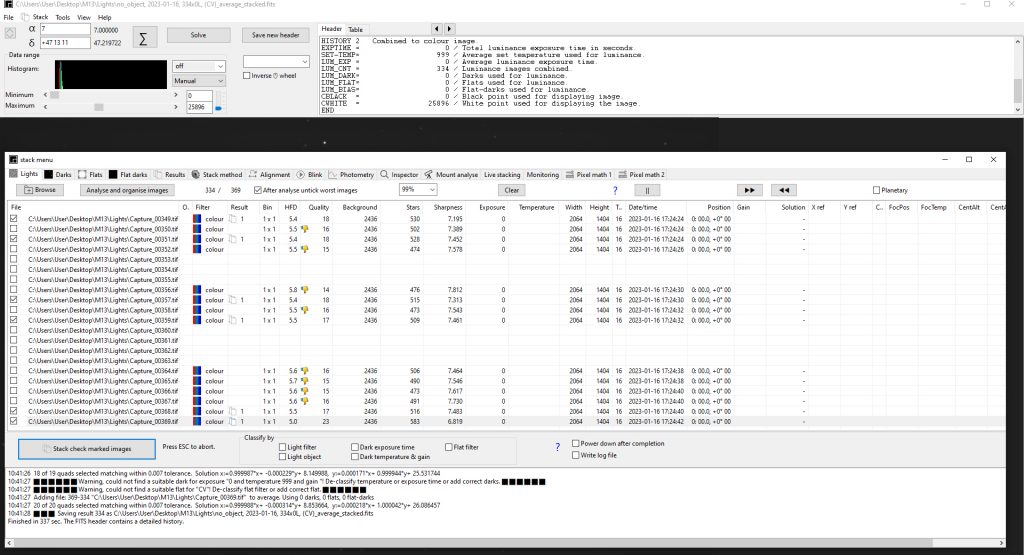
I do not fully understand these equations, but it does indicate high precision. From the screen shot above: ‘File 334: 20 of 20 quads selected matching with 0.007 tolerance. Solution x:=0.999988x+ -0.000134y+ 8.85364, y:=0.000218x+ 1.000042y+ 26.086457′
Processing in SIRILand Adobe Photoshop
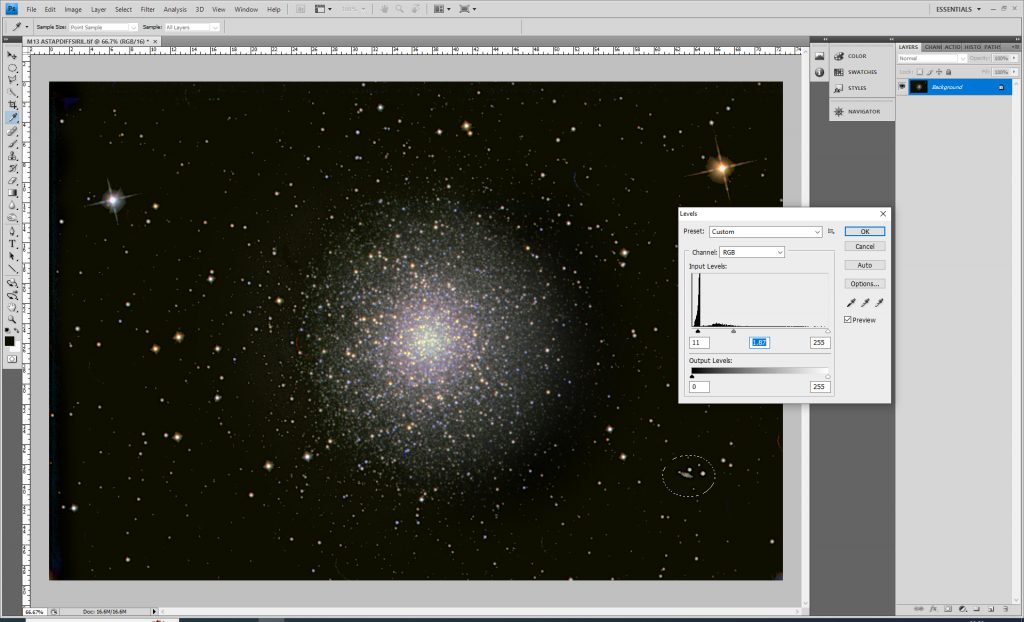
The 32 bit image was imported into Siril but was also then exported as a 16 bit TIFF file forinput into Adobe Photoshop for a reason that will become apparent. [The excellent, low cost program, AffinityPhoto or the free Program, Glimpse, can be used instead of Photoshop.]
The first SIRIL action that is applied to the stacked image is the Background Extraction tool to remove the sky background – largely light pollution. However, having used Siril to carry out the background extraction I found that. when the image was stretched, there were some significant edge effects and, very surprisingly, a better removal of the sky background was obtained using the author’s (*) Photoshop technique: the TIFF image was duplicated in Photoshop and a ‘Dust and Scratches’ or ‘Median’ filter applied with a radius of ~50 pixels. This removed the stars from the image leaving just a ‘glow’ at the location of the cluster. This was cloned out from nearby regions of the image or, alternatively, painted out with the ‘colour’ of a nearby spot – both assuming that the sky background was not changing significantly across the image. The two layers were then flattened using the ‘Difference’ blending mode. This image was then imported into Siril.
(*) This a variant on a simpler technique that has been used by others but is, I think, the only version that uses a ‘Dust and scratches’ or ‘Median’ filter first to remove the stars and give a smooth background from which to clone or sample the background from.
Photometeric ColourCalibration in Siril
This superb tool is fully described in the Digest article: https://www.ianmorison.com/photometric-colour-calibration-using-siril-messier-67-open-cluster/
The tool was selected from the ‘Image Processing’ drop down menu and, in the command window that opens,the image RA and Dec selected using the M13 name and ‘Find’. The telescope focal length (1800 mm) and the pixel size of the camera are also entered. Either of the NOMAD or APASS star cataloguesis selected and the process initiated. (Sometimes it will work with one of these and not the other.) Siril then compares the star colours in thecaptured image with those in the star catalogue and adjust the colour balanceto correct that in the image. Magic! [Note: the computer must have access to theinternet to access the star catalogue.]
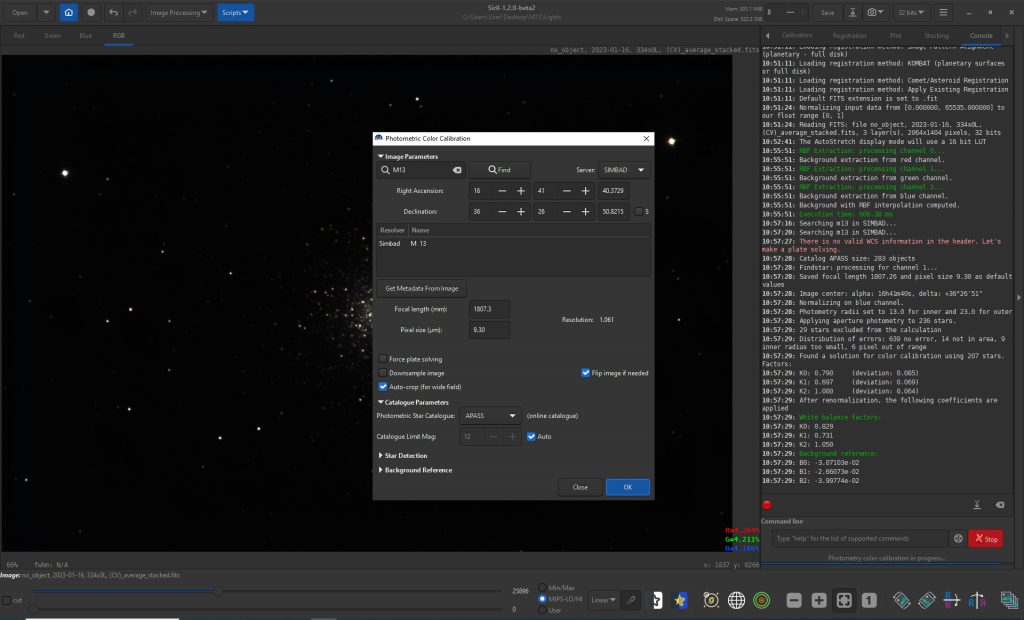
In the log are given the waiting to be applied to the Red, Green and Blue channels: Red 0.829, Green 0.731 relative to the Blue channel 1.050.
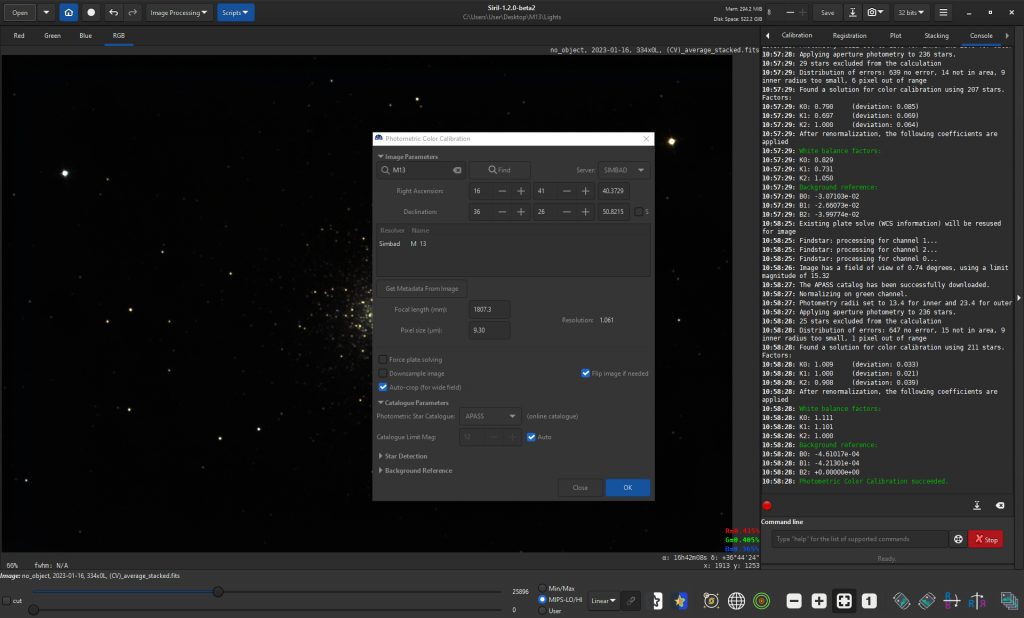
If the process is repeated then, as expected, the three values are very close to 1.0: Red 1.111, Green 1.101 and Blue 1.000.
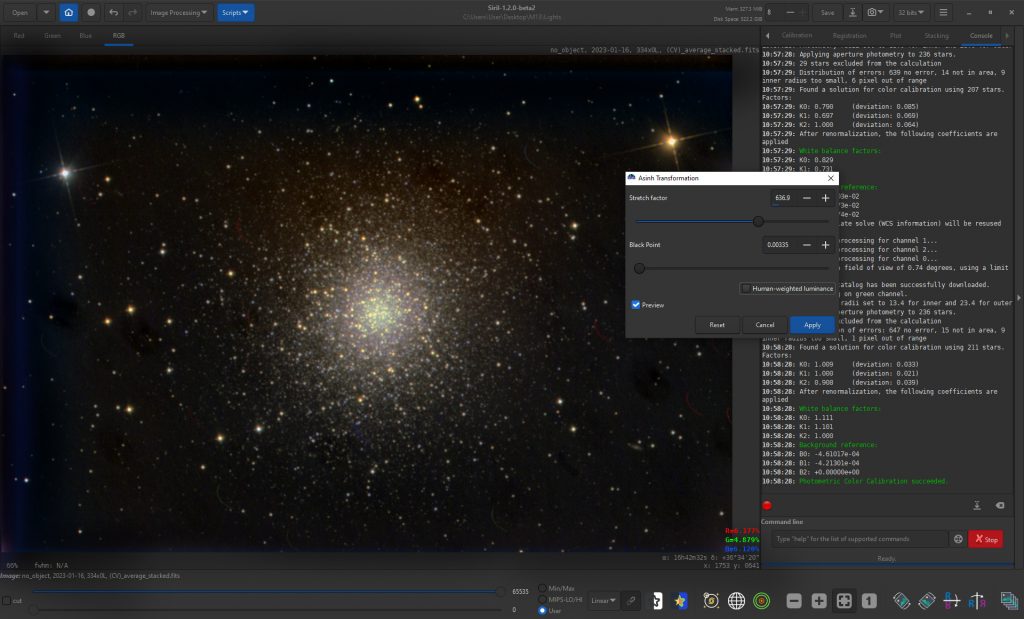
Asinh stretching inSiril
To lift up the fainter parts of the image but, less so, the brighter parts, I used the Asinh stretching tool using the Stretch Factor and Black point as seen below. This tool appears to give nicely saturated star colours. There is some blue excess at the extreme left of the image. The stretched result was saved as a 16 bit TIFF file for input into Photoshop.
Final adjustment to the image in Photoshop
The blue glow at the extreme left of the image was removed using the burn tool darkening the shadows. Plate solving the image in Astrometry.net showed the faint galaxy IC 4617 in the lower right of the image.
To bring this out, a small region around it was selected, stretched using the levels tool by moving the central slider a little to the left and then the left hand slider a little to the right to reset the black point.
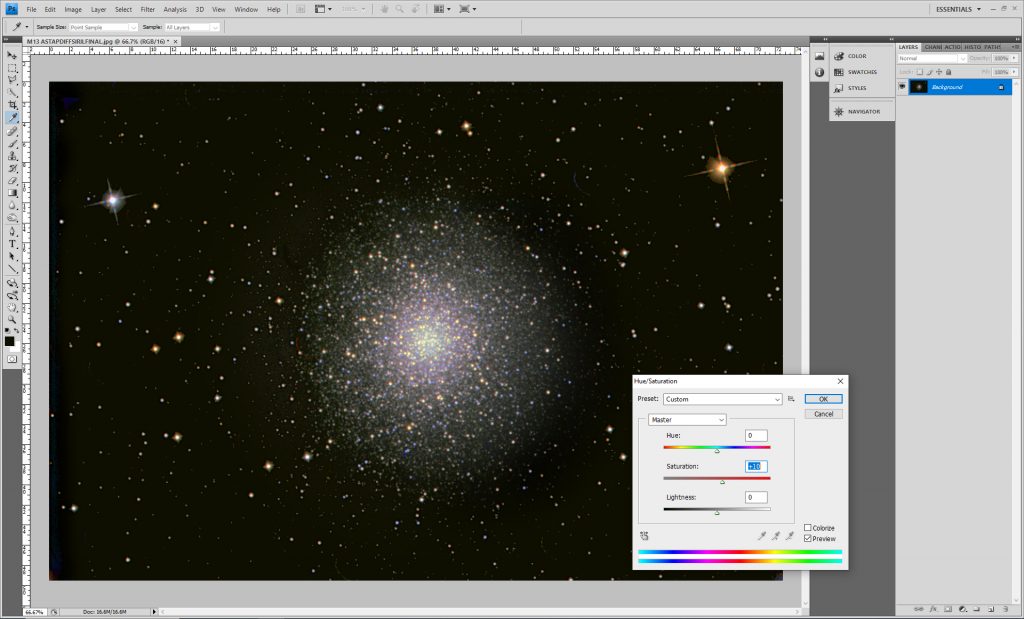
If desired, one could increase the saturation a little.
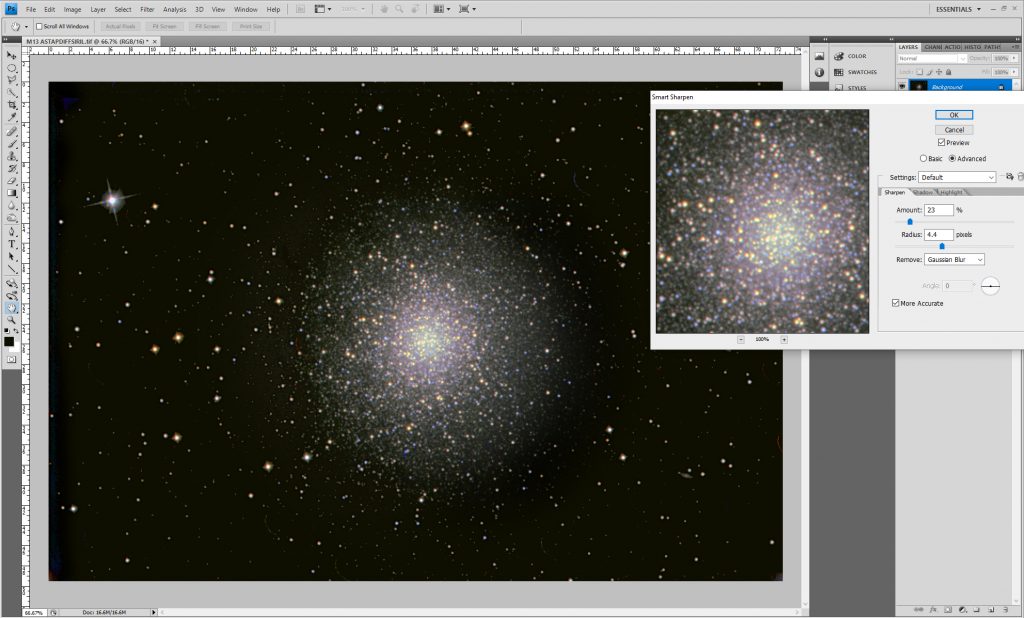
I then used the ‘Smart Sharpen’ filter to increase the perceived sharpness, but other sharpening tools could be used. A good alternative technique is called ‘High Pass Sharpening’: the image is duplicated and the ‘High Pass’ filter applied to the duplicate layer with a radius of, say, 3 pixels. The two layers are then flattened using the ‘Overlay’ blending mode with the ‘Opacity’ slider controlling the amount of sharpening applied.
The final result was very satisfying, and stands up well toimages found on the internet.
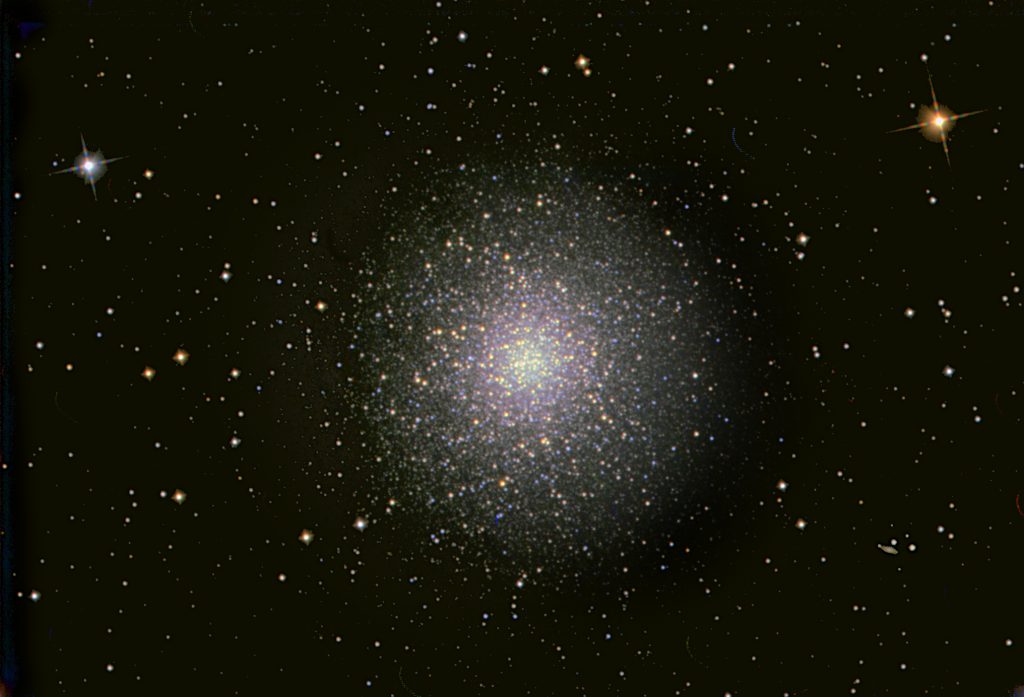
Why was this resultbetter?
The use of ASTAP had made no significant difference compared to the use of Deep Sky Stacker though the stellar images were fractionally smaller. However I did like the way that it had removed the least good images from the stack and selected a reference frame so will continue to use it as I agree with Nico Carver that it is the best free stacking tool.
Siril provided the two tools that made the result possible. The ‘Photometric Colour Calibration’ tool produced a far better colour balance than I had been able to achieve in Photoshop and the ability to stretch the image using the Asinh tool in Siril was a major factor. It also seemed to bring out the star colours. I do have an Asinh tool in Photoshop which produces a good stretch but the colour saturation was very low.
These two programs thus seem to be an excellent choice withwhich to process captured image frames.